
To install a skylight in your tiny home, start by measuring and marking the opening on your roof while prioritizing safety. Cut through the roof surface carefully, ensuring proper reinforcement and sealing to prevent leaks. Install the skylight frame securely, add insulation around it for efficiency, and consider solar-powered blinds for light control. For detailed steps and tips that will help you complete your project successfully, keep exploring further guidance.
Key Takeaways
- Measure and mark the skylight opening accurately on the roof, considering optimal placement for sunlight and aesthetics.
- Cut the roof opening carefully, following safety precautions and ensuring proper tool use to prevent leaks.
- Install flashing and sealing materials around the skylight to create a waterproof barrier and prevent leaks.
- Reinforce surrounding roof structure if needed, ensuring stability and support for the skylight.
- Finish with interior trim or window treatments and consider solar-powered shades for light and heat control.
Installing a skylight in your tiny home is a straightforward way to bring in natural light and make your space feel more open. When you add a skylight, you not only brighten the interior but also create opportunities to harness solar energy. Natural sunlight can reduce your reliance on electrical lighting during the day, cutting down energy costs and promoting a more sustainable lifestyle. Plus, with the right placement, a skylight becomes a key element of your interior design, enhancing the overall aesthetic and making your tiny home feel more spacious.
Adding a skylight boosts natural light and energy efficiency in your tiny home.
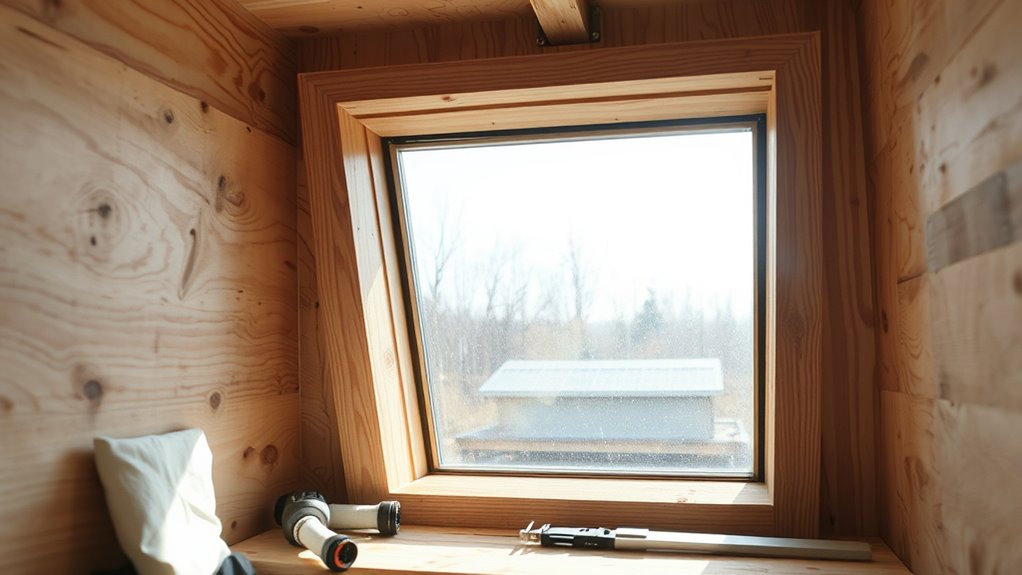
Before you start, consider the orientation of your tiny home. Positioning the skylight to maximize sunlight exposure during peak hours can substantially boost solar energy collection. If your goal is to optimize solar gain, install the skylight on the roof’s southern side (if you’re in the northern hemisphere), where it will catch the most sunlight throughout the day. This approach not only improves energy efficiency but also adds a warm, welcoming glow to your living space. Keep in mind that the size and shape of the skylight can influence how much light enters and how effectively it contributes to your tiny home’s energy needs. Larger skylights let in more light but might require additional insulation to prevent heat loss or gain.
When it comes to interior design, a skylight is a versatile feature. It creates visual interest and serves as a focal point, making your small space appear larger and more inviting. You can frame the skylight with decorative trim or add window treatments that complement your decor style. The natural light streaming in can highlight artwork, plants, or other decorative elements, elevating your interior aesthetic. Additionally, integrating solar-powered blinds or shades can give you control over light and heat, further enhancing your design while improving energy efficiency. Incorporating proper insulation around the skylight opening can also help maintain indoor comfort and energy efficiency.
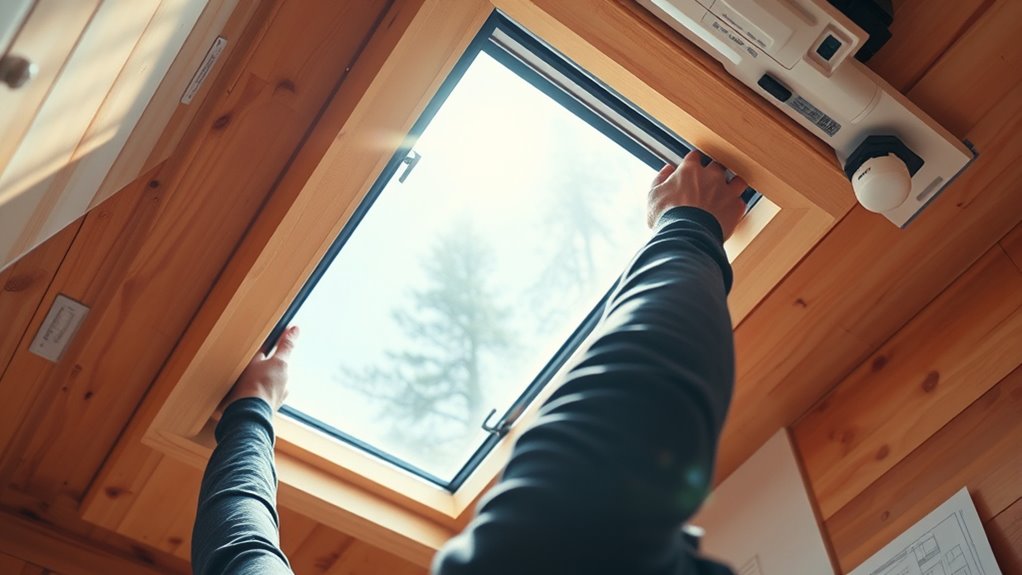
Installation involves cutting through your roof’s surface, so safety is paramount. You’ll need to carefully measure and mark the opening, ensure proper sealing to prevent leaks, and reinforce the surrounding structure if necessary. Using quality materials and following manufacturer instructions ensures your skylight remains durable and energy-efficient. Once installed, you’ll enjoy the benefits of increased daylight, reduced energy consumption, and a beautifully upgraded interior that reflects your personal style. With a little effort, your tiny home can become a brighter, more sustainable, and visually appealing space—making the most of natural light and solar energy in your cozy retreat.
Frequently Asked Questions
What Tools Are Essential for Installing a Tiny Home Skylight?
You’ll need essential tools like a saw to cut the skylight frame accurately, a drill for securing the frame, and a screwdriver for fasteners. Don’t forget a utility knife for precise trimming and a caulking gun for sealant application to guarantee a watertight fit. Additionally, measuring tape and a level help with proper placement, making sure your skylight is secure and well-sealed for long-lasting performance.
How Do I Ensure Proper Insulation Around the Skylight?
Think of your skylight as a fortress—your goal is airtight protection. To guarantee proper insulation, choose quality insulation materials like spray foam or R-13 batts around the frame. Use effective sealing techniques—apply weatherproof caulk and flashing to prevent leaks. Carefully fill gaps, focusing on edges and corners. Regularly inspect your work, maintaining the integrity of your tiny home’s thermal barrier, just as a fortress withstands the elements.
What Are Common Mistakes to Avoid During Installation?
To avoid common pitfalls during installation, double-check your measurements before cutting, as errors here can lead to leaks or poor fit. Don’t rush the sealing process—skipping or improperly applying sealant is a frequent mistake that causes leaks. Make certain flashing is properly installed and secured, and avoid ignoring manufacturer instructions. Properly insulating around the skylight is vital, so don’t overlook this step to prevent drafts and heat loss.
How Weatherproof Is a DIY Skylight Installation?
Imagine rain pounding on your tiny home’s roof, yet your skylight stays dry—that’s how weatherproof your DIY installation can be. You should conduct weatherproof testing to verify it withstands the elements. Use leak prevention techniques like sealing edges and applying waterproof caulk thoroughly. When properly installed and sealed, your skylight becomes a resilient shield against weather, keeping your space cozy and dry, no matter the storm outside.
Can I Install a Skylight on a Sloped Roof?
Yes, you can install a skylight on a sloped roof. When doing so, consider ventilation options to prevent moisture buildup and choose skylight materials like tempered glass or acrylic for durability. Proper sealing is vital to maintain weatherproofing, especially on slopes where water runoff differs. Measure carefully and follow manufacturer instructions to guarantee a secure, leak-proof fit, enhancing both natural light and airflow in your tiny home.
Conclusion
Now that you’ve installed your skylight, your tiny home transforms into a beacon of natural light and warmth. It’s not just an addition; it’s a window to endless possibilities and brighter days ahead. Think of it as opening a door to the sky itself—inviting the outside in and elevating your space’s charm. With your newfound skills, you’ve turned a simple project into a shining example of DIY brilliance. The sky’s the limit!