Creating a DIY drip irrigation system from recycled bottles is an easy, eco-friendly weekend project. Simply prepare your bottles by cleaning and puncturing small holes in the caps, then connect them with tubing or connectors. Secure the bottles in the soil and test your setup for steady water flow. With some basic tools and a bit of effort, you’ll have an efficient watering system that conserves water and reduces waste. Keep exploring to get all the step-by-step details.
Key Takeaways
- Collect and prepare recycled plastic bottles, ensuring they are clean, intact, and properly punctured for water flow.
- Connect bottles using tubing, connectors, and adjustable emitters to create a customized drip irrigation system.
- Secure and position bottles in the soil, anchoring them to prevent wobbling and ensure consistent watering.
- Fine-tune flow rates by adjusting holes, tubing, and emitters for optimal plant hydration and system efficiency.
- Maintain the system regularly by inspecting for clogs, leaks, and sediment buildup to ensure long-term sustainability.
Gathering and Preparing Materials
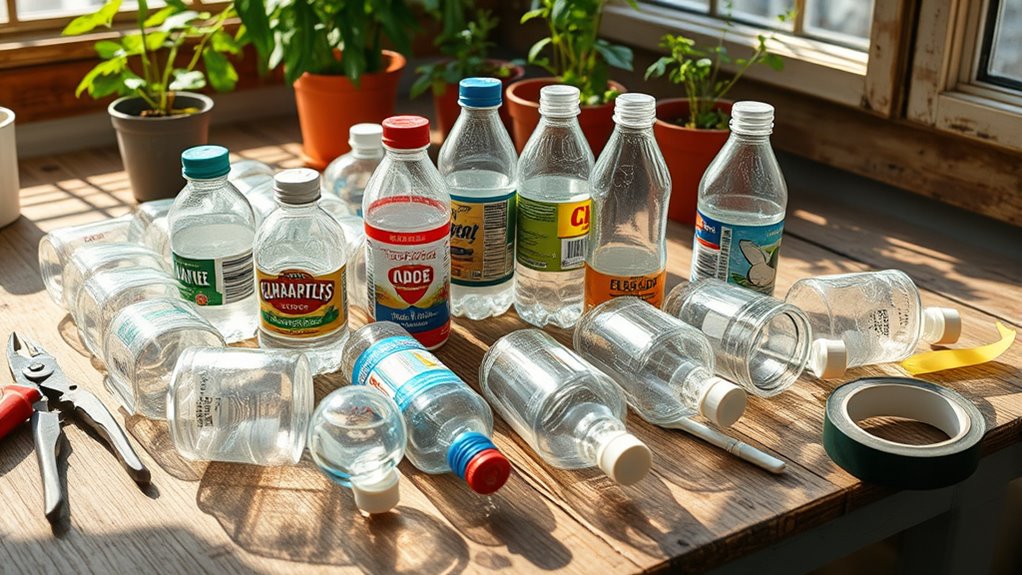
To start your DIY drip irrigation system, you first need to gather and prepare the necessary materials. Choose sturdy, recycled plastic bottles ranging from 500 ml to 2 liters, depending on your watering needs. Check each bottle for cracks or damage, as intact bottles prevent leaks and last longer outdoors. Clear or translucent bottles make it easy to monitor water levels. Wash all bottles thoroughly with warm, soapy water, using a bottle brush to clean inside, then rinse well. Remove labels completely, using a baking soda and cooking oil mixture if needed. Dry bottles fully to prevent mold. Have sharp scissors or a utility knife ready for cutting, and a drill or nail for puncturing holes in caps. Gather gloves, safety glasses, and optional tools like silicone sealant and cotton buds for precise flow control. Incorporating water conservation techniques can also help optimize your irrigation system’s efficiency and sustainability.
Crafting the Recycled Bottle Drip System
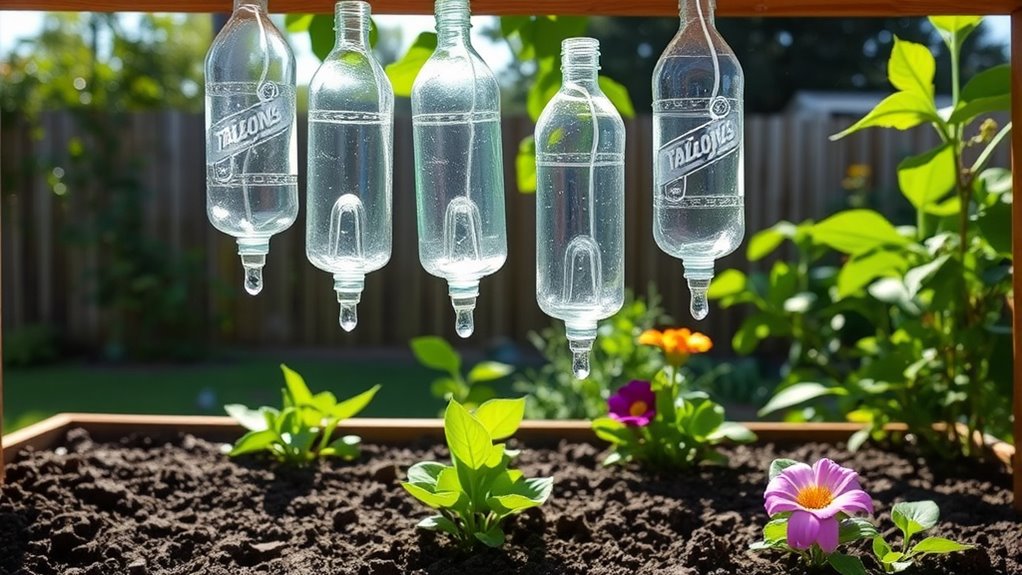
Creating your recycled bottle drip system involves puncturing small holes in the bottle cap to control water flow. Use a pushpin, small nail, or drill bit to make 4-5 holes, making certain the flow is slow and steady. Be mindful of hole size; large holes cause rapid drainage, while tiny ones may clog. To fine-tune water release, insert a small piece of tubing or half of an ear cleaning stick into the cap hole to nearly seal it. After puncturing, clean the holes to prevent blockages. Guarantee proper air exchange by creating small air gaps—raising the bottle slightly or placing a stick underneath helps. Multiple holes balance water flow and airflow, preventing soil clogs and ensuring consistent watering right at the roots. Additionally, considering water pressure consistency can help maintain steady flow rates and improve overall watering effectiveness.
Assembling and Installing Your Drip Irrigation
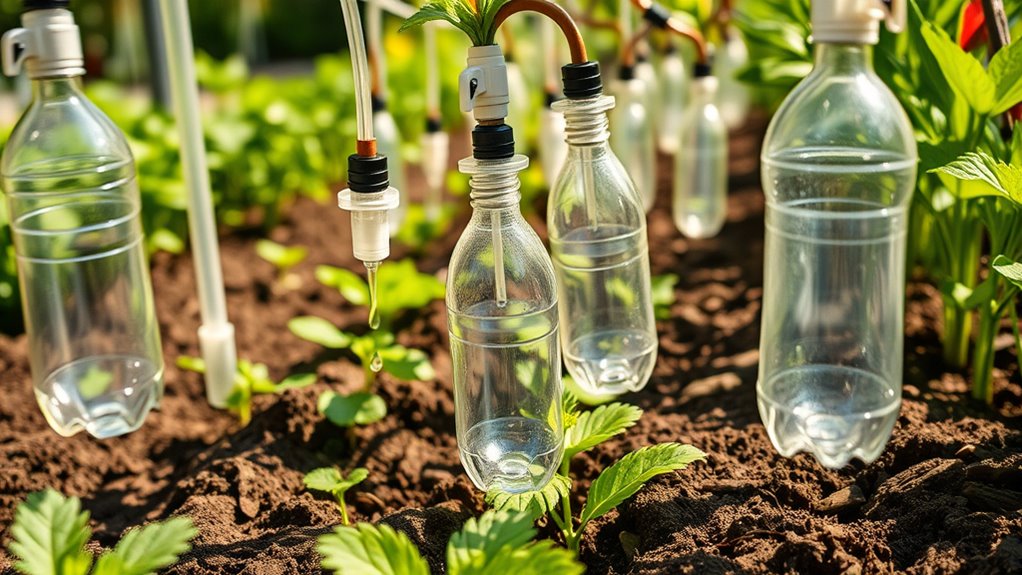
Start by securing your bottles in the right spots near your plants, using supports or stakes to keep them stable. Next, connect your bottles with tubing or simply place them where they can drip directly onto roots, then test the system to make certain water flows properly. Adjust the placement and flow as needed to achieve consistent watering without clogs or leaks. Difficult to water pots full to the rim or with dense roots can be especially challenging, so ensure your bottles are positioned where they can reach these areas effectively. Proper watering distribution is essential for healthy plant growth and efficient irrigation.
Secure Bottle Placement
Securing bottle placement is essential for a reliable drip irrigation system. Properly stabilized bottles prevent wobbling and ensure consistent watering. Here’s how to do it:
- Insert bottles neck-down into the soil, with the cut bottom facing up, pushing them deep enough to anchor firmly while keeping the neck above soil.
- For extra stability, dig a small hole slightly larger than the bottle diameter before insertion.
- Use stakes or garden wire to brace bottles if the soil is loose or the site is windy.
- Gently compact soil around the bottles to eliminate wobbling and secure their position.
- Proper placement ensures bottles are firmly anchored and positioned upright, so they stay in place during watering. Proper placement guarantees an effective irrigation system.
Connect and Test System
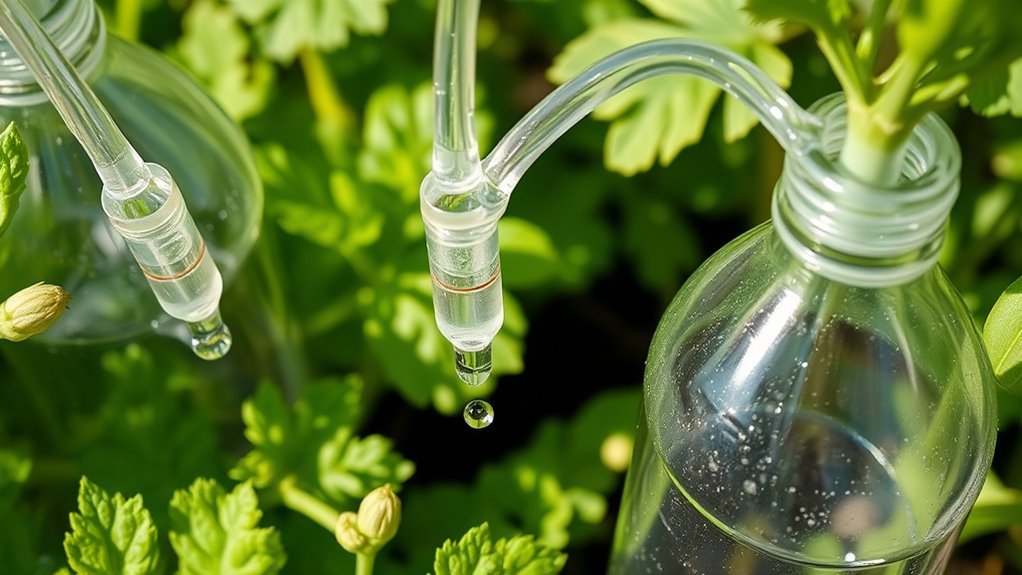
Once your bottles are securely placed, you can begin connecting and testing your drip irrigation system to guarantee proper operation. Start by attaching Y connectors to split the main line into multiple drip zones, and use T connectors to extend tubing to reach additional plants. Slide quarter-inch tubing securely over connector ends to prevent leaks, and install adjustable emitters at the tubing ends for controlled watering. Fix tubing and emitters with stakes or clamps to keep everything stable and in position. Test the system by running water, checking for leaks, clogs, or uneven flow. Adjust hole sizes with needles or modify valve settings to fine-tune drip rates. Re-test until you achieve consistent, targeted watering for all plants.
| Connection Type | Purpose |
|---|---|
| Y Connectors | Split main line into zones |
| T Connectors | Extend tubing, create branches |
| Cap Connectors | Regulate flow, shut off sections |
| Adjustable Emitters | Control water output |
Fine-Tuning the Water Flow and Drip Rate

Fine-tuning the water flow and drip rate guarantees your recycled bottle irrigation system delivers the right amount of water without waste or overwatering. To do this effectively, consider these key steps:
- Match emitter flow rates to plant needs—shallow-rooted plants benefit from lower rates, while high-demand plants need higher flow.
- Use adjustable emitters to start with low flow for young plants and increase as they grow.
- Measure your water supply with a bucket and stopwatch to ensure the system’s demand doesn’t exceed capacity. Proper pressure regulation is also vital to prevent inconsistent flow.
- Adjust valves and replace emitters if clogging occurs, maintaining consistent drip rates.
- Proper filtration is essential to prevent clogging, especially when using smaller emitters, and can help maintain consistent flow over time. Filtration prevents clogging and ensures that your system functions smoothly and efficiently.
Balancing flow and pressure ensures efficient watering. Regular checks and modifications keep your system functioning perfectly, preventing both over- and under-watering.
Maintaining and Troubleshooting Your Setup
Regular maintenance and prompt troubleshooting are essential to keep your recycled bottle drip irrigation system operating smoothly. Regularly inspect bottle caps and tubing for clogs or leaks, removing bottles every few months to rinse away dirt and algae. Use a thin wire or pin to clear blockages and flush tubing to prevent sediment buildup. Check filters and screens, cleaning or replacing them as needed. Watch for water pooling around bottles, indicating cracks or loose connections, and seal leaks with silicone or tighten fittings. Adjust watering frequency seasonally and reposition bottles for even distribution. Periodically flush mains and laterals, and inspect filters and valves. Proper maintenance prevents system damage and operational costs, addressing issues like uneven flow, kinks, or root intrusion promptly to maintain system efficiency and ensure healthy plant growth.
Benefits of Using Recycled Bottles for Water Conservation

Using recycled bottles for drip irrigation offers significant water conservation advantages. First, they help reduce water waste by delivering water directly to plant roots, decreasing evaporation and runoff. Second, repurposing bottles cuts down on the demand for new plastic production, which requires extensive water input—recycling bottles consumes up to 75% less energy than creating new ones. Third, reusing bottles minimizes waste sent to landfills, preventing plastic pollution and reducing the environmental impact. Fourth, recycling and reusing bottles support a circular economy, conserving natural resources and reducing the need for virgin plastic. By incorporating recycled bottles into your garden, you save water, lower your ecological footprint, and contribute to sustainable resource management—all while making a simple, effective irrigation system.
Frequently Asked Questions
How Long Can a Recycled Bottle Reliably Provide Water to Plants?
You can generally rely on a recycled bottle to water your plants for a few days to a few weeks, depending on factors like soil type, water pressure, and bottle size. Regular refilling is necessary for extended watering, and proper placement helps optimize flow. Keep an eye on potential clogging or damage, and cover the bottles to prevent UV damage. With good maintenance, your system stays functional longer.
Can This System Be Adapted for Larger Gardens or Farm-Scale Use?
Like a river that finds its way to the sea, your recycled bottle drip system can adapt to larger gardens with careful planning. You’ll need to add more units, incorporate automation, and guarantee water distribution stays even. Expect increased labor—like tending a garden in full bloom—and consider blending with standard drip lines. With thoughtful adjustments, your eco-friendly approach can flourish on a farm-scale, conserving water while nurturing your crops.
What Are the Signs of Clogging or Malfunction in the Drip System?
When your drip system malfunctions, look for uneven watering, dry spots, or pooling water, which indicate clogs or leaks. You might notice weak or slow emitters, sediment buildup, or plants wilting unevenly. Check pressure gauges for sudden changes, and monitor flow rates with a meter. These signs help you identify blockages caused by debris, algae, or mineral deposits, so you can clean or replace affected parts promptly.
How Should I Store the System During Rainy or Off-Season Periods?
Think of your system like a ship preparing for a storm. You should turn off the main water supply, drain all pipes and emitters, and remove residual water with an air compressor if needed. Cover aboveground parts with insulation, store reusable components indoors, and keep everything organized. This way, your system stays safe from freeze damage and ready to sail smoothly when the season returns.
Are There Any Safety Concerns With Using Recycled Plastic Bottles?
You should be aware that using recycled plastic bottles can pose safety concerns. They often leach harmful chemicals like antimony, benzene, and endocrine disruptors, which may contaminate your water or plants. Additionally, recycled plastics can contain higher levels of toxins compared to virgin plastics, and there’s limited regulation ensuring their safety. Always wash bottles thoroughly and consider alternatives like glass or stainless steel to reduce health risks.
Conclusion
By creating your own drip irrigation system from recycled bottles, you not only save water and money but also reduce plastic waste. Did you know that drip irrigation can cut water usage by up to 50% compared to traditional watering? This simple weekend project empowers you to nurture your garden sustainably, making a positive impact on the environment while keeping your plants healthy. Start today and enjoy a greener, more efficient garden tomorrow.

I’m Theodore, and I love tiny houses. In fact, I’m the author of Tiny House 43, a book about tiny houses that are also tree houses. I think they’re magical places where imaginations can run wild and adventures are just waiting to happen.
While tree houses are often associated with childhood, they can be the perfect adult retreat. They offer a cozy space to relax and unwind, surrounded by nature. And since they’re typically built on stilts or raised platforms, they offer stunning views that traditional homes simply can’t match.
If you’re looking for a unique and romantic getaway, a tree house tiny house might just be the perfect option.