
To frame your tiny house roof correctly, choose a suitable style like gable or shed, and measure accurately before cutting rafters and ridge beams. make certain your framing supports adequate space for insulation and ventilation, including soffit vents or ridge caps to prevent moisture buildup. Secure everything with proper fasteners and connectors, and verify the pitch for good runoff and air circulation. If you want to learn detailed steps and tips, there’s more to think about for a strong, weatherproof roof.
Key Takeaways
- Select an appropriate roof style (gable, shed) that matches tiny house dimensions and structural needs.
- Measure and cut rafters and ridge beams accurately, verifying angles regularly for precise fitting.
- Leave sufficient space for insulation and ventilation to enhance energy efficiency and prevent moisture issues.
- Incorporate vents, soffit vents, or ridge caps during framing to promote proper airflow and extend roof lifespan.
- Use proper fasteners, connectors, and adhere to building codes to ensure structural integrity and safety.

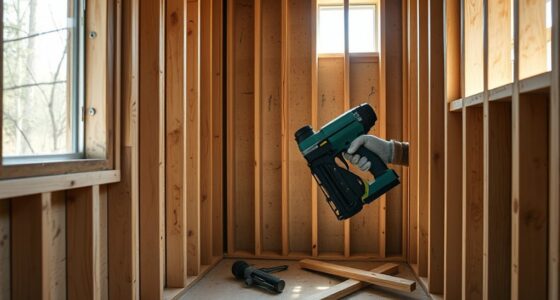
Framing a tiny house roof is a critical step that determines the structure’s stability and durability. Your choice of framing techniques affects how well the roof withstands weather, supports insulation, and facilitates proper ventilation. As you plan, keep in mind that a well-framed roof provides a solid foundation for insulation options and guarantees adequate roof ventilation, both essential for maintaining comfort and energy efficiency inside your tiny home.
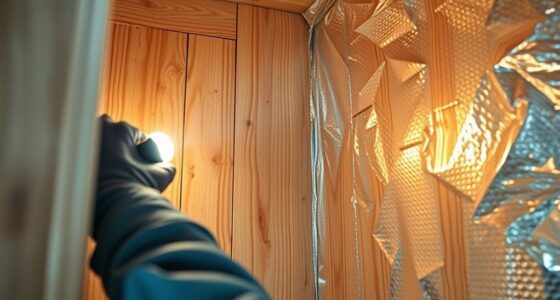
When you start framing, focus on the type of roof you want—gable, shed, or another style—as each requires specific framing methods. For a typical gable roof, you’ll install ridge beams, rafters, and collar ties. Precision is fundamental here; measure twice, cut once, and verify angles regularly. Proper framing not only supports the roof’s weight but also creates a structure that allows space for insulation and ventilation. If you’re considering insulation options, such as spray foam, rigid foam boards, or batt insulation, confirm your framing leaves enough space to accommodate these materials without compressing or damaging them. Adequate space prevents thermal bridging and enhances insulation effectiveness.
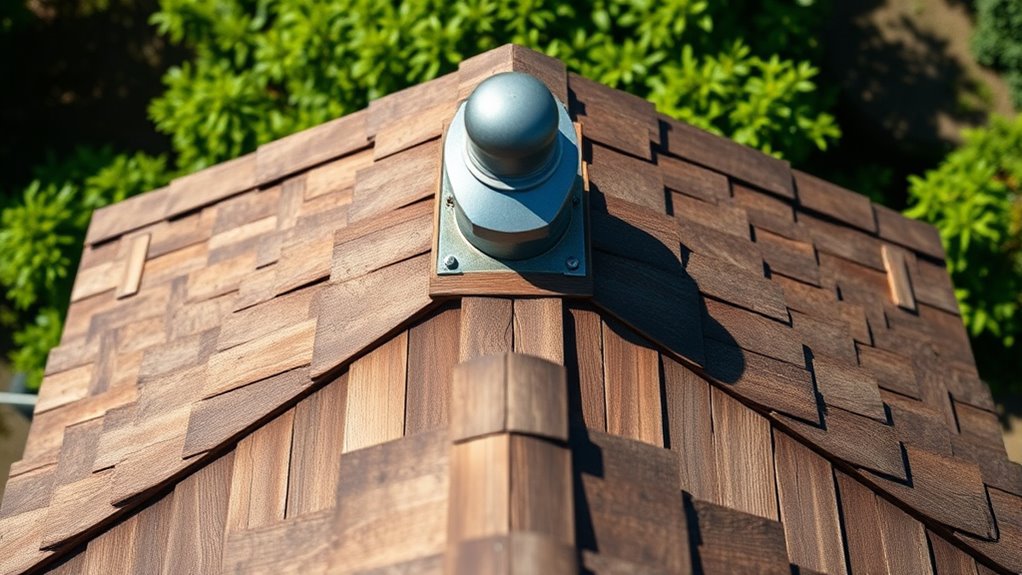
Roof ventilation is another key aspect you shouldn’t overlook during framing. Ventilation helps prevent moisture buildup, which can cause mold, rot, or ice dams. Incorporate vents, ridge caps, soffit vents, or even turbine vents into your plan. Framing your roof with ventilation in mind means leaving gaps or spaces that allow air to flow freely. Properly vented roofs extend the lifespan of your tiny house and improve energy efficiency by reducing heat buildup in summer and moisture accumulation in winter. Additionally, understanding building codes and standards ensures your roof framing meets safety and durability requirements, providing peace of mind for your project.
As you assemble the framing, pay attention to the pitch or angle of your roof, as it influences runoff and how insulation is installed. A steeper pitch might require additional bracing but can improve water drainage and ventilation. Make sure your framing is level and secure, using the right fasteners and connectors. This creates a sturdy shell that supports insulation and ventilation systems seamlessly once the roofing material is added.
Top picks for "fram tiny house"
Open Amazon search results for this keyword.
As an affiliate, we earn on qualifying purchases.
Frequently Asked Questions
What Materials Are Best for Tiny House Roof Framing?
You should choose lightweight yet sturdy materials like engineered wood or metal for your tiny house roof framing. These materials help manage roof load considerations effectively, ensuring your roof can handle snow, rain, and wind. Pair them with weatherproofing techniques like proper sealing and insulation to prevent leaks and damage. This combination keeps your tiny house safe, durable, and comfortable, while making installation manageable and efficient.
How Do I Insulate a Tiny House Roof Effectively?
Did you know that proper insulation can cut your tiny house energy costs by up to 50%? To insulate your roof effectively, choose quality insulation types like spray foam or rigid foam boards for excellent R-values. Guarantee proper ventilation options, such as ridge vents or soffit vents, to prevent moisture buildup and maintain airflow. This combination keeps your tiny house cozy in winter and cool in summer, saving you money and stress.
What Is the Typical Lifespan of a Tiny House Roof?
Your tiny house roof typically lasts around 20 to 30 years, depending on roof durability and weather resistance. Properly maintained, it can withstand harsh weather conditions like rain, snow, and sun exposure. Regular inspections and timely repairs help extend its lifespan. Choosing quality materials and ensuring correct installation also boost your roof’s longevity, keeping your tiny home protected and secure for years to come.
Can I Install Solar Panels on My Tiny House Roof?
Think of your tiny house roof as a stage ready for a solar panel performance. You can install solar panels, but first, check the roof load capacity—your stage’s strength. Proper solar panel placement ensures they stay secure and efficient, like actors in harmony. With a solid foundation and careful planning, your roof can manage the weight, turning your tiny house into a self-sufficient energy hub.
How Do I Handle Roof Ventilation in Small Spaces?
You handle roof ventilation in small spaces by implementing effective ventilation strategies like installing vents or ridge vents at the peak. Use airflow management techniques such as soffit vents for intake and exhaust vents to promote continuous airflow. Make certain there’s enough space for air to circulate, preventing moisture buildup and overheating. Regularly check and maintain your vents to keep airflow ideal, which helps maintain a comfortable, dry, and energy-efficient tiny house.
Conclusion
Now that you’ve carefully framed your tiny house roof, picture it soaring above your cozy retreat, weathering storms and catching sunlight. With each beam in place, you’re crafting a sturdy sanctuary that’s both functional and beautiful. As you step back, admire the structure—ready to shelter your adventures and dreams. Your tiny house roof isn’t just framing; it’s the crown of your tiny haven, built with purpose and precision to stand the test of time.