Connect with us

Beginners Guides

How Big Is Considered A Tiny House In Oregon

Published

on

An image showcasing an adorable, pint-sized home nestled amidst lush Oregonian landscapes, with towering evergreen trees, a quaint porch adorned with hanging flower baskets, and a vibrant garden bursting with colorful blooms

Standing amidst Oregon’s verdant surroundings, encased by majestic trees and stunning vistas, I find myself pondering: what size qualifies as a tiny house in this picturesque state?

Like a hummingbird among giants, these pint-sized dwellings have become a popular choice for those seeking a simpler, more sustainable way of life. In Oregon, the definition of a tiny house is a dwelling that measures 400 square feet or less, allowing for creative and efficient use of space. But it’s not just about size; it’s about a mindset.

Living in a tiny house means embracing minimalism, reducing our carbon footprint, and finding freedom in simplicity. In this article, we will delve into the regulations, benefits, design possibilities, and challenges of tiny house living in Oregon.

So, join me on this journey as we explore the world of tiny homes in the great state of Oregon.

Key Takeaways

  • The definition of a tiny house in Oregon is 400 square feet or less.
  • Tiny houses in Oregon offer benefits such as minimalism, reduced carbon footprint, and simplicity.
  • Tiny houses in Oregon are often built on wheels, providing mobility and flexibility.
  • There are regulations and size limitations in Oregon for the construction and placement of tiny houses, including restrictions on height and width in some cities.

Understanding the Definition of a Tiny House

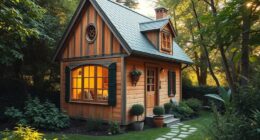
Imagine a cozy little dwelling tucked away in the picturesque landscapes of Oregon, where a tiny house is defined as a charming, compact home measuring less than 400 square feet. The defining criteria for a tiny house in Oregon are based on its size, not its architectural style or materials used. These homes are often built on wheels, allowing for mobility and flexibility.

However, it’s important to address the misconceptions and stereotypes associated with tiny houses. Contrary to popular belief, tiny houses aren’t just glorified sheds or temporary structures. They can be fully functional homes, complete with all the necessary amenities and features. Understanding these defining criteria and debunking misconceptions helps to paint a clearer picture of what a tiny house truly is.

Advertisement

Now, let’s explore the regulations and size limitations in Oregon.

Regulations and Size Limitations in Oregon

Explore the restrictions and dimensions within Oregon’s regulations, and discover how the size of your dwelling can either limit or liberate your dreams.

In Oregon, there are specific regulations and size limitations that govern the construction and placement of tiny houses. These regulations are in place to ensure the safety and well-being of occupants, as well as to maintain the aesthetic appeal of neighborhoods. Here are some key points to consider:

  • The maximum size of a tiny house on wheels is usually around 400 square feet.
  • Some cities in Oregon have additional restrictions on the height and width of tiny houses.
  • Tiny houses on foundations are subject to local building codes, which may require a minimum square footage.
  • Zoning laws vary across different areas in Oregon, so it’s important to check the specific regulations for the location where you plan to build or park your tiny house.
  • It’s advisable to consult with local authorities and professionals to ensure compliance with all regulations.

Understanding these regulations and size limitations will play a crucial role in determining the feasibility of your tiny house project. With this knowledge, you can move forward and explore the benefits of living in a tiny house.

Benefits of Living in a Tiny House

Discover the freedom and simplicity of embracing a minimalist lifestyle in a compact, cozy dwelling. Living in a tiny house in Oregon comes with numerous benefits, including financial considerations and a reduced environmental impact. By opting for a tiny house, you can significantly lower your expenses. With smaller square footage, utility bills and maintenance costs are greatly decreased. Additionally, the reduced environmental impact of a tiny house is noteworthy. These homes require fewer resources to build and maintain, resulting in a smaller carbon footprint. Living in a tiny house allows you to minimize your ecological impact and be more environmentally conscious. In the next section, we will explore how you can design and customize your tiny house in Oregon to suit your unique preferences and needs. Let’s dive into the exciting world of creating your perfect tiny oasis.

Designing and Customizing Your Tiny House in Oregon

Get ready to unleash your creativity and transform your compact haven into a personalized masterpiece that reflects your unique style and needs.

Advertisement

When designing and customizing your tiny house in Oregon, there are a few tips to keep in mind. First, maximize your space by utilizing multi-functional furniture and storage solutions. Think about incorporating built-in shelves, hidden compartments, and lofted areas for additional living space.

Next, consider the cost considerations of your design choices. While it may be tempting to splurge on high-end finishes, remember that every dollar adds up in a tiny house. Prioritize your must-haves and be mindful of your budget.

Finally, think about how your design will complement the surrounding landscape and adhere to local building codes. With these designing tips and cost considerations in mind, you can create a stunning and functional tiny house that is uniquely yours.

So, now that you have your design plan in place, let’s explore finding land and parking options for your tiny house.

Finding Land and Parking Options for Your Tiny House

When it comes to finding land and parking options for my tiny house, there are a few key points to consider.

Advertisement

First, I need to understand the zoning and land use regulations in the area I plan to live in. This will determine whether I can legally park my tiny house on a piece of land or not.

Additionally, I can explore the option of living in tiny house communities, which are specifically designed for tiny homes and often provide utilities and amenities.

Another option is to park my tiny house in RV parks, which may have specific regulations and requirements for tiny house owners.

Overall, it’s important to research and understand the different options available for parking your tiny house to ensure a smooth and legal living experience.

Zoning and Land Use Regulations

Although zoning and land use regulations vary across Oregon, it’s important to understand the dimensions that classify a tiny house as small enough to comply with local guidelines. Here are three key considerations when it comes to zoning challenges and building codes for tiny houses in Oregon:

Advertisement
  1. Minimum square footage: Many cities and counties in Oregon have established minimum square footage requirements for dwellings. These requirements often exceed the size of a typical tiny house, which can range from 100 to 400 square feet.

  2. Building permits: Before constructing a tiny house, you’ll need to obtain the necessary building permits. These permits ensure that your tiny house meets safety standards and complies with local building codes.

  3. Zoning restrictions: Zoning regulations can dictate where you can legally park and live in a tiny house. Some areas may allow tiny houses as accessory dwelling units, while others may require them to be located in designated tiny house communities or RV parks.

Understanding these aspects of zoning and building codes is crucial when navigating the regulations for tiny houses in Oregon. Moving forward, let’s explore the options available for tiny house communities and RV parks.

[Transition sentence into next section: Now that we have a better understanding of zoning and land use regulations, let’s explore the opportunities for tiny house communities and RV parks.]

Tiny House Communities and RV Parks

Imagine stepping into a world where community and freedom intertwine, where like-minded individuals gather in picturesque settings to create their own tiny havens. In Oregon, tiny house communities and RV parks provide the perfect backdrop for those seeking a minimalist lifestyle.

These communities offer a range of amenities and shared spaces, fostering a sense of belonging and connection. Additionally, financing options are available for those looking to purchase or build their own tiny house, making it an accessible dream for many.

One of the advantages of tiny houses is their eco-friendly features, such as solar panels and composting toilets, which promote sustainable living.

Advertisement

As we delve into the challenges and considerations for tiny house living in Oregon, it is important to remember the sense of community and environmental consciousness that these communities foster.

Challenges and Considerations for Tiny House Living in Oregon

Living in a tiny house in Oregon presents a unique set of challenges and considerations. First and foremost, limited space requires lifestyle adjustments to downsize and simplify.

Additionally, many tiny house owners in Oregon choose to live off-grid, which entails finding alternative sources for utilities such as water and electricity.

Overall, tiny house living in Oregon requires careful planning and adaptation to make the most of the limited space and embrace a more sustainable lifestyle.

Limited Space and Lifestyle Adjustments

When you live in a tiny house in Oregon, you’ll quickly discover the need to adjust your lifestyle to fit within the limited space. The challenges of limited space are a constant reality, requiring a minimalist mindset and creative solutions.

Advertisement

Downsizing your belongings is essential, as every item must serve a purpose or have multiple uses. Storage solutions such as built-in cabinets, foldable furniture, and vertical shelving are crucial to maximize the available space.

Adapting to a minimalist lifestyle means prioritizing experiences over possessions and embracing simplicity. It may take time to adapt to the reduced square footage, but the benefits of living with less can be rewarding.

As we transition into the next section about off-grid living and utilities, it’s important to consider how these adjustments also impact our energy and resource consumption.

Off-Grid Living and Utilities

In the realm of off-grid living in a small dwelling, your lifestyle will become intimately intertwined with the dance of self-sufficiency and resource management. It’s all about off-grid sustainability and cost efficiency. Living off the grid in a tiny house in Oregon means making the most of limited resources and finding innovative ways to meet your needs. One way to achieve this is by using alternative energy sources like solar panels or wind turbines. These can provide power for your home and reduce your reliance on the grid. Additionally, implementing water-saving techniques and composting toilets can help you conserve water and reduce waste. Living off the grid requires careful planning and a willingness to adapt, but the rewards of self-sufficiency and environmental responsibility make it all worth it. Transitioning into the next section, let’s explore the resources and support available for building and living in a tiny house in Oregon.

Resources and Support for Building and Living in a Tiny House in Oregon

If you’re dreaming of calling a tiny house your home in Oregon, you’ll be amazed at the abundance of resources and support available to help you build and thrive in your cozy abode.

Advertisement

Oregon is known for its strong tiny house community, which offers a wealth of resources for those interested in building and living in a tiny house. There are workshops and classes that provide guidance on everything from design and construction to zoning and legal considerations.

Additionally, there are numerous online forums and websites where you can connect with other tiny house enthusiasts, share ideas, and find answers to your questions.

In terms of support, there are organizations and advocacy groups that can provide assistance and information on navigating the various challenges that may arise when building and living in a tiny house in Oregon.

Overall, the resources and support available make Oregon an ideal place to pursue your tiny house dreams.

Frequently Asked Questions

Are there any specific regulations regarding the exterior design of a tiny house in Oregon?

When it comes to regulations on the exterior design of a tiny house in Oregon, there are some specific guidelines to follow. The state has requirements regarding the materials used, the overall appearance, and the structural integrity of the house. These regulations ensure that tiny houses are both safe and aesthetically pleasing.

Advertisement

It’s important to consult with local authorities or a professional builder to ensure compliance with all the necessary regulations in Oregon.

What are some alternative parking options for tiny house owners in Oregon?

There are several alternative parking options available for tiny house owners in Oregon, considering zoning restrictions. Some popular options include renting or purchasing land in a tiny house community or RV park that allows tiny houses.

Additionally, some homeowners may choose to park their tiny houses on private land with the permission of the landowner.

Other options include exploring cooperative living arrangements or seeking out local ordinances that may allow for temporary parking of tiny houses on residential properties.

How do I find land to park my tiny house on in Oregon?

Finding land to park my tiny house on in Oregon can be a challenge due to zoning regulations. However, with some research and perseverance, it’s possible to locate suitable options.

Advertisement

Start by looking for vacant lots or properties that allow for tiny houses. Online platforms like Tiny House Listings and Craigslist can be helpful in finding available land.

Additionally, contacting local real estate agents or reaching out to tiny house communities in the area can provide valuable leads. Remember to check the zoning regulations in each area to ensure compliance.

Are there any financial incentives or tax breaks available for tiny house owners in Oregon?

Yes, there are financial incentives and tax breaks available for tiny house owners in Oregon. The state offers property tax exemptions for qualifying tiny houses on wheels, which can significantly lower the overall cost of homeownership.

Additionally, there are various grants, loans, and programs that provide financial assistance for building, purchasing, or renting a tiny house. These incentives aim to promote affordable housing options and sustainable living in Oregon.

What are some common challenges faced by tiny house owners in Oregon, and how can they be overcome?

Overcoming challenges faced by tiny house owners in Oregon can be a daunting task. One common challenge is finding suitable parking options. Many cities have zoning regulations that restrict the placement of tiny houses, making it difficult to find legal parking spots.

Advertisement

However, some solutions include seeking out RV parks or campgrounds that allow tiny house parking, joining tiny house communities, or even purchasing land and obtaining proper permits. It’s important for owners to research and understand local regulations to ensure a smooth experience.

Conclusion

In conclusion, living in a tiny house in Oregon offers a unique and rewarding lifestyle. The regulations and size limitations may seem daunting, but with careful planning and design, it’s possible to create a comfortable and functional living space.

The benefits of living in a tiny house, such as reduced expenses and a smaller carbon footprint, are undeniable. However, one must also consider the challenges and limitations that come with tiny house living.

Overall, is the freedom and simplicity of tiny house living worth the sacrifices?

Advertisement
Continue Reading
Advertisement

Beginners Guides

How Long Will Take To Build A Tiny Cob House 200m2

Published

on

By

An image showcasing the step-by-step construction process of a 200m2 tiny cob house, capturing the excavation of the foundation, laying the cob walls, shaping the interior, installing the roof, and adding finishing touches

Congratulations on your decision to start building a small cob house! Before you dive into this important project, let me provide you with some insights on what to expect in the future.

Building a tiny cob house, especially one that spans a generous 200m2, is no small feat. It requires meticulous planning, careful design, and a whole lot of elbow grease. But fear not, my fellow adventurers, for I am here to guide you through this arduous journey.

In this article, we will explore the various factors that can affect the construction time of a tiny cob house. From the initial planning and design phase to the final landscaping and exterior features, every step of the process will be analyzed and detailed.

We will delve into the art of cob mixing and building walls, the intricacies of roof construction, and the importance of interior finishes and flooring. We’ll even uncover the secrets of installing doors and windows and navigating those pesky final inspections and testing.

So, grab your hard hat and buckle up, because this is going to be one wild ride. Together, we will uncover the mysteries of building a tiny cob house and answer that burning question: How long will it take?

Advertisement

Let’s embark on this adventure and create a home that is as unique as it is sustainable.

Key Takeaways

  • The construction time of a tiny cob house is influenced by factors such as construction methods, skilled labor, and the complexity of the design.
  • Efficient construction methods, such as pre-fabrication and modular construction, can speed up the process.
  • The availability of skilled labor is important for a quicker construction process.
  • The complexity of the design and the size of the house can impact the construction time.

Factors Affecting Construction Time

So, how long’s it gonna take to whip up a tiny cob house that’s 200m2? Well, the construction time of a tiny cob house is influenced by several factors.

First and foremost, the efficiency of construction methods plays a significant role in determining the timeline. Using modern construction techniques, such as pre-fabrication and modular construction, can greatly expedite the process. These methods allow for faster assembly and reduce the time required for on-site construction.

Another factor to consider is the availability of skilled labor. The more experienced and skilled the workers are, the quicker the construction process will be. Adequate planning and coordination are essential to ensure that the skilled labor is utilized efficiently and effectively.

Additionally, the complexity of the design and the size of the house also impact the construction time. A more intricate design with unique features and a larger floor area will naturally take longer to build.

The factors influencing the timeline of building a tiny cob house include efficient construction methods, the availability of skilled labor, and the complexity of the design. By considering these factors and incorporating efficient construction methods, the construction time can be minimized.

Advertisement

Now, let’s move on to the next section about the planning and design phase.

Planning and Design Phase

During the planning and design phase, you’ll be amazed at how quickly ideas start flowing for your dream 200m2 cob home. This is the stage where you can consider various planning considerations and tackle the design challenges that may arise.

To ensure a smooth construction process, it’s important to carefully plan and consider all aspects of your cob house. Here are some key planning considerations to keep in mind:

  • Site orientation: Determine the most optimal orientation for your cob house to maximize natural light and energy efficiency.
  • Layout and functionality: Plan the layout of your home to optimize space and functionality, taking into account factors such as room sizes, flow, and accessibility.
  • Material selection: Choose the right materials for your cob house, considering factors such as durability, sustainability, and local availability.

In addition to these planning considerations, you’ll also face design challenges. These challenges may include incorporating unique architectural elements, integrating modern amenities while maintaining the traditional cob house aesthetic, and ensuring structural stability.

As you navigate through the planning and design phase, you’ll gain a deeper understanding of the intricacies involved in building your cob house. With careful consideration and attention to detail, you’ll be well-prepared for the subsequent section about foundation and site preparation.

Foundation and Site Preparation

Clearing and leveling the land is the first step in preparing the site for building my tiny cob house. This involves removing any vegetation, rocks, or debris that may hinder the construction process.

Advertisement

Next, I’ll need to install drainage systems to ensure proper water flow and prevent any potential damage to the foundation.

Finally, I’ll pour the foundation, which will provide a stable and level base for the construction of my tiny cob house.

Clearing and Leveling the Land

First, you’ll need to make sure the land is leveled before you can start building your tiny cob house. This involves a thorough clearing process to remove any trees, rocks, or debris from the site. Once the land is cleared, the next step is to level it using various techniques such as grading and excavation. This is crucial to ensure a stable foundation for your cob house.

To give you an idea of the clearing and leveling process, here’s a table outlining the steps involved:

Step Description
1 Clearing the site of trees and vegetation
2 Removing rocks and debris
3 Grading the land to create a level surface
4 Excavating any excess soil or uneven areas
5 Compacting the soil for stability

Once the land is cleared and leveled, you can proceed with installing drainage systems to ensure proper water management. This will be discussed in the subsequent section.

Advertisement

Installing Drainage Systems

To ensure the stability and longevity of your cob house, it’s essential to install drainage systems that effectively manage water flow on your leveled land. Proper drainage system maintenance provides numerous benefits, including preventing water accumulation, protecting the foundation of your cob house, and reducing the risk of mold or mildew growth.

  1. Prevent water accumulation: A well-designed drainage system ensures that rainwater and groundwater are diverted away from your cob house, preventing water from pooling around the foundation.

  2. Protect the foundation: Proper drainage prevents water from seeping into the soil beneath the cob house, which can weaken the foundation over time.

  3. Reduce mold and mildew growth: Adequate drainage eliminates excess moisture, reducing the chances of mold and mildew growth, which can lead to health issues and damage to the structure.

With a well-designed drainage system in place, you can proceed to the next phase of building your cob house: pouring the foundation.

Pouring the Foundation

Once you’ve completed the essential step of installing proper drainage systems, it’s time to move on to the exciting process of pouring the foundation for your cob home. The foundation is a crucial element in the construction of any building, providing stability and support. When choosing foundation materials, it’s important to consider the specific needs of your cob house. Common materials include concrete, stone, or a combination of both. The foundation depth will depend on factors such as soil composition and local building codes. It’s essential to dig deep enough to ensure a solid base that can withstand the weight of your cob house. A table below illustrates some common foundation materials and their recommended depths:

Foundation Material Recommended Depth
Concrete 1.5-2 feet
Stone 2-3 feet

With the foundation poured and set, we can now move on to the next exciting step: cob mixing and building walls.

Cob Mixing and Building Walls

Mixing cob by hand, I feel the earth’s texture as it blends with water and straw. This technique is a key aspect of eco-friendly construction materials, as cob is made from natural and sustainable resources.

Advertisement

To ensure a well-mixed cob, I follow these techniques:

  • Thoroughly wet the soil before adding the straw to achieve the right consistency.
  • Use my feet to mix the cob, moving in a circular motion to evenly distribute the materials.
  • Continuously add water as needed to maintain the desired moisture level.

The process of building walls with cob is a labor-intensive but rewarding endeavor. Using my hands, I scoop up the cob mixture and firmly press it into place, layer by layer. I pay attention to creating smooth and even walls, ensuring structural stability. As the walls rise, I incorporate windows and door frames, embedding them securely into the cob.

With the walls complete, the next step in the construction process is roof construction. This phase involves designing and building a sturdy and weather-resistant roof to protect the cob house.

Roof Construction

Now it’s time to tackle the exciting task of constructing a strong and weather-resistant roof for your beautiful cob home. The roof design plays a crucial role in protecting your house from the elements and ensuring its longevity.

There are various options to consider when it comes to roof materials for a tiny cob house. One popular choice is a thatched roof, which provides excellent insulation and adds a rustic charm to your home. Thatched roofs are made from bundles of dry vegetation, such as straw or reeds, layered tightly to create a waterproof barrier.

Another option is a metal roof, which is durable, fire-resistant, and requires minimal maintenance. Metal roofs come in a variety of styles and colors, allowing you to customize the look of your cob house.

Advertisement

When selecting roof materials, it’s important to consider the weight they will add to your structure. Cob walls are sturdy, but they have their limits. Consulting with a structural engineer or an experienced cob builder can help you determine the best materials for your roof design while maintaining the structural integrity of your home.

With the roof construction complete, it’s time to move on to the next phase of your cob house project: plumbing and electrical installations. These essential components will ensure that your home is functional and comfortable.

Plumbing and Electrical Installations

To ensure your cob home is fully functional and comfortable, you’ll need to tackle the essential tasks of plumbing and electrical installations, like a skilled craftsman threading needles through a tapestry. These two crucial components are vital for modern living and require careful consideration.

When it comes to plumbing, you’ll need to plan for water supply, drainage, and waste management. Installing a water filter system and rainwater harvesting can help minimize your environmental impact. Additionally, considering eco-friendly alternatives like composting toilets and greywater systems can further enhance sustainability.

For electrical installations, it’s important to determine your power needs and design a system that meets them. This may involve installing solar panels, wind turbines, or a combination of renewable energy sources. Implementing energy-efficient appliances and LED lighting can also reduce your electricity consumption. Furthermore, incorporating smart home technology can enhance convenience and control over your electrical system.

Advertisement

As we move forward to the subsequent section about ‘interior finishes and flooring,’ it’s crucial to ensure that the plumbing and electrical installations are completed before proceeding. These essential systems lay the foundation for a functional and efficient home, allowing you to seamlessly transition into the next step of the construction process.

Interior Finishes and Flooring

When it comes to the interior finishes and flooring of your cob home, you’ll have the opportunity to create a space that reflects your personal style and adds warmth and character to your living environment. The interior design of your tiny cob house is a chance to showcase your creativity and express yourself.

One of the main considerations when selecting interior finishes is to choose eco-friendly materials. Opting for sustainable options like reclaimed wood or bamboo flooring not only reduces environmental impact but also adds a unique charm to your space. Additionally, using natural paints and finishes made from organic materials can further enhance the eco-friendly aspect of your cob home.

When it comes to flooring, there are various options to choose from. Hardwood floors provide a timeless and elegant look, while tile floors offer durability and easy maintenance. Another option is polished concrete floors, which can be stained or stamped to mimic the appearance of other materials. Whichever flooring material you choose, make sure it complements the overall aesthetic of your cob home.

In the next section about installing doors and windows, you’ll have the opportunity to bring natural light into your space and enhance the connection between the indoors and outdoors. Choosing energy-efficient windows and doors will not only reduce your carbon footprint but also contribute to the overall comfort and efficiency of your tiny cob house.

Advertisement

Installing Doors and Windows

Bring the beauty of the outdoors into your cob home by installing energy-efficient windows and doors that create a seamless connection between your living space and the natural world. Proper door installation and strategic window placement are essential to maximize natural light and ventilation while maintaining the structural integrity of your tiny cob house.

Here are three key considerations for installing doors and windows in your cob home:

  1. Door Installation: Choose sturdy, weather-resistant doors that complement the overall aesthetic of your cob house. Install them in a way that ensures a tight seal to prevent drafts and maintain insulation. Consider using double doors or a larger entrance to create a more open and inviting feel.

  2. Window Placement: Strategically place windows to optimize natural light and airflow throughout your cob home. Consider the orientation of your house to maximize exposure to sunlight during different times of the day. Install windows at varying heights to allow for cross-ventilation and to create interesting views of the surrounding landscape.

  3. Energy Efficiency: Invest in energy-efficient windows and doors that are well-insulated and have low emissivity coatings. This will help regulate indoor temperatures, reduce energy consumption, and lower your carbon footprint.

With the doors and windows properly installed, your cob home will not only be a cozy and sustainable living space but also a place that seamlessly connects you to the beauty of the natural world.

In the next section, we will discuss the importance of final inspections and testing to ensure the safety and functionality of your tiny cob house.

Final Inspections and Testing

After all the doors and windows have been installed, it’s time for the final inspections and testing phase of the construction process. This is a crucial step to ensure that the tiny cob house meets all the necessary safety and building code requirements.

Advertisement

During the final inspections, a professional inspector will thoroughly examine every aspect of the house, from the foundation to the roof, to make sure that everything is in compliance with the regulations. They will check for any potential hazards, such as faulty electrical wiring or structural issues. Additionally, the inspector will also test the functionality of all the doors and windows to ensure they open and close properly.

Final inspections can take some time, depending on the size and complexity of the house. It’s important to note that unexpected construction delays or issues discovered during the inspections can affect the overall construction timeline. However, it’s better to address these issues during the inspections rather than later on when the house is already occupied.

Once the final inspections and testing are complete, we can move on to the next phase of the construction process, which involves landscaping and exterior features. This step will give the tiny cob house its final touches and enhance its overall aesthetic appeal.

Landscaping and Exterior Features

Enhance the overall aesthetic appeal of your tiny cob house with landscaping and exterior features. A well-designed landscape can transform the exterior of your home, creating a harmonious blend between nature and your cob house.

Here are three key elements to consider when planning your landscaping design:

Advertisement
  1. Plant Selection: Choose plants that complement the natural materials and earthy tones of your cob house. Opt for native plants that require minimal maintenance and are adapted to the local climate. Incorporate a mix of flowering plants, shrubs, and trees to add texture and color to your landscape.

  2. Hardscaping: Incorporate hardscaping elements, such as pathways, patios, and retaining walls, to create functional outdoor spaces. Use materials that complement the organic nature of your cob house, such as natural stone or reclaimed wood. These features will not only enhance the visual appeal but also provide practicality and durability.

  3. Lighting: Proper lighting can highlight the architectural details of your cob house and create a warm and inviting ambiance. Install outdoor lighting fixtures strategically to accentuate key features, such as the entrance or garden areas. Consider energy-efficient options, such as solar-powered lights, to minimize environmental impact.

By carefully planning your landscaping design and selecting appropriate exterior materials, you can create a cohesive and visually stunning environment that complements your tiny cob house.

Frequently Asked Questions

How much does it cost to build a tiny cob house?

In terms of cost analysis, building a tiny cob house can be a cost-effective option. The use of sustainable materials like cob, which is a mixture of clay, sand, and straw, can significantly reduce construction expenses.

Additionally, incorporating sustainable features like passive solar design and rainwater harvesting can provide long-term sustainability benefits. With these factors considered, the overall cost of building a tiny cob house is relatively affordable compared to traditional construction methods.

Can I build a tiny cob house on my own or do I need to hire a professional?

Building a tiny cob house on your own can be a challenging yet rewarding experience. While it’s possible to DIY, hiring a professional can ensure a more efficient and successful construction process.

The challenges of building on your own include acquiring the necessary skills and knowledge, managing the project, and overcoming any hurdles that may arise. However, the benefits of DIY include cost savings, personal satisfaction, and the opportunity to customize your house according to your preferences.

Advertisement

What are the advantages of building a tiny cob house compared to a conventional house?

Building a tiny cob house offers numerous advantages compared to a conventional house. One interesting statistic is that cob houses can last for centuries, with some still standing after 500 years. The use of natural materials like clay, sand, and straw promotes sustainability and healthy living.

Cob houses are also incredibly energy efficient, providing insulation and reducing heating and cooling costs. Their unique design and connection to nature create a truly special and harmonious living environment.

Are there any specific building codes or regulations that I need to consider when building a tiny cob house?

When it comes to building a tiny cob house, there are specific building codes and regulations that need to be considered. These codes and regulations vary depending on the location, so it’s essential to research and understand the requirements in your area.

Generally, permits are needed for constructing a cob house, and there may be guidelines for the size, structure, and materials used. Consulting with local authorities and professionals in the field can provide a more detailed understanding of the specific building codes and regulations for tiny cob houses.

Can a tiny cob house be customized and expanded in the future if needed?

Yes, a tiny cob house can definitely be customized and expanded in the future if needed. There are plenty of customization options for tiny cob houses, allowing you to personalize the layout, finishes, and even add unique features.

Advertisement

Additionally, cob is a versatile building material that can be easily modified or added to as your needs change. So, whether you want to expand the living space or create additional rooms, future expansion possibilities for tiny cob houses are certainly feasible.

Conclusion

In conclusion, building a tiny cob house of 200m2 requires careful planning, diligent construction, and attention to detail.

From the initial phase of designing and preparing the site, to the mixing and building of the cob walls, and the installation of doors and windows, every step plays a crucial role in the overall construction process.

Additionally, final inspections, testing, and landscaping are equally important in completing the project.

By considering these factors and executing each step with precision, the construction time of a tiny cob house can be effectively minimized while ensuring a high-quality end result.

Advertisement
Continue Reading

Beginners Guides

How Low Can Tiny House Trailers Be?

Published

on

By

An image showcasing a tiny house trailer nestled beneath a majestic, towering tree, highlighting the juxtaposition between the humble structure and the grandeur of nature

Always wondered how low a tiny house trailer can go? Get ready to be amazed as this article delves into the world of low-profile trailers made for tiny homes.

These innovative trailers offer a multitude of benefits, from space-saving design features to easy mobility and transportation. But what are the legal requirements and regulations surrounding these unique structures? And what challenges can arise when building and living in a low tiny house trailer?

Fear not, as I will provide all the answers you need. Whether you’re considering a low-profile trailer for your own tiny house or simply curious about this fascinating trend, join me as we explore the possibilities and discover inspiring examples of low tiny house trailer designs.

Get ready to be inspired and amazed by the incredible world of low tiny house trailers.

Key Takeaways

  • Low-profile trailers for tiny houses offer benefits such as space-saving design features and easy mobility.
  • Regulations and legal requirements vary by jurisdiction, including height restrictions, weight limits, building codes, and zoning regulations.
  • Challenges of building and living in a low tiny house trailer include careful planning, precise measurements, and lightweight yet durable materials.
  • Tips for maximizing space in a low tiny house trailer include utilizing vertical space, optimizing storage under furniture, using multipurpose furniture, and embracing organization systems.

The Benefits of Low-Profile Trailers

Imagine cruising down the road with a low-profile tiny house trailer, effortlessly gliding under bridges and through narrow spaces, making the journey to your next destination a breeze. Low-profile trailers offer numerous benefits for tiny house enthusiasts, including space-saving solutions and cost-effective alternatives.

One of the major advantages of low-profile trailers is their ability to navigate through tight spaces. With a reduced height, these trailers can easily maneuver under low bridges and overhead obstacles that taller trailers would struggle with. This opens up a world of possibilities for tiny house owners, allowing them to explore areas that were previously inaccessible.

Advertisement

In addition to their maneuverability, low-profile trailers also offer space-saving design features. These trailers are designed to maximize every inch of available space, allowing for efficient storage and utilization of the interior. From built-in cabinets and shelves to fold-out furniture, every nook and cranny is utilized to its fullest potential.

Furthermore, low-profile trailers are cost-effective alternatives to traditional tiny house trailers. With their smaller size and reduced materials, these trailers are often more affordable to purchase and maintain. This makes them an attractive option for those on a tight budget or looking for a more economical solution.

Low-profile tiny house trailers offer a range of benefits, including space-saving solutions and cost-effective alternatives. With their ability to navigate through tight spaces and their efficient use of interior space, these trailers provide a practical and efficient housing option for those seeking a minimalist lifestyle.

Space-Saving Design Features

With clever design features, these compact mobile homes can maximize every inch of available space. Space-saving techniques and innovative compact designs allow tiny house trailers to offer functionality and comfort despite their small size. Here are some key design features that contribute to their space-saving capabilities:

  • Lofted sleeping areas: By utilizing vertical space, tiny house trailers often feature lofted sleeping areas, freeing up valuable floor space for other purposes.

  • Foldable furniture: To optimize space, many tiny house trailers incorporate foldable furniture such as tables, chairs, and beds. These can easily be folded away when not in use, creating a more open living area.

  • Multi-functional furniture: Dual-purpose furniture, such as a sofa that can transform into a bed or storage compartments built into staircases, maximize functionality while minimizing the footprint.

  • Clever storage solutions: Tiny house trailers often utilize creative storage solutions, such as built-in cabinets, under-bed storage, and hidden compartments, to make the most of limited space.

  • Compact appliances: Compact appliances, like combination washer-dryers and slim refrigerators, are specifically designed to fit seamlessly into the small footprint of tiny house trailers.

These space-saving design features enable tiny house trailers to offer a surprising amount of livable space despite their compact size. Transitioning into the subsequent section, the mobility and easy transportation of these homes is another key aspect to consider.

Advertisement

Mobility and Easy Transportation

When you’re on the move, it’s remarkable how easily these compact homes can be transported. Tiny house trailers are specifically designed for mobility and easy transportation. Their compact size and lightweight construction make them perfect for towing behind a vehicle.

These trailers are typically built to be no taller than 13.5 feet, which allows them to fit under most bridges and overpasses. Additionally, they are designed to be narrow enough to fit within standard lane widths on the road.

To ensure their mobility, tiny house trailers are constructed using lightweight materials such as steel or aluminum. These materials not only reduce the overall weight of the trailer but also provide strength and durability. The lightweight construction allows for easier towing and maneuverability, making it feasible to take your tiny house on trips or move it to a new location whenever desired.

In terms of transportation, it’s important to note that regulations and legal requirements vary by jurisdiction. It’s crucial to familiarize yourself with the specific rules and regulations in your area before transporting your tiny house. By understanding and adhering to these regulations, you can ensure a safe and hassle-free journey with your compact home.

Moving on to the next section about regulations and legal requirements, it’s important to know what you need to do to comply with the law.

Advertisement

Regulations and Legal Requirements

To comply with regulations and legal requirements, you must familiarize yourself with the specific rules in your jurisdiction, ensuring a safe and hassle-free journey with your compact home. Here are four key considerations when it comes to regulations compliance and building permits for low tiny house trailers:

  1. Height Restrictions: Many jurisdictions have height restrictions for trailers on public roads. It’s crucial to adhere to these limitations to avoid any legal issues. Make sure your low tiny house trailer meets the height requirements set by local authorities.

  2. Weight Limits: Different jurisdictions have specific weight restrictions for trailers. Ensure that your low tiny house trailer falls within the permissible weight limits to ensure road safety and avoid any penalties.

  3. Building Codes: When constructing your low tiny house trailer, it’s important to adhere to building codes and regulations. These codes ensure the structural integrity and safety of your compact home. Consult with local building authorities to obtain the necessary permits and ensure compliance.

  4. Zoning Regulations: Before parking or living in your low tiny house trailer, it’s essential to understand and comply with zoning regulations. Some areas have restrictions on where you can park or live in a tiny house trailer. Research the local zoning laws to avoid potential challenges.

Understanding and complying with regulations and legal requirements will help you overcome the challenges of building and living in a low tiny house trailer, ensuring a smooth transition into the subsequent section about the challenges of building and living in a low tiny house trailer.

Challenges of Building and Living in a Low Tiny House Trailer

Navigating the obstacles of constructing and residing in a compact mobile sanctuary can be an exhilarating yet demanding adventure. When it comes to building a low tiny house trailer, there are a few challenges that need to be considered.

Firstly, one of the challenges is the construction process itself. Building a low-profile trailer requires careful planning and precise measurements to ensure that the structure remains stable and secure. Additionally, the materials used must be lightweight yet durable to withstand the stresses of the road.

Cost considerations are also a significant challenge when constructing a low tiny house trailer. The specialized design and materials needed for a low-profile trailer can increase the overall cost of the project. From choosing the right trailer base to purchasing low-profile materials, the expenses can quickly add up.

Advertisement

Despite these challenges, the rewards of living in a low tiny house trailer can outweigh the difficulties. The ability to travel with ease and live a minimalist lifestyle can be incredibly freeing. Transitioning into the subsequent section about design considerations for low-profile trailers, it is essential to carefully consider the layout and overall design to maximize space and functionality.

Design Considerations for Low-Profile Trailers

Consider carefully planning the layout and design of your compact mobile sanctuary to optimize space and functionality. When it comes to designing a low-profile tiny house trailer, there are several important considerations to keep in mind.

One of the primary concerns is ensuring stability. A low-profile trailer may have a lower center of gravity, which can increase stability while towing and when parked.

Additionally, it is crucial to carefully consider the height of the ceilings in your tiny house. Low ceilings can create a cozy and intimate atmosphere, but they can also make the space feel cramped and claustrophobic. To prevent this, consider using light colors and reflective materials on the walls and ceilings to create an illusion of more space. Additionally, using clever storage solutions that maximize vertical space can help compensate for the lower ceiling height.

When designing your low-profile tiny house trailer, take into account these considerations for stability and low ceilings to create a comfortable and functional living space. Transitioning into the next section about choosing the right trailer height for your needs, it’s important to consider not only the height limitations but also the overall requirements of your tiny house.

Advertisement

Choosing the Right Trailer Height for Your Needs

When choosing the perfect trailer for your compact mobile sanctuary, it’s important to keep in mind your specific needs, such as the ideal height that can accommodate your lifestyle and preferences. Did you know that trailers with taller heights provide more headroom and can offer up to 10% more usable space? To determine the right trailer height for your needs, it’s crucial to consider factors like weight distribution and choosing the appropriate trailer width.

When it comes to weight distribution, it’s essential to ensure that the weight of your tiny house is evenly distributed along the trailer. This will help maintain stability and prevent any potential issues during transportation. Additionally, the width of the trailer should be chosen carefully to ensure that it aligns with the width of your tiny house, allowing for a secure fit.

To help you better understand the considerations for choosing the right trailer height, take a look at the table below:

Trailer Height Headroom Usable Space
Low Limited Less
Medium Moderate Average
High Ample More
Extra High Spacious Maximum

By carefully considering your specific needs and preferences, you can choose a trailer height that provides the perfect balance of headroom and usable space for your tiny house. In the next section, we will explore tips for maximizing space in a low tiny house trailer, ensuring that every inch is utilized efficiently.

Tips for Maximizing Space in a Low Tiny House Trailer

Looking to make the most of your compact mobile sanctuary? Discover simple yet effective tips for maximizing space in a low tiny house trailer.

Advertisement
  1. Utilize vertical space: When dealing with limited floor space, it’s essential to think vertically. Install shelves, hooks, and racks on the walls to store items such as kitchen utensils, clothing, and accessories.

  2. Optimize storage under furniture: Don’t let the space under your furniture go to waste. Invest in storage containers or bins that fit neatly underneath your bed, couch, or dining table. This way, you can make use of every inch available.

  3. Use multipurpose furniture: Select furniture pieces that serve multiple functions. For example, choose a sofa that can convert into a bed or a coffee table with hidden storage compartments. This allows you to maximize functionality while minimizing the amount of furniture you need.

  4. Embrace organization systems: Implementing smart storage solutions can greatly enhance the organization of your tiny house. Utilize drawer dividers, hanging organizers, and storage baskets to keep everything in its place and easily accessible.

By implementing these tips for maximizing storage and small space organization, you can create a more efficient and comfortable living environment in your low tiny house trailer. Transitioning into the subsequent section about creative storage solutions for low-profile trailers, you’ll discover even more innovative ways to optimize your space.

Creative Storage Solutions for Low-Profile Trailers

Get ready to discover some ingenious storage ideas that will transform your compact mobile haven into a clutter-free oasis. When it comes to creative storage solutions for low-profile trailers, space-saving design is key. Maximizing every inch of available space is crucial in order to make the most out of your tiny home on wheels.

One effective way to optimize storage in a low-profile tiny house trailer is by utilizing vertical space. Installing tall cabinets or shelves that reach the ceiling allows you to store items that are not frequently used, such as seasonal clothing or kitchen appliances. Additionally, incorporating built-in furniture with hidden compartments, like a bed with drawers underneath or a dining table with storage compartments, can help maximize space while keeping your belongings organized.

To give you a visual representation of these storage solutions, take a look at the table below:

Storage Solution Description
Vertical Cabinets Tall cabinets that reach the ceiling, providing ample storage space.
Built-in Furniture Furniture pieces with hidden compartments for extra storage.

These creative storage solutions not only help declutter your tiny house trailer, but also create a visually appealing and organized living space. By utilizing these space-saving techniques, you can make the most out of your limited square footage. Now, let’s move on to inspiring examples of low tiny house trailer designs.

Advertisement

Inspiring Examples of Low Tiny House Trailer Designs

Prepare to be inspired by these awe-inspiring examples of compact mobile homes on wheels, showcasing innovative designs that’ll leave you amazed.

These low tiny house trailer designs are not only visually appealing but also offer practical solutions for those seeking a minimalist lifestyle.

  • Ingenious Use of Space: These low-profile trailers feature clever space-saving techniques that maximize every inch of the interior. From foldable furniture to hidden storage compartments, these designs prioritize functionality without compromising on comfort.

  • Low Cost Construction: One of the key advantages of these tiny house trailers is their affordability. By utilizing cost-effective materials and simplified construction techniques, these homes offer a budget-friendly alternative to traditional housing options.

  • Environmental Sustainability: Many of these low tiny house trailer designs prioritize environmental sustainability. They incorporate eco-friendly features such as solar panels, composting toilets, and rainwater harvesting systems. These sustainable practices not only reduce the ecological footprint but also provide a self-sufficient living experience.

Whether you’re looking to downsize, embrace a minimalist lifestyle, or simply seek inspiration for innovative design solutions, these low tiny house trailer designs offer a wealth of ideas to explore.

With their low-cost construction and environmental sustainability, these compact mobile homes on wheels provide a glimpse into the future of sustainable and affordable housing options.

Frequently Asked Questions

How much does a low-profile trailer typically cost?

A low-profile trailer typically costs between $5,000 to $10,000, depending on the size and features. The advantages of a low-profile trailer are that it offers better stability, easier towing, and improved fuel efficiency compared to a standard trailer. However, it also has some disadvantages such as limited storage space and reduced headroom inside the trailer.

Advertisement

Overall, the cost range for a low-profile trailer makes it a popular choice for those looking for a budget-friendly option.

What are the most common materials used in building low tiny house trailers?

The most common materials used in building low tiny house trailers are steel and aluminum. Steel is a popular choice due to its strength and durability, while aluminum offers a lightweight option.

These materials allow for a sturdy yet lightweight construction, making low profile trailers easier to tow and maneuver. The advantages of low profile trailers include improved fuel efficiency and reduced wind resistance.

By utilizing these materials, builders can create efficient and reliable low tiny house trailers.

Are there any limitations on where I can park a low-profile tiny house trailer?

There are certain limitations on where you can park a low-profile tiny house trailer due to parking regulations. These regulations may vary depending on the specific area or jurisdiction. However, the benefits of having a low-profile trailer include increased maneuverability and a lower center of gravity, which can make it easier to navigate tight spaces and reduce the risk of tipping.

Advertisement

Always check local parking regulations and restrictions before deciding on a parking location.

Can I customize the interior design of a low tiny house trailer?

Yes, you can customize the interior design of a low tiny house trailer. There are a variety of customization options available, allowing you to create a space that suits your specific needs and preferences.

The benefits of a low profile design include increased mobility and ease of towing. With a low trailer, you can navigate tight spaces and travel on roads with height restrictions. This allows for more flexibility in choosing where to park your tiny house.

Are there any specific safety precautions I should take when towing a low-profile trailer?

When it comes to towing a low-profile trailer, there are several important safety precautions to keep in mind. First and foremost, make sure the trailer’s properly secured to the towing vehicle using a strong and reliable hitch system.

Additionally, always check the trailer’s tire pressure and make sure the brakes are in good working condition. It’s also crucial to distribute the weight evenly and avoid overloading the trailer.

Advertisement

Lastly, be mindful of your speed and maintain a safe following distance to ensure a smooth and safe towing experience.

Conclusion

In conclusion, opting for a low-profile tiny house trailer offers numerous benefits, such as greater mobility and space-saving design features.

While some may argue that building and living in a low tiny house trailer pose challenges, with careful planning and creativity, these obstacles can be overcome.

By choosing the right trailer height for your needs and implementing smart storage solutions, you can maximize space and create a comfortable living environment.

Don’t let the idea of a low tiny house trailer deter you; embrace the possibilities and discover the freedom and flexibility it offers.

Advertisement
Continue Reading

Beginners Guides

How Make Tiny House

Published

on

By

An image showcasing a cozy, minimalist living space inside a tiny house

Have you ever dreamed of living in a cozy, compact space that showcases your uniqueness? A place where you can simplify your life and focus on what truly matters? If so, building a tiny home might be the perfect choice for you.

In this article, I will guide you through the process of creating your own tiny house, step by step. From determining your needs and goals, to choosing a suitable location, designing the layout, and obtaining the necessary permits and insurance, I will provide you with all the information you need to get started.

We will also discuss how to gather the materials and tools, install plumbing and electrical systems, insulate and finish the interior, and add the final touches and decorations.

So, if you’re ready to embark on this exciting journey, let’s dive in and learn how to make your dream of living in a tiny house a reality.

Key Takeaways

  • Building a tiny house offers benefits such as simplifying life, promoting financial freedom, and reducing stress levels.
  • The steps to building a tiny house include determining needs and goals, setting a budget, choosing a suitable location, and obtaining permits and insurance.
  • Key considerations when building a tiny house include budget alignment, location proximity to amenities, material durability, and adherence to building codes.
  • Personalization and mindful downsizing are important aspects of building a tiny house, including finishing techniques, color schemes, and avoiding clutter.

Determine Your Needs and Goals

Before diving into the exciting world of building a tiny house, it’s important to determine what your needs and goals are for this unique living space. Identifying your priorities is the first step in creating a tiny house that perfectly suits your lifestyle. Consider what is most important to you – whether it’s having a minimalist design, maximizing storage space, or being environmentally friendly.

Once you have a clear understanding of your priorities, you can set a budget that aligns with your goals. This will help you make informed decisions about materials, appliances, and any additional features you want to incorporate into your tiny house. Remember, a tiny house is all about efficiency and functionality, so it’s crucial to plan ahead and allocate your resources wisely.

Advertisement

Now that you have determined your needs and set a budget, it’s time to choose a suitable location for your tiny house.

Choose a Suitable Location

Selecting an appropriate site for my compact dwelling involves considering various factors such as the surroundings, accessibility, and overall feasibility. When selecting a location for my tiny house, I need to take into account the proximity to amenities and services, such as grocery stores, hospitals, and schools.

Additionally, I should consider the natural surroundings, such as the presence of trees, bodies of water, or scenic views that can enhance my living experience. The accessibility of the site is also crucial, as I want to ensure that I have easy access to major roads and public transportation.

Moreover, I need to assess the feasibility of the location in terms of zoning regulations and building codes. It’s important to find land that allows for the construction of a tiny house and to comply with any necessary permits or regulations.

By carefully selecting the location for my tiny house, I can create a harmonious living environment that meets my needs and goals. Once I’ve found the suitable site, I can then proceed to the next step of designing my compact dwelling.

Advertisement

Design Your Tiny House

Once you’ve decided on the suitable site, it’s time to begin brainstorming and blueprinting your cozy, cleverly crafted compact dwelling. Designing your tiny house is an exciting process that allows you to unleash your creativity while incorporating the latest tiny house design trends. The key to maximizing space in a tiny house is to think strategically and utilize every square inch efficiently.

To help you get started, I’ve created a table below showcasing three innovative design ideas that can make a significant difference in your tiny house:

Design Idea Description Benefit
Lofted Sleeping Area Utilize vertical space by creating a lofted sleeping area, freeing up valuable floor space Maximize living space and create a cozy, separate sleeping sanctuary
Multi-Purpose Furniture Invest in furniture that serves multiple functions, such as a sofa that converts into a bed or a dining table that can be folded against the wall Save space and have furniture that adapts to your changing needs
Clever Storage Solutions Incorporate creative storage solutions, like built-in shelving, hidden compartments, and under stairs storage Keep your belongings organized and out of sight, reducing clutter

By incorporating these design ideas, you can create a functional and stylish tiny house that maximizes space and meets your needs. Moving forward, it’s important to obtain permits and insurance to ensure the legality and protection of your tiny house project.

Transitioning into the subsequent section about obtaining permits and insurance, it’s crucial to navigate the regulatory requirements and secure the necessary documentation to bring your dream tiny house to life.

Obtain Permits and Insurance

To ensure the safety and legality of your dream tiny house, you’ll need to navigate the process of obtaining permits and insurance, allowing you to confidently bring your unique vision to life.

Advertisement

When it comes to permits, it’s essential to research and understand the regulations in your area. Start by contacting your local building department to inquire about the specific requirements for tiny houses. They’ll provide you with the necessary permit application forms and guide you through the process. It’s crucial to complete these forms accurately and submit them in a timely manner to avoid any delays in your project.

Now, let’s talk about insurance coverage. While not always required, getting insurance for your tiny house is highly recommended. It provides protection against potential risks such as theft, fire, or accidents. Contact insurance providers specializing in tiny houses to find the coverage that suits your needs. They can help you understand the different options available and ensure you have adequate protection for your investment.

Obtaining permits and insurance is a crucial step towards making your tiny house project a success. Once you have these in place, you can proceed with confidence to the next phase of your journey: gathering materials and tools.

Gather Materials and Tools

Now that you have your permits and insurance sorted, what materials and tools do you need to bring your dream tiny house to life? Sourcing the right materials is crucial for a successful project. You want to ensure that the materials you choose are not only durable but also lightweight to maximize the available space in your tiny house. Consider using sustainable materials such as reclaimed wood or recycled metal to reduce your environmental impact.

In order to select the right tools, you need to consider the complexity of your project and your personal skill level. A basic toolkit should include essential items such as a measuring tape, hammer, screwdriver set, level, and a power drill. Additionally, specialized tools like a miter saw, circular saw, and a nail gun can make your construction process more efficient.

Advertisement

To help you better visualize the materials and tools needed, here is a table that outlines some common items:

Materials Tools
Plywood Measuring tape
Insulation Hammer
Lumber Screwdriver set
Roofing materials Level
Siding Power drill

Now that you have gathered all the necessary materials and tools, it’s time to move on to the next section and start building the foundation and frame of your tiny house.

Build the Foundation and Frame

With the foundation and frame in place, you’ll feel a surge of excitement as your dream tiny house starts to take shape. Building a tiny house requires careful planning and the use of specific building techniques to ensure a sturdy and reliable structure.

The foundation serves as the base of your house and can be built using either a concrete slab or a pier-and-beam system. This decision will depend on your specific needs and budget.

Once the foundation is completed, it’s time to start building the frame. The frame provides the structural support for your tiny house and can be constructed using wood or metal. Wood is a popular choice due to its affordability and ease of use. However, metal frames offer greater durability and resistance to pests and weather conditions.

Advertisement

Before beginning the frame construction, it’s important to have a detailed cost estimation to ensure you stay within your budget. This includes factoring in the cost of materials, tools, and any professional help you might need.

As you complete the foundation and frame, you’ll be ready to move on to the next step: installing plumbing and electrical systems. This crucial stage will bring your tiny house one step closer to being fully functional and livable.

Install Plumbing and Electrical Systems

Once you’ve built the foundation and frame, it’s time for you to dive into the installation of plumbing and electrical systems, bringing your dream tiny house closer to becoming a comfortable and functional home.

When it comes to tiny house plumbing, it’s important to carefully plan and design the layout to maximize space efficiency. You’ll need to install a water supply system, including a water heater, water lines, and a sewage system. To ensure proper functioning, it’s crucial to use high-quality materials and follow local building codes.

When it comes to electrical system installation techniques in a tiny house, safety should be the top priority. Begin by determining your power needs and design a system accordingly, including outlets, switches, and lighting fixtures. It’s essential to use a circuit breaker panel to protect against overloads and install Ground Fault Circuit Interrupters (GFCIs) to prevent electric shock in wet areas. Don’t forget to properly ground your electrical system to ensure safety.

Advertisement

Next, you’ll want to insulate and finish the interior of your tiny house. This step will not only provide comfort but also help with energy efficiency. By insulating the walls, floors, and ceiling, you can regulate the temperature inside and reduce noise. Once the insulation is in place, you can move on to finishing the interior with your chosen materials, such as drywall or wood paneling. This will give your tiny house a polished and personalized look.

Transitioning into the subsequent section about ‘insulate and finish the interior’, you can now focus on creating a cozy and inviting living space.

Insulate and Finish the Interior

To create a warm and inviting living space, it’s essential to insulate and finish the interior of your cozy abode.

When it comes to finishing techniques, there are various options to consider. One popular choice is drywall, which provides a smooth and polished look to the walls. It can be easily installed and painted to match your desired aesthetic.

Another option is tongue and groove paneling, which adds a rustic charm to the interior. This type of paneling can be made from wood or other materials and gives a cozy cabin-like feel to your tiny house.

Advertisement

In terms of insulation, there are different options available depending on your climate and personal preferences. Fiberglass insulation is a common choice due to its affordability and effectiveness in trapping heat. It comes in rolls or batts that can be easily installed between the studs.

Another option is spray foam insulation, which provides a superior air seal and is ideal for tiny house owners who want maximum energy efficiency.

Once the insulation and finishing techniques are complete, it’s time to add the final touches and decorations to make your tiny house truly feel like home.

Add the Final Touches and Decorations

After insulating and finishing the interior of your tiny house, it’s time to add the final touches and decorations that will truly make it feel like home.

These decorative elements not only enhance the aesthetics of your space but also allow you to personalize it according to your taste and style.

Advertisement

One of the first things you can do is to choose a color scheme that reflects your personality and creates a harmonious atmosphere. Whether you prefer bold and vibrant colors or a more tranquil and neutral palette, painting the walls and choosing coordinating fabrics for curtains and pillows can make a significant impact.

Next, consider adding artwork, photographs, or other wall hangings that reflect your interests and experiences. These can serve as conversation starters and add a personal touch to your space.

In addition to wall decor, don’t forget about smaller decorative items such as plants, candles, and decorative bowls or trays. These can add texture and visual interest to your tiny house.

As you add these final touches and decorations, remember to keep the overall size and scale of your tiny house in mind. You want to avoid clutter and choose items that enhance the space rather than overwhelm it.

With the final touches in place, it’s time to move into your tiny house and enjoy your new lifestyle.

Advertisement

Move into Your Tiny House and Enjoy Your New Lifestyle

Now that I’ve settled into my cozy abode, it’s time to fully embrace the tiny living lifestyle and revel in the fact that research shows that people who downsize their living spaces experience a decrease in stress levels by 33%.

It’s truly amazing how a smaller and simpler living space can have such a positive impact on my overall well-being.

One of the things I love about living in a tiny house is being able to stay up to date with the latest trends. There are always new and innovative ideas popping up in the tiny house community, from space-saving storage solutions to eco-friendly designs. It’s exciting to see how people are constantly pushing the boundaries of what is possible in a small space.

Another benefit of downsizing is the financial freedom it brings. With a smaller mortgage or no mortgage at all, I have more money to spend on experiences and adventures. I can travel more, pursue my passions, and live a more fulfilling life.

Living in a tiny house has also made me more mindful of my consumption habits. I’ve learned to appreciate the things that truly bring me joy and let go of the rest. It’s a liberating feeling to let go of material possessions and focus on what really matters.

Advertisement

Overall, moving into my tiny house has been a transformative experience. I feel lighter, happier, and more connected to the world around me. I encourage anyone considering downsizing to give it a try and discover the many benefits of living small.

Frequently Asked Questions

How much does it cost to build a tiny house?

The cost of building a tiny house can vary depending on several factors such as the size, materials used, and location.

A rough cost estimation for a basic tiny house is around $20,000 to $30,000. However, more elaborate designs and high-end finishes can increase the cost significantly.

Financing options for tiny houses include personal loans, RV loans, or even crowdfunding. It’s important to research and compare different options to find the best financing solution for your specific needs.

What are the legal restrictions for building a tiny house in my area?

Legal requirements and zoning regulations for building a tiny house vary depending on the area. It’s crucial to research and understand the specific rules in your location.

Advertisement

For instance, in a study conducted by the American Tiny House Association, it was found that only 23% of cities have specific regulations for tiny houses. This highlights the importance of being aware of the legal restrictions and ensuring compliance with building codes and permits before embarking on your tiny house project.

Can I build a tiny house on wheels instead of a foundation?

When considering building a tiny house, it’s important to weigh the pros and cons of choosing a foundation or wheels.

Building a tiny house on wheels offers the advantage of mobility, allowing you to easily move your home to different locations. However, it may require additional permits and regulations, and can be more expensive to construct.

On the other hand, building a tiny house on a foundation provides stability and less hassle with regulations, but lacks the flexibility of mobility.

Consider your priorities and lifestyle when deciding between the two options.

Advertisement

How long does it typically take to build a tiny house?

Typically, it takes several months to build a tiny house, depending on the complexity and size of the project. The typical timeline involves several stages, including designing, acquiring materials, and construction.

However, construction challenges can arise, such as limited space, plumbing and electrical installations, and ensuring structural stability. These challenges may extend the timeline, but with careful planning and attention to detail, building a tiny house can be a rewarding and fulfilling experience.

Are there any specific building codes or regulations I need to follow when constructing a tiny house?

When constructing a tiny house, it’s crucial to adhere to specific building codes and regulations to ensure safety and compliance. Building permits are typically required, and it’s essential to check with your local municipality for specific requirements.

Zoning requirements also play a role in determining where you can legally build your tiny house. It’s important to research and understand these regulations before beginning construction to avoid any legal issues down the road.

Conclusion

After going through the process of building my own tiny house, I can confidently say that it’s a rewarding and fulfilling experience.

Advertisement

By determining my needs and goals, choosing a suitable location, and designing the house to my liking, I was able to create a space that perfectly fits my lifestyle.

Obtaining the necessary permits and insurance gave me peace of mind, while gathering materials and tools allowed me to bring my vision to life.

Installing plumbing and electrical systems, insulating and finishing the interior, and adding the final touches and decorations all contributed to making my tiny house a comfortable and personalized space.

Now, I can proudly say that I’ve moved into my tiny house and I’m enjoying a new and simplified lifestyle.

Advertisement
Continue Reading

Trending