Did you know that the average tiny home owner uses around 10-20 gallons of water per day? Although this might seem like a small amount compared to typical American homes, in a small living space like a tiny house, every drop is crucial. This highlights the importance of selecting the right water tank size for your tiny house.
In this article, I will guide you through the process of determining the perfect water tank size for your tiny house, taking into consideration factors such as your water usage needs, available space, and budget. We will explore different types of water tanks suitable for tiny houses, and I will provide you with average water tank sizes to help you make an informed decision.
Additionally, I will share tips on how to efficiently use water in your tiny house and provide maintenance and care advice for your water tank. So, let’s dive in and find the perfect water tank size for your tiny house!
Key Takeaways
- The average tiny house owner uses 10-20 gallons of water per day.
- Factors such as number of occupants, daily water usage, and availability of water source influence the size of water tank needed for a tiny house.
- Water tanks for tiny houses can be made of plastic or stainless steel and can be placed inside or outside the house.
- The optimal water tank size for a tiny house depends on the balance between water storage needs and space utilization.
Importance of Water Storage in Tiny Houses
Water storage is crucial in tiny houses because it allows us to have a sufficient supply of water for all our daily needs. In a tiny house, space is limited, so it’s important to make the most of every available resource.
Water conservation techniques play a significant role in ensuring we have enough water to sustain ourselves. These techniques include using low-flow faucets and showers, collecting and reusing rainwater, and installing water-efficient appliances. By implementing these strategies, we can reduce our water consumption and maximize the use of our water storage.
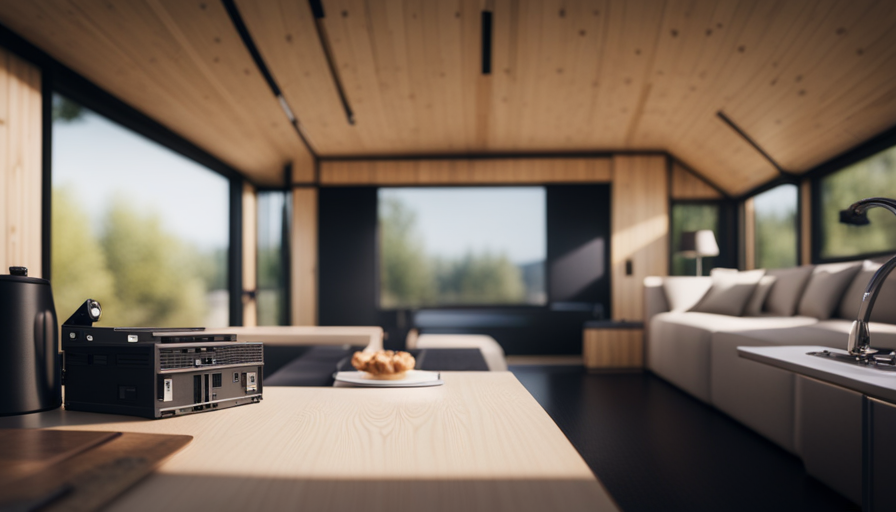
Another important aspect of water storage in tiny houses is the placement of the water tank. Due to limited space, finding the optimal location for the tank is essential. It should be easily accessible for maintenance and refilling purposes, while also minimizing the risk of leaks or damage. It is common to place the water tank under the kitchen sink or in a dedicated storage area.
Factors influencing water tank size in a tiny house include the number of occupants and their water usage habits, as well as the availability of alternative water sources such as wells or municipal connections. By considering these factors, we can determine the ideal size of our water tank to ensure we have enough water for our daily needs without wasting valuable space.
Factors Influencing Water Tank Size
One factor that influences the size of the water tank for a tiny house is the metaphorical lifeblood that sustains it. There are several factors and considerations that must be taken into account when determining the size of the water tank for a tiny house. These factors include the number of occupants, the daily water usage, and the availability of a water source.
-
Number of occupants: The more people living in the tiny house, the larger the water tank needs to be. Each person will have their own water needs for drinking, cooking, and personal hygiene.
-
Daily water usage: The amount of water used on a daily basis will also impact the size of the water tank. Factors such as shower frequency, laundry needs, and dishwashing habits will all contribute to the overall water usage.
-
Availability of a water source: If the tiny house is connected to a municipal water supply, a smaller water tank may be sufficient. However, if the tiny house relies on rainwater harvesting or a well, a larger water tank will be necessary to ensure an adequate supply.
Considering these factors, it is important to carefully assess the water needs of the tiny house before determining the size of the water tank. In the next section, we’ll explore the different types of water tanks commonly used in tiny houses.
Types of Water Tanks for Tiny Houses
When it comes to choosing the right water tank for your tiny home, you have a variety of options to consider. One important factor to consider is the type of material used for the water tank.
There are several types of water tanks available for tiny houses, each with its own advantages and disadvantages. One common type of water tank material is plastic. Plastic water tanks are lightweight and easy to install, making them a popular choice for tiny houses. They’re also resistant to corrosion and can withstand harsh weather conditions.
Another option is stainless steel water tanks. These tanks are durable and long-lasting, but they can be more expensive than plastic tanks.
In addition to the material, you also have to consider the placement options for your water tank. Some tiny house owners choose to install their water tanks inside the house, while others prefer to place them outside. Placing the water tank inside the house can save space, but it may require additional insulation and ventilation to prevent moisture buildup. On the other hand, placing the water tank outside can free up valuable space inside the tiny house, but it may be more exposed to the elements.
With the different types of water tank materials and placement options available, you can find the perfect solution for your tiny home’s water needs. Transitioning into the subsequent section about average water tank sizes for tiny houses, it’s important to consider not only the type of water tank but also the appropriate size for your specific needs.
Average Water Tank Sizes for Tiny Houses
If you’re looking to quench your thirst and keep your tiny oasis hydrated, imagine having a compact reservoir that perfectly fits your needs. When it comes to water tanks for tiny houses, the capacity varies depending on the size of the house and the water consumption patterns of its occupants.
Here are some average water tank sizes commonly used in tiny houses:
-
20-30 gallons: This is the smallest water tank size suitable for a tiny house. It can provide enough water for basic needs such as drinking, cooking, and minimal washing.
-
40-50 gallons: A slightly larger water tank capacity that can accommodate a small family or individuals with moderate water consumption patterns. It allows for a bit more flexibility in terms of water usage.
-
60 gallons or more: For those who value water independence and have higher water consumption needs, a larger water tank size is recommended. This size can support extended periods without refilling and is suitable for tiny houses with more occupants or those with specific water-intensive activities like gardening or showering.
By understanding the average water tank sizes for tiny houses and considering your water consumption patterns, you can ensure that you have the right amount of water storage for your needs. Now let’s explore some tips for efficient water usage in tiny houses.
Tips for Efficient Water Usage in Tiny Houses
When it comes to efficient water usage in tiny houses, there are several key points to consider.
First, installing water-saving fixtures is essential. This includes low-flow faucets, showerheads, and toilets that can significantly reduce water consumption.
Second, collecting and reusing greywater can help conserve water. This involves utilizing water from sinks, showers, and washing machines for purposes such as watering plants or flushing toilets.
Lastly, conserving water in daily activities is crucial. This includes turning off the tap while brushing teeth, taking shorter showers, and only running the dishwasher or washing machine when they’re full.
Installing Water-Saving Fixtures
To maximize water efficiency and reduce your ecological footprint, consider installing water-saving fixtures in your tiny house. These fixtures are designed to minimize water usage without compromising functionality. Here are five water-saving fixtures that can greatly benefit your water conservation efforts:
-
Low-flow showerhead: This fixture reduces water consumption by restricting the flow rate while still providing a satisfying shower experience.
-
Dual-flush toilet: With two flushing options, this toilet allows you to choose between a lower water volume for liquid waste and a higher volume for solid waste.
-
Faucet aerators: These devices mix air with the water, maintaining a steady flow while reducing water usage.
-
Water-efficient dishwasher: This appliance uses less water per cycle, making it an ideal choice for minimizing water consumption.
-
Rainwater harvesting system: By collecting and storing rainwater, you can reuse it for various purposes, such as watering plants or flushing toilets.
By installing these water-saving fixtures, you can significantly decrease your water usage in the tiny house.
Transitioning to the next section, let’s explore the practice of collecting and reusing greywater.
Collecting and Reusing Greywater
Consider implementing a greywater collection and reuse system to further enhance your water conservation efforts in your tiny house. Reusing greywater is a sustainable practice that can significantly reduce water usage. Greywater is the wastewater generated from sources like sinks, showers, and laundry machines, which can be collected and treated for reuse in flushing toilets, watering plants, or even for laundry.
The benefits of greywater recycling are twofold. Firstly, it reduces the strain on freshwater sources by substituting them with recycled water. Secondly, it lowers the amount of wastewater that needs to be treated and disposed of, thus minimizing the environmental impact. By incorporating a greywater system, you can make the most out of every drop of water, contributing to a more efficient and sustainable water management in your tiny house.
Transitioning into the subsequent section about conserving water in daily activities, it’s important to be mindful of our water usage in order to maintain a responsible and sustainable lifestyle.
Conserving Water in Daily Activities
One effective way to minimize water consumption in our daily routines is by incorporating simple habits that make a big impact. Here are some water conservation techniques that can help in conserving water in our daily activities:
In the bathroom:
- Install low-flow showerheads and faucets to reduce water usage.
- Take shorter showers and turn off the water while brushing your teeth or shaving.
In the kitchen:
- Use a dishwasher instead of washing dishes by hand, as it uses less water.
- Fix any leaks in faucets or pipes to prevent water wastage.
Water efficient appliances also play a significant role in conserving water. Consider investing in appliances like water-saving washing machines and toilets, which use less water per cycle. These appliances are designed to minimize water consumption without compromising on performance.
Transitioning into the subsequent section about the pros and cons of different water tank sizes, it’s important to understand how these water conservation techniques can help us make informed decisions about the appropriate size of water tank for a tiny house.
Pros and Cons of Different Water Tank Sizes
When considering the pros and cons of different water tank sizes for tiny houses, there are several key points to consider.
Firstly, smaller tanks offer the advantage of saving space, which is crucial in a tiny house. However, larger tanks can provide a greater water storage capacity, allowing for longer periods between refills.
Additionally, smaller tanks are more portable and flexible, making them easier to transport if the tiny house is on wheels.
Overall, the decision on tank size must be based on balancing water needs with space constraints and considering the flexibility and portability of smaller tanks.
Small Tanks vs. Large Tanks
If you want to maximize water usage in your tiny house, opting for a larger water tank can be a smart choice. Did you know that the average tiny house with a small tank of around 20 gallons can only provide enough water for a few days, while a larger tank of 50 gallons can last up to a week?
When considering small tank benefits and large tank drawbacks, it’s important to weigh the following factors:
- Small tank benefits:
- Takes up less space
- Requires less maintenance
- Lower upfront cost
- Can be easier to install
While small tanks have their advantages, it’s crucial to balance water needs and space constraints.
In the next section, we will explore the options for balancing these factors and finding the optimal water tank size for your tiny house.
Balancing Water Needs and Space Constraints
To strike the perfect balance between your water requirements and the limited space in your cozy abode, you’ll need to carefully consider how to optimize the size of your water storage solution. When it comes to water tank options for tiny houses, there are various sizes available that can accommodate different needs. To help you make an informed decision, let’s take a look at a comparison table of water tank sizes and their corresponding capacities:
| Tank Size | Capacity (Gallons) |
|---|---|
| Small | 50-100 |
| Medium | 100-200 |
| Large | 200+ |
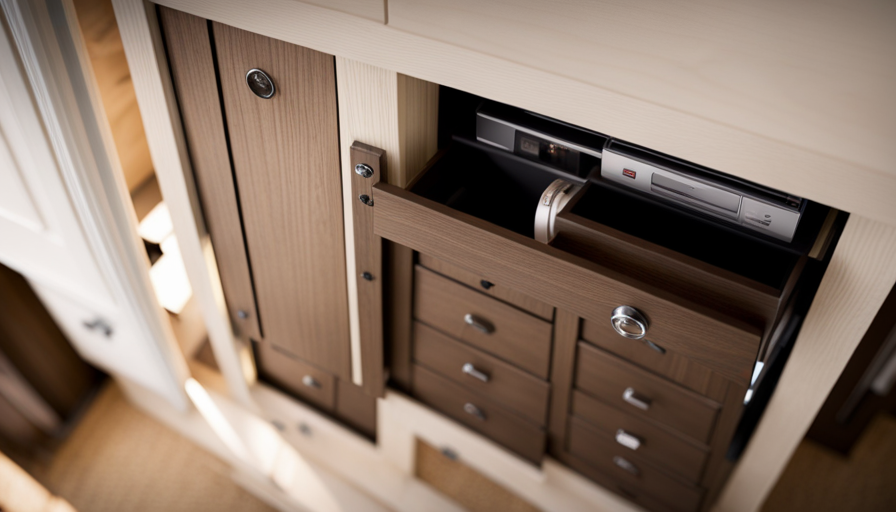
By assessing your daily water consumption and storage requirements, you can determine the ideal tank size for your tiny house. Additionally, the placement of the water tank is crucial to maximize space efficiency. Consider utilizing hidden or underfloor storage areas, or even installing tanks under seating areas or beds. This will help save precious space in your tiny house without compromising your water supply. Transitioning to the next section, let’s explore the flexibility and portability of smaller tanks.
Flexibility and Portability of Smaller Tanks
Consider the convenience and versatility of smaller tanks, which can be easily moved and adapted to fit your changing water storage needs in a compact living space.
-
Smaller tanks offer flexibility in placement, allowing you to maximize the available space in your tiny house.
-
Portable water containers are lightweight and easy to transport, making them ideal for those on the move or living off-grid.
-
These flexible tank options come in various shapes and sizes, ensuring you can find the perfect fit for your specific requirements.
Having explored the benefits of smaller tanks and portable water containers, it’s essential to address the maintenance and care needed to ensure their longevity and efficiency.
Maintenance and Care for Water Tanks
Taking care of your water tank is essential for ensuring the longevity and efficient use of this vital resource in your tiny house. Proper maintenance techniques can significantly extend the lifespan of your water tank and prevent any potential issues that may arise.
Firstly, regular cleaning is crucial to remove any sediment or debris that can accumulate over time. This can be done by draining the tank and scrubbing the interior with a mild detergent.
Secondly, inspecting the tank for any leaks or cracks is important to avoid water wastage and potential damage to your tiny house. Additionally, checking the fittings and connections for any signs of wear and tear is recommended.
Lastly, it is essential to monitor the water quality and perform regular water testing to ensure it is safe for consumption.
By following these maintenance techniques, you can ensure the longevity of your water tank and the quality of the water it provides for your tiny house.
In the next section, we will explore alternative water storage solutions that can complement or replace traditional water tanks in tiny houses.
Alternative Water Storage Solutions
In my previous discussion on maintenance and care for water tanks, I emphasized the importance of regular cleaning and inspection to ensure optimal performance. Now, let’s explore alternative water storage solutions that can supplement or replace traditional water tanks in tiny houses.
One popular option is rainwater harvesting, which involves collecting and storing rainwater for later use. This method not only reduces reliance on municipal water supply but also promotes sustainability. By installing a rainwater collection system, tiny house owners can harness the power of nature to meet their water needs.
There are various ways to implement rainwater harvesting in a tiny house. One approach is to install a rooftop collection system, where rainwater is directed from the roof into gutters and downspouts, then into a storage tank. This tank can be located either above or below ground, depending on the available space.
Another option is to use portable water storage containers, such as collapsible rain barrels or bladders. These can be easily set up and moved around as needed, making them ideal for smaller spaces.
By incorporating alternative water sources like rainwater harvesting, tiny house owners can maximize their self-sufficiency and minimize their ecological footprint. Speaking of water storage, the next section will delve into the DIY installation of water tanks in tiny houses, providing step-by-step guidance for aspiring tiny homeowners.
DIY Water Tank Installation in Tiny Houses
To successfully install a water tank in your compact dwelling, you’ll need to carefully follow a step-by-step guide that outlines the process in detail. DIY water tank installation can be a cost-effective solution for tiny house owners who want to have control over their water supply.
Before starting the installation, it’s essential to determine the water tank capacity that suits your needs. Consider factors such as the number of people living in the house, average water consumption, and the frequency of refilling the tank. Once you’ve determined the appropriate size, you can start the installation process.
Begin by selecting a suitable location for the water tank. It should be easily accessible for maintenance and refilling. The tank should also be placed on a stable and level surface to avoid any accidents. Connect the tank to the main water source using appropriate plumbing fittings. Ensure that all connections are secure and leak-proof. To prevent contamination, install a filtration system and consider adding a UV sterilizer if necessary.
Finally, test the system to ensure it’s functioning properly.
Choosing the right water tank size for your tiny house is crucial to meet your water needs. By following the DIY water tank installation steps and considering the water tank capacity, you can ensure a reliable and sufficient water supply for your compact dwelling.
Conclusion: Choosing the Right Water Tank Size for Your Tiny House
Now that we’ve discussed the DIY installation of water tanks in tiny houses, let’s move on to the crucial step of choosing the right water tank size for your tiny house. Selecting the appropriate water tank size is essential to ensure an adequate and efficient supply of water for all your needs.
When it comes to choosing a water tank for a tiny house, you must consider factors such as the number of occupants, water usage habits, and the availability of water sources. The size of the water tank will directly impact the length of time between refills and the overall water capacity you can store.
It’s vital to strike a balance between having enough water storage to meet your needs without sacrificing valuable space within your tiny house. A larger water tank may provide a longer supply, but it can take up valuable square footage that could be utilized for other purposes.
On the other hand, a smaller water tank may require more frequent refills but can free up space for other essential components in your tiny house. Careful consideration of your water usage patterns and available resources will help you determine the optimal water tank size for your tiny house.
Remember, the right water tank size for your tiny house is unique to your specific needs and preferences. By carefully assessing your requirements and prioritizing space utilization, you can choose a water tank that perfectly fits your tiny house lifestyle.
Frequently Asked Questions
How much does a water tank for a tiny house typically cost?
The cost of a water tank for a tiny house can vary depending on several factors. Water tank sizes can range from as small as 20 gallons to as large as 100 gallons. Factors that affect the cost include the material of the tank, such as plastic or stainless steel, as well as any additional features like a filtration system.
On average, a water tank for a tiny house can cost anywhere from $200 to $800.
Can I use rainwater for drinking in my tiny house?
Rainwater safety is a crucial consideration when using it for drinking in a tiny house. Various purification methods, such as filtration and disinfection, can ensure its cleanliness. However, it is essential to have a robust water management system in place, including regular testing for contaminants.
While rainwater can be a sustainable option, ensuring its safety requires careful monitoring and maintenance.
What are the advantages of using alternative water storage solutions in a tiny house?
Using alternative water storage solutions in a tiny house has several advantages. Firstly, it allows for greater self-sufficiency and reduces reliance on external water sources.
Secondly, it promotes sustainability by utilizing rainwater or greywater, reducing overall water consumption.
Additionally, alternative storage solutions can save space, as they can be designed to fit the limited area of a tiny house. However, some disadvantages include the initial cost of installation and potential maintenance requirements.
How often should I clean and maintain my water tank in a tiny house?
To ensure the water quality in a tiny house, it’s important to regularly clean and maintain the water tank. Start by checking the water quality using a water testing kit or sending a sample to a laboratory.
For maintenance, drain the tank and scrub the interior with a mixture of bleach and water. Rinse thoroughly before refilling.
Additionally, conserve water by fixing leaks, installing low-flow fixtures, and practicing water-saving habits like shorter showers and reusing greywater.
Are there any regulations or permits required for installing a water tank in a tiny house?
Regulations and permits for installing a water tank in a tiny house vary depending on location. Prior to installation, it’s crucial to research local codes and obtain necessary permits.
The installation process involves selecting an appropriate tank size and material, considering factors such as rainwater usage and available space. Alternative storage options, like collapsible tanks or bladder tanks, offer advantages such as easy transportation and flexibility.
Cleaning and maintenance frequency will depend on usage and water quality.
Conclusion
After considering the importance of water storage in tiny houses and the factors influencing water tank size, it’s clear that choosing the right water tank size is crucial.
By understanding the average water tank sizes for tiny houses and implementing efficient water usage tips, you can ensure a sufficient and sustainable water supply.
Don’t forget to regularly maintain and care for your water tank, and explore alternative water storage solutions if needed.
Remember the wise words: "In the end, we will conserve only what we love, we will love only what we understand, and we will understand only what we are taught."