Connect with us

Beginners Guides

How Deep Should a Tiny House Closet Be

Published

on

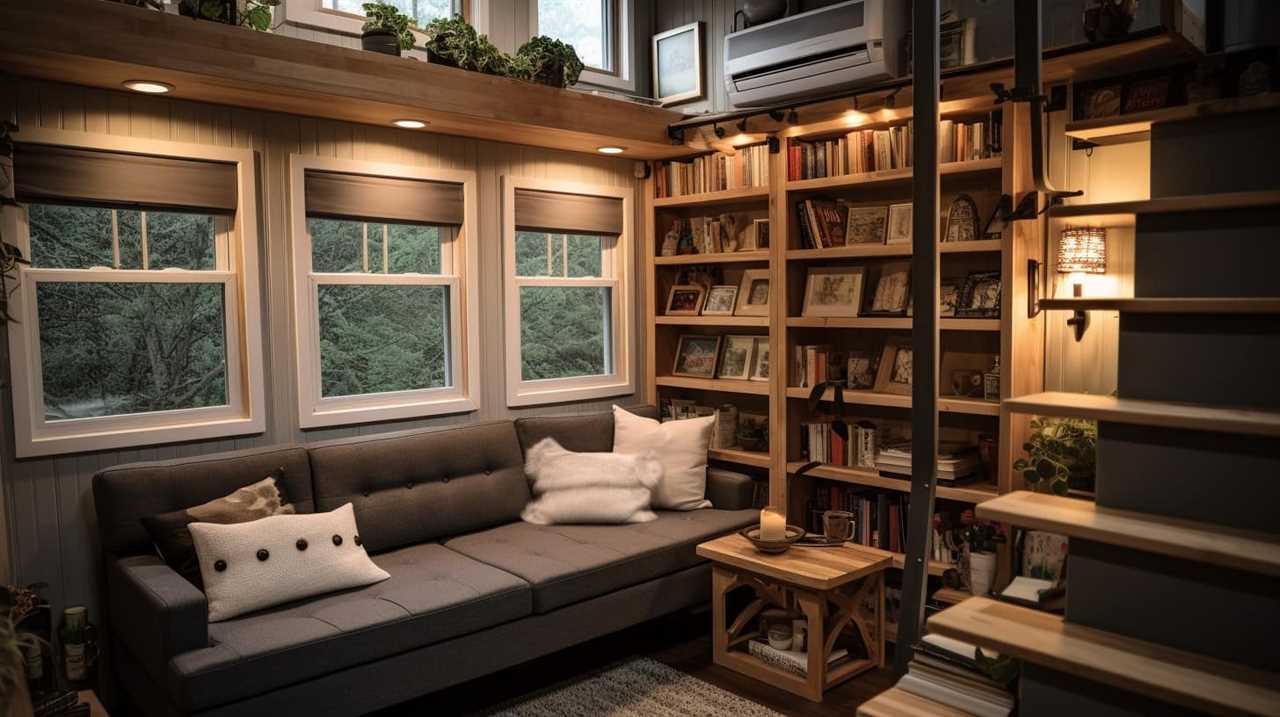
Picture yourself entering your snug tiny home, meticulously designed with every inch of space in mind. Join me on a journey into the realm of tiny house living as we delve into a crucial component: the closet.

How deep should a tiny house closet be? In this article, I’ll share my expertise and provide valuable insights on determining the perfect closet depth for efficient storage.

With creative solutions and expert tips, you’ll be able to maximize your closet space and create the organized oasis you’ve always dreamed of.

Key Takeaways

  • Closet depth is crucial for organization and space-saving in a tiny house.
  • The right balance between depth and space is vital for maximizing storage capacity.
  • Factors such as available space and clothing storage requirements should be considered when determining closet depth.
  • The ideal closet depth for efficient storage in a tiny house is generally around 24 to 30 inches.

The Importance of Closet Depth in a Tiny House

I always find the closet depth to be crucial in my tiny house. When it comes to closet organization and space saving solutions, having the right depth is essential.

tumbleweed cypress 26

In a small living space, every inch matters, and maximizing storage capacity is key. A shallow closet depth can limit your options and make it difficult to keep your belongings organized. On the other hand, a closet that’s too deep can waste valuable space and make it challenging to access your items efficiently.

Advertisement

Therefore, finding the perfect balance is vital. In the next section, we’ll discuss the factors to consider when determining closet depth for tiny houses, which will help you make an informed decision for your own space.

Factors to Consider When Determining Closet Depth for Tiny Houses

When determining closet depth for tiny houses, it’s important to consider a few factors to ensure maximum functionality and efficiency. Here are three factors to consider when determining the closet depth for your tiny house:

  1. Available space: Take into account the overall square footage of your tiny house and allocate the appropriate amount of space for your closet. Consider other storage needs and prioritize accordingly.

    tiny houses

  2. Clothing storage requirements: Assess your clothing collection and determine how much space you need for hanging clothes, folded items, and accessories. This will help you determine the depth needed for your closet to accommodate all your clothing storage needs.

  3. Space-saving solutions: Look for innovative storage solutions that can maximize the use of your closet space. Consider using hanging organizers, shelves, and adjustable rods to make the most of the available space.

Considering these factors will help you determine the optimal closet depth for your tiny house, ensuring efficient storage solutions.

To ensure efficient storage in tiny houses, a recommended closet depth is determined based on available space and storage needs. The ideal measurements for a tiny house closet can vary depending on the layout and design of the space, but generally, a depth of around 24 to 30 inches is recommended. This allows for enough space to hang clothes and store folded items without taking up too much precious square footage. Additionally, incorporating space-saving closet organization ideas can maximize the functionality of the closet. Utilizing vertical space with shelves or hanging organizers, using slim hangers, and installing hooks or racks on the closet doors can help optimize storage in a tiny house closet. By carefully considering the dimensions and implementing smart storage solutions, a tiny house closet can provide efficient storage while still maintaining a compact footprint.

tiny house on wheels

Dimensions (inches) Hanging Space Shelves Drawers
Recommended Range 24-30 2-3 1-2

Creative Solutions for Maximizing Closet Depth in Tiny Houses

Maximizing closet depth in tiny houses requires thinking outside the box and exploring innovative storage solutions. When space is limited, it’s important to make the most of every inch. Here are three creative solutions for maximizing storage in tiny house closets:

Advertisement
  1. Utilize vertical space: Install hanging rods that extend from floor to ceiling to make use of the entire height of the closet. This allows for multiple levels of hanging clothes or the addition of shelving units above the rods.

  2. Install adjustable shelves: Use adjustable shelves that can be moved up or down as needed. This allows for customization based on the size and type of items being stored, ensuring efficient use of the available space.

  3. Use slim hangers: Opt for slim hangers that take up less space and allow for more items to be hung in the closet. This can significantly increase the overall storage capacity.

    the monocle tiny house

Expert Tips for Designing the Perfect Tiny House Closet

I’ve gathered some expert tips that can help you design the perfect tiny house closet. When it comes to organizing a tiny house closet, maximizing every inch of space is crucial. Here are some tips to help you make the most of your small closet:

Tips for organizing a tiny house closet Common mistakes to avoid when designing a tiny house closet
Utilize vertical space with shelves Neglecting to measure the available space accurately
Use hanging organizers for accessories Overcrowding the closet with unnecessary items
Install hooks and rods for additional storage Ignoring the need for proper lighting in the closet
Sort and categorize items for easy access Failing to consider the type and size of clothing
Make use of under-bed storage Neglecting to incorporate adjustable shelving

Frequently Asked Questions

What Are Some Alternative Storage Solutions for Tiny Houses Without a Traditional Closet?

Alternative storage solutions for tiny houses without a traditional closet include maximizing vertical space by using wall-mounted shelves, hanging organizers, and under-bed storage bins. These options allow for efficient use of limited space.

How Can I Make the Most Out of a Limited Closet Space in a Tiny House?

To maximize vertical space in a tiny house closet, I suggest using adjustable shelving and hanging organizers. Additionally, utilizing under bed storage can be a great way to store items that don’t fit in the limited closet space.

Are There Any Specific Measurements or Guidelines to Follow When Designing a Closet for a Tiny House?

When designing a closet for a tiny house, it’s important to prioritize storage space organization and maximizing vertical storage. Specific measurements and guidelines can help ensure efficient use of limited space.

tiny house kaufen

What Are the Advantages of Having a Deep Closet in a Tiny House?

Having a deep closet in a tiny house offers several advantages. It allows for better organization and storage of clothing and other items, maximizing the limited closet space available.

Some items, like bulky winter coats or large suitcases, may not be ideal for storing in a tiny house closet. Maximizing storage in a small space requires careful consideration of what to keep.

Advertisement

Conclusion

In conclusion, when designing a tiny house closet, it’s crucial to consider the depth to ensure efficient storage.

According to a survey conducted among tiny house owners, it was found that the recommended closet depth for optimal organization and functionality is between 24 and 30 inches.

tiny house big living

By maximizing closet depth through creative solutions such as using vertical space and utilizing adjustable shelving, tiny house dwellers can make the most out of their limited storage area.

Continue Reading
Advertisement

Beginners Guides

Different Types of Treehouse Netting

Published

on

By

If you are considering building a treehouse, getting netting for the treehouse is essential. Fortunately, there are many options available on the market. Whether you need climbing nets in different colors, patterns, or styles, you will discover that these products are typically sold by the linear foot and require a specific amount of space – usually starting at 75 square feet. Moreover, these nets are multipurpose, working well for both cargo lofts and hammocks. You can choose a net that suits your treehouse project perfectly, whether it is for a hammock, a cargo loft, or a combination of both.

Dream Nets Are a Treehouse Netting

The concept behind Dream Nets is to create a tensile tree platform that can be woven on-site. It creates a safe and playful play environment that can be enjoyed by the entire family. The dream nets are made of nautical/fishery supplies and are sturdy yet flexible, making them a great choice for any treehouse. The average lifespan of the Dream Nets is 10+ years, making them a great alternative to traditional treehouse materials.

These innovative netting systems come in many different styles and colors. Tree House Supplies offers nets by the linear foot. Depending on the size of your structure, there are several different types of dream nets available. You can also purchase nets specific for hammocks, cargo lofts, or a cargo loft. If you have a large space, you can also buy a netting system that allows you to fit many different-sized hammocks and cargo bins in your treehouse.

Treehouses with net floors are fun for kids of all ages. They are an adventure for children and can be equipped with a rope swing. Kids love to swing from the treehouse and the net floor will make the experience more enjoyable. Treehouses with net floors can be constructed quickly and easily, making the experience fun for everyone. You don’t even have to spend hours or even days building the stairs. The net floors are flexible and can be customized to your child’s needs.

Spider Web Climbing Nets Are a Treehouse Netting

9.8 X 14.8FT Kids Playground Play Safety Net Outdoor Climbing Cargo Net Playground Sets Double Layers Backyard Net for Playground
Spider Web Climbing Nets

This climbing net is ideal for playgrounds, amusement parks, and residential areas. It’s easy to install with essential hand tools. The net is available in standard sizes of twelve, sixteen, and twenty feet. It has two-inch square netting liners and synthetic rope and can be attached to bridges, cargo climbs, and treehouse structures. A few tools are required to install this netting, and you’ll want to have some help if your children aren’t sure about it.

The net allows children to climb up and down without hurting themselves. These nettings are also very durable and should last a long time. These nets are often custom-made from high-quality materials. Once installed, they can be used as a treehouse roof or as an accessory for other structures. Spider web climbing nets are a great option for treehouses designed to keep kids safe. They don’t break easily and are very durable.

Advertisement

Double Stack Climbing Nets Are Ideal for Larger Areas

If you plan to create a playhouse in your backyard, you will need to use sturdy, double-stack climbing nets. You need to use the right knots when tying them, and most resources point you in the right direction. If you’re not sure about what knot to use, the Carrick Bend is an ideal choice. This ornamental knot is very strong and will not create sharp bends that can tear or damage your netting. However, you can experiment with different knots to ensure you’re tying the right knots to keep the net from fraying or breaking.

Double stack climbing nets are designed to accommodate multiple occupants and perfect for larger treehouse netting areas. They are made from two layers of two-inch square netting that are reinforced with a sewn edge and 5/8″ thick rope on the perimeter. The border rope also acts as a stronger connection point, and is usually attached to a wooden platform. These netting products are popular for treehouse platforms.

Treehouse Netting Can Be Used as A Ladder

Treehouse netting is an excellent alternative to traditional ladders for many reasons. Not only can it be used as a ladder, but it can also serve as a protective barrier in case of a fall. A store’s staff usually installs these nets. The installation costs depend on the size of the net, so it is best to check with the store before buying it.

Advertisement
Continue Reading

Beginners Guides

What Happens to a Tree House When the Tree Grows?

Published

on

By

One obstacle you may face while building a treehouse is the weight it adds to the tree. The sudden increase in weight can strain the tree and its roots may take years to strengthen enough to support the additional load. This could potentially affect the tree’s stability in stormy weather. Despite this challenge, there are ways to address it. It is recommended to assess the structure’s weight before deciding to proceed with building the treehouse.

Building a Treehouse

Using specialized bolts is important when building a treehouse. The platform should be at least eight feet above the ground, and the house should be out of reach of children and adults. You should also use safety measures such as railings and individual spacers to prevent falls. If you are not a construction expert, you may want to seek advice from a professional. If you are unsure of the safety precautions to take, consider a platform with railings on all sides.

If you’d like to build a treehouse, it should be built away from power lines. Power lines can fall on the branches of a tree, and a dangerous accident can lead to injury and death. Also, avoid building a treehouse near a waterfall, a working road, or a hilly area. Also, don’t forget to build a sandpit underneath the tree house. Make sure to leave enough room around the tree to accommodate the growth of the house.

You should discuss your plans with your neighbors before you start building. You’ll want to be aware of any potential legal or neighborly problems that might arise if your treehouse is too close to your neighbors’ property. While a treehouse may be fun for children, it’s not worth a neighbor’s ire. As long as you’re considerate and follow the city code, you’ll be able to enjoy your treehouse for years to come.

The cost of building a treehouse will depend on its height and size. The complexity and type of materials used will also determine the project’s overall cost. Remember that it can be hazardous to trees, so always check with a professional before you begin. For example, large bolts and fasteners can damage the tree. Also, the added weight can damage the tree’s trunk and branches. If you’re not sure of the tree’s capacity to handle the extra weight, consult with an arborist. Many tree care companies have arborists on staff.

Advertisement

Before building a treehouse, you should make sure the tree you plan to use is a strong one. If the tree is young and the trunk is a hardwood, you should consult with an arborist. You should also find a tree with strong limbs. You should also consider if the tree will grow to be a good fit for your new treehouse. This will ensure the safety of everyone who uses it.

Once you have a tree with enough size and shape to support a treehouse, you can start with the construction of the treehouse. You should build the base first, and then move on to the main part of the structure, the roof. If the tree is too small or too large, you may need to build a treehouse on stilts to avoid damage. Building a treehouse requires some preparation, but once you’ve completed the initial steps, you’ll be glad you did.

Problems with Tree Support

One of the most common reasons a young tree leans is its poorly developed roots. Soil that isn’t consistent, or which does not support the roots well is also a common cause. The tree may also be leaning because of wind or a wet ground. In these cases, addressing drainage patterns is essential to prevent the problem. Proper placement of stakes, cables, or other supports will prevent a tree from leaning and ensure it has sufficient support during its life.

Problems with Tree Compartmentalization

Wood decay in trees has several causes, including injuries caused by animals, inappropriate pruning cuts, and excessive weight. The damage can also occur as a result of extreme temperature changes. To survive, trees must protect themselves by creating boundary areas to prevent damage. This process is known as compartmentalization. It helps prevent the spread of discoloration and loss of normal wood function. However, this defense system can also lead to problems with tree compartmentalization.

The concept of tree compartmentalization was first introduced in the 1960s and has since become one of the standard concepts in the field. It is based on extensive studies of wood and bark. In addition to the lab, it is based on observational studies of trees in the field. This research led to the development of tree compartmentalization as a concept to describe the growth and decay of trees.

Advertisement

During a forest fire, the first step in preventing decay and disease is to protect the burned area. Trees respond to injury by forming a wall around it to prevent decay and disease from spreading. This wall covers the injured area and prevents the disease from spreading vertically. This wall is made up of two types of tissue: vascular tissue and thick-walled latewood growth rings.

The concept of compartmentalization was originally presented as a systems approach to decay problems. Before Shigo’s research, it was thought that living tree sapwood was dead and that decay was the result of cellular differentiation and maturation. Punky wood, a void left in a tree after wood decay, was also viewed as dead wood. With the compartmentalization concept, wood decay is understood as a multi-step process, beginning with wood formation in the vascular cambium, and culminating in apoptosis and shedding.

Continue Reading

Beginners Guides

Types of Treehouse Brackets

Published

on

By

Brackets are essential for building treehouses in any do-it-yourself project involving treehouses. A strong and dependable support system is crucial for constructing a treehouse. There are various types of brackets available, and the right choice will depend on the specific project requirements. Options include floating brackets, J-brackets, TABs, and treehouse cables. Keep reading to learn more about each type. Each type has its own pros and cons. When you are constructing a treehouse for your child, it is important to choose the appropriate types.

Floating Brackets

A floating bracket can support a treehouse in the wind. This can be achieved with a single-inch lag bolt. The bracket can withstand 50 kg of weight without the use of scaffolding or cherry pickers. A cheater bar can be used for additional leverage. Once the bracket is installed, the beams need to be screwed into the flat plate of the bracket. This allows the structure to sway with the tree.

When building a treehouse, it is important to use flexible supports. If you have multiple trees, you will want to use floating brackets. They are specially designed to withstand the swaying of the trees. They are better than through bolts because they do not damage the trees. Floating brackets are also better for long-term stability, so you can enjoy your new treehouse for a long time.

In order to attach the treehouse to a living tree, you will need to use TABs. These are specially designed bolts that attach a treehouse to a tree. These can withstand thousands of pounds of weight. They also help the tree heal. Treehouse attachment bolts are easy to install and do not require any tools or training. You can find them at home improvement stores. If you decide to use these brackets, make sure to check the manufacturer’s warranty.

Tree houses weigh thousands of pounds. This means that they must be stable. When using fasteners, be sure to use large bolts. These will provide the same strength and durability as a handful of nails or screws, but will also cause less damage to the tree. Moreover, you can also use lag bolts to perch your treehouse on them. However, it is important to use fasteners made for treehouses. They should be at least 1 inch in diameter.

Advertisement

J-brackets

There are two main types of J-brackets for building a treehouse: simple and strong. The former is made of a single bolt which is fed into the tree from one side. The second type requires a single bolt, which is a bit longer and bigger than the first one. It is easy to use and doesn’t need any special tools. The J-bracket can be attached to the tree with rope support or scaffolding.

Another type of attachment point is a floating bracket. These are used to support the roof of the treehouse. A single J-bracket can support up to 50kg. An array of floats can be as large as three feet. These are useful if the tree needs to move. While floating brackets are more expensive, they provide more security and can support the weight of your treehouse. For safety and stability, it is a good idea to hire a professional to install the treehouse.

To install a treehouse, you must follow specific guidelines. The first rule is to keep the spacing between treehouse components at least 12 inches horizontally and vertically. The second rule is to make sure that the J-brackets are not butted against the tree trunk. If you install them at the wrong height, you run the risk of compromising the safety of both you and the tree. This disclaimer is valid for both Be in a Tree LLC and Nelson Treehouse and Supply.

Another important rule of treehouse construction is to always use a solid support system. Do not nail or glue the tree house to the tree; this will only create a wobbly structure. A good solution to this is to use diagonal bracing beneath the structure. You may only need one set if your treehouse is supported by two trees, but you can use up to four if the treehouse is supported by only one.

To attach the treehouse to the tree, you should choose a strong and sturdy beam. A two-by-ten-inch beam should span eight feet and a four-by-six-inch beam is recommended for 12 feet and greater. Remember, most localities require building permits for a treehouse, so you should check your local laws before deciding on the size of the beams. This way, your treehouse will not be a hazard to the tree.

Advertisement

TABs

A treehouse bracket is a simple structure that slides over the TAB to create a flexible platform for the structure. It can withstand up to one inch of wind movement and is attached to the treehouse structure with a flat plate. It has a rectangular frame that resembles a long handle. It fits over the TAB so it can move with the tree. The bracket is made of durable materials to withstand the weight of the treehouse and can also be removed and washed.

Treehouse brackets can be used for different types of structures. The J bracket is one of the most common and is the most common. It requires the beam to be fed in from one side while the J bracket is designed to be installed the other way around. Treehouse brackets can be attached to a tree using rope supports or scaffolding. A cheater bar will give you additional leverage when mounting brackets on a tree. It is important to choose the right one for your treehouse project.

Before you install a treehouse bracket, you must measure the beam and make sure it is the correct length. Remember to do this on a calm day when you don’t have to worry about the wind. During construction, you will need a metal plate for the underside of the beam to prevent it from sliding out of the bracket. Using a 1/4″ steel strip for the bearing surface will help ensure the bracket doesn’t slide off the beam.

Another type of treehouse bracket is called the floating bracket. It can be used for treehouses with three or four trees. It is also used for connecting several trees with a single tree. Floating brackets are attached with 1.25″ lag bolts. They are only compatible with 1.25″ lag bolts. If you use a TAB for your treehouse, make sure to follow the manufacturer’s instructions.

Besides TABs, you also need to consider using attachment bolts. These special bolts are made for treehouse construction and distribute the weight. In general, these bolts can support up to 2000 pounds. The nut and bracket ensure that the beams and joists are protected and won’t fall off the bolt. They also prevent any damage to the tree. However, make sure that the bolts are not too loose or too tight.

Advertisement

Treehouse Cables

If you’re building a treehouse, you’ll want to think about where to run the cables and brackets. While they may not seem important, they’re an important part of the structure. Cables can support long beams, overhangs, and radiating supports. Cable designs can affect how much floor space your treehouse takes up, so consider how you want to use them. You can run them along the inside of the wall, or you can divert them in a diagonal fashion to save floor space.

The cable should not come into contact with the tree. Any branches that brush against the cables may lose bark. You also don’t want to wrap the cables around the tree trunk, as this can girdle it and cut off the flow of sap. Also, be sure to leave a gap of about two inches between the platforms and the tree. The common mistake that novice treehouse builders make is not giving enough room to the tree to grow.

For a treehouse to be safe, cable systems must be installed correctly. The cables should be at least four feet in length. If the cables are not long enough, they might end up damaging the tree. When installing them, make sure that the cables and brackets are installed at right angles to the tree. If they are not, the cables may wear away the bark. Be sure that the eyebolt is in the correct location and angle to the cable direction.

If the treehouse requires cables or brackets, make sure that the TAB is securely attached to the timber frame with lag screws. Then, install four sliding brackets. The cables must be secure and stable so that they don’t come loose in the event of a move. When the treehouse is in motion, cables and brackets can cut the bark of the tree. They must be secured to the tree, and ideally, the treehouse must be placed in a location where it won’t cause damage to it.

Advertisement
Continue Reading

Trending