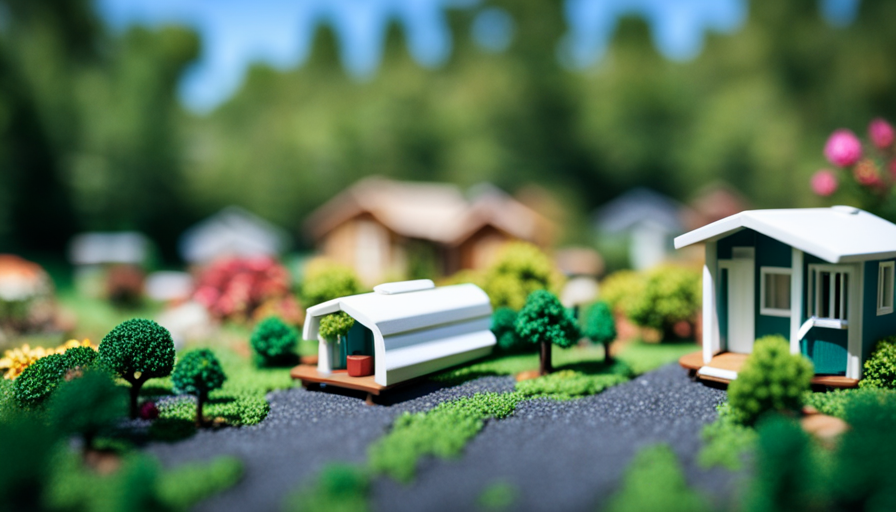
Through sheer chance, you have stumbled upon the enchanting realm of tiny houses and, boy, are they a delight to behold! These compact dwellings are full of surprises with their clever utilization of space, providing you with a clean slate to showcase your unique style.
As you delve deeper into the realm of tiny house living, you soon realize that plumbing plays a crucial role in ensuring the functionality and comfort of these compact abodes. Fear not, for in this article, we will guide you through the intricacies of plumbing a tiny house with precision and expertise.
From understanding the basics to planning your system, gathering materials, and installing the water supply and drainage systems, we have got you covered. So, grab your tools and let’s embark on this plumbing adventure together, ensuring that your tiny house becomes the epitome of efficient and cozy living.
Key Takeaways
- Plumbing is crucial for functionality and comfort in tiny houses.
- Compact fixtures and storage solutions maximize space efficiency.
- PVC pipes can be a cost-effective alternative to copper pipes.
- Regular maintenance and care are essential for preventing plumbing issues.

Zerodeko 4Pcs Miniature Faucets Set 1 12 Scale Dollhouse Kitchen Bathroom Accessories Plastic Mini Faucet Decoration for Dollhouse Sink Model
- Realistic Miniature Faucet: Detailed 1:12 scale dollhouse faucet
- Durable Plastic Construction: Wear-resistant and long-lasting material
- Perfect Scale Compatibility: Fits seamlessly with 1:12 dollhouse furniture
As an affiliate, we earn on qualifying purchases.
As an affiliate, we earn on qualifying purchases.
Understand the Basics of Tiny House Plumbing
Get ready to dive into the world of tiny house plumbing and discover the magic of turning a small space into a fully functional home! Tiny house plumbing presents its own unique set of challenges, but with the right knowledge and tools, you can overcome them and create a cost-effective solution.
One of the common challenges of tiny house plumbing is limited space. With a smaller footprint, you need to carefully plan and utilize every inch of available area. Compact fixtures and clever storage solutions are key to maximizing space efficiency.
Additionally, you need to consider the weight and size limitations of your tiny house when selecting plumbing materials.
Cost-effective solutions are also important when it comes to tiny house plumbing. Since you have limited resources, it’s crucial to find affordable options that don’t compromise quality. Using PVC pipes, for example, can be a cost-effective alternative to traditional copper pipes. Additionally, installing low-flow fixtures and water-saving devices can help reduce water consumption and lower utility costs.
Now that you understand the basics of tiny house plumbing, it’s time to plan your plumbing system. By carefully considering your needs and available space, you can design a functional and efficient plumbing layout that meets your requirements.
Plan Your Plumbing System
Start by carefully designing and mapping out the layout of your water and waste pipes for your compact dwelling. Planning your plumbing layout is crucial to ensure an efficient and functional system in your tiny house. Consider the size and location of your water heater, as well as the placement of fixtures such as sinks, toilets, and showers.
To grab your attention, here are two important aspects to consider when planning your plumbing system:
-
Calculate Water Usage:
- Determine your average daily water consumption to size your water storage tank appropriately.
- Consider low-flow fixtures and appliances to reduce water usage and increase efficiency.
-
Plan Pipe Routing:
- Map out the route for your water and waste pipes, considering the shortest and most direct path.
- Keep in mind that vertical runs should be kept to a minimum to prevent excessive strain on your plumbing system.
Now that you have a clear plan for your plumbing system, it’s time to gather the necessary materials and tools. By carefully considering your layout and calculating your water usage, you can ensure a well-designed and functional plumbing system for your tiny house.
Gather the Necessary Materials and Tools
To ensure a successful plumbing system, it’s essential to gather all the required materials and tools for your compact dwelling. When choosing the right plumbing fixtures for your tiny house, consider the space limitations and functionality. Opt for compact designs that maximize efficiency without compromising on quality.
Additionally, it’s crucial to understand tiny house plumbing codes to ensure compliance with regulations and avoid any potential issues down the line.
Start by making a list of the necessary materials such as pipes, fittings, valves, and connectors. Use materials that are specifically designed for tiny houses to ensure proper fit and durability. Check with local authorities to determine if there are any specific requirements for plumbing materials in your area.
Next, gather the tools needed for the installation process. This may include a pipe cutter, wrenches, a torch for soldering, and plumbing tape. Ensure that you have the correct sizes of each tool to accommodate the plumbing fixtures and materials you’ve chosen.
By gathering all the necessary materials and tools, you’re setting yourself up for a successful plumbing system in your tiny house. Now, it’s time to move onto the next step and install the water supply system.
Install the Water Supply System
Once you’ve gathered all the necessary materials and tools, it’s time to bring in the water supply system to ensure a steady flow of water throughout your compact dwelling.
There are various water supply installation methods you can choose from, depending on the specific needs of your tiny house. One common approach is to connect your tiny house directly to a municipal water supply line, using a pressure regulator to control the water pressure. This method allows you to enjoy a constant supply of water without the need for a storage tank.
Another option is to install a water storage tank that collects rainwater or is filled manually. This can be a great solution if you want to be self-sufficient and reduce your dependency on external water sources.
Regardless of the installation method you choose, it’s important to regulate the water pressure to avoid damage to your plumbing system. You can achieve this by installing a pressure regulator or a pressure-reducing valve. These devices ensure that the water pressure remains within safe limits.
Once you’ve successfully installed the water supply system, it’s time to move on to the next step: installing the drainage system.
Install the Drainage System
To install the drainage system in your tiny house, it’s crucial to choose the right type of drainage system that suits your needs. This involves considering factors such as the size of your house and the local regulations.
Once you’ve chosen the appropriate system, you’ll need to install pipes and connect them to either a sewer or a septic tank, ensuring proper alignment and sealing.
Additionally, you may want to consider adding a greywater system to efficiently manage and recycle water from sinks, showers, and laundry, reducing environmental impact.
Choose the Right Type of Drainage System
When choosing the right type of drainage system for a tiny house, it’s important to consider the specific needs and limitations of the space. You need to choose the best drainage system that suits the size of your tiny house.
Since space is limited, it’s crucial to select a system that can efficiently handle the waste and water flow without taking up too much room. One option is a gravity drainage system, which relies on the natural downward flow of water. This system is simple and reliable, but it may not be suitable for all locations.
Alternatively, you could opt for a macerating or composting toilet system, which can help conserve water and space. These systems break down waste and reduce odor, making them ideal for tiny homes.
Once you have chosen the right drainage system, you can move on to installing pipes and connecting to the sewer or septic tank.
Install Pipes and Connect to the Sewer or Septic Tank
Now that you’ve chosen the perfect drainage system, it’s time to install pipes and connect them to the sewer or septic tank. This step is crucial to ensure a properly functioning plumbing system for your tiny house.
Start by measuring and cutting the pipes to the required lengths, making sure they fit snugly together. Connect the pipes using PVC glue or compression fittings, ensuring a tight seal to prevent any leaks.
Once the pipes are connected, it’s essential to test the system for any leaks before proceeding. Finally, connect the pipes to the sewer or septic tank, following local regulations and guidelines.
Remember to maintain your plumbing regularly, checking for any clogs or leaks that may occur over time.
Considering the importance of water conservation, in the subsequent section, consider adding a greywater system to your tiny house setup.
Consider Adding a Greywater System
Consider incorporating a greywater system into your drainage setup, as it can significantly reduce water usage and benefit the environment. According to a study conducted by the EPA, greywater systems can save up to 40% of indoor water usage in residential buildings.
When implementing a greywater system, it’s important to understand the benefits it offers. Here are some key advantages of using a greywater system:
-
Greywater filtration: Greywater systems filter out impurities and contaminants, ensuring the water is safe for reuse.
-
Water conservation: By reusing greywater from sinks, showers, and laundry, you can reduce your overall water consumption and contribute to water conservation efforts.
-
Cost savings: Reusing greywater means you can reduce your reliance on freshwater sources, leading to lower water bills.
-
Environmental impact: By diverting greywater from the sewer or septic tank, you can minimize the strain on wastewater treatment plants and reduce pollution.
-
Sustainable living: Incorporating a greywater system aligns with sustainable practices, promoting a greener lifestyle.
Considering the benefits of a greywater system, it’s a wise choice for your tiny house plumbing setup.
Next, let’s explore how to install fixtures and appliances.
Install Fixtures and Appliances
To install a toilet in your tiny house, you’ll need to connect the water supply line and secure the toilet to the floor using bolts.
Installing a shower or bathtub involves connecting the water supply lines, drainage pipes, and securing the fixture to the wall.
When installing a kitchen sink, you’ll need to connect the water supply lines, drainage pipes, and secure the sink to the countertop.
Install a Toilet
Start by positioning the toilet in the desired location, making sure it’s secure and level. Before connecting the toilet to the plumbing, it’s important to follow some toilet installation tips to ensure a smooth and trouble-free plumbing experience. First, check that the flange is properly aligned with the toilet’s waste outlet. Then, tighten the bolts securely to prevent any leaks. Next, attach the water supply line to the bottom of the toilet tank, ensuring it is tightly fastened. Once everything is connected, turn on the water supply and check for any leaks or running water. Troubleshooting toilet plumbing can involve checking the wax ring, adjusting the float valve, or replacing worn-out parts. With the toilet successfully installed, you’re now ready to move on to installing a shower or bathtub.
| Common Toilet Installation Tips | Troubleshooting Toilet Plumbing |
|---|---|
| Properly align flange with waste outlet | Check wax ring for leaks |
| Securely tighten bolts | Adjust float valve if necessary |
| Tighten water supply line | Replace worn-out parts |
| Turn on water supply and check for leaks | |
| Install a shower or bathtub |
Install a Shower or Bathtub
Once the toilet is securely installed, you can now move on to installing a shower or bathtub to complete your bathroom setup.
When deciding between a shower and a bathtub, there are a few factors to consider. Showers are more space-efficient and easier to clean, making them ideal for tiny houses. On the other hand, bathtubs provide a luxurious and relaxing experience. Choosing the right option depends on your personal preferences and the available space in your tiny house.
If you’re confident in your plumbing skills, installing a shower or bathtub can be a rewarding DIY project. However, hiring a professional ensures proper installation and minimizes the risk of leaks or other plumbing issues. It’s essential to weigh the pros and cons of each approach before making a decision.
Moving on to the next section about installing a kitchen sink, you’ll need to gather the necessary tools and materials.
Install a Kitchen Sink
Installing a kitchen sink in your small home can be a satisfying project that adds both functionality and style to your space. Did you know that a well-designed kitchen sink can increase the value of your home by up to 7%? When it comes to kitchen sink installation, it’s important to follow plumbing regulations to ensure proper functionality and avoid any potential issues down the line.
Here are some key steps to consider:
- Choose the right sink size and style that fits your space and complements your kitchen design.
- Ensure proper positioning and secure the sink in place using brackets or clips.
- Connect the sink to the water supply lines and install a shut-off valve for easy maintenance.
- Install the drain assembly, ensuring a proper seal and avoiding any leaks.
By carefully following these steps, you can successfully install a kitchen sink that not only meets plumbing regulations but also enhances the functionality and aesthetics of your tiny home.
Now, let’s move on to testing and inspecting your plumbing system to ensure everything is working smoothly.
Test and Inspect Your Plumbing System
First, make sure to thoroughly test and inspect your plumbing system in your tiny house to ensure everything is working properly. This step is crucial to identify any potential issues and troubleshoot common plumbing problems. To assist you in this process, you can use the following table as a guide:
| Plumbing Component | Inspection Method |
|---|---|
| Water Supply Lines | Check for leaks and verify proper water pressure using a pressure gauge. |
| Drainage System | Run water through all drains and inspect for any backups or slow drainage. |
| Water Heater | Test the water heater to ensure it is heating water effectively and check for any leaks. |
| Fixtures (sinks, showers, toilets) | Turn on and off each fixture, checking for any leaks, proper water flow, and drainage. |
By meticulously examining each component, you can pinpoint any potential issues and take appropriate action. Once you have tested and inspected your plumbing system, you can move on to making necessary adjustments and repairs. This will ensure that your tiny house’s plumbing is functioning optimally, allowing you to enjoy a reliable and efficient water supply throughout your home.
Make Necessary Adjustments and Repairs
To ensure your plumbing system is in optimal condition, it’s time to roll up your sleeves and make any necessary adjustments and repairs.
Start by adjusting the plumbing layout if needed. This may involve repositioning pipes, adding or removing connections, or rerouting the system to improve efficiency.
Troubleshoot any plumbing issues that you come across during this process. Check for leaks, clogs, or weak water pressure. Use a pressure gauge to measure the water pressure and ensure it falls within the recommended range. If you detect any problems, take the necessary steps to fix them, whether it’s replacing a faulty valve, clearing a clog, or tightening a loose connection.
Remember to be precise and meticulous in your work. Double-check all adjustments and repairs to ensure they’re done correctly.
Once you’ve made all necessary adjustments and repairs, you can move on to the next step: insulating and protecting your plumbing system. This’ll help prevent freezing pipes and improve overall energy efficiency.
Insulate and Protect Your Plumbing System
Now it’s time for you to take the necessary steps to insulate and protect your plumbing system, ensuring its durability and efficiency. Proper insulation of your pipes is crucial to prevent freezing and potential damage to your tiny house.
Freezing temperatures can cause pipes to burst, leading to costly repairs and water damage. To insulate your pipes, you can use foam pipe insulation sleeves or heat tape. These materials provide an extra layer of protection against the cold and help maintain a consistent temperature within your plumbing system.
Start by measuring the length of your pipes and cut the insulation sleeves accordingly. Wrap the sleeves around the pipes, making sure there are no gaps or exposed areas. Secure the sleeves with tape or zip ties to keep them in place. For added protection, consider using heat tape along the exterior of the insulation sleeves. Heat tape provides a constant source of heat that helps prevent freezing even in the coldest temperatures.
By insulating your pipes, you ensure that your plumbing system remains functional and reliable throughout the year. However, it’s important to note that insulation alone is not enough. Regular maintenance and care for your tiny house plumbing are also essential to prevent any issues from arising.
Maintain and Care for Your Tiny House Plumbing
Taking care of your plumbing system ensures it remains in good condition and continues to function properly. Proper maintenance is crucial to avoiding costly repairs and ensuring the longevity of your tiny house plumbing.
Here are some important tips to help you care for and maintain your plumbing system:
-
Regularly check for leaks: Inspect all visible pipes and fixtures for any signs of leaks. This includes checking under sinks, around toilets, and near water heaters. If you notice any leaks, address them promptly to prevent further damage.
-
Clear clogs immediately: If you experience a clogged drain, address it right away. Use a plunger or a drain snake to remove the obstruction. Avoid using harsh chemical drain cleaners as they can damage your pipes.
-
Winterize your plumbing: If you live in an area with cold winters, it’s essential to winterize your plumbing system. This involves insulating exposed pipes and disconnecting outdoor hoses to prevent freezing and bursting.
-
Learn basic troubleshooting: Familiarize yourself with common plumbing issues and their solutions. This knowledge will help you tackle minor problems on your own, saving you time and money.
By following these maintenance tips and promptly addressing any plumbing issues that arise, you can ensure a well-functioning plumbing system in your tiny house. Remember, proper care and maintenance go a long way in preventing major plumbing problems down the road.
Frequently Asked Questions
What are the common plumbing issues that can occur in a tiny house?
To ensure proper plumbing maintenance in a tiny house, it’s essential to be familiar with troubleshooting common plumbing issues.
Some common problems include leaky faucets, clogged drains, and malfunctioning toilets.
Regularly inspecting and maintaining the plumbing system can prevent these issues.
If a problem arises, you may need to tighten connections, clear blockages, or replace faulty components.
Understanding these common plumbing issues and their solutions will help you maintain a functional and efficient plumbing system in your tiny house.
How can I prevent freezing pipes in my tiny house during colder months?
To prevent frozen pipes in your tiny house during colder months, it’s crucial to insulate your plumbing properly. Inadequate insulation leads to frozen pipes, which can cause significant damage. To avoid this, ensure all exposed pipes are well-insulated using foam sleeves or heat tape.
Additionally, consider insulating your tiny house’s foundation and skirting to protect the plumbing from freezing temperatures. This will help maintain a functional plumbing system throughout the winter.
Are there any specific building codes or regulations for plumbing in a tiny house?
To ensure compliance with building code requirements and plumbing regulations for a tiny house, it’s crucial to adhere to specific guidelines. These may include the use of approved materials, proper sizing and installation of pipes, and adherence to local plumbing codes.
Additionally, it’s essential to consider factors such as water supply, wastewater disposal, and venting systems. Familiarizing yourself with these regulations will help ensure a safe and functional plumbing system in your tiny house.
What is the average cost of installing a plumbing system in a tiny house?
Investigating the truth of a theory, it’s important to note that the average cost of installing a plumbing system in a tiny house can vary depending on various factors.
However, it’s crucial to consider potential plumbing issues that may arise during the installation process. These issues can include limited space, access to water and sewer lines, and the need for specialized fixtures.
Seeking professional advice and estimating costs based on specific requirements is recommended for an accurate assessment.
How often should I clean and maintain my tiny house plumbing system?
To ensure optimal performance, it’s essential to clean and maintain your tiny house plumbing system regularly. Cleaning frequency will depend on usage and water quality, but a general guideline is to clean it every six months.
Start by flushing the system with a mixture of water and vinegar to remove mineral deposits. Additionally, inspect and tighten any loose connections, replace worn-out seals, and check for leaks. These maintenance tips will help prolong the lifespan of your plumbing system.
Conclusion
So, there you have it – the complete guide on how to plumb a tiny house. By following these steps and using the right materials and tools, you can ensure a properly functioning plumbing system in your tiny home.
Remember to plan carefully, test and inspect your work, and make any necessary adjustments or repairs. And don’t forget to insulate and protect your plumbing system to avoid any potential issues down the line.
Now, with your plumbing system in place, ask yourself: Are you ready to enjoy the comforts of a fully functional tiny house?