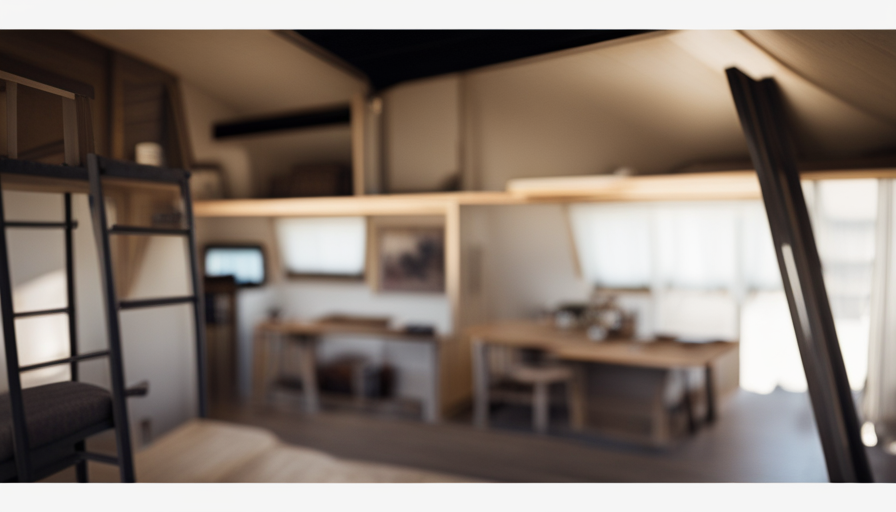
Connect with us

Beginners Guides

How High Is A Tiny House Loft / How Tall Are Lofts In Tiny Houses?

Published

on

An image showcasing a cozy, minimalist tiny house loft, nestled beneath a sloping roof

Step into the realm of miniature homes, where aspirations take shape on a cornerstone of simplicity and creativity. Much like a secret gem waiting to be uncovered, the tiny house loft invites with its allure of snug living areas and the clever utilization of space. Yet, what is the true height of this elevated retreat?

In this article, we will unravel the mystery of tiny house lofts, exploring their purpose, height measurements, and the factors that influence their design. From maximizing space to creating a functional sleeping area, we will delve into the art of crafting a perfect tiny house loft. Along the way, we will also explore alternative loft designs and showcase real-life examples of well-designed tiny house lofts.

So, whether you’re a tiny house enthusiast or simply curious about the heights of these miniature abodes, join me on this journey as we uncover the heights of tiny house lofts and discover the secrets they hold. Get ready to reach new heights in the world of tiny living!

Key Takeaways

  • Factors influencing the height of tiny house lofts include overall height of the tiny house, size of the loft, intended use of the space, ceiling height, purpose of the loft, and building codes and regulations.
  • Most builders aim for a minimum clearance of around 3 to 4 feet in a tiny house loft.
  • Safety considerations for tiny house lofts include proper space utilization, avoiding clutter, ensuring sufficient headroom, sturdy guardrails, non-slip flooring, and a nearby fire extinguisher.
  • Clever design tips can maximize storage space and incorporate natural light in a tiny house loft.

Understanding the Purpose of a Loft in a Tiny House

Do you ever wonder why tiny houses have lofts and what their purpose is? Well, let me enlighten you.

The main reason for having a loft in a tiny house is to maximize storage space. In a tiny house, every inch counts, and utilizing vertical space is essential. By having a loft, you can free up valuable floor space for other purposes like living areas or kitchenettes.

Now, let’s talk about loft ladder options. Since the loft is located above the main living area, you need a safe and convenient way to access it. There are various ladder options available for tiny house lofts, including fixed ladders, pull-down stairs, and even spiral staircases. The choice depends on your personal preference and the layout of your tiny house.

Advertisement

Factors influencing the height of tiny house lofts include the overall height of the tiny house, the size of the loft, and the intended use of the space. For example, if you plan on using the loft as a bedroom, you will need enough headroom to sit up comfortably. On the other hand, if the loft is primarily for storage, the height can be adjusted accordingly.

In the next section, we will explore the factors influencing the height of tiny house lofts in more detail. But before we take that next step, let’s delve into the different factors that come into play.

Factors Influencing the Height of Tiny House Lofts

Consider the layout of your tiny dwelling, as factors such as the height of your loft can be influenced by the overall design. For instance, I came across a fascinating case study where a creative homeowner incorporated a raised platform into their tiny home to maximize space and create a cozy sleeping area. This innovative design not only added functionality but also influenced the height measurements of their loft.

To help you understand the factors that can influence the height of a tiny house loft, I’ve compiled a list of key considerations:

  • Ceiling height: The overall height of your tiny house will directly impact the height of your loft. If you have limited vertical space, your loft will need to be lower to ensure you have enough headroom in the rest of your living area.

  • Purpose of the loft: The intended use of the loft will also affect its height. If you plan to use it solely for sleeping, a lower loft height may be sufficient. However, if you intend to use the loft for additional activities such as reading or working, you may want to consider a higher loft for more comfortable movement.

  • Building codes and regulations: It’s important to check local building codes and regulations, as they may dictate minimum height requirements for lofts in tiny houses.

Understanding these factors will help you make informed decisions about the height of your tiny house loft. In the next section, we’ll explore standard height measurements for tiny house lofts without skipping a beat.

Advertisement

Standard Height Measurements for Tiny House Lofts

To ensure your loft meets standard height measurements, it’s important to take into account the regulations and codes set by local authorities.

The height of a tiny house loft can vary depending on several factors. One of the main factors affecting loft height is the size and design of the overall tiny house. Smaller tiny houses may have lower ceilings, resulting in a lower loft height. Additionally, the type of roofing used can also impact the loft height. For example, a gable roof may provide more vertical space compared to a shed roof.

Another factor to consider is the specific purpose of the loft. If it is intended for sleeping, a lower height may be acceptable. However, if you plan to use the loft for more activities, such as standing or sitting, a higher loft height may be necessary.

Keep in mind that there are also creative loft alternatives that can help maximize space, such as using a raised platform or incorporating storage underneath the loft.

Transitioning into the subsequent section about considerations for standing room in a tiny house loft, it’s important to take into account the overall height of the loft as well as any potential obstacles that may restrict movement.

Advertisement

Considerations for Standing Room in a Tiny House Loft

If you want to comfortably move around in the elevated area of your compact living space, it’s important to take into account the vertical clearance and any potential obstructions that may hinder your mobility. When designing a tiny house loft, one of the key considerations is the height of the space.

While there is no standard height for tiny house lofts, most builders aim for a minimum clearance of around 3 to 4 feet. This allows for easy movement without feeling cramped or claustrophobic.

To maximize storage and functionality in a tiny house loft, there are a few key factors to consider. First, choose a loft ladder that fits your space and needs. There are various options available, including foldable ladders, retractable stairs, and even built-in storage units that double as steps. Consider the height and weight capacity of the ladder to ensure it’s safe and easy to use.

Another important aspect is the layout of the loft. Strategically place storage units, such as shelves or cabinets, to make the most of the available space. Utilize wall-mounted options to free up floor space and create a more open feel. Additionally, consider incorporating multi-purpose furniture, such as a loft bed with built-in storage or a desk that can be folded away when not in use.

In the next section, we’ll explore further strategies for maximizing space in a tiny house loft.

Advertisement

Maximizing Space in a Tiny House Loft

Make the most of your compact living space by maximizing the available space in your elevated area. When it comes to tiny house lofts, every inch counts.

One effective way to maximize storage is by incorporating built-in furniture. Customizable shelves, cabinets, and drawers can be installed along the walls of the loft, providing ample space for all your belongings.

Additionally, utilizing vertical space is crucial. Consider installing hooks or hanging organizers on the walls or ceiling of the loft to store items such as clothing, bags, or kitchen utensils.

Another key aspect to consider is the loft ladder. There are various options available, including fixed, retractable, or folding ladders. Choose one that’s not only safe and sturdy, but also takes up minimal space when not in use.

By maximizing storage and carefully selecting a loft ladder option, you can ensure that your tiny house loft is both functional and efficient.

Advertisement

As we move into the next section about safety considerations for tiny house lofts, it’s important to keep in mind the importance of a well-designed and secure elevated area.

Safety Considerations for Tiny House Lofts

When it comes to maximizing space in your compact living area, it’s important to prioritize safety in your elevated space. Did you know that according to a recent study, over 50% of accidents in tiny house lofts are related to improper ladder usage? To ensure the safety of your tiny house loft, there are several key considerations to keep in mind.

First and foremost, proper space utilization is crucial. Make sure to design your loft in a way that allows for easy navigation and movement. Avoid cluttering the space with unnecessary items that could pose a tripping hazard. Additionally, ensure that the loft has sufficient headroom to prevent any accidental bumps or injuries.

Implementing safety measures is also essential. Install sturdy guardrails around the loft to prevent falls and provide a sense of security. Use non-slip materials for the flooring and stairs to minimize the risk of slipping. It’s also a good idea to have a fire extinguisher nearby in case of emergencies.

By prioritizing safety in your tiny house loft, you can enjoy your elevated space without any worries.

Advertisement

In the subsequent section about designing a functional and cozy sleeping area in a tiny house loft, we will explore creative ideas to optimize comfort and maximize space.

Designing a Functional and Cozy Sleeping Area in a Tiny House Loft

Creating a cozy sleeping space in a compact loft is all about maximizing comfort and functionality. When designing a tiny house loft, there are several important considerations to keep in mind.

First, it’s essential to carefully plan the layout to ensure there’s enough headroom for sitting up comfortably in bed. The height of the loft will depend on personal preference, but typically ranges from 2 to 3 feet.

Additionally, it’s crucial to incorporate safety features such as sturdy guardrails and a secure ladder or staircase for easy access.

To make the most of the limited space, utilizing clever design tips can greatly enhance the functionality of the sleeping area. Installing built-in storage solutions, such as drawers or shelves, can help maximize storage space and keep the loft organized.

Advertisement

Additionally, opting for a loft design that allows for natural light to flow through, such as incorporating skylights or large windows, can create a more open and airy feeling.

Designing a functional and cozy sleeping area in a tiny house loft requires careful consideration and planning. By optimizing the layout, incorporating safety features, and utilizing smart design tips, it’s possible to create a comfortable and inviting space.

Transitioning into the subsequent section about alternatives to traditional lofts, there are also innovative options available for those seeking alternative sleeping arrangements in tiny houses.

Alternatives to Traditional Lofts in Tiny Houses

When it comes to designing a tiny house, there are alternatives to traditional lofts that can make the most of limited space.

One option is utilizing Murphy beds and foldable furniture, which can be tucked away when not in use to create more living space during the day.

Advertisement

Another option is choosing a loft-less design, which allows for a more open floor plan and eliminates the need for stairs or ladders.

Lastly, there are innovative sleeping solutions such as convertible sofas or slide-out beds that can serve multiple purposes and maximize functionality in a small space.

Murphy Beds and Foldable Furniture

Foldable furniture in tiny houses is like a clever magician, effortlessly transforming a cozy living area into a comfortable sleeping space with a flick of the wrist. One popular option for maximizing space is the Murphy bed, a bed that folds up against the wall when not in use. This ingenious design allows homeowners to have a spacious living area during the day and a cozy bedroom at night.

Another space-saving furniture option is the use of foldable tables and chairs. These can be neatly tucked away when not needed, creating more floor space for other activities. In addition, there are innovative storage solutions that double as seating, such as ottomans with hidden compartments.

To help you visualize the possibilities, here is a comparison table showcasing some common foldable furniture options for tiny houses:

Advertisement
Furniture Type Function Features
Murphy Bed Bed Folds up against the wall
Foldable Table Table Easily stored away
Foldable Chair Chair Compact and portable

With these space-saving options, tiny house dwellers can enjoy the best of both worlds – a comfortable living area during the day and a cozy sleeping space at night. As we explore loft-less designs and innovative sleeping solutions, you’ll discover even more ways to optimize space in tiny houses.

Loft-less Designs and Innovative Sleeping Solutions

Introducing new and creative ways to maximize space and enhance comfort in compact living areas, innovative sleeping solutions and loft-less designs provide a refreshing alternative for those seeking a cozy and functional home.

Loft-less designs have gained popularity in the tiny house movement, offering homeowners the option to forgo the traditional lofted sleeping area. Instead, these designs often incorporate innovative sleeping solutions such as convertible furniture, hidden beds, or pull-out sleeping compartments. By eliminating the need for a loft, these designs create a more open and spacious feel within the tiny home, while still providing ample sleeping accommodations.

For example, some tiny houses feature murphy beds that can be folded up during the day to create more living space. Others utilize built-in sofas or benches with hidden compartments that can be transformed into a comfortable sleeping area at night. These loft-less designs offer a practical and versatile solution for maximizing space in tiny homes, allowing homeowners to customize their living areas to suit their specific needs and preferences.

Transitioning to the subsequent section about ‘real-life examples of well-designed tiny house lofts,’ these loft-less designs showcase the versatility and ingenuity of compact living.

Advertisement

Real-life Examples of Well-designed Tiny House Lofts

Explore real-life examples of well-designed tiny house lofts, and you’ll be amazed at how high they can be, giving you plenty of headroom to move around comfortably. These well-designed loft alternatives not only provide a cozy sleeping area but also maximize the available space in your tiny house.

One innovative solution is the use of space-saving furniture options such as built-in storage units or foldable beds. These allow you to make the most of the vertical space in your tiny house, creating a loft that feels spacious and open.

In some tiny houses, the loft height can reach up to 4 feet, providing ample room to stand up and move around. This is achieved by incorporating clever design elements like raised platforms or dormer windows that add height to the loft area. Additionally, well-placed windows and skylights bring in natural light and create a sense of openness, making the loft feel even more spacious.

When considering the height of your tiny house loft, it’s important to think about your personal preferences and needs. Some people may prefer a lower loft height for a more cozy and intimate feel, while others may prioritize a higher loft for increased headroom. Ultimately, choosing the right loft height is a personal decision that should be based on your individual lifestyle and comfort level.

Transitioning into the next section about final thoughts: choosing the right loft height for your tiny house, it’s important to consider both functionality and personal preferences.

Advertisement

Final Thoughts: Choosing the Right Loft Height for Your Tiny House

When it comes to finding the perfect loft height for your cozy abode, it’s all about striking the right balance between functionality and personal comfort. The loft in a tiny house is a versatile space that can be used for sleeping, storage, or even as a cozy reading nook. Here are some key factors to consider when choosing the right loft height for your tiny house:

  • Maximizing storage: One of the main advantages of having a loft in a tiny house is the extra storage space it provides. To make the most of this, consider a loft height that allows for ample headroom underneath. This will allow you to incorporate built-in storage solutions such as shelves, cabinets, or even a closet.

  • Incorporating natural light: Natural light can make a small space feel bigger and more inviting. When designing your tiny house loft, consider incorporating windows or skylights to bring in as much natural light as possible. This will not only brighten up the space but also create a sense of openness and airiness.

  • Accessibility: While maximizing storage and natural light are important, it’s also crucial to ensure that the loft is easily accessible. Consider the height of the ladder or staircase leading up to the loft and make sure it’s comfortable to climb and descend.

  • Personal comfort: Ultimately, the loft height should be chosen based on your personal preferences and comfort. Consider factors such as your height, mobility, and how you plan to use the loft space. Make sure you have enough headroom to sit up comfortably and move around without feeling cramped.

By carefully considering these factors, you can choose a loft height that maximizes storage, incorporates natural light, and provides the perfect balance of functionality and personal comfort for your tiny house.

Frequently Asked Questions

How much weight can a tiny house loft support?

In my experience, the weight capacity of a tiny house loft depends on the design and materials used. I once met a couple who had a loft in their tiny house that could support up to 500 pounds. They used sturdy beams and reinforced the structure to ensure safety.

It’s important to consider not only the weight capacity but also how the loft space is utilized to maximize functionality and minimize any potential risks.

What are some creative storage solutions for a tiny house loft?

When it comes to creative storage solutions for a tiny house loft, maximizing vertical space is key.

Advertisement

There are many clever ways to make the most of this area. One idea is to use wall-mounted shelves or hooks to store items such as books, clothing, or kitchen utensils.

Another option is to install built-in cabinets or drawers beneath the loft platform.

Additionally, utilizing hanging storage or collapsible bins can help keep things organized while saving precious space.

Are there any building codes or regulations specific to tiny house lofts?

Building codes for tiny house lofts vary by location, but safety considerations are universally important. According to a study by the American Tiny House Association, approximately 70% of jurisdictions have specific regulations regarding loft heights in tiny houses.

These codes ensure that lofts are built with proper headroom, secure railings, and easy access. Safety considerations include fire safety, weight distribution, and structural integrity. It’s crucial to adhere to these regulations to ensure a safe and comfortable living space.

Advertisement

How much headroom should I aim for in a tiny house loft?

When designing a tiny house loft, it’s important to consider headroom requirements for a comfortable living space. The recommended headroom for a loft in a tiny house is typically around 6 feet 8 inches. This allows for comfortable movement and prevents any feeling of claustrophobia.

However, it’s essential to check your local building codes and regulations, as they may have specific requirements for loft headroom. Designing with these guidelines will ensure a cozy and functional loft space in your tiny house.

Can a tiny house loft be used for purposes other than sleeping, such as a home office or lounge area?

Yes, a tiny house loft can definitely be used for purposes other than sleeping. It can be transformed into a versatile space that suits your needs.

For example, you can create a cozy home office where you can work comfortably, or a lounge area where you can relax and unwind. Additionally, with some creativity, you can even turn your loft into a home gym for a quick workout or a quiet reading nook to enjoy your favorite books.

The possibilities are endless!

Advertisement

Conclusion

In conclusion, when it comes to the height of a tiny house loft, there are several factors to consider. The purpose of the loft, the overall design of the tiny house, and the preference of the homeowner all play a role in determining the height.

While standard measurements exist, it’s important to prioritize standing room and maximize space in a tiny house loft. Whether you opt for a traditional loft or explore alternative options, finding the right loft height is essential for creating a functional and cozy sleeping area.

As the saying goes, "The sky’s the limit!" when it comes to designing your dream tiny house loft.

Continue Reading
Advertisement

Beginners Guides

How Is A Tiny House Made

Published

on

By

An image capturing the meticulous process of constructing a tiny house: skilled hands deftly assembling wooden beams, precise measurements being taken, sawdust filling the air, and the gradual formation of a cozy dwelling

Have you ever wondered how those charming tiny homes on wheels are made? Let me walk you through the captivating process of constructing a tiny house.

These diminutive dwellings, known for their space-saving ingenuity, are meticulously crafted using a combination of innovative techniques and expert craftsmanship. From the initial design and planning stages to the final touches, every step in the process is carefully executed to create a functional and aesthetically pleasing living space.

In this article, we will delve into the precise steps involved in building a tiny house. We’ll explore the foundation and framing, electrical and plumbing installation, insulation and weatherproofing, as well as the intricate process of interior finishes.

Additionally, we’ll uncover the complexities of HVAC system installation, windows and doors, and the limitless possibilities for customization and personalization.

So, join me as we unravel the secrets behind the creation of these extraordinary tiny abodes.

Advertisement

Key Takeaways

  • The construction process of a tiny house includes initial design and planning, foundation and framing, electrical and plumbing installation, insulation and weatherproofing, interior finishes, and roofing and exterior finishes.
  • Common materials used in tiny house construction include reclaimed wood, bamboo, and cork.
  • Foundation installation can be done using a concrete slab or piers.
  • Electrical and plumbing installation requires careful planning and adherence to safety standards.

Initial Design and Planning

Now you’re ready to start envisioning your dream tiny house and mapping out the floor plan that will perfectly suit your needs and maximize the limited space available.

The initial design process of a tiny house is crucial in ensuring that every inch of space is utilized efficiently. It starts with careful consideration of your lifestyle, needs, and preferences. Do you require a separate bedroom, or would a loft be sufficient? Will you need a dedicated workspace or storage area? These questions help determine the layout and flow of your tiny house.

Once you have a clear vision in mind, it’s time to move on to material selection. Choosing the right materials is essential for both functionality and aesthetics. Lightweight and durable materials are often preferred for tiny houses to minimize weight and maximize structural integrity. Common options include sustainable materials like reclaimed wood, bamboo, or cork, which not only contribute to a greener environment but also add a unique charm to your tiny house.

With the initial design process and material selection complete, you can now move on to the next phase of building your dream tiny house: the foundation and framing. This stage lays the groundwork for the structural integrity of your tiny house, and it is where your vision starts to take shape.

Foundation and Framing

First, the builders lay the foundation and frame the structure of the compact dwelling. The foundation installation is a crucial step in building a tiny house, as it provides stability and support for the entire structure. Typically, a concrete slab or piers are used as the foundation for a tiny house.

The builders carefully level the ground and pour the concrete, ensuring it’s properly cured before proceeding. Once the foundation is in place, the framing process begins. Framing techniques for tiny houses are similar to those used in traditional construction but on a smaller scale. The builders use precision measurements and high-quality lumber to create the frame, ensuring it’s strong and durable. They secure the frame together using nails, screws, or bolts, depending on the design.

Advertisement

The framing process involves carefully constructing the walls, roof, and floor, making sure they’re properly aligned and plumb. Once the foundation and framing are complete, the next step is electrical and plumbing installation. This allows for the integration of essential systems into the tiny house design seamlessly.

Electrical and Plumbing Installation

To ensure the seamless integration of essential systems into your compact dwelling design, you’ll need to investigate the truth of a theory about electrical and plumbing installation.

When it comes to electrical wiring in a tiny house, careful planning and adherence to safety standards are crucial. The electrical system should be designed to meet your specific power needs, taking into account the appliances and devices you plan to use. It is essential to consult a professional electrician to ensure that the wiring is properly installed and the load capacity is adequate.

In terms of plumbing fixtures, a tiny house requires a well-thought-out plumbing system that maximizes space efficiency. This includes installing water supply lines, drainage pipes, and fixtures such as sinks, showers, and toilets. Similar to electrical installation, it is recommended to seek the expertise of a plumber to ensure proper installation and compliance with building codes.

Once the electrical and plumbing systems are in place, the next step is to move on to insulation and weatherproofing. This is crucial for maintaining a comfortable indoor environment and protecting the structure from the elements.

Advertisement

Insulation and Weatherproofing

Creating a cozy and energy-efficient living space requires expert insulation and weatherproofing techniques. To ensure optimal insulation, several techniques can be employed.

Firstly, cavity wall insulation involves filling the gaps between the inner and outer walls with insulating materials such as fiberglass or foam. This method prevents heat loss and reduces energy consumption.

Additionally, roof insulation is vital for maintaining a comfortable interior temperature. Installing materials like mineral wool or rigid foam insulation boards under the roof can effectively prevent heat transfer.

Lastly, floor insulation is essential for thermal efficiency. By placing insulating materials, such as polystyrene or polyurethane foam, under the flooring, heat loss through the ground is minimized.

To guarantee a weatherproof tiny house, suitable materials and techniques must be employed. Waterproofing the exterior walls can be achieved by applying a weather-resistant barrier, such as a liquid-applied membrane or a self-adhering sheet, before installing sidings.

Advertisement

Similarly, ensuring a watertight roof involves using high-quality roofing materials, such as asphalt shingles or metal sheets, and properly sealing joints and edges.

Finally, sealing gaps and cracks around windows and doors with weatherstripping helps prevent drafts and water leakage.

Moving on to the subsequent section about interior finishes, it is crucial to focus on creating a comfortable and visually appealing living space.

Interior Finishes

Now, imagine stepping into your dream home, where every detail of the interior finishes has been carefully chosen to create a warm and inviting atmosphere. When it comes to tiny house construction, interior finishes play a crucial role in maximizing the functionality and aesthetic appeal of the limited space.

Unique materials are often used to add character and charm to the interior. From reclaimed wood accents to recycled glass countertops, these materials not only contribute to the sustainability of the tiny house but also create a one-of-a-kind look.

Advertisement

Additionally, color schemes are carefully selected to enhance the visual perception of space. Light and neutral tones are commonly used to make the interior appear larger, while pops of vibrant colors can be incorporated to add personality and visual interest.

By combining unique materials and thoughtful color schemes, the interior finishes of a tiny house can transform it into a cozy and stylish living space.

As we transition to the next section on roofing and exterior finishes, we will explore how these elements further contribute to the overall design and functionality of a tiny house.

Roofing and Exterior Finishes

When it comes to installing the roof on a tiny house, it’s crucial to choose the right materials and ensure a proper installation process. This includes selecting a durable and weather-resistant roofing material, such as asphalt shingles or metal panels, and ensuring that it’s installed correctly to prevent any leaks or water damage.

Additionally, the siding and exterior paint of a tiny house play a crucial role. They protect the structure from the elements and enhance its overall aesthetic appeal. It’s important to choose a siding material that’s durable, low-maintenance, and visually appealing. Also, applying a high-quality exterior paint that can withstand the outdoor elements for an extended period of time is essential.

Advertisement

Installing the Roof

To ensure proper insulation, it’s essential to install the roof correctly in a tiny house. When it comes to tiny house roofing techniques, there are several options to consider.

One common approach is to use a metal roof, which offers durability and longevity. Metal roofs are lightweight and easy to install, making them a popular choice among tiny house builders.

Another option is to use asphalt shingles, which are more affordable but may require more maintenance over time. When comparing roof materials, it’s important to consider factors such as cost, weight, and maintenance requirements.

Moving on to the next step, after the roof is installed, it’s time to focus on the siding and exterior paint.

Siding and Exterior Paint

After the roof is installed, the siding and exterior paint are like the finishing touches on a canvas, adding depth and character to the tiny abode.

Advertisement

Siding installation is a crucial step in the construction process of a tiny house. It not only protects the structure from the elements but also enhances its aesthetic appeal. There are various materials to choose from, such as vinyl, wood, or metal. Each material has its own advantages and disadvantages, so it’s important to consider factors like cost, durability, and maintenance requirements when making a decision.

Once the siding is in place, choosing the right exterior paint colors can make a huge difference in the overall look of the tiny house. It’s important to select colors that complement the surrounding landscape and reflect your personal style. The right combination of colors can make the house blend in seamlessly with its surroundings or stand out as a unique statement piece.

As the siding and exterior paint are completed, the tiny house starts to come to life, ready to welcome its future inhabitants.

Now, let’s move on to the next step, which is the installation of the HVAC system.

HVAC System Installation

Once the foundation is in place, it’s time to install the HVAC system in a tiny house. The HVAC system is an essential component of any home, including tiny houses. It not only provides comfort by regulating the temperature but also ensures proper ventilation and air quality. In a tiny house, where space is limited, it becomes even more crucial to choose an HVAC system that is compact and efficient.

Advertisement

When it comes to HVAC system maintenance in tiny houses, regular inspections and cleaning are necessary to keep it functioning optimally. This includes checking filters, cleaning ducts, and ensuring proper airflow. Additionally, energy efficiency is a top priority in tiny houses. Therefore, selecting an HVAC system with a high energy efficiency rating is crucial to minimize energy consumption and reduce utility costs.

During the installation process, it is important to carefully plan the placement of the HVAC system to maximize space utilization. Compact units that can be mounted on walls or placed in unobtrusive areas are often preferred in tiny houses. Proper insulation and sealing of the system are also essential to prevent any air leaks that could compromise energy efficiency.

As we move on to the next section about windows and doors, it’s important to consider their impact on the overall energy efficiency of a tiny house.

Windows and Doors

Windows and doors play a crucial role in enhancing the energy efficiency and overall aesthetic appeal of a compact dwelling. When it comes to window installation, it’s important to choose the right type and size to ensure proper ventilation and natural light. The selection process should consider factors such as insulation, durability, and ease of maintenance.

Additionally, the placement of windows should be strategically planned to maximize views while minimizing heat gain or loss.

Advertisement

In terms of door selection, the focus should be on security, insulation, and space optimization. A durable and weather-resistant door is essential to protect the interior from harsh weather conditions. Additionally, the door should be properly insulated to prevent heat transfer and maintain a comfortable indoor temperature.

To create a rhythm and flow in the writing, here’s an unordered bullet list of 5 items related to windows and doors in tiny house construction:

  • Double-pane windows with low-emissivity (Low-E) coatings for improved insulation.
  • Energy-efficient doors with weatherstripping and thermal breaks.
  • Multi-functional windows, such as awning or casement windows, to maximize ventilation.
  • High-quality window frames made from materials like vinyl or fiberglass for durability.
  • Customizable door designs to suit personal preferences and architectural style.

With windows and doors carefully installed, the next step is to dive into the exciting realm of customization and personalization, where the tiny house truly becomes a unique and inviting home.

Customization and Personalization

After discussing the importance of windows and doors in a tiny house, let’s now delve into the exciting realm of customization and personalization. One of the greatest advantages of building a tiny house is the ability to tailor it to your specific needs and preferences.

Tiny house customization allows you to create a home that reflects your unique personality and lifestyle. When it comes to personalizing a tiny home, the possibilities are endless. You can choose from a wide range of interior finishes, such as flooring, cabinetry, and countertops, to create the aesthetic that resonates with you. Additionally, you can customize the layout to optimize the use of space and accommodate your specific requirements.

Whether you need a designated workspace, a cozy reading nook, or additional storage solutions, the design of your tiny house can be tailored to meet your needs. Furthermore, personalization extends beyond the interior. You can add your personal touch to the exterior by selecting the color scheme, siding material, and even incorporating unique architectural elements. From rustic and cozy to sleek and modern, the choice is yours.

Advertisement

As we move towards the final touches and move-in phase, the process of bringing your customized tiny house to life becomes even more exciting.

Final Touches and Move-In

As you step over the threshold of your carefully crafted abode, the final touches and move-in process envelops you in a whirlwind of excitement and anticipation. Before settling in, it is essential to ensure that everything is in order. A move-in checklist will help you stay organized and ensure that all tasks are completed. Here is a table outlining the main items to consider:

Task Description Status
Utilities Setup Arrange for electricity, water, and gas services ✔️
Cleaning Thoroughly clean every nook and cranny ✔️
Furniture Arrangement Plan the layout and arrange furniture ✔️
Decorations Add personal touches with artwork and plants ✔️

Once the essentials are taken care of, you can focus on decorating your new tiny house. The limited space calls for creative solutions. Consider utilizing multi-functional furniture, such as storage ottomans or fold-out tables. Mirrors can create an illusion of added space, while strategically placed shelves can maximize storage. Experiment with colors to create a cozy atmosphere. Lighter shades can make the space feel larger, while pops of vibrant colors can add personality. Lastly, don’t forget to hang curtains or blinds for privacy and to control natural light. By following these tips and incorporating your own decorating ideas, you can transform your tiny house into a comfortable and personalized haven.

Frequently Asked Questions

How much does it cost to build a tiny house?

The cost of building a tiny house depends on several factors such as size, materials used, and location. However, a rough cost estimation for building a tiny house is around $20,000 to $50,000.

This includes budget planning for purchasing materials, hiring labor, and any additional costs such as permits and utilities. It’s important to carefully plan and consider all expenses to stay within budget when building a tiny house.

Advertisement

What are the legal requirements for living in a tiny house?

To live in a tiny house, certain legal requirements must be met. Zoning restrictions are an important consideration, as they determine where tiny houses can be located. It is essential to research local regulations and ensure compliance with building codes.

Additionally, insurance requirements should be taken into account to protect your investment. Consult with local authorities and insurance providers to understand the specific legal obligations and coverage needed for living in a tiny house.

Can I build a tiny house on my own or do I need to hire professionals?

In deciding whether to build a tiny house on your own or hire professionals, there are pros and cons to consider.

DIY (Do-It-Yourself) allows for cost savings and a sense of accomplishment, but it requires time, skills, and knowledge of building codes.

Hiring professionals ensures expertise and a smoother process, but it can be more expensive.

Advertisement

Ultimately, the choice depends on your capabilities, resources, and preferences.

Are there any specific building codes or regulations that apply to tiny houses?

Building code requirements and zoning regulations are essential factors to consider when building a tiny house. These regulations vary depending on the location, but they generally cover aspects such as minimum square footage, ceiling height, plumbing, electrical systems, and safety standards.

It’s crucial to research and understand the specific building codes and zoning regulations in your area to ensure compliance. Failing to meet these requirements may result in fines or the inability to legally occupy the tiny house.

Can a tiny house be easily moved from one location to another?

Moving a tiny house is like transporting a compact treasure chest. It can be easily hitched to a vehicle and transported to a new location.

This mobility has significant economic implications, as it allows homeowners to explore new job opportunities or live in different communities without the high costs of traditional home relocation. Moreover, the environmental impact is reduced, as the need for land development and new construction is minimized.

Advertisement

Conclusion

After countless hours of meticulous planning, skilled craftsmanship, and unwavering determination, my tiny house has finally come to life.

From the sturdy foundation and precise framing to the intricately installed electrical and plumbing systems, every step has been taken with utmost precision.

The insulation and weatherproofing ensure that my haven stands strong against the harshest elements.

The interior finishes, HVAC system, and carefully chosen windows and doors bring comfort and style to this petite abode.

With the final touches and personalized touches, it’s time to move in and make this tiny house a home.

Advertisement
Continue Reading

Beginners Guides

How Long Will Take To Build A Tiny Cob House 200m2

Published

on

By

An image showcasing the step-by-step construction process of a 200m2 tiny cob house, capturing the excavation of the foundation, laying the cob walls, shaping the interior, installing the roof, and adding finishing touches

Congratulations on your decision to start building a small cob house! Before you dive into this important project, let me provide you with some insights on what to expect in the future.

Building a tiny cob house, especially one that spans a generous 200m2, is no small feat. It requires meticulous planning, careful design, and a whole lot of elbow grease. But fear not, my fellow adventurers, for I am here to guide you through this arduous journey.

In this article, we will explore the various factors that can affect the construction time of a tiny cob house. From the initial planning and design phase to the final landscaping and exterior features, every step of the process will be analyzed and detailed.

We will delve into the art of cob mixing and building walls, the intricacies of roof construction, and the importance of interior finishes and flooring. We’ll even uncover the secrets of installing doors and windows and navigating those pesky final inspections and testing.

So, grab your hard hat and buckle up, because this is going to be one wild ride. Together, we will uncover the mysteries of building a tiny cob house and answer that burning question: How long will it take?

Advertisement

Let’s embark on this adventure and create a home that is as unique as it is sustainable.

Key Takeaways

  • The construction time of a tiny cob house is influenced by factors such as construction methods, skilled labor, and the complexity of the design.
  • Efficient construction methods, such as pre-fabrication and modular construction, can speed up the process.
  • The availability of skilled labor is important for a quicker construction process.
  • The complexity of the design and the size of the house can impact the construction time.

Factors Affecting Construction Time

So, how long’s it gonna take to whip up a tiny cob house that’s 200m2? Well, the construction time of a tiny cob house is influenced by several factors.

First and foremost, the efficiency of construction methods plays a significant role in determining the timeline. Using modern construction techniques, such as pre-fabrication and modular construction, can greatly expedite the process. These methods allow for faster assembly and reduce the time required for on-site construction.

Another factor to consider is the availability of skilled labor. The more experienced and skilled the workers are, the quicker the construction process will be. Adequate planning and coordination are essential to ensure that the skilled labor is utilized efficiently and effectively.

Additionally, the complexity of the design and the size of the house also impact the construction time. A more intricate design with unique features and a larger floor area will naturally take longer to build.

The factors influencing the timeline of building a tiny cob house include efficient construction methods, the availability of skilled labor, and the complexity of the design. By considering these factors and incorporating efficient construction methods, the construction time can be minimized.

Advertisement

Now, let’s move on to the next section about the planning and design phase.

Planning and Design Phase

During the planning and design phase, you’ll be amazed at how quickly ideas start flowing for your dream 200m2 cob home. This is the stage where you can consider various planning considerations and tackle the design challenges that may arise.

To ensure a smooth construction process, it’s important to carefully plan and consider all aspects of your cob house. Here are some key planning considerations to keep in mind:

  • Site orientation: Determine the most optimal orientation for your cob house to maximize natural light and energy efficiency.
  • Layout and functionality: Plan the layout of your home to optimize space and functionality, taking into account factors such as room sizes, flow, and accessibility.
  • Material selection: Choose the right materials for your cob house, considering factors such as durability, sustainability, and local availability.

In addition to these planning considerations, you’ll also face design challenges. These challenges may include incorporating unique architectural elements, integrating modern amenities while maintaining the traditional cob house aesthetic, and ensuring structural stability.

As you navigate through the planning and design phase, you’ll gain a deeper understanding of the intricacies involved in building your cob house. With careful consideration and attention to detail, you’ll be well-prepared for the subsequent section about foundation and site preparation.

Foundation and Site Preparation

Clearing and leveling the land is the first step in preparing the site for building my tiny cob house. This involves removing any vegetation, rocks, or debris that may hinder the construction process.

Advertisement

Next, I’ll need to install drainage systems to ensure proper water flow and prevent any potential damage to the foundation.

Finally, I’ll pour the foundation, which will provide a stable and level base for the construction of my tiny cob house.

Clearing and Leveling the Land

First, you’ll need to make sure the land is leveled before you can start building your tiny cob house. This involves a thorough clearing process to remove any trees, rocks, or debris from the site. Once the land is cleared, the next step is to level it using various techniques such as grading and excavation. This is crucial to ensure a stable foundation for your cob house.

To give you an idea of the clearing and leveling process, here’s a table outlining the steps involved:

Step Description
1 Clearing the site of trees and vegetation
2 Removing rocks and debris
3 Grading the land to create a level surface
4 Excavating any excess soil or uneven areas
5 Compacting the soil for stability

Once the land is cleared and leveled, you can proceed with installing drainage systems to ensure proper water management. This will be discussed in the subsequent section.

Advertisement

Installing Drainage Systems

To ensure the stability and longevity of your cob house, it’s essential to install drainage systems that effectively manage water flow on your leveled land. Proper drainage system maintenance provides numerous benefits, including preventing water accumulation, protecting the foundation of your cob house, and reducing the risk of mold or mildew growth.

  1. Prevent water accumulation: A well-designed drainage system ensures that rainwater and groundwater are diverted away from your cob house, preventing water from pooling around the foundation.

  2. Protect the foundation: Proper drainage prevents water from seeping into the soil beneath the cob house, which can weaken the foundation over time.

  3. Reduce mold and mildew growth: Adequate drainage eliminates excess moisture, reducing the chances of mold and mildew growth, which can lead to health issues and damage to the structure.

With a well-designed drainage system in place, you can proceed to the next phase of building your cob house: pouring the foundation.

Pouring the Foundation

Once you’ve completed the essential step of installing proper drainage systems, it’s time to move on to the exciting process of pouring the foundation for your cob home. The foundation is a crucial element in the construction of any building, providing stability and support. When choosing foundation materials, it’s important to consider the specific needs of your cob house. Common materials include concrete, stone, or a combination of both. The foundation depth will depend on factors such as soil composition and local building codes. It’s essential to dig deep enough to ensure a solid base that can withstand the weight of your cob house. A table below illustrates some common foundation materials and their recommended depths:

Foundation Material Recommended Depth
Concrete 1.5-2 feet
Stone 2-3 feet

With the foundation poured and set, we can now move on to the next exciting step: cob mixing and building walls.

Cob Mixing and Building Walls

Mixing cob by hand, I feel the earth’s texture as it blends with water and straw. This technique is a key aspect of eco-friendly construction materials, as cob is made from natural and sustainable resources.

Advertisement

To ensure a well-mixed cob, I follow these techniques:

  • Thoroughly wet the soil before adding the straw to achieve the right consistency.
  • Use my feet to mix the cob, moving in a circular motion to evenly distribute the materials.
  • Continuously add water as needed to maintain the desired moisture level.

The process of building walls with cob is a labor-intensive but rewarding endeavor. Using my hands, I scoop up the cob mixture and firmly press it into place, layer by layer. I pay attention to creating smooth and even walls, ensuring structural stability. As the walls rise, I incorporate windows and door frames, embedding them securely into the cob.

With the walls complete, the next step in the construction process is roof construction. This phase involves designing and building a sturdy and weather-resistant roof to protect the cob house.

Roof Construction

Now it’s time to tackle the exciting task of constructing a strong and weather-resistant roof for your beautiful cob home. The roof design plays a crucial role in protecting your house from the elements and ensuring its longevity.

There are various options to consider when it comes to roof materials for a tiny cob house. One popular choice is a thatched roof, which provides excellent insulation and adds a rustic charm to your home. Thatched roofs are made from bundles of dry vegetation, such as straw or reeds, layered tightly to create a waterproof barrier.

Another option is a metal roof, which is durable, fire-resistant, and requires minimal maintenance. Metal roofs come in a variety of styles and colors, allowing you to customize the look of your cob house.

Advertisement

When selecting roof materials, it’s important to consider the weight they will add to your structure. Cob walls are sturdy, but they have their limits. Consulting with a structural engineer or an experienced cob builder can help you determine the best materials for your roof design while maintaining the structural integrity of your home.

With the roof construction complete, it’s time to move on to the next phase of your cob house project: plumbing and electrical installations. These essential components will ensure that your home is functional and comfortable.

Plumbing and Electrical Installations

To ensure your cob home is fully functional and comfortable, you’ll need to tackle the essential tasks of plumbing and electrical installations, like a skilled craftsman threading needles through a tapestry. These two crucial components are vital for modern living and require careful consideration.

When it comes to plumbing, you’ll need to plan for water supply, drainage, and waste management. Installing a water filter system and rainwater harvesting can help minimize your environmental impact. Additionally, considering eco-friendly alternatives like composting toilets and greywater systems can further enhance sustainability.

For electrical installations, it’s important to determine your power needs and design a system that meets them. This may involve installing solar panels, wind turbines, or a combination of renewable energy sources. Implementing energy-efficient appliances and LED lighting can also reduce your electricity consumption. Furthermore, incorporating smart home technology can enhance convenience and control over your electrical system.

Advertisement

As we move forward to the subsequent section about ‘interior finishes and flooring,’ it’s crucial to ensure that the plumbing and electrical installations are completed before proceeding. These essential systems lay the foundation for a functional and efficient home, allowing you to seamlessly transition into the next step of the construction process.

Interior Finishes and Flooring

When it comes to the interior finishes and flooring of your cob home, you’ll have the opportunity to create a space that reflects your personal style and adds warmth and character to your living environment. The interior design of your tiny cob house is a chance to showcase your creativity and express yourself.

One of the main considerations when selecting interior finishes is to choose eco-friendly materials. Opting for sustainable options like reclaimed wood or bamboo flooring not only reduces environmental impact but also adds a unique charm to your space. Additionally, using natural paints and finishes made from organic materials can further enhance the eco-friendly aspect of your cob home.

When it comes to flooring, there are various options to choose from. Hardwood floors provide a timeless and elegant look, while tile floors offer durability and easy maintenance. Another option is polished concrete floors, which can be stained or stamped to mimic the appearance of other materials. Whichever flooring material you choose, make sure it complements the overall aesthetic of your cob home.

In the next section about installing doors and windows, you’ll have the opportunity to bring natural light into your space and enhance the connection between the indoors and outdoors. Choosing energy-efficient windows and doors will not only reduce your carbon footprint but also contribute to the overall comfort and efficiency of your tiny cob house.

Advertisement

Installing Doors and Windows

Bring the beauty of the outdoors into your cob home by installing energy-efficient windows and doors that create a seamless connection between your living space and the natural world. Proper door installation and strategic window placement are essential to maximize natural light and ventilation while maintaining the structural integrity of your tiny cob house.

Here are three key considerations for installing doors and windows in your cob home:

  1. Door Installation: Choose sturdy, weather-resistant doors that complement the overall aesthetic of your cob house. Install them in a way that ensures a tight seal to prevent drafts and maintain insulation. Consider using double doors or a larger entrance to create a more open and inviting feel.

  2. Window Placement: Strategically place windows to optimize natural light and airflow throughout your cob home. Consider the orientation of your house to maximize exposure to sunlight during different times of the day. Install windows at varying heights to allow for cross-ventilation and to create interesting views of the surrounding landscape.

  3. Energy Efficiency: Invest in energy-efficient windows and doors that are well-insulated and have low emissivity coatings. This will help regulate indoor temperatures, reduce energy consumption, and lower your carbon footprint.

With the doors and windows properly installed, your cob home will not only be a cozy and sustainable living space but also a place that seamlessly connects you to the beauty of the natural world.

In the next section, we will discuss the importance of final inspections and testing to ensure the safety and functionality of your tiny cob house.

Final Inspections and Testing

After all the doors and windows have been installed, it’s time for the final inspections and testing phase of the construction process. This is a crucial step to ensure that the tiny cob house meets all the necessary safety and building code requirements.

Advertisement

During the final inspections, a professional inspector will thoroughly examine every aspect of the house, from the foundation to the roof, to make sure that everything is in compliance with the regulations. They will check for any potential hazards, such as faulty electrical wiring or structural issues. Additionally, the inspector will also test the functionality of all the doors and windows to ensure they open and close properly.

Final inspections can take some time, depending on the size and complexity of the house. It’s important to note that unexpected construction delays or issues discovered during the inspections can affect the overall construction timeline. However, it’s better to address these issues during the inspections rather than later on when the house is already occupied.

Once the final inspections and testing are complete, we can move on to the next phase of the construction process, which involves landscaping and exterior features. This step will give the tiny cob house its final touches and enhance its overall aesthetic appeal.

Landscaping and Exterior Features

Enhance the overall aesthetic appeal of your tiny cob house with landscaping and exterior features. A well-designed landscape can transform the exterior of your home, creating a harmonious blend between nature and your cob house.

Here are three key elements to consider when planning your landscaping design:

Advertisement
  1. Plant Selection: Choose plants that complement the natural materials and earthy tones of your cob house. Opt for native plants that require minimal maintenance and are adapted to the local climate. Incorporate a mix of flowering plants, shrubs, and trees to add texture and color to your landscape.

  2. Hardscaping: Incorporate hardscaping elements, such as pathways, patios, and retaining walls, to create functional outdoor spaces. Use materials that complement the organic nature of your cob house, such as natural stone or reclaimed wood. These features will not only enhance the visual appeal but also provide practicality and durability.

  3. Lighting: Proper lighting can highlight the architectural details of your cob house and create a warm and inviting ambiance. Install outdoor lighting fixtures strategically to accentuate key features, such as the entrance or garden areas. Consider energy-efficient options, such as solar-powered lights, to minimize environmental impact.

By carefully planning your landscaping design and selecting appropriate exterior materials, you can create a cohesive and visually stunning environment that complements your tiny cob house.

Frequently Asked Questions

How much does it cost to build a tiny cob house?

In terms of cost analysis, building a tiny cob house can be a cost-effective option. The use of sustainable materials like cob, which is a mixture of clay, sand, and straw, can significantly reduce construction expenses.

Additionally, incorporating sustainable features like passive solar design and rainwater harvesting can provide long-term sustainability benefits. With these factors considered, the overall cost of building a tiny cob house is relatively affordable compared to traditional construction methods.

Can I build a tiny cob house on my own or do I need to hire a professional?

Building a tiny cob house on your own can be a challenging yet rewarding experience. While it’s possible to DIY, hiring a professional can ensure a more efficient and successful construction process.

The challenges of building on your own include acquiring the necessary skills and knowledge, managing the project, and overcoming any hurdles that may arise. However, the benefits of DIY include cost savings, personal satisfaction, and the opportunity to customize your house according to your preferences.

Advertisement

What are the advantages of building a tiny cob house compared to a conventional house?

Building a tiny cob house offers numerous advantages compared to a conventional house. One interesting statistic is that cob houses can last for centuries, with some still standing after 500 years. The use of natural materials like clay, sand, and straw promotes sustainability and healthy living.

Cob houses are also incredibly energy efficient, providing insulation and reducing heating and cooling costs. Their unique design and connection to nature create a truly special and harmonious living environment.

Are there any specific building codes or regulations that I need to consider when building a tiny cob house?

When it comes to building a tiny cob house, there are specific building codes and regulations that need to be considered. These codes and regulations vary depending on the location, so it’s essential to research and understand the requirements in your area.

Generally, permits are needed for constructing a cob house, and there may be guidelines for the size, structure, and materials used. Consulting with local authorities and professionals in the field can provide a more detailed understanding of the specific building codes and regulations for tiny cob houses.

Can a tiny cob house be customized and expanded in the future if needed?

Yes, a tiny cob house can definitely be customized and expanded in the future if needed. There are plenty of customization options for tiny cob houses, allowing you to personalize the layout, finishes, and even add unique features.

Advertisement

Additionally, cob is a versatile building material that can be easily modified or added to as your needs change. So, whether you want to expand the living space or create additional rooms, future expansion possibilities for tiny cob houses are certainly feasible.

Conclusion

In conclusion, building a tiny cob house of 200m2 requires careful planning, diligent construction, and attention to detail.

From the initial phase of designing and preparing the site, to the mixing and building of the cob walls, and the installation of doors and windows, every step plays a crucial role in the overall construction process.

Additionally, final inspections, testing, and landscaping are equally important in completing the project.

By considering these factors and executing each step with precision, the construction time of a tiny cob house can be effectively minimized while ensuring a high-quality end result.

Advertisement
Continue Reading

Beginners Guides

How Low Can Tiny House Trailers Be?

Published

on

By

An image showcasing a tiny house trailer nestled beneath a majestic, towering tree, highlighting the juxtaposition between the humble structure and the grandeur of nature

Always wondered how low a tiny house trailer can go? Get ready to be amazed as this article delves into the world of low-profile trailers made for tiny homes.

These innovative trailers offer a multitude of benefits, from space-saving design features to easy mobility and transportation. But what are the legal requirements and regulations surrounding these unique structures? And what challenges can arise when building and living in a low tiny house trailer?

Fear not, as I will provide all the answers you need. Whether you’re considering a low-profile trailer for your own tiny house or simply curious about this fascinating trend, join me as we explore the possibilities and discover inspiring examples of low tiny house trailer designs.

Get ready to be inspired and amazed by the incredible world of low tiny house trailers.

Key Takeaways

  • Low-profile trailers for tiny houses offer benefits such as space-saving design features and easy mobility.
  • Regulations and legal requirements vary by jurisdiction, including height restrictions, weight limits, building codes, and zoning regulations.
  • Challenges of building and living in a low tiny house trailer include careful planning, precise measurements, and lightweight yet durable materials.
  • Tips for maximizing space in a low tiny house trailer include utilizing vertical space, optimizing storage under furniture, using multipurpose furniture, and embracing organization systems.

The Benefits of Low-Profile Trailers

Imagine cruising down the road with a low-profile tiny house trailer, effortlessly gliding under bridges and through narrow spaces, making the journey to your next destination a breeze. Low-profile trailers offer numerous benefits for tiny house enthusiasts, including space-saving solutions and cost-effective alternatives.

One of the major advantages of low-profile trailers is their ability to navigate through tight spaces. With a reduced height, these trailers can easily maneuver under low bridges and overhead obstacles that taller trailers would struggle with. This opens up a world of possibilities for tiny house owners, allowing them to explore areas that were previously inaccessible.

Advertisement

In addition to their maneuverability, low-profile trailers also offer space-saving design features. These trailers are designed to maximize every inch of available space, allowing for efficient storage and utilization of the interior. From built-in cabinets and shelves to fold-out furniture, every nook and cranny is utilized to its fullest potential.

Furthermore, low-profile trailers are cost-effective alternatives to traditional tiny house trailers. With their smaller size and reduced materials, these trailers are often more affordable to purchase and maintain. This makes them an attractive option for those on a tight budget or looking for a more economical solution.

Low-profile tiny house trailers offer a range of benefits, including space-saving solutions and cost-effective alternatives. With their ability to navigate through tight spaces and their efficient use of interior space, these trailers provide a practical and efficient housing option for those seeking a minimalist lifestyle.

Space-Saving Design Features

With clever design features, these compact mobile homes can maximize every inch of available space. Space-saving techniques and innovative compact designs allow tiny house trailers to offer functionality and comfort despite their small size. Here are some key design features that contribute to their space-saving capabilities:

  • Lofted sleeping areas: By utilizing vertical space, tiny house trailers often feature lofted sleeping areas, freeing up valuable floor space for other purposes.

  • Foldable furniture: To optimize space, many tiny house trailers incorporate foldable furniture such as tables, chairs, and beds. These can easily be folded away when not in use, creating a more open living area.

  • Multi-functional furniture: Dual-purpose furniture, such as a sofa that can transform into a bed or storage compartments built into staircases, maximize functionality while minimizing the footprint.

  • Clever storage solutions: Tiny house trailers often utilize creative storage solutions, such as built-in cabinets, under-bed storage, and hidden compartments, to make the most of limited space.

  • Compact appliances: Compact appliances, like combination washer-dryers and slim refrigerators, are specifically designed to fit seamlessly into the small footprint of tiny house trailers.

These space-saving design features enable tiny house trailers to offer a surprising amount of livable space despite their compact size. Transitioning into the subsequent section, the mobility and easy transportation of these homes is another key aspect to consider.

Advertisement

Mobility and Easy Transportation

When you’re on the move, it’s remarkable how easily these compact homes can be transported. Tiny house trailers are specifically designed for mobility and easy transportation. Their compact size and lightweight construction make them perfect for towing behind a vehicle.

These trailers are typically built to be no taller than 13.5 feet, which allows them to fit under most bridges and overpasses. Additionally, they are designed to be narrow enough to fit within standard lane widths on the road.

To ensure their mobility, tiny house trailers are constructed using lightweight materials such as steel or aluminum. These materials not only reduce the overall weight of the trailer but also provide strength and durability. The lightweight construction allows for easier towing and maneuverability, making it feasible to take your tiny house on trips or move it to a new location whenever desired.

In terms of transportation, it’s important to note that regulations and legal requirements vary by jurisdiction. It’s crucial to familiarize yourself with the specific rules and regulations in your area before transporting your tiny house. By understanding and adhering to these regulations, you can ensure a safe and hassle-free journey with your compact home.

Moving on to the next section about regulations and legal requirements, it’s important to know what you need to do to comply with the law.

Advertisement

Regulations and Legal Requirements

To comply with regulations and legal requirements, you must familiarize yourself with the specific rules in your jurisdiction, ensuring a safe and hassle-free journey with your compact home. Here are four key considerations when it comes to regulations compliance and building permits for low tiny house trailers:

  1. Height Restrictions: Many jurisdictions have height restrictions for trailers on public roads. It’s crucial to adhere to these limitations to avoid any legal issues. Make sure your low tiny house trailer meets the height requirements set by local authorities.

  2. Weight Limits: Different jurisdictions have specific weight restrictions for trailers. Ensure that your low tiny house trailer falls within the permissible weight limits to ensure road safety and avoid any penalties.

  3. Building Codes: When constructing your low tiny house trailer, it’s important to adhere to building codes and regulations. These codes ensure the structural integrity and safety of your compact home. Consult with local building authorities to obtain the necessary permits and ensure compliance.

  4. Zoning Regulations: Before parking or living in your low tiny house trailer, it’s essential to understand and comply with zoning regulations. Some areas have restrictions on where you can park or live in a tiny house trailer. Research the local zoning laws to avoid potential challenges.

Understanding and complying with regulations and legal requirements will help you overcome the challenges of building and living in a low tiny house trailer, ensuring a smooth transition into the subsequent section about the challenges of building and living in a low tiny house trailer.

Challenges of Building and Living in a Low Tiny House Trailer

Navigating the obstacles of constructing and residing in a compact mobile sanctuary can be an exhilarating yet demanding adventure. When it comes to building a low tiny house trailer, there are a few challenges that need to be considered.

Firstly, one of the challenges is the construction process itself. Building a low-profile trailer requires careful planning and precise measurements to ensure that the structure remains stable and secure. Additionally, the materials used must be lightweight yet durable to withstand the stresses of the road.

Cost considerations are also a significant challenge when constructing a low tiny house trailer. The specialized design and materials needed for a low-profile trailer can increase the overall cost of the project. From choosing the right trailer base to purchasing low-profile materials, the expenses can quickly add up.

Advertisement

Despite these challenges, the rewards of living in a low tiny house trailer can outweigh the difficulties. The ability to travel with ease and live a minimalist lifestyle can be incredibly freeing. Transitioning into the subsequent section about design considerations for low-profile trailers, it is essential to carefully consider the layout and overall design to maximize space and functionality.

Design Considerations for Low-Profile Trailers

Consider carefully planning the layout and design of your compact mobile sanctuary to optimize space and functionality. When it comes to designing a low-profile tiny house trailer, there are several important considerations to keep in mind.

One of the primary concerns is ensuring stability. A low-profile trailer may have a lower center of gravity, which can increase stability while towing and when parked.

Additionally, it is crucial to carefully consider the height of the ceilings in your tiny house. Low ceilings can create a cozy and intimate atmosphere, but they can also make the space feel cramped and claustrophobic. To prevent this, consider using light colors and reflective materials on the walls and ceilings to create an illusion of more space. Additionally, using clever storage solutions that maximize vertical space can help compensate for the lower ceiling height.

When designing your low-profile tiny house trailer, take into account these considerations for stability and low ceilings to create a comfortable and functional living space. Transitioning into the next section about choosing the right trailer height for your needs, it’s important to consider not only the height limitations but also the overall requirements of your tiny house.

Advertisement

Choosing the Right Trailer Height for Your Needs

When choosing the perfect trailer for your compact mobile sanctuary, it’s important to keep in mind your specific needs, such as the ideal height that can accommodate your lifestyle and preferences. Did you know that trailers with taller heights provide more headroom and can offer up to 10% more usable space? To determine the right trailer height for your needs, it’s crucial to consider factors like weight distribution and choosing the appropriate trailer width.

When it comes to weight distribution, it’s essential to ensure that the weight of your tiny house is evenly distributed along the trailer. This will help maintain stability and prevent any potential issues during transportation. Additionally, the width of the trailer should be chosen carefully to ensure that it aligns with the width of your tiny house, allowing for a secure fit.

To help you better understand the considerations for choosing the right trailer height, take a look at the table below:

Trailer Height Headroom Usable Space
Low Limited Less
Medium Moderate Average
High Ample More
Extra High Spacious Maximum

By carefully considering your specific needs and preferences, you can choose a trailer height that provides the perfect balance of headroom and usable space for your tiny house. In the next section, we will explore tips for maximizing space in a low tiny house trailer, ensuring that every inch is utilized efficiently.

Tips for Maximizing Space in a Low Tiny House Trailer

Looking to make the most of your compact mobile sanctuary? Discover simple yet effective tips for maximizing space in a low tiny house trailer.

Advertisement
  1. Utilize vertical space: When dealing with limited floor space, it’s essential to think vertically. Install shelves, hooks, and racks on the walls to store items such as kitchen utensils, clothing, and accessories.

  2. Optimize storage under furniture: Don’t let the space under your furniture go to waste. Invest in storage containers or bins that fit neatly underneath your bed, couch, or dining table. This way, you can make use of every inch available.

  3. Use multipurpose furniture: Select furniture pieces that serve multiple functions. For example, choose a sofa that can convert into a bed or a coffee table with hidden storage compartments. This allows you to maximize functionality while minimizing the amount of furniture you need.

  4. Embrace organization systems: Implementing smart storage solutions can greatly enhance the organization of your tiny house. Utilize drawer dividers, hanging organizers, and storage baskets to keep everything in its place and easily accessible.

By implementing these tips for maximizing storage and small space organization, you can create a more efficient and comfortable living environment in your low tiny house trailer. Transitioning into the subsequent section about creative storage solutions for low-profile trailers, you’ll discover even more innovative ways to optimize your space.

Creative Storage Solutions for Low-Profile Trailers

Get ready to discover some ingenious storage ideas that will transform your compact mobile haven into a clutter-free oasis. When it comes to creative storage solutions for low-profile trailers, space-saving design is key. Maximizing every inch of available space is crucial in order to make the most out of your tiny home on wheels.

One effective way to optimize storage in a low-profile tiny house trailer is by utilizing vertical space. Installing tall cabinets or shelves that reach the ceiling allows you to store items that are not frequently used, such as seasonal clothing or kitchen appliances. Additionally, incorporating built-in furniture with hidden compartments, like a bed with drawers underneath or a dining table with storage compartments, can help maximize space while keeping your belongings organized.

To give you a visual representation of these storage solutions, take a look at the table below:

Storage Solution Description
Vertical Cabinets Tall cabinets that reach the ceiling, providing ample storage space.
Built-in Furniture Furniture pieces with hidden compartments for extra storage.

These creative storage solutions not only help declutter your tiny house trailer, but also create a visually appealing and organized living space. By utilizing these space-saving techniques, you can make the most out of your limited square footage. Now, let’s move on to inspiring examples of low tiny house trailer designs.

Advertisement

Inspiring Examples of Low Tiny House Trailer Designs

Prepare to be inspired by these awe-inspiring examples of compact mobile homes on wheels, showcasing innovative designs that’ll leave you amazed.

These low tiny house trailer designs are not only visually appealing but also offer practical solutions for those seeking a minimalist lifestyle.

  • Ingenious Use of Space: These low-profile trailers feature clever space-saving techniques that maximize every inch of the interior. From foldable furniture to hidden storage compartments, these designs prioritize functionality without compromising on comfort.

  • Low Cost Construction: One of the key advantages of these tiny house trailers is their affordability. By utilizing cost-effective materials and simplified construction techniques, these homes offer a budget-friendly alternative to traditional housing options.

  • Environmental Sustainability: Many of these low tiny house trailer designs prioritize environmental sustainability. They incorporate eco-friendly features such as solar panels, composting toilets, and rainwater harvesting systems. These sustainable practices not only reduce the ecological footprint but also provide a self-sufficient living experience.

Whether you’re looking to downsize, embrace a minimalist lifestyle, or simply seek inspiration for innovative design solutions, these low tiny house trailer designs offer a wealth of ideas to explore.

With their low-cost construction and environmental sustainability, these compact mobile homes on wheels provide a glimpse into the future of sustainable and affordable housing options.

Frequently Asked Questions

How much does a low-profile trailer typically cost?

A low-profile trailer typically costs between $5,000 to $10,000, depending on the size and features. The advantages of a low-profile trailer are that it offers better stability, easier towing, and improved fuel efficiency compared to a standard trailer. However, it also has some disadvantages such as limited storage space and reduced headroom inside the trailer.

Advertisement

Overall, the cost range for a low-profile trailer makes it a popular choice for those looking for a budget-friendly option.

What are the most common materials used in building low tiny house trailers?

The most common materials used in building low tiny house trailers are steel and aluminum. Steel is a popular choice due to its strength and durability, while aluminum offers a lightweight option.

These materials allow for a sturdy yet lightweight construction, making low profile trailers easier to tow and maneuver. The advantages of low profile trailers include improved fuel efficiency and reduced wind resistance.

By utilizing these materials, builders can create efficient and reliable low tiny house trailers.

Are there any limitations on where I can park a low-profile tiny house trailer?

There are certain limitations on where you can park a low-profile tiny house trailer due to parking regulations. These regulations may vary depending on the specific area or jurisdiction. However, the benefits of having a low-profile trailer include increased maneuverability and a lower center of gravity, which can make it easier to navigate tight spaces and reduce the risk of tipping.

Advertisement

Always check local parking regulations and restrictions before deciding on a parking location.

Can I customize the interior design of a low tiny house trailer?

Yes, you can customize the interior design of a low tiny house trailer. There are a variety of customization options available, allowing you to create a space that suits your specific needs and preferences.

The benefits of a low profile design include increased mobility and ease of towing. With a low trailer, you can navigate tight spaces and travel on roads with height restrictions. This allows for more flexibility in choosing where to park your tiny house.

Are there any specific safety precautions I should take when towing a low-profile trailer?

When it comes to towing a low-profile trailer, there are several important safety precautions to keep in mind. First and foremost, make sure the trailer’s properly secured to the towing vehicle using a strong and reliable hitch system.

Additionally, always check the trailer’s tire pressure and make sure the brakes are in good working condition. It’s also crucial to distribute the weight evenly and avoid overloading the trailer.

Advertisement

Lastly, be mindful of your speed and maintain a safe following distance to ensure a smooth and safe towing experience.

Conclusion

In conclusion, opting for a low-profile tiny house trailer offers numerous benefits, such as greater mobility and space-saving design features.

While some may argue that building and living in a low tiny house trailer pose challenges, with careful planning and creativity, these obstacles can be overcome.

By choosing the right trailer height for your needs and implementing smart storage solutions, you can maximize space and create a comfortable living environment.

Don’t let the idea of a low tiny house trailer deter you; embrace the possibilities and discover the freedom and flexibility it offers.

Advertisement
Continue Reading

Trending