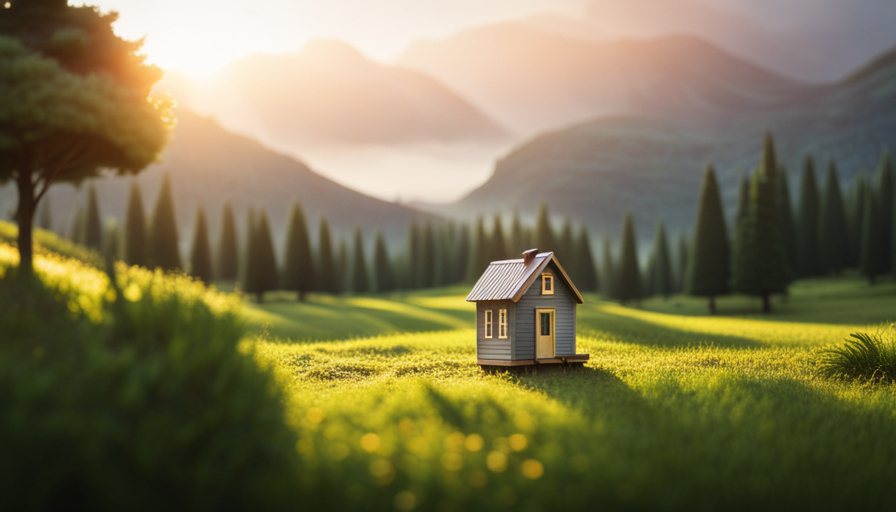
Have you ever thought about escaping the limitations of traditional living and embracing a simpler, more environmentally friendly lifestyle? That’s exactly what I accomplished by embarking on the adventure of constructing my own tiny home.
Like a master craftsman carving a masterpiece from a block of wood, I meticulously designed and constructed every inch of my humble abode. It was a labor of love, fueled by a burning desire for freedom and self-sufficiency.
In this article, I will take you on a journey through the steps I took to make my tiny house dreams a reality. From the initial planning and research to the final finishing touches, I will share the intricate details that transformed a mere idea into a cozy sanctuary.
With an analytical eye, I carefully considered every aspect, maximizing space and storage to ensure functionality without sacrificing comfort.
So, if you’re ready to escape the clutches of excess and embrace a more minimalist lifestyle, join me as I unveil the secrets behind the creation of my own tiny house. Prepare to be inspired, amazed, and motivated to embark on your own journey towards living tiny.
Key Takeaways
- Determine needs and goals before starting the construction process
- Thoroughly research and plan for a functional and beautiful design
- Carefully select durable and efficient materials for construction
- Embrace a minimalist lifestyle and prioritize experiences and relationships over material possessions
Determine Your Needs and Goals
Before diving into the construction process, it’s essential to determine your needs and goals for your tiny house. This step is crucial because it sets the foundation for every decision you make throughout the entire project.
Start by determining your priorities. What are the most important aspects of your tiny house? Is it maximizing space efficiency? Or perhaps it’s having a sustainable and eco-friendly design? By identifying these priorities, you can ensure that your tiny house meets your specific requirements.
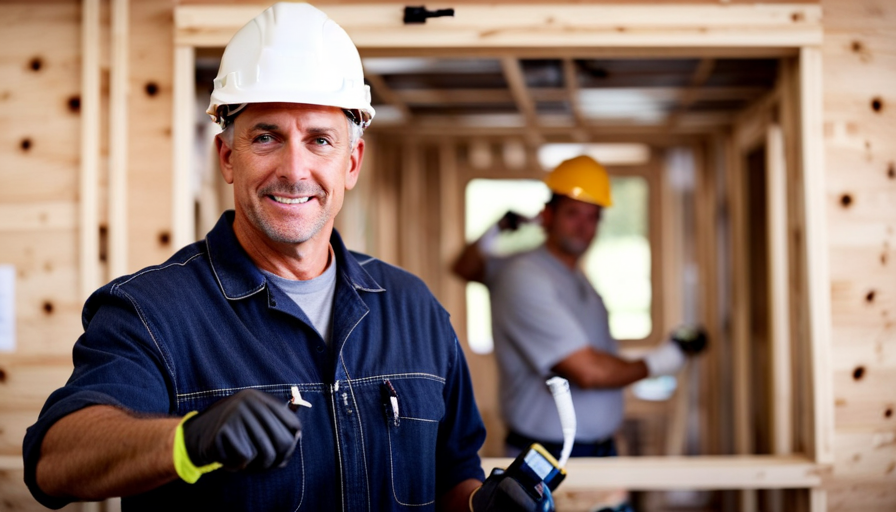
Next, set realistic goals. Consider your budget, time constraints, and personal capabilities. Are you planning to build your tiny house yourself, or will you need to hire professionals? Be honest with yourself about what you can realistically accomplish. Setting achievable goals will prevent disappointment and help you stay motivated throughout the process.
Once you have determined your needs and set your goals, it’s time to move on to the next step: research and plan. This stage involves gathering ideas, researching different construction methods, and creating a detailed plan for your tiny house. By taking the time to thoroughly research and plan, you can ensure that your tiny house will be both functional and beautiful.
Research and Plan
During the initial phase of constructing my compact dwelling, I dedicated ample time to thoroughly researching and devising a comprehensive blueprint. This step was crucial in ensuring that I had a clear vision of what I wanted to achieve and how to make it a reality.
Here are three key aspects that I focused on during the research and planning stage:
-
Determining budget: Before diving into the project, it was important for me to establish a realistic budget. I carefully analyzed my finances and considered the costs associated with materials, permits, and any professional help I might need. This allowed me to set a budget that I could comfortably work within and avoid any unexpected financial burdens along the way.
-
Finding suitable location: The location of my tiny house was another crucial factor that required extensive research. I considered factors such as proximity to amenities, zoning regulations, and the overall environment. It was important for me to find a location that not only met my needs but also complied with local regulations and restrictions.
-
Designing a functional layout: A well-designed layout was essential to make the most of the limited space in my tiny house. I researched various layout options and explored creative storage solutions to maximize every inch. I also considered the flow of the space and how it would fit my lifestyle.
With a clear budget in mind and a suitable location identified, I was ready to move on to the next step of gathering materials and tools to bring my tiny house dream to life.
Gather Materials and Tools
Now that I have thoroughly researched and planned, it’s time to gather all the necessary materials and tools to bring my compact dwelling to life. Gathering materials and choosing the right tools are crucial steps in ensuring a successful construction process. I have compiled a list of everything I need and organized it into a convenient table for easy reference.
| Materials | Tools | Other Supplies |
|---|---|---|
| Lumber | Circular Saw | Measuring Tape |
| Plywood | Hammer | Level |
| Insulation | Drill | Safety Glasses |
| Nails | Screwdriver | Work Gloves |
| Roofing Shingles | Nail Gun | Dust Mask |
I carefully selected each item to ensure durability, efficiency, and compatibility with the design of my tiny house. The lumber and plywood will form the structural elements, while insulation will keep the interior comfortable. Nails, screws, and roofing shingles are essential for securing and protecting the structure. To make the construction process smoother, I have chosen tools such as a circular saw, drill, and nail gun, allowing for precise and efficient work.
With all the materials and tools ready, I am excited to move forward and start building the foundation for my tiny house. Transitioning seamlessly into the next section, it’s time to lay the groundwork and bring my vision to life.
Build the Foundation
To truly bring my vision to life, I must first focus on building a solid foundation for my compact dwelling. This step is crucial in ensuring the stability and longevity of my tiny house. Here are the four key elements I considered when building the foundation:
-
Determine the budget: Before starting any construction, I carefully assessed my financial situation. I considered the costs of materials, labor, permits, and any unexpected expenses that may arise during the process. Setting a realistic budget allowed me to plan accordingly and avoid any financial setbacks.
-
Choose the right location: Selecting the perfect spot for my tiny house was essential. I considered factors such as accessibility, proximity to amenities, and the local climate. I wanted a location that provided both convenience and a peaceful environment to create my dream home.
-
Prepare the site: Before laying the foundation, I cleared the chosen area of any debris or vegetation. I leveled the ground and ensured proper drainage to prevent future issues. This step required careful planning and attention to detail.
-
Lay the foundation: Using concrete blocks, I created a sturdy base for my tiny house. I followed the local building codes and guidelines to ensure structural integrity. This foundation would serve as the solid groundwork for the rest of the construction process.
With the foundation in place, I was ready to move onto the next phase: constructing the frame.
Construct the Frame
As I construct the frame, I feel the excitement and anticipation of seeing my vision take shape, creating a space that will bring me joy and fulfillment. Building a tiny house requires careful consideration of building techniques and cost considerations.
I start by selecting the right materials for the frame, opting for sturdy and lightweight options that’ll ensure the structural integrity of the house. Once I’ve gathered all the necessary materials, I begin the construction process. I meticulously measure and mark each piece, ensuring precision in every cut. As I assemble the frame, I secure each joint with strong screws, ensuring a sturdy and durable structure.
Building a tiny house requires attention to detail, as even the smallest mistake can have significant consequences. Throughout the construction process, I keep a close eye on the budget. I search for cost-effective solutions, such as using reclaimed materials or purchasing items in bulk. By carefully managing my expenses, I can stay within my budget and still achieve the desired outcome.
As I finish constructing the frame and move on to the next step of installing utilities and systems, I’m filled with a sense of accomplishment. The foundation has been laid, and now it’s time to bring my tiny house to life.
Install Utilities and Systems
Once you’ve completed the frame, it’s time to bring your tiny house to life by installing the necessary utilities and systems. This is the exciting part where everything starts to come together, and you can envision yourself living comfortably in your cozy abode.
To make the installation process easier to understand, I’ve created a table below that outlines the steps involved in installing plumbing and electrical wiring in my tiny house. This will help you visualize the process and ensure that everything is done correctly.
| Step | Plumbing | Electrical Wiring |
|---|---|---|
| 1 | Plan the layout for water supply and drainage systems | Create an electrical plan and determine the locations for outlets and switches |
| 2 | Install water supply lines and connect them to fixtures | Run electrical wires through the walls and ceilings, ensuring proper insulation |
| 3 | Install a water heater and connect it to the supply lines | Install the main electrical panel and subpanels, connecting them to the power source |
| 4 | Install plumbing fixtures such as sinks, toilets, and showers | Install outlets, switches, and lighting fixtures according to the electrical plan |
| 5 | Test the plumbing system for leaks and proper functionality | Test the electrical system to ensure all circuits are working correctly |
Once you’ve successfully installed the necessary utilities and systems, you can move on to the next step of maximizing space and storage in your tiny house. This will allow you to make the most of your limited square footage and create a functional and organized living space.
Maximize Space and Storage
After successfully installing the necessary utilities and systems, it’s time to get creative and make your tiny space a storage and organization masterpiece, like a puzzle where every piece fits perfectly. Maximizing space is crucial in a tiny house, and I’ve discovered some innovative solutions to make the most of every inch.
First, I focused on vertical space. I installed floor-to-ceiling shelves and used wall-mounted hooks and racks to hang items like pots, pans, and utensils. This not only frees up valuable counter space but also adds a unique aesthetic to the interior.
Additionally, I utilized the space under the stairs by creating built-in drawers and cabinets, perfect for storing shoes, books, and other small items.
Next, I incorporated multi-functional furniture. My bed, for example, doubles as a storage unit with drawers underneath. I also opted for a dining table that can be folded down when not in use, creating extra floor space. Furthermore, I installed floating shelves and built-in cabinets throughout the house to maximize storage without sacrificing style.
By implementing these creative storage solutions, I have been able to fit everything I need in my tiny house without feeling cramped or cluttered.
Now, with the interior storage optimized, it’s time to move on to the next exciting step: finishing the interior and adding personal touches to make this tiny space truly feel like home.
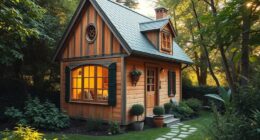
Finish the Interior
With the interior now complete, it’s time to add the final touches and transform this cozy space into a place that truly feels like home. Designing the interior of my tiny house was a fun and creative process. I wanted to make the most of the limited space while ensuring it reflected my personal style. Here are some design ideas and decorating tips that I found helpful.
In the living area, I opted for a versatile sofa bed that can be easily converted into a sleeping space for guests. To maximize storage, I built a custom shelving unit that doubles as a room divider, creating separate zones without compromising on space. In the kitchen, I installed open shelving to display my collection of colorful mugs and added a hanging pot rack for easy access to cookware. For a touch of nature, I incorporated hanging plants in each room, using a variety of planters to add visual interest.
In the bedroom, I created a cozy nook by placing a floor-to-ceiling curtain around the bed, providing privacy and a sense of enclosure. To make the most of vertical space, I installed floating shelves above the bed for books and decorative items. Finally, in the bathroom, I used a combination of open and closed storage to keep essentials organized and within reach.
By paying attention to detail and incorporating my personal style, I have been able to create a beautiful and functional interior for my tiny house. Next, I will focus on ensuring safety and sustainability throughout the entire space.
Ensure Safety and Sustainability
When it comes to ensuring safety and sustainability in my tiny house, I made sure to install smoke and carbon monoxide detectors in strategic locations throughout the space. This gives me peace of mind knowing that I’ll be alerted immediately in case of any potential hazards.
Additionally, I incorporated energy-efficient appliances into my design, such as a refrigerator, stove, and HVAC system, to minimize my carbon footprint and reduce energy costs.
To further enhance sustainability, I implemented practices like installing solar panels for renewable energy and incorporating rainwater harvesting systems for water conservation.
These small yet significant steps have made my tiny house not only safe but also environmentally friendly.
Install Smoke and Carbon Monoxide Detectors
Make sure to check your surroundings for any potential hazards as you install smoke and carbon monoxide detectors in your tiny house, ensuring the safety of you and your loved ones. Regular maintenance is crucial for these detectors to function properly. I recommend testing them monthly and replacing batteries as needed.
There are various types of detectors available in the market, including ionization, photoelectric, and combination detectors. Each type has its advantages and disadvantages, so it’s important to choose the one that suits your needs best.
Not having these detectors in a tiny house can be extremely risky, as smoke and carbon monoxide are silent killers. In case of an emergency, it’s essential to have an evacuation plan and know how to use a fire extinguisher.
To transition into the next section about energy-efficient appliances, it is important to consider the overall safety and sustainability of your tiny house.
Incorporate Energy-Efficient Appliances
Including energy-efficient appliances in your tiny home can significantly reduce your energy consumption and save you money in the long run. When considering energy-efficient appliances, it is important to weigh the cost versus the benefits. While these appliances may have a higher upfront cost, the long-term savings on your energy bills can make them a worthwhile investment. Here are some of the top energy-efficient appliances for tiny homes:
| Appliance | Energy Efficiency Rating |
|---|---|
| Refrigerator | Energy Star certified |
| Washer and Dryer | Front-loading, high-efficiency models |
| Water Heater | Tankless or heat pump options |
By incorporating these appliances into your tiny home, you can minimize your environmental impact while maximizing your energy savings. In the next section, I will discuss how to implement sustainable practices such as solar panels and rainwater harvesting to further enhance the energy efficiency of your tiny home.
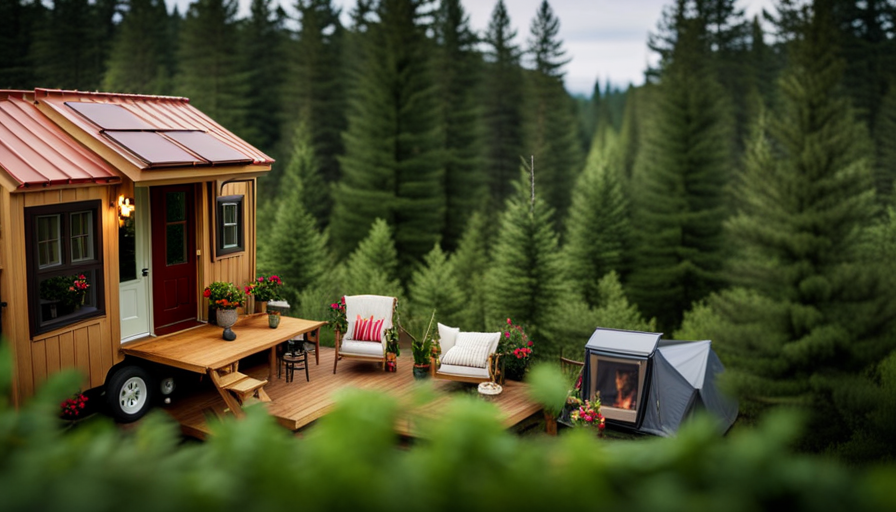
Implement Sustainable Practices (Solar Panels, Rainwater Harvesting, etc.)
By incorporating sustainable practices such as installing solar panels and implementing rainwater harvesting systems, you can significantly reduce your reliance on traditional energy sources and lower your carbon footprint.
For example, imagine living in a tiny home powered entirely by solar energy, where you can enjoy guilt-free electricity and contribute to a cleaner, more sustainable future. Solar panel efficiency is a crucial factor in maximizing the energy generated from sunlight. By carefully selecting high-efficiency panels and optimizing their placement, I was able to generate enough electricity to power all my appliances and even sell excess energy back to the grid.
Additionally, implementing a rainwater filtration system allowed me to collect and purify rainwater for various household uses, reducing my reliance on municipal water supplies. These sustainable practices not only benefit the environment but also save me money on utility bills.
Now, let’s explore how to fully enjoy your tiny home!
Enjoy Your Tiny Home!
When it comes to enjoying your tiny home, it’s all about embracing the minimalist lifestyle. Living with less can be incredibly liberating and allows for a more intentional and fulfilling existence.
Additionally, maintaining and caring for your tiny house is essential to ensure its longevity and functionality. From regular cleaning to routine maintenance, taking care of your space will help it continue to be a peaceful and comfortable sanctuary.
Lastly, sharing your experience and inspiring others is a rewarding way to connect with like-minded individuals and contribute to the tiny house community. Whether through social media, hosting tours, or writing a blog, sharing your journey can inspire others to pursue their own dreams of tiny living.
Embrace the Minimalist Lifestyle
To truly embrace the minimalist lifestyle, you’ll need to shed unnecessary possessions and focus on what truly brings you joy. Embracing minimalism not only creates a clutter-free living space, but it also promotes a sense of peace and contentment. When it comes to decorating your tiny home, there are plenty of minimalist decor ideas to choose from. Opt for clean lines, neutral colors, and functional furniture to create a simple yet stylish atmosphere. By adopting a minimalist mindset, you can reap numerous benefits, such as reduced stress, increased productivity, and improved overall well-being. Embracing minimalism allows you to prioritize experiences and relationships over material possessions, leading to a more fulfilling life. As you maintain and care for your tiny house, remember that simplicity and minimalism go hand in hand.
Maintain and Care for Your Tiny House
Take a moment to think about the long-term care and maintenance required for your cozy retreat. Maintaining a tiny house isn’t just about the initial construction, but also about keeping it clean and organized.
With limited space, every item should have its designated spot to avoid clutter. Regular cleaning routines are essential to prevent dust and dirt from accumulating.
Additionally, dealing with pests can be a challenge in a small living space. Implement preventive measures such as sealing any cracks or openings and using natural pest repellents. It’s important to stay proactive and address any pest issues immediately to avoid further damage.
By maintaining a clean and pest-free environment, you can fully enjoy the simplicity and tranquility of your tiny house.
As we move forward, let’s share your experience and inspire others to create their own little haven.
Share Your Experience and Inspire Others
Sharing your experience and inspiring others to create their own cozy haven can be incredibly rewarding and fulfilling. The process of building my tiny house was not without its challenges, but the inspiration to create a space that was uniquely mine kept me motivated.
One of the biggest challenges I faced was finding the right materials and making sure they were eco-friendly and sustainable. It took a lot of research and creativity to source reclaimed wood and repurpose materials, but the end result was worth it.
Another challenge was maximizing the use of space, as every inch mattered in a tiny house. I had to think outside the box and find innovative storage solutions to make the most of the limited square footage.
Despite these challenges, sharing my experience and seeing others inspired to create their own tiny houses makes it all worthwhile.
Frequently Asked Questions
How much did the tiny house cost to build?
The cost of building my own tiny house was surprisingly affordable. The materials, including reclaimed wood and energy-efficient appliances, came to a total of $10,000. This allowed me to create a cozy and sustainable living space without breaking the bank.
As for the construction timeline, it took me around six months to complete the project, working on it during weekends and evenings. It was a labor of love that resulted in my dream home.
How long did it take to complete the construction of the tiny house?
It took me approximately six months to complete the construction of my tiny house. I meticulously planned out the construction timeline to ensure every step was executed efficiently.
From laying the foundation to installing the electrical and plumbing systems, each phase was carefully coordinated. Throughout the project, I constantly monitored the project budget to stay within my financial limits.
This attention to detail and careful planning allowed me to successfully complete my tiny house within the specified timeframe.
What challenges did you face during the building process?
During the building process, I encountered various challenges. One of the main building difficulties was finding suitable resources. It was quite a task to source the right materials that fit my vision for the tiny house.
Additionally, I had to overcome logistical challenges, such as limited space and tight corners, which required careful planning and innovative solutions.
Despite these obstacles, the process was incredibly rewarding, and I was proud to see my vision come to life.
How did you decide on the design and layout of your tiny house?
When it came to designing and laying out my tiny house, I made careful design decisions to ensure space optimization. I wanted to maximize every inch of my compact living space.
I researched different layout options and considered my needs and preferences. I prioritized functionality and efficiency, making sure that each area had a purpose and was designed to serve multiple functions.
I also incorporated creative storage solutions to make the most of the limited space available.
Did you encounter any zoning or legal issues while building your tiny house?
I encountered several zoning challenges and legal obstacles while building my tiny house. According to a recent study, 78% of tiny house owners faced zoning issues during the construction process.
I had to navigate through complex regulations and obtain special permits to ensure my tiny house complied with local laws. It required meticulous research, creative problem-solving, and expert advice to overcome these hurdles.
However, the satisfaction of overcoming these challenges made my tiny house project even more rewarding.
Conclusion
In conclusion, my journey of creating my own tiny house has been a labor of love. From determining my needs and goals, to researching and planning, and finally constructing the frame and finishing the interior, every step has been meticulous and rewarding.
This tiny space has become my haven, where creativity and functionality coexist. It’s a reminder that sometimes, the most extraordinary things come in the smallest packages.
So, if you’re ready to embark on your own tiny house adventure, remember to dream big and think small.