
How long does it take to build a tiny house?
This is a question that many aspiring tiny homeowners ask themselves when embarking on the exciting journey of creating their own compact and efficient living space.
Building a tiny house requires careful planning, research, and a solid understanding of the construction process.
In this article, I will guide you through the step-by-step process of building a tiny house, from research and planning to moving in and enjoying your new home.
We will explore the time it takes to complete each stage, as well as the factors that can affect the overall timeline.
By following this comprehensive guide, you will gain the knowledge and confidence to successfully build your own tiny house and create the lifestyle you desire.
So, let’s dive in and discover just how long it takes to build a tiny house!
Key Takeaways
- Building a tiny house requires careful planning, research, and understanding of the construction process.
- Research local regulations and zoning laws before starting the construction process.
- Create a detailed budget, timeline, and list of materials and tools needed for the project.
- Stay organized and follow a construction timeline for efficient progress.

SOG PowerPint Mini Compact Stainless Steel Multi-Tool |18 Lightweight Specialty Tools & SOG Multitool Pliers Pocket Knife, Stone Wash
- Number of Tools: 18 tools in one multi-tool
- Size and Weight: 3.2-inch closed, 4.2 ounces
- Enhanced Pliers Power: Double leverage for easier use
As an affiliate, we earn on qualifying purchases.
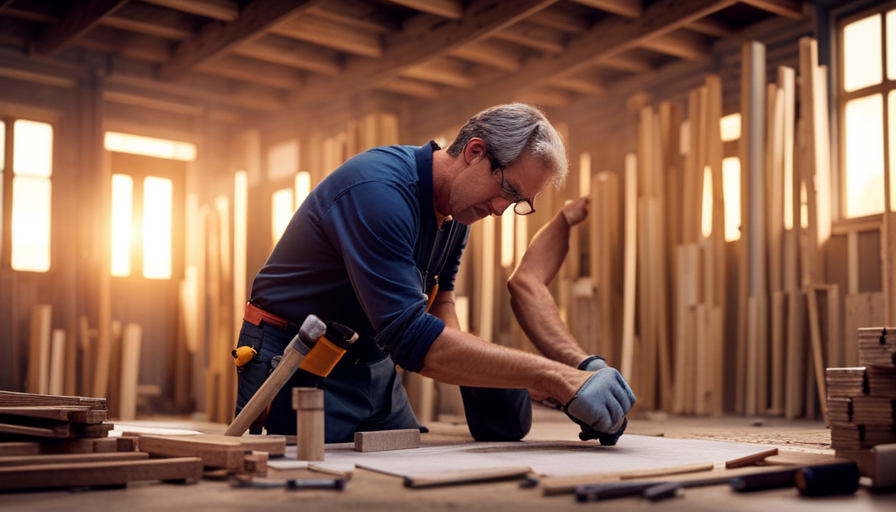
Research and Planning
You’ll need to spend a significant amount of time researching and planning before you can start building your tiny house. Research challenges and planning considerations are crucial in ensuring a successful project.
Firstly, you need to research local regulations and zoning laws to understand the restrictions and requirements for building a tiny house in your area. This includes obtaining necessary permits and understanding any limitations on size or placement.
Additionally, researching different designs and layouts will help you determine the best use of space and functionality for your tiny house. You should also research construction techniques and materials to ensure your tiny house is structurally sound and meets your needs.
Planning considerations include creating a detailed budget, timeline, and list of materials and tools needed for the project. This will help you stay organized and on track throughout the building process.
Finding the right materials and tools is the next step in turning your tiny house dream into a reality.
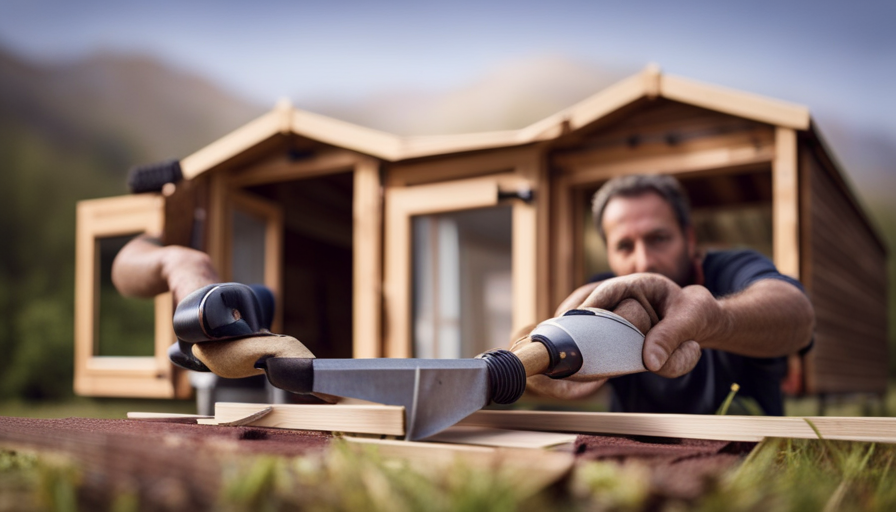
Finding the Right Materials and Tools
To ensure a delightful construction experience, it’s important to gather the perfect materials and tools for your cozy abode. Finding affordable materials is crucial when building a tiny house. Here are three key factors to consider:
-
Salvaged or recycled materials: Look for reclaimed lumber, windows, and doors that can be repurposed for your project. These materials not only add character to your tiny house but also help reduce costs.
-
Cost-effective alternatives: Instead of using expensive building materials, consider using more affordable options. For example, opt for plywood instead of hardwood flooring or vinyl siding instead of cedar shakes. These alternatives can significantly lower your overall expenses.
-
Local suppliers and online resources: Research local suppliers who offer discounts or bulk deals on building materials. Additionally, explore online platforms and forums where individuals sell or give away unused construction materials. This can help you find affordable options and connect with others in the tiny house community.
Selecting the right tools is equally important for a smooth construction process. Invest in high-quality tools that are suitable for your specific needs. Consider tools like a miter saw, circular saw, power drill, and a level. These tools will help you achieve precise cuts, secure connections, and ensure a sturdy structure.
With the perfect materials and tools in hand, you’re ready to move on to building the foundation and frame of your tiny house.
Building the Foundation and Frame
Once you’ve gathered your materials and tools, it’s time to lay the groundwork and construct the sturdy foundation and frame that will be the backbone of your cozy abode. Before you begin, make sure to check with your local authorities to obtain any necessary building permits. These permits ensure that your tiny house meets safety standards and regulations.
When building the foundation, start by clearing the area and leveling the ground. This will provide a stable base for your tiny house. Next, lay down a layer of gravel to improve drainage and prevent moisture buildup. Once the ground is prepared, you can pour a concrete slab or construct a pier and beam foundation, depending on your preferences and local regulations.
Once the foundation is complete, you can start building the frame of your tiny house. Begin by constructing the floor frame, using pressure-treated lumber for added durability. Next, build the walls and roof trusses, following the measurements and design plans you have prepared. It’s important to ensure that everything is level and square during this process to avoid any structural issues later on.
By following a construction timeline, you can efficiently complete each step of building the foundation and frame. This will help you stay organized and ensure that the construction process progresses smoothly.
Once the foundation and frame are finished, you can move on to the next phase of the project: installing plumbing and electrical systems.
Installing Plumbing and Electrical Systems
When it comes to installing plumbing and electrical systems in a tiny house, I start by carefully planning the layout and making sure it maximizes space efficiency.
Then, I proceed to install plumbing fixtures like sinks, toilets, and showers, ensuring they’re properly connected to the main water supply and wastewater disposal system.
Next, I wire the electrical system, making sure to follow all safety codes and regulations, and then install outlets strategically throughout the house for convenient access to electricity.
Plan the layout and install plumbing fixtures
Designing the layout and adding plumbing fixtures brings the tiny house one step closer to becoming a cozy and functional home. When installing plumbing fixtures, it’s crucial to choose the right layout that maximizes space and ensures efficient water flow.
Careful consideration should be given to the location of sinks, showers, toilets, and water heaters to optimize functionality. Plumbing fixtures should be strategically placed to minimize the need for long pipe runs, reducing the risk of leaks and increasing water pressure.
Additionally, selecting fixtures that are specifically designed for small spaces can further enhance the functionality of the tiny house. Once the layout is finalized and the fixtures are chosen, the next step is to proceed with wiring the electrical system and installing outlets. This will ensure a seamless integration of the plumbing and electrical systems, creating a fully functional and comfortable living space.
Wire the electrical system and install outlets
To create a fully functional and cozy living space, it’s time to wire the electrical system and get those outlets installed. Ensuring electrical safety precautions are followed is crucial during this process. Choosing the right electrical wiring is essential to meet the power needs of the tiny house.
To give you a visual representation, here is a 2 column and 5 row table showcasing the steps involved in wiring the electrical system and installing outlets:
| Step | Description |
|---|---|
| 1 | Plan the layout and mark the locations for outlets |
| 2 | Install electrical wiring according to local codes |
| 3 | Connect the wiring to the circuit breaker panel |
| 4 | Install outlets and switches at designated locations |
| 5 | Test the electrical system for proper functioning |
Once the electrical system is in place, we can move on to the next section, which involves insulation and interior finishing.
Insulation and Interior Finishing
As the walls are caressed with a cozy layer of insulation, the tiny house transforms into a snug sanctuary, ready to embrace its inhabitants. Insulation techniques play a crucial role in maintaining a comfortable temperature inside the tiny house while also reducing energy consumption.
There are various insulation options available for tiny houses, including spray foam, cellulose, and fiberglass. Each option has its own advantages and disadvantages, and the choice depends on factors such as budget, climate, and personal preference.
Interior design trends in tiny houses prioritize functionality and maximizing space. With limited square footage, it’s important to make every inch count. Clever storage solutions, multi-purpose furniture, and open floor plans are popular choices. Additionally, incorporating natural elements such as wood accents or plants can create a warm and inviting atmosphere.
Once the insulation and interior finishing are complete, the tiny house is ready for the next phase: roofing and exterior finishing. This involves installing the roof, siding, windows, and doors to protect the interior from external elements and enhance its aesthetic appeal. The right roofing materials and exterior finishes can not only provide durability and weather resistance but also add character and charm to the tiny house.
Transitioning into the next section, the roofing and exterior finishing are crucial steps in completing the tiny house and turning it into a fully functional and aesthetically pleasing home.
Roofing and Exterior Finishing
When it comes to roofing and exterior finishing for a tiny house, there are two key points to consider. First, it is crucial to properly install the roof and ensure it’s watertight to protect the interior from potential leaks. Additionally, weatherproofing is essential to prevent damage caused by external elements such as rain, wind, or snow.
Finally, finishing the exterior with siding or cladding not only adds visual appeal but also provides additional protection against the elements.
Install the roof and weatherproofing
Installing the roof and weatherproofing creates a cozy and secure sanctuary, shielding you from the elements and sparking a sense of accomplishment.
When it comes to roofing materials for a tiny house, there are several options to consider. Common choices include metal, asphalt shingles, or even eco-friendly materials like recycled rubber. Whatever material you choose, it’s important to ensure proper installation to prevent leaks and maintain the structural integrity of your tiny house.
Additionally, waterproofing techniques should be employed to protect against moisture damage. This can include applying a waterproof membrane under the roofing material and properly sealing all joints and seams.
Once the roof is installed and weatherproofed, it’s time to move on to the next step: finishing the exterior with siding or cladding. This will not only enhance the aesthetic appeal of your tiny house but also provide further protection against the elements.
Finish the exterior with siding or cladding
To make your sanctuary truly stand out, it’s time to wrap it up in a fashionable exterior by adding siding or cladding. When sourcing materials for your tiny house exterior, consider durability, maintenance requirements, and aesthetics.
Common siding options include wood, vinyl, fiber cement, and metal. Each material has its own benefits and drawbacks, such as cost, ease of installation, and resistance to weathering. Researching and comparing prices from different suppliers is crucial to ensure you stay within budget. Additionally, factor in the cost of any necessary tools or equipment for installation.
Remember that the exterior of your tiny house is not only for visual appeal but also for protecting the structure from the elements. Once the siding or cladding is in place, you can move on to installing fixtures and appliances, turning your tiny house into a fully functional home.
Installing Fixtures and Appliances
The process of outfitting the tiny house with fixtures and appliances is a crucial step in its construction. It is important to choose energy efficient appliances to minimize the environmental impact and maximize the available resources. Additionally, maximizing storage space in a tiny house is essential to ensure functionality and organization.
To achieve this, I have created a table below that showcases some common fixtures and appliances that are commonly used in tiny house construction. This table provides a quick reference for selecting the right items that will fit seamlessly into the limited space.
| Fixtures and Appliances | Energy Efficiency | Storage Space |
|---|---|---|
| Compact Refrigerator | High | Limited |
| Induction Cooktop | High | Minimal |
| Washer/Dryer Combo | Medium | Compact |
| Tankless Water Heater | High | Small |
After carefully considering these factors, I have installed fixtures and appliances that meet my needs while maximizing the available space. With the appliances now in place, I can move on to the next step of painting and decorating the tiny house, adding the finishing touches to make it feel like a cozy home.
Painting and Decorating
Before moving on to the next step, I need to prime and paint the interior walls of my tiny house. This will ensure a smooth and even finish, as well as provide a protective layer against moisture and stains.
Once the walls are painted, I can add decorative touches and personalize the space to make it feel like home. This could include hanging artwork, adding wallpaper accents, or incorporating unique furniture pieces.
Prime and paint the interior walls
Once you’ve gathered all your supplies and chosen the perfect color, step back and watch as the interior walls of your tiny house come alive with a fresh coat of paint, transforming the space into a cozy and inviting sanctuary.
To ensure a professional finish, it’s important to employ proper painting techniques. Begin by preparing the walls, removing any dust or debris. Then, apply a coat of primer to create a smooth surface and enhance paint adhesion.
Once the primer is dry, use a roller or brush to carefully apply the chosen color, working from the top down. Consider using color palettes that complement the overall aesthetic of your tiny house, creating a harmonious and visually appealing environment.
With the walls painted, it’s time to move on to the next step: adding decorative touches and personalization to truly make your tiny house feel like home.
Add decorative touches and personalization
Now, it’s time to infuse your unique style and personality into every nook and cranny of your cozy sanctuary, turning it into a space that truly speaks to your soul.
Adding decorative accents and personalized touches will give your tiny house a touch of charm and make it feel like home. Consider incorporating elements such as artwork, throw pillows, curtains, and rugs that reflect your individual taste. Choose colors and patterns that evoke a sense of calm and tranquility.
Don’t forget to display cherished mementos and photographs that hold special meaning for you. These personal touches will create a warm and inviting atmosphere.
Once you have added these decorative touches and personalized elements, you can move on to the final touches and inspections, ensuring that every aspect of your tiny house is perfect before you embark on your new adventure.
Final Touches and Inspections
After adding the final touches and getting the necessary inspections, the tiny house will be ready to welcome its new owners with its cozy charm. The final touches involve adding those special details that truly personalize the space and make it feel like home. This can include things like hanging curtains, installing shelving units, and placing decorative items such as artwork or plants. Each decision is carefully considered to ensure that the tiny house reflects the unique style and preferences of its owners.
Once the final touches are in place, it’s time for the final inspections. These inspections are crucial to ensure that the tiny house meets all safety and building code requirements. Inspectors will check for proper electrical wiring, plumbing connections, and structural integrity. They will also verify that the tiny house is compliant with zoning regulations and any applicable permits have been obtained.
After passing the final inspections, the tiny house is officially ready for its new owners to move in and enjoy. The attention to detail and thoroughness of the final touches and inspections ensures that the tiny house is not only aesthetically pleasing, but also safe and functional. So, get ready to start a new chapter in your life as you step into your cozy, personalized tiny home.
Moving In and Enjoying Your Tiny Home
As you step through the threshold of your cozy sanctuary, a world of boundless possibilities and cherished memories awaits in your diminutive haven. Moving into your tiny home can be an exciting and fulfilling experience, but it also requires careful planning and organization.
Here are some tips to help you make the most of your small space:
-
Maximize storage: In a tiny home, every inch counts. Invest in clever storage solutions such as under-bed drawers, wall-mounted shelves, and multi-functional furniture. Utilize vertical space to its fullest potential by installing hooks and racks for hanging items.
-
Declutter regularly: With limited space, it’s crucial to keep your tiny home clutter-free. Regularly evaluate your belongings and get rid of items you no longer need or use. Adopt a minimalist mindset and focus on keeping only the essentials.
-
Create zones: Divide your tiny home into functional zones to make the most of the available space. Designate areas for sleeping, dining, working, and relaxing. Use room dividers or furniture placement to create visual separation between these zones.
By following these moving-in tips and organizing small spaces, you can transform your tiny home into a comfortable and functional living space. Embrace the simplicity and enjoy the freedom that comes with living in a cozy haven of your own making.
Frequently Asked Questions
How much does it cost to build a tiny house?
The cost of building a tiny house can vary depending on factors such as location, size, and materials used. However, on average, the materials cost for building a tiny house ranges from $10,000 to $30,000.
It’s important to note that this estimate doesn’t include labor costs or other expenses like permits and utilities.
The building timeline for a tiny house can take anywhere from a few weeks to several months, depending on the complexity of the design and the availability of resources.
What are the legal requirements for building a tiny house?
To legally build a tiny house, one must adhere to certain requirements. These include obtaining the necessary legal permits and complying with zoning regulations.
Legal permits ensure that the construction process meets safety and building code standards.
Zoning regulations dictate where and how a tiny house can be built, considering factors like minimum lot size, setbacks, and occupancy restrictions.
It’s crucial to thoroughly research and understand these legal requirements before embarking on a tiny house construction project.
How do I choose the right location for my tiny house?
When choosing the right location for my tiny house, I consider zoning restrictions and accessibility to utilities.
For example, in a hypothetical case, I would research local zoning laws to ensure my tiny house can be legally placed. I would also prioritize finding a location with easy access to utilities such as water, electricity, and sewage.
These factors are crucial in determining the feasibility and functionality of my tiny house.
Can I build a tiny house on wheels or does it have to be stationary?
You can definitely build a tiny house on wheels if you prefer mobility and flexibility. Building a tiny house on wheels allows you to easily move and travel with your home. It offers the advantage of being able to change your location whenever you want.
However, a stationary tiny house has its own benefits, such as stability and a more permanent living situation. It ultimately depends on your personal preferences and lifestyle choices.
Are there any financing options available for building a tiny house?
Financing options for building a tiny house are like a bridge to your dream home. When it comes to tiny house loans, there are a few avenues to explore.
First, consider personal loans from banks or credit unions. Some lenders even specialize in tiny house financing. Alternatively, you can explore crowdfunding platforms or RV loans.
Remember, researching and comparing interest rates and terms will help you find the best financing option for your tiny house project.
Conclusion
After months of research, planning, and hard work, my tiny house is finally complete. It stands proudly, a symbol of my determination and resourcefulness.
The foundation and frame are strong, providing a sturdy base for my new home. The plumbing and electrical systems are seamlessly integrated, ensuring comfort and convenience. The insulation and interior finishing create a cozy atmosphere, while the fixtures and appliances add functionality.
With a fresh coat of paint and decorative touches, my tiny house is truly a work of art. Now, as I step inside, I’m ready to begin this new chapter of my life, embracing the simplicity and freedom that comes with living in a tiny home.