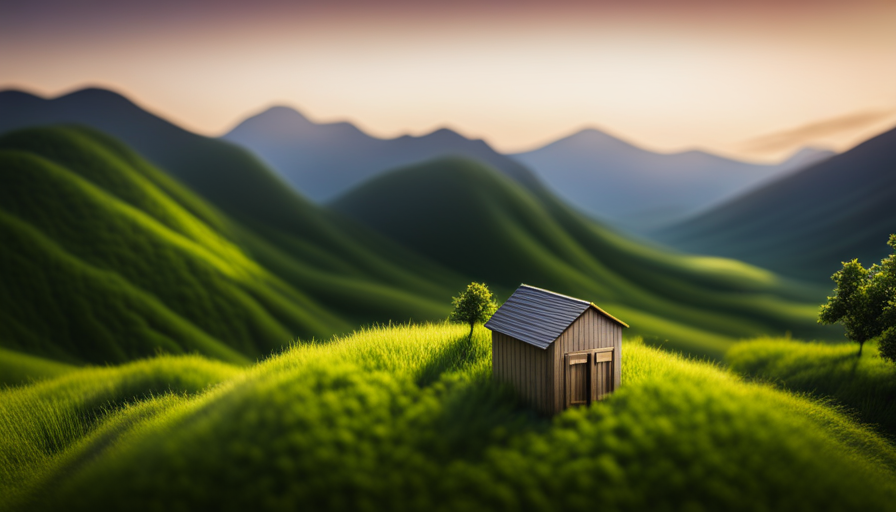

When I first decided to build my own small house, I had no idea how long it would take. I looked online for help, but the information I found was scattered and inconsistent. So today, I want to share my experience with you to give you a better idea of how long it takes to build a tiny house.
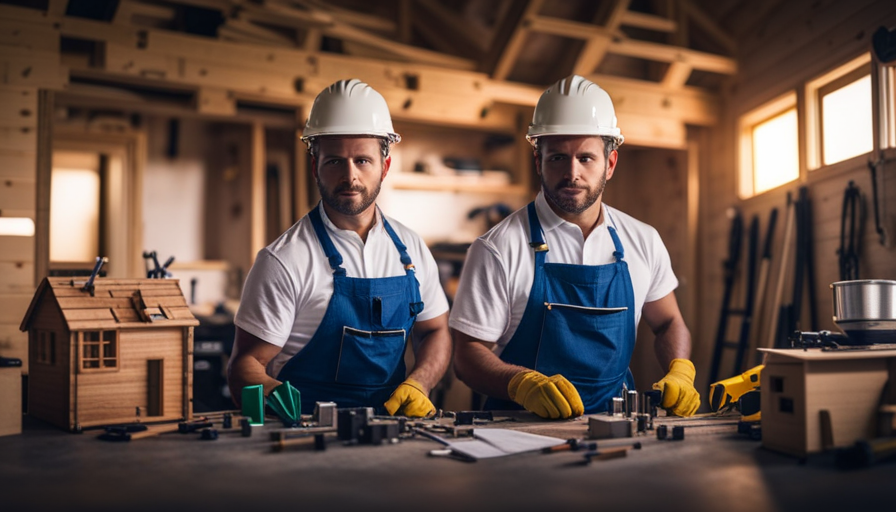
Let me start by telling you about my friend Mike. He had previous construction experience and decided to build his own tiny house from scratch. With his expertise, he estimated that it would take him around six months to complete the project.
Now, keep in mind that building a tiny house is a multi-step process. It starts with the planning and design phase, where you determine the layout and gather materials. From there, you move on to the foundation and framing, followed by electrical and plumbing installation, insulation, interior walls, flooring, and ceiling.
After that, it’s time for interior finishes and paint, exterior finishes and roofing, and finally, the plumbing and electrical connections. Once all that is done, you can add the final touches and start furnishing your tiny house.
Throughout this article, I will walk you through each phase in detail, giving you a better understanding of the time it takes to build a tiny house when you have experience.
So let’s get started!
Key Takeaways
- Building a tiny house typically takes around six months to complete.
- The process involves several phases, including planning and design, foundation and framing, electrical and plumbing installation, insulation, and interior walls.
- Attention to detail and adherence to code regulations are essential in each phase.
- Factors such as budget, sustainable design options, space maximization, natural light, and various materials (such as hardwood or laminate flooring, drywall or beadboard ceilings) should be considered during the construction process.
Planning and Design Phase
With some know-how, it won’t take you long to come up with a killer design plan for your tiny house.
The first step in the planning and design phase is to establish a budget and consider financial aspects. Determine how much you’re willing to spend on materials, tools, and labor. This will help you make informed decisions throughout the process and avoid any unexpected expenses.
Once you have a budget in mind, it’s time to focus on sustainable and eco-friendly design options. Consider using recycled materials, installing energy-efficient appliances, and incorporating renewable energy sources like solar panels. These choices not only minimize your environmental impact but also save you money in the long run.
During this phase, it’s essential to be organized and detail-oriented. Sketch out your floor plan and make sure it maximizes the available space while still meeting your needs. Consider storage solutions, multi-purpose furniture, and efficient use of natural light.
By carefully planning and designing your tiny house, you lay the foundation for a successful build.
Next, we’ll dive into the exciting world of foundation and framing, where your dream home starts to take shape.
Foundation and Framing
Once the foundation and framing are complete, the real magic of constructing a tiny house begins. The foundation construction is crucial as it provides stability and support to the entire structure. I started by excavating the site and pouring a concrete slab, ensuring it was level and properly reinforced. This step is essential to prevent any future issues with the stability of the tiny house.
Next, I moved on to framing techniques, which involved constructing the walls, floor, and roof. I used traditional stick framing, which allowed for flexibility and easy customization. This involved measuring and cutting each piece of lumber precisely to ensure a snug fit. I also used advanced framing techniques to minimize waste and improve energy efficiency.
During the framing process, I relied on these four key techniques:
-
Stud spacing: I spaced the studs at 16 inches on center to provide structural integrity and support.
-
Header installation: I installed headers above doors and windows to distribute weight evenly and prevent sagging.
-
Sheathing: I used plywood or OSB sheathing to strengthen the structure and provide a solid base for exterior finishes.
-
Truss installation: I used pre-made trusses to simplify the roofing process and ensure a strong and durable roof.
With the foundation and framing complete, it’s time to move on to the next step: electrical and plumbing installation. This phase is critical for ensuring the tiny house is functional and ready for occupancy.
Electrical and Plumbing Installation
Now that the foundation and framing are complete, it’s time to dive into the exciting world of electrical and plumbing installation. This is where the house comes alive with the flick of a switch and water flows through its veins like a mighty river.
When it comes to electrical and plumbing installation in a tiny house, it’s crucial to adhere to electrical and plumbing code regulations. These regulations ensure safety and efficiency in the system.
One common challenge in electrical installation is ensuring that all outlets, switches, and light fixtures are properly wired and grounded. It’s important to have a thorough understanding of electrical systems and to follow best practices to avoid any potential hazards.
Similarly, plumbing installation requires careful attention to detail. It involves connecting pipes, installing fixtures, and ensuring proper water flow and drainage. It’s essential to follow plumbing code regulations to prevent leaks and maintain the integrity of the system.
As I move forward with the installation process, I must be diligent in ensuring that all electrical and plumbing elements are up to code and function properly.
With the electrical and plumbing installation complete, it’s time to move on to the next step of insulation and interior walls, where the house truly starts to take shape.
Insulation and Interior Walls
When it comes to insulation and interior walls in a tiny house, it’s crucial to ensure a comfortable living environment. I always start by carefully installing insulation to regulate the temperature inside the house, making it cozy in both hot summers and cold winters.
Once the insulation is in place, I put up interior walls to divide the space and create distinct rooms, maximizing the functionality of the tiny house.
Install insulation to regulate temperature
To regulate the temperature in your tiny house, you’ll want to start by installing insulation. There are various types of insulation available, such as fiberglass, spray foam, and cellulose. Each type has its own benefits and drawbacks, so it’s important to research and choose the one that best fits your needs.
When estimating the cost of insulation, consider factors such as the size of your tiny house and the type of insulation you choose. Fiberglass insulation tends to be cheaper, while spray foam insulation can be more expensive but offers better insulation properties.
Once the insulation is installed, you can move on to the next step of putting up interior walls to divide the space and create rooms. By properly insulating your tiny house, you’ll be able to maintain a comfortable temperature throughout the year.
Put up interior walls to divide the space and create rooms
Putting up interior walls in your tiny house is like adding the final strokes to a masterpiece, transforming an open space into distinct rooms with their own unique purposes. It’s an exciting step that allows you to create functional spaces and maximize storage.
First, consider the layout and functionality of your tiny house. Determine where you want to place the walls to create separate rooms such as a bedroom, bathroom, kitchen, and living area. This will help you make the most of the available space and ensure that each room serves its purpose efficiently.
Once you have a plan in mind, start by framing the walls. Use lightweight materials that won’t add unnecessary weight to your tiny house. Consider using pocket doors or sliding doors to save space and add a touch of modernity.
After framing, it’s time to insulate the walls for soundproofing and temperature regulation. Use insulation materials that are efficient and eco-friendly, such as recycled denim or spray foam.
Finish off the walls with your choice of materials, such as drywall, plywood, or reclaimed wood. Consider using built-in shelves or storage units to maximize storage and keep your tiny house organized.
With the interior walls in place, you’re one step closer to completing your tiny house. The next section will focus on flooring and ceiling, bringing you even closer to your dream home.
Flooring and Ceiling
When it comes to flooring in a tiny house, I find that laying down hardwood or laminate materials is the best choice. These options are not only durable but also easy to clean and maintain.
As for the ceiling, I prefer installing drywall for a smooth and seamless finish, although other materials such as beadboard or tongue and groove can also be used depending on personal preference and style.
Overall, flooring and ceiling installation are important steps in the construction process that contribute to the overall aesthetics and functionality of the tiny house.
Lay down flooring materials such as hardwood or laminate
First, measure and cut the hardwood or laminate flooring to fit perfectly in your tiny house, ensuring a seamless and polished look. When deciding between hardwood and laminate flooring, it’s important to consider the pros and cons of each. Hardwood offers a timeless and natural beauty, but it can be more expensive and requires regular maintenance. On the other hand, laminate is more cost-effective, easy to install, and requires less maintenance, but it may not have the same level of durability and authenticity as hardwood. Once you’ve chosen your flooring material, lay it down according to the manufacturer’s instructions, starting from one corner and working your way across the room. As you lay each piece, be sure to use spacers to maintain the proper expansion gap. Once the flooring is complete, you can move on to installing the ceiling, whether it’s drywall or another material, to further enhance the aesthetic appeal of your tiny house.
Install the ceiling, whether it’s drywall or another material
Now it’s time to choose and install the ceiling material, whether you go with classic drywall or opt for a more unique and creative option.
When it comes to installing alternative materials, there are various options to consider. Here are three popular choices:
-
Wood paneling: This can give your tiny house a rustic and cozy feel. It’s relatively easy to install and provides natural warmth to the space.
-
Tin tiles: These can add a touch of vintage charm to your tiny house. They’re durable, easy to clean, and can provide an interesting visual element to the ceiling.
-
Bamboo: If you’re looking for an eco-friendly option, bamboo is a great choice. It’s sustainable, lightweight, and gives a modern and clean look to the ceiling.
Choosing the right ceiling material is important as it can greatly impact the overall aesthetic of your tiny house.
After completing the ceiling installation, we can move on to the next section about kitchen and bathroom fixtures, where we’ll make important decisions about these essential areas.
Kitchen and Bathroom Fixtures
With some experience under your belt, you’ll be amazed at how quickly kitchen and bathroom fixtures come together in your tiny house.
When it comes to the kitchen, there are a few kitchen renovation tips that can help you make the most of the limited space. Opting for compact appliances and utilizing vertical storage solutions can maximize the functionality of your kitchen. Consider installing a wall-mounted pot rack or magnetic knife strip to free up valuable counter space. Additionally, incorporating pull-out shelves and sliding drawers in your cabinets can provide easy access to your cooking essentials.
Moving on to the bathroom, storage solutions are equally important. Utilize wall-mounted cabinets or floating shelves to keep your toiletries organized and within reach. Installing a pedestal sink or a wall-mounted vanity can help create the illusion of more space. Consider adding a mirrored medicine cabinet to provide additional storage while also doubling as a reflective surface to make the bathroom appear larger.
As you wrap up the installation of kitchen and bathroom fixtures, it’s time to move on to interior finishes and paint.
Interior Finishes and Paint
To create a cozy and inviting atmosphere in your tiny house, consider incorporating your personal style through interior finishes and paint.
One of the most important aspects to consider when it comes to interior finishes is the choice of color schemes. Selecting the right colors can greatly impact the overall look and feel of your tiny house. Neutral colors such as whites, beiges, and grays can create a sense of openness and tranquility, while bold colors like blues and greens can add a pop of personality and vibrancy. It’s important to choose colors that complement each other and create a cohesive look throughout the space.
When it comes to choosing the right paint, there are a few factors to consider. First, you want to make sure you select a high-quality paint that will withstand the wear and tear of daily living. Look for paints that are specifically designed for interior use and have good durability. Additionally, consider the finish of the paint. Matte or eggshell finishes are popular choices for tiny houses as they provide a subtle sheen and are easy to clean.
Interior finishes and paint play a crucial role in creating the desired ambiance in your tiny house. By carefully selecting color schemes and choosing the right paint, you can achieve a space that reflects your personal style and creates a warm and inviting atmosphere.
Now, let’s move on to the next section about exterior finishes and roofing.
Exterior Finishes and Roofing
When it comes to the exterior finishes and roofing of a tiny house, there are two key points to consider. The first is the installation of siding or cladding materials to the exterior walls, which not only enhances the aesthetics but also provides protection against the elements.
Secondly, it’s crucial to put on the roofing materials to ensure the tiny house is well-insulated and shielded from rain, snow, and other weather conditions.
These steps are essential in completing the construction of a tiny house and ensuring its durability and longevity.
Install siding or cladding materials to the exterior walls
Once the siding or cladding materials are in place, the tiny house starts to don its fashionable exterior attire. Installing siding is an important step in the construction process as it not only enhances the aesthetics of the tiny house but also provides protection against the elements. When choosing cladding materials, it is essential to consider factors such as durability, weather resistance, and maintenance requirements. Popular options include vinyl, wood, fiber cement, and metal. To engage the audience, let’s take a look at a comparison table showcasing the pros and cons of these materials:
| Material | Pros | Cons |
|---|---|---|
| Vinyl | Low maintenance and wide range of styles | Prone to cracking and fading |
| Wood | Natural beauty and can be painted | Requires regular maintenance |
| Fiber Cement | Durable and resistant to rot and insects | Can be more expensive |
| Metal | Long-lasting and fire-resistant | Can be noisy during rain or hailstorms |
With the siding installed, the next step is to put on the roofing materials to protect your tiny house from the elements.
Put on the roofing materials to protect your tiny house
Now it’s time to protect your tiny house from the elements by putting on the roofing materials. Roofing material selection is an important step in this process. You’ll want to choose materials that are durable and weather-resistant, such as asphalt shingles or metal roofing. Consider the climate in your area and the overall aesthetic you’re going for when making this decision.
Once you’ve selected your materials, it’s time for the roofing installation techniques. Start by measuring and cutting the materials to fit the roof properly. Then, secure them in place using nails or screws, making sure to overlap each piece to ensure a watertight seal. Remember to follow the manufacturer’s instructions and consult with professionals if needed.
With the roofing materials in place, you can now move on to the next section about plumbing and electrical connections.
Plumbing and Electrical Connections
When it comes to connecting the plumbing system in a tiny house, one of the key points is to ensure a proper connection to the main water and sewer lines. This involves carefully installing the necessary pipes and fixtures to ensure a smooth flow of water and efficient disposal of waste.
As for the electrical system, it’s crucial to hook it up to the main power source, ensuring a safe and reliable supply of electricity throughout the tiny house. This involves connecting the wiring, outlets, and switches, while also ensuring compliance with electrical codes and safety regulations.
Connect the plumbing system to the main water and sewer lines
To successfully connect the plumbing system to the main water and sewer lines, you’ll need to navigate through the intricate web of pipes, weaving together the lifeblood of your tiny home, until every faucet and drain pulsates with the promise of convenience and comfort. It’s crucial to understand the layout of your plumbing system and ensure proper connections to avoid any issues down the line. Here’s a helpful table that outlines the steps involved in connecting the plumbing system:
| Step | Description |
|---|---|
| 1 | Identify the main water and sewer lines |
| 2 | Measure and cut the necessary pipes |
| 3 | Install the pipes and fittings |
| 4 | Test for leaks and troubleshoot common issues |
By following these steps, you can ensure a smooth and efficient connection of your plumbing system. Once the plumbing is successfully connected, it’s time to move on to the next crucial step: hooking up the electrical system to the main power source.
Hook up the electrical system to the main power source
Connecting the electrical system to the main power source is a crucial step in ensuring the functionality and convenience of your tiny home. Before starting, it’s important to take electrical system safety precautions to avoid any potential hazards. This includes turning off the main power supply and wearing protective gear.
Once the safety measures are in place, the next step is to connect the electrical panel to the main power source. This involves wiring the circuit breakers, grounding the system, and properly labeling each circuit. It’s important to follow local electrical codes and regulations to ensure compliance and safety.
Common electrical issues in tiny houses include overloaded circuits, improper grounding, and faulty wiring. These can lead to electrical failures, power outages, or even fire hazards. To avoid these issues, it’s recommended to hire a licensed electrician or seek professional advice.
With the electrical system successfully connected, you can now move on to the final touches and furnishing of your tiny home.
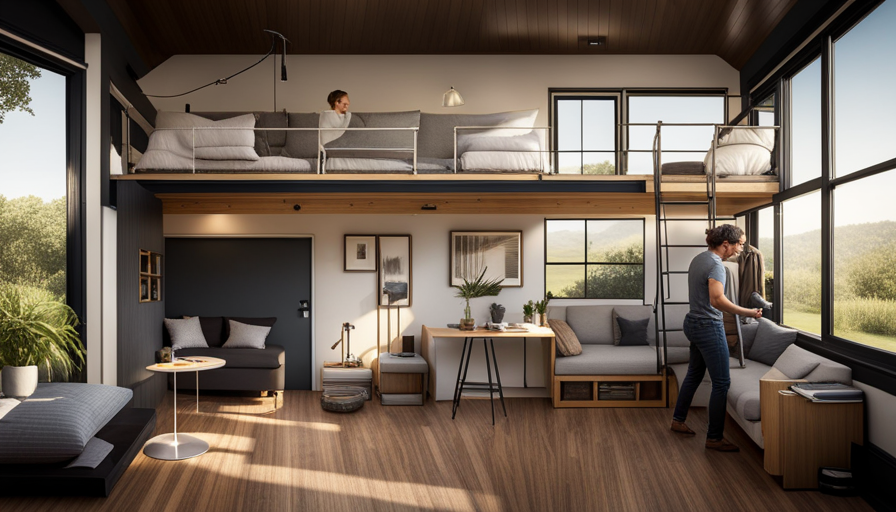
Final Touches and Furnishing
When it comes to the final touches and furnishing of a tiny house, there are a few key points to consider.
First, you’ll need to install fixtures such as lighting, switches, and outlets. This is an important step in making your tiny house functional and comfortable.
Once the electrical connections are in place, it’s time to furnish your tiny house with furniture, appliances, and decor. This is where you can really make your tiny house feel like home and reflect your personal style.
With the right fixtures and furnishings, your tiny house will be ready for you to move in and enjoy.
Install fixtures like lighting, switches, and outlets
After all the hard work, it’s time to put the finishing touches on the tiny house by installing fixtures like lighting, switches, and outlets.
When it comes to lighting design, I believe it’s essential to create a warm and inviting atmosphere. I carefully plan the placement of lights to ensure optimal illumination in each space. Additionally, I prioritize energy efficiency by using LED bulbs and fixtures that consume less power.
As for switches and outlets, I make sure they are conveniently located and easily accessible throughout the house. This ensures a seamless and user-friendly experience for the future occupants.
With the fixtures in place, it’s time to move on to the next step of furnishing your tiny house with furniture, appliances, and decor.
Furnish your tiny house with furniture, appliances, and decor
Now that you’ve finished installing fixtures, it’s time to make your tiny house feel like home by filling it with furniture, appliances, and decor, just like sprinkling the final touches on a delicious cake. Choosing the right furniture and appliances is crucial in maximizing the limited space of a tiny house. Opt for multi-functional pieces such as a sofa that can also be used as a bed or a dining table that can be folded and stored away when not in use. Consider lightweight and compact appliances that are energy-efficient to save space and reduce your carbon footprint. When decorating your tiny house, keep in mind the minimalist approach to avoid clutter. Use neutral colors to create a sense of openness and add pops of color through accent pieces like pillows or artwork. Don’t forget to incorporate storage solutions such as wall-mounted shelves or under-bed storage to keep your space organized and clutter-free.
| Furniture | Appliances |
|---|---|
| Sofa bed | Compact refrigerator |
| Folding dining table | Induction cooktop |
| Wall-mounted shelves | Combination washer-dryer |
| Under-bed storage | Smart TV |
Frequently Asked Questions
How much does it cost to build a tiny house?
The cost of building a tiny house varies depending on several factors. These factors include the size and design of the house, the materials used, and the location.
On average, the cost can range from $20,000 to $100,000 or more. It’s important to consider expenses such as permits, labor, and utilities. Additionally, custom features and high-quality materials can significantly increase the overall cost.
Proper planning and budgeting are essential to ensure a successful and affordable tiny house building project.
What tools and equipment are needed to build a tiny house?
To build a tiny house, you’ll need a list of essential tools and safety equipment. Some essential tools include a power drill, circular saw, tape measure, level, and hammer. Safety equipment like goggles, gloves, and a dust mask are also important.
These tools and equipment will help you complete various tasks, such as cutting lumber, assembling the structure, and installing fixtures. Having the right tools and safety equipment is crucial for a successful tiny house build.
Can a tiny house be built on wheels or does it need a permanent foundation?
Building a tiny house on wheels or a permanent foundation both have their pros and cons. A tiny house on wheels offers mobility and flexibility, allowing you to easily move it to different locations.
On the other hand, a tiny house on a permanent foundation provides stability and a more traditional feel.
To choose the right option, consider factors such as your lifestyle, budget, and future plans. Ultimately, it depends on your preferences and needs.
Are there any legal requirements or permits needed to build a tiny house?
Legal requirements and permits are necessary when building a tiny house. In my experience, I had to obtain a building permit from the local government before starting construction.
Additionally, zoning regulations may dictate where you can place your tiny house and what size it can be.
It’s essential to research and comply with these legal restrictions to avoid any issues during the building process.
Can a tiny house be customized to fit specific needs or preferences?
Customization options for a tiny house are vast, allowing you to tailor it to your specific needs and preferences. You can choose the layout, materials, and finishes to create a unique living space.
Pros of customizing a tiny house include maximizing functionality, optimizing storage, and reflecting your personal style. However, there are cons to consider, such as increased costs, longer construction time, and potential challenges in meeting building codes and regulations.
Conclusion
In conclusion, building a tiny house is an incredibly rewarding experience. From the initial planning and design phase to the final touches and furnishing, every step is filled with excitement and anticipation.
With enough experience, one can efficiently navigate through each phase, saving time and ensuring a smooth construction process. As the tiny house takes shape, a sense of accomplishment grows, fueling the desire to see the final result.
The wait is almost over, the tiny house is almost complete. Stay tuned for the big reveal and prepare to be amazed.