
Congratulations on choosing to embark on the adventure of tiny houses on wheels! You are about to start a journey that will test your patience, creativity, and do-it-yourself skills. But fret not, with the right guidance and determination, you can build your very own miniature dream home on wheels.
In this step-by-step guide, I will walk you through the process of designing and constructing a tiny house on wheels. From choosing the right materials to ensuring safety and compliance, I will cover everything you need to know to turn your vision into a reality.
But before we dive in, let’s take a moment to appreciate the irony of building a tiny house on wheels. It’s like trying to fit an elephant into a shoebox or squeezing a camel through the eye of a needle. However, with a touch of ingenuity and some clever maneuvering, we can make the impossible possible.
So grab your tool belt, put on your construction hat, and let’s get started on this exciting journey of building a tiny house on wheels!
Key Takeaways
- Importance of choosing durable and energy-efficient materials
- Maximizing storage in a small space
- Careful planning of plumbing layout for efficient water flow and waste management
- Understanding building codes and regulations for necessary standards and requirements

Tiny House Plans, 170 Sq Ft, DIY Plans for Wheeled Cozy Retreat, Build Your Own Tiny Home, 170thow1
COMPLETE PLANS: Detailed blueprint package includes full construction plans, materials list, and cutting diagrams to build your own…
As an affiliate, we earn on qualifying purchases.
As an affiliate, we earn on qualifying purchases.
Designing Your Tiny House on Wheels
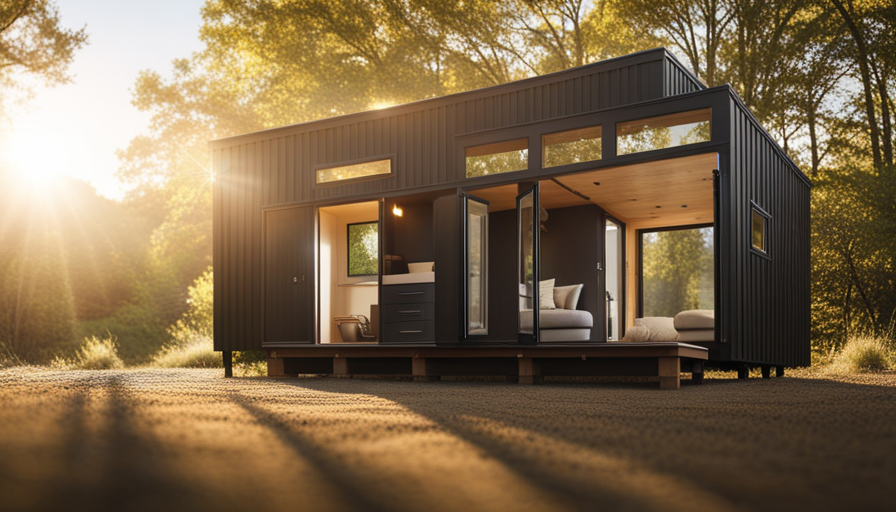
Now that you’ve decided to take on the exciting challenge of building a tiny house on wheels, it’s time for you to start designing it and bringing your vision to life.
When it comes to designing a tiny house, there are a few key factors to consider. First and foremost, you’ll want to stay up-to-date with the latest tiny house design trends. This will ensure that your tiny house is not only functional but also aesthetically pleasing. Some popular trends include using natural materials, incorporating large windows for ample natural light, and utilizing multi-purpose furniture to maximize space.
Another important aspect of designing your tiny house is maximizing storage in a small space. With limited square footage, it’s crucial to make the most of every inch. Consider utilizing vertical space by incorporating built-in shelves or using loft areas for storage. Additionally, think about incorporating hidden storage solutions, such as under-bed storage or utilizing the space under stairs.
As you finalize your design, keep in mind the importance of choosing the right materials for your tiny house. The materials you select will impact the overall weight, durability, and energy efficiency of your home. Transitioning into the next section about choosing the right materials, it’s essential to carefully consider your options to ensure your tiny house is built to last.

Olympia Tools 85-188 Pack-N-Roll Folding Collapsible Service Cart, 150LB Capacity, Black
Portable Collapsible Cart: This service cart keep all your tools and equipment in one place when needed for…
As an affiliate, we earn on qualifying purchases.
As an affiliate, we earn on qualifying purchases.
Choosing the Right Materials
When designing my tiny house on wheels, it was important for me to select lightweight and durable building materials. I wanted materials that would be strong enough to withstand the rigors of travel, but also wouldn’t add unnecessary weight to my tiny house.
Insulation and energy efficiency were also key considerations for me, as I wanted to ensure that my tiny house would be comfortable and energy efficient in all seasons.
Finally, I made a conscious effort to choose sustainable and eco-friendly options for my materials, as I wanted my tiny house to have a minimal impact on the environment.
Selecting Lightweight and Durable Building Materials
Choose lightweight and sturdy materials for your tiny house on wheels to create a structure that will soar through the open road like a feather on the breeze. When selecting building materials, it’s important to consider their weight and durability.
Opt for lightweight insulation options such as spray foam or rigid foam boards. These provide excellent thermal performance without adding unnecessary weight to your tiny house.
Additionally, choose eco-friendly materials that aren’t just lightweight but also sustainable, such as bamboo or reclaimed wood. These materials not only reduce the overall weight of your tiny house but also minimize your environmental impact.
By carefully selecting lightweight and durable materials, you can ensure that your tiny house on wheels is not only easy to tow but also built to last. This focus on materials sets the stage for the subsequent section on insulation and energy efficiency.
Insulation and Energy Efficiency
To achieve optimal comfort and conserve energy, insulate your tiny home with materials that provide superior thermal performance and enhance energy efficiency. Proper insulation techniques ensure that your tiny house maintains a comfortable temperature year-round, reducing the need for excessive heating or cooling.
Here are three key considerations for insulation and energy efficiency:
-
Use spray foam insulation to create a seamless and airtight barrier, preventing heat loss and air leakage.
-
Install double-paned windows with low-emissivity coatings to minimize heat transfer and improve insulation.
-
Opt for energy-efficient appliances, such as a compact refrigerator and a tankless water heater, to reduce energy consumption.
Implementing these insulation and energy efficiency measures will not only make your tiny house more comfortable, but it’ll also help you save on energy costs.
In the next section, we’ll explore sustainable and eco-friendly options to further enhance your tiny house on wheels.
Sustainable and Eco-Friendly Options
By incorporating sustainable and eco-friendly options into your tiny abode, you can create a harmonious and environmentally conscious living space that leaves a positive footprint on the planet.
When it comes to building a tiny house on wheels, there are several sustainable building methods you can employ. One option is to use reclaimed or recycled materials for construction. This not only reduces waste but also gives your tiny home a unique and rustic charm.
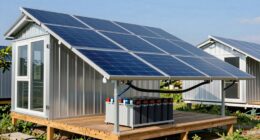
Additionally, you can incorporate renewable energy sources such as solar panels or wind turbines to power your tiny house. These energy-efficient options not only reduce your carbon footprint but also save you money in the long run.
As you move on to the next stage of building the foundation and frame, you can continue to prioritize sustainability and eco-friendliness in your tiny house project.

INSULATION MARKETPLACE SmartSHIELD -3mm 16inx10Ft ReflectiveINSULATION roll, Foam Core Radiant Barrier, ThermalINSULATION Shield – Engineered Foil
EXTREMELY EFFECTIVE – reflect 95% of radiant energy, perfect RADIANT BARRIER.
As an affiliate, we earn on qualifying purchases.
As an affiliate, we earn on qualifying purchases.
Building the Foundation and Frame
When it comes to building a tiny house on wheels, selecting the right trailer base is crucial. I’ll discuss the key points of choosing a trailer that meets your needs in terms of size, weight capacity, and durability.
Once the trailer is selected, constructing the floor and frame is the next step. I’ll explain the process of building a solid foundation and frame that can support the weight of the entire structure.
Lastly, I’ll discuss the importance of reinforcing the structure for mobility, ensuring that the tiny house is sturdy and safe for travel.
Selecting a Trailer Base
The perfect foundation for your tiny house on wheels is a sturdy, reliable trailer base. When selecting a trailer base, it is crucial to consider the size and weight capacity of the trailer. The size of the trailer should align with the dimensions of your tiny house, ensuring a proper fit and maximum stability. Additionally, the weight capacity of the trailer should be able to support the weight of your tiny house, including all the materials and furnishings inside.
To emphasize the importance of trailer size and weight capacity, here is a table:
| Trailer Size | Trailer Weight Capacity |
|---|---|
| 16 ft | 5,000 lbs |
| 20 ft | 7,000 lbs |
| 24 ft | 10,000 lbs |
| 28 ft | 12,000 lbs |
| 32 ft | 15,000 lbs |
By carefully considering these factors, you can ensure that your tiny house on wheels has a strong foundation. Now, let’s move on to the next step of constructing the floor and frame.
Constructing the Floor and Frame
Now, it’s time for me to start constructing my floor and frame, giving my tiny house on wheels a solid structure that will make me feel secure and excited about my future home.
To begin, I carefully measure and mark the dimensions of my floor plan design on the trailer base. Next, I use framing techniques to build the floor joists and secure them to the trailer. I make sure to use pressure-treated lumber to protect against moisture and decay.
Once the floor is complete, I move on to constructing the walls and roof frame, ensuring they’re square and level. By following these steps, I’m well on my way to creating a sturdy foundation for my tiny house on wheels.
Now, let’s discuss reinforcing the structure for mobility, ensuring my home is safe and secure during travel.
Reinforcing the Structure for Mobility
To ensure your mobile home is safe and secure during travel, it’s crucial to reinforce the structure for easy mobility. One important aspect of reinforcing the structure is by using proper anchoring methods.
This will help to prevent any movement or shifting of the tiny house on wheels while it’s in motion. There are various anchoring methods available, such as using steel cables or straps to secure the structure to the trailer frame.
Additionally, weight distribution plays a key role in ensuring the stability of the mobile home. By distributing the weight evenly throughout the structure, you can minimize any potential swaying or tipping during transportation. This can be achieved by strategically placing heavier items, such as appliances or furniture, towards the center of the tiny house.
With the structure reinforced and the weight properly distributed, you can now move on to the next section about installing plumbing and electrical systems, ensuring that your mobile home is both sturdy and functional on the road.

Lifewit 1 Pack Over the Door Organizer, 5 Section Clear Window Hanging Storage with 4 Side Pockets, Sturdy Anti Tilt 40 lbs Load Behind Door for Closet, Bedroom, Bathroom, Nursery, Dorm, Dark Gray
Maximize Door Space Utilization: This 5 section over the door organizer features dimensions of 14.9"×6.5"×51.6"(38cm×16.5cm×131cm) with five large…
As an affiliate, we earn on qualifying purchases.
As an affiliate, we earn on qualifying purchases.
Installing Plumbing and Electrical Systems
When it comes to installing plumbing and electrical systems in my tiny house on wheels, I need to carefully plan my plumbing layout to ensure efficient water flow and waste management.
This involves determining the locations of fixtures such as sinks, showers, and toilets, and mapping out the path of the pipes.
Next, I need to wire my tiny house for electricity, taking into consideration the placement of outlets, light fixtures, and appliances.
Lastly, I will need to connect my tiny house to water and sewer lines, ensuring proper connections for a reliable water supply and waste disposal.
Planning Your Plumbing Layout
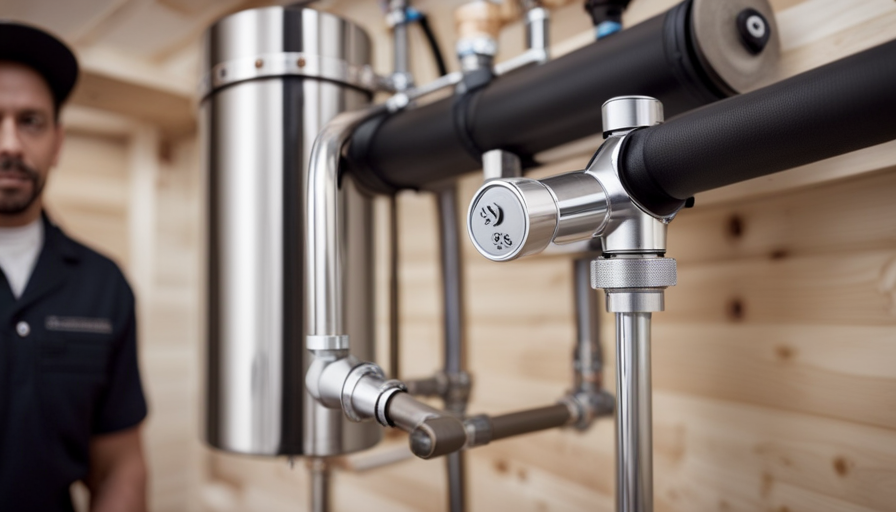
First and foremost, envision the convenience and comfort of a fully functional plumbing system in your tiny house on wheels. When planning your plumbing layout, it’s crucial to consider the plumbing materials and the plumbing installation process. Choose durable and lightweight materials like PEX or CPVC pipes that are easy to install and won’t add unnecessary weight to your tiny house.
Plan the location of your water heater, sink, shower, and toilet carefully to ensure efficient water flow and easy access for maintenance. Consider using a greywater system to recycle water from sinks and showers for irrigation purposes. Properly venting your plumbing system is essential to prevent odors and ensure proper drainage.
With a well-thought-out plumbing layout, you can enjoy the convenience of running water in your tiny house on wheels. Transitioning into the subsequent section about wiring your tiny house for electricity, it’s important to consider the electrical needs and safety measures for your tiny house.
Wiring Your Tiny House for Electricity
Now let’s dive into the exciting world of wiring your tiny house so you can bring it to life with electricity! One of the first steps in this process is the installation of the electrical panel. This is where all the circuits and breakers will be housed, ensuring a safe and efficient electrical system.
It’s important to carefully plan the layout of your electrical wiring, considering the location of outlets, switches, and appliances. You’ll need to use proper electrical wiring techniques, such as running wires through conduits and securing them with appropriate connectors. It’s also crucial to follow local electrical codes and regulations to ensure the safety of your tiny house.
Once your electrical system is properly set up, you’ll be able to connect to water and sewer lines, which we’ll discuss in the next section.
Connecting to Water and Sewer Lines
To bring your tiny house to life, you’ll need to connect it to water and sewer lines, ensuring a comfortable and convenient living experience. When connecting to city utilities, it’s important to follow local regulations and obtain any necessary permits.
Start by locating the main water and sewer lines on your property and determine the best connection points for your tiny house. For water, you can choose between a direct connection or using a water tank with a pump. Similarly, for sewer, you can connect directly to a sewer line or utilize a composting or incinerating toilet.
Alternative water options include rainwater collection systems or installing a well. As for sewer options, you can explore composting toilets or a septic tank. Remember to consider the long-term maintenance and sustainability of your choices.
Once the water and sewer connections are established, you can move on to building the walls, roof, and exterior, creating a secure and functional space for your tiny house.
Building the Walls, Roof, and Exterior
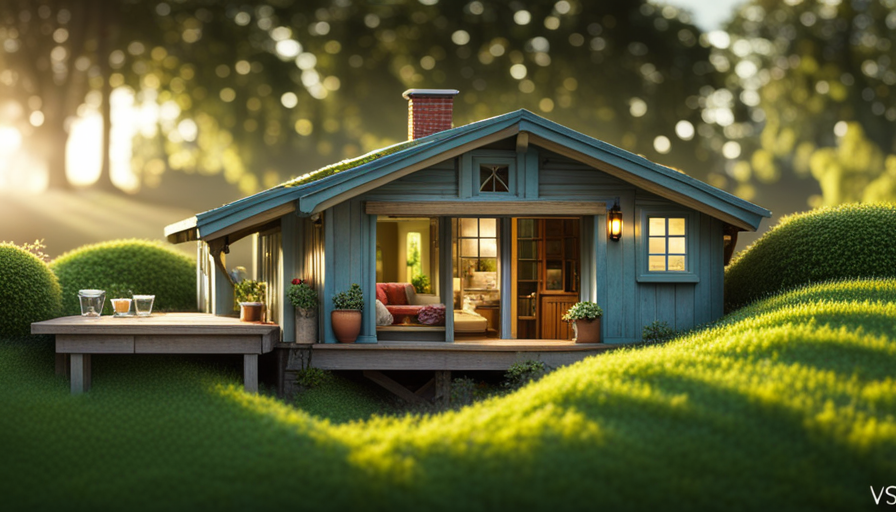
As I construct the walls, roof, and exterior of my tiny house on wheels, I envision the cozy and functional space I’ll create.
The first step is to choose the perfect exterior color options that’ll reflect my personal style and preferences. Whether I opt for a bold and vibrant hue or a more subtle and neutral tone, the color choice will set the tone for the entire design.
Once the color is decided, I’ll focus on weatherproofing techniques to ensure that my tiny house is well-insulated and protected from the elements. This includes properly sealing any gaps or joints, installing weather-resistant siding, and adding insulation to the walls and roof. By taking these precautions, I can ensure that my tiny house will be comfortable and energy-efficient in any weather condition.
After completing the weatherproofing, I’ll move on to constructing the walls and roof. This involves carefully measuring and cutting the materials, such as plywood or metal, and securing them in place. I’ll pay close attention to detail to ensure that everything is level and properly aligned.
With the walls, roof, and exterior complete, I can now move on to the exciting part – interior design and space optimization. By utilizing clever storage solutions and maximizing the use of every inch of space, I can create a functional and inviting living area in my tiny house.
Interior Design and Space Optimization
Once the walls, roof, and exterior are complete, I can unleash my creativity and transform the interior of my tiny house into a cozy and efficient space, like a puzzle coming together.
The key to designing the interior of a tiny house is to maximize every inch of space available. One way to achieve this is by incorporating space-saving furniture. I carefully select pieces that serve multiple functions, such as a sofa that can be converted into a bed or a dining table that can be folded against the wall when not in use. Additionally, I utilize built-in storage solutions, like hidden compartments under the stairs or storage ottomans that double as seating.
To create a bright and airy atmosphere, I prioritize maximizing natural light. I install large windows and skylights strategically throughout the house to allow sunlight to flood in. I also choose light-colored paint and reflective surfaces to help bounce the light around the space. Furthermore, I use mirrors strategically to create an illusion of more space.
As I transition into the next section about installing kitchen and bathroom fixtures, I’m excited to continue designing my tiny house to be both functional and aesthetically pleasing.
Installing Kitchen and Bathroom Fixtures
Now it’s time to bring the heart of the home and the oasis of relaxation to life with the installation of kitchen and bathroom fixtures.
To ensure a well-functioning kitchen, start by installing the necessary appliances. First, connect the sink and faucet, ensuring proper drainage and water supply. Next, install the stove and oven, making sure to follow the manufacturer’s instructions for proper ventilation and gas or electrical connections. Don’t forget to mount the microwave above the stove for convenience. Finally, install a compact refrigerator that fits snugly into the designated space, taking into consideration the power source.
When it comes to bathroom layout planning, consider the available space and your personal preferences. Install a toilet in a location that allows for privacy and easy access. Mount a sink with a vanity or countertop that provides storage for toiletries and towels. Don’t forget to install a mirror above the sink for functionality and aesthetic appeal. Lastly, install a shower or bathtub, depending on your preference and available space.
With the kitchen and bathroom fixtures in place, it’s time to move on to adding the finishing touches.
Adding Finishing Touches
To truly complete the transformation, you’ll want to add those special details that make your kitchen and bathroom feel like home. Adding decorative elements and personalization options can give your tiny house on wheels a unique touch. In the kitchen, consider installing a backsplash with intricate designs or vibrant colors to make a statement. You could also add decorative cabinet knobs or pulls that match your style. In the bathroom, a beautiful mirror with an ornate frame can add a touch of elegance. Additionally, you could hang artwork or shelves to display your favorite items.
To help you visualize the possibilities, here are some ideas for decorative elements and personalization options:
| Kitchen | Bathroom | Living Area |
|---|---|---|
| Colorful backsplash | Elegant mirror | Artwork |
| Decorative cabinet knobs/pulls | Shelving for toiletries | Statement lighting |
| Unique countertop | Planters for greenery | Cozy throw pillows |
By incorporating these finishing touches, you can create a cozy and inviting atmosphere in your tiny house on wheels. These small details can make a big difference in how your space feels.
As you complete the process of adding the finishing touches, it’s important to keep in mind the importance of ensuring safety and compliance.
Ensuring Safety and Compliance
When it comes to building a tiny house on wheels, ensuring safety and compliance should be a top priority. Understanding building codes and regulations is crucial in order to meet the necessary standards and requirements.
Additionally, installing smoke and carbon monoxide detectors is essential for early detection of potential hazards. Lastly, implementing fire safety measures and creating escape routes is vital to ensure the safety of occupants in case of emergencies.
By following these guidelines, you can build a tiny house that’s not only aesthetically pleasing but also safe and secure for its inhabitants.
Understanding Building Codes and Regulations
Although building codes and regulations can vary by location, it’s fascinating to note that approximately 81% of municipalities in the United States have some sort of regulations for tiny houses on wheels. Understanding zoning restrictions and navigating permit processes are crucial when building a tiny house on wheels.
To help you grasp the importance of building codes and regulations, here are four key points to consider:
-
Familiarize yourself with local zoning restrictions to ensure your tiny house is allowed in the desired area.
-
Research and understand the specific building codes and regulations that apply to your location.
-
Consult with local authorities or building departments to navigate the permit process smoothly.
-
Engage with professionals, such as architects or builders experienced in tiny house construction, to ensure compliance with all regulations.
Understanding and adhering to building codes and regulations will not only ensure your tiny house is safe and legal but also prevent potential headaches down the road. Installing smoke and carbon monoxide detectors is the next important step in creating a secure living space.
Installing Smoke and Carbon Monoxide Detectors
Make sure you prioritize your safety by installing smoke and carbon monoxide detectors in your tiny home – it’s a small investment that could potentially save lives. Proper installation techniques are crucial to ensure these detectors function effectively. When installing smoke detectors, place them on the ceiling or high on the wall, away from corners and vents. For carbon monoxide detectors, position them at knee height, as this is where the gas typically accumulates. Regular maintenance is essential for optimal performance. Test the detectors monthly, replace batteries annually, and replace the entire unit every 5-7 years. To engage the audience, here’s a table summarizing the installation techniques and maintenance tips:
| Detector Type | Installation Techniques | Maintenance Tips |
|---|---|---|
| Smoke | Place on ceiling or high on wall | Test monthly, replace batteries |
| Carbon Monoxide | Position at knee height | Replace unit every 5-7 years |
Now, let’s discuss fire safety measures and escape routes to further enhance the safety of your tiny home.
Fire Safety Measures and Escape Routes
After installing smoke and carbon monoxide detectors in your tiny house on wheels, it’s crucial to implement fire safety measures and establish emergency evacuation procedures.
Fire prevention should be a top priority when living in a small space, especially one that is mobile. To minimize the risk of fire, make sure to keep flammable materials away from heat sources and install fire extinguishers in easily accessible locations.
Additionally, create a well-planned escape route that includes multiple exits and clearly marked pathways. Practice emergency drills regularly to ensure everyone knows what to do in case of a fire.
By taking these precautions, you can greatly reduce the chances of a fire occurring and increase the likelihood of a safe evacuation if one does happen. With these fire safety measures in place, you can now move on to enjoying your tiny house on wheels and all the adventures it has to offer.
Enjoying Your Tiny House on Wheels
Once you step inside your cozy tiny house on wheels, a world of freedom and adventure awaits you like a hidden treasure waiting to be discovered. It’s time to enjoy the fruits of your labor and make the most of your new home on wheels.
Here are some tips to help you create a cozy living space and maximize storage solutions:
-
Utilize vertical storage: Install shelves and cabinets that reach all the way to the ceiling. This will not only maximize storage space but also create a visually appealing display of your belongings.
-
Get creative with hidden storage: Look for furniture pieces that have hidden compartments or built-in storage. For example, a bed with drawers underneath or a coffee table with a lift-up top can provide additional storage space without taking up extra room.
-
Make use of multi-functional furniture: Opt for furniture pieces that serve multiple purposes. A sofa that can be converted into a bed or a dining table that can be folded away when not in use are great examples. This will help you make the most of the limited space available.
By implementing these storage solutions, you can create a cozy and functional living space in your tiny house on wheels. So go ahead, embrace the freedom and adventure that awaits you in your tiny home and make it your own.
Frequently Asked Questions
How much does it cost to build a tiny house on wheels?
Building a tiny house on wheels can vary in cost depending on various factors. A cost breakdown typically includes expenses for materials, labor, permits, and utilities. Financing options such as personal savings, loans, or crowdfunding can help cover these costs.
It’s essential to create a detailed budget and consider all expenses involved. Researching and comparing prices for materials and services can also help in managing costs effectively.
Can I build a tiny house on wheels without any prior construction experience?
Building a tiny house on wheels without any prior construction experience can be challenging, but it’s not impossible. There are plenty of learning resources available online and in-person that can help you acquire the necessary skills.
Some of the building challenges you may face include understanding structural integrity, electrical and plumbing systems, and insulation. However, with dedication, patience, and the right resources, you can learn the necessary skills to successfully build your own tiny house on wheels.
Are there any specific regulations or permits required for building a tiny house on wheels?
Yes, there are specific regulations and permits required for building a tiny house on wheels. These regulations can vary depending on your location and local authorities. Generally, you’ll need to comply with zoning laws, legal requirements, and construction codes. Building restrictions and safety standards must also be met. Additionally, you may need to obtain permits for building inspections and adhere to parking regulations. It’s important to research and consult with your local authorities to ensure compliance with all necessary regulations.
Can I transport my tiny house on wheels across state lines?
Transporting my tiny house on wheels across state lines is like navigating a labyrinth of legal requirements and transporting restrictions. Before hitting the road, I must ensure compliance with state regulations and obtain necessary permits.
This involves understanding weight limits, height restrictions, and trailer specifications. Additionally, I must plan my route carefully, considering low bridges and narrow roads. By meticulously adhering to these guidelines, I can confidently transport my tiny house, avoiding any legal hiccups along the way.
Are there any special considerations for insulating a tiny house on wheels for different climates?
When it comes to insulating a tiny house on wheels for different climates, there are some important considerations to keep in mind.
Insulation techniques play a crucial role in maintaining energy efficiency and creating a comfortable living space. Proper insulation helps regulate temperature and prevents heat loss or gain.
Factors such as the type of insulation, R-value, and installation method should be carefully considered to ensure optimal performance in varying climates.
Conclusion
In conclusion, building a tiny house on wheels is a rewarding and fulfilling project. Throughout the process, I learned the importance of choosing the right materials and ensuring safety and compliance.
One interesting statistic that stood out to me was that the average weight of a tiny house on wheels is around 10,000 pounds, which is equivalent to the weight of five small cars. This statistic really emphasizes the compact and efficient nature of these homes, allowing you to take your living space with you wherever you go.
By following the step-by-step process outlined in this article, you can create a beautiful and functional tiny house on wheels that fits your unique needs and lifestyle.