Connect with us

Beginners Guides

How To Insulate A Tiny House

Published

on

An image showcasing a step-by-step guide on insulating a tiny house

Are you prepared to take on the challenge of insulating your small house? Don’t fret! This article will walk you through the steps of insulating your modest home, helping you to achieve a warm and energy-efficient living area.

Insulating a tiny house is a crucial step in maintaining comfortable temperatures and reducing energy consumption. By properly insulating your walls, ceilings, windows, and doors, you can protect your home from the ever-changing weather conditions.

To start, we will assess your insulation needs and select the perfect materials for the job. Then, we’ll craft a meticulous insulation strategy and prepare your tiny house for the installation process.

With careful precision, we will tackle the walls and ceilings, ensuring no nook or cranny is left uninsulated.

But we won’t stop there! We’ll also delve into insulating windows and doors, exploring additional strategies to maximize energy efficiency.

Advertisement

Finally, we’ll test and evaluate our insulation, providing tips on maintenance and updates to keep your tiny house snug and warm.

So, let’s embark on this insulation adventure together and create the perfect sanctuary for you to call home!

Key Takeaways

  • Assess current insulation performance and identify areas for improvement.
  • Consider insulation cost comparison to determine the most cost-effective solution.
  • Choose the right insulation materials based on factors like cost, R-value, and ease of installation.
  • Properly seal gaps and cracks, inspect windows and doors for drafts, and remove ineffective insulation before installing new insulation.

Assess Your Insulation Needs

Assessing your insulation needs is like taking a snapshot of your tiny house’s temperature control. It helps you determine how efficient your current insulation is and identify areas for improvement.

Start by assessing insulation efficiency, which involves evaluating how well your current insulation is performing in terms of maintaining a comfortable indoor temperature and reducing energy consumption. This can be done by checking for drafts, cold spots, and high energy bills.

Additionally, consider insulation cost comparison to determine the most cost-effective solution for your tiny house. Compare the initial cost, long-term savings, and lifespan of different insulation materials.

Once you have assessed your insulation needs and identified areas for improvement, you can move on to choosing the right insulation materials that will help maximize energy efficiency and create a comfortable living environment.

Advertisement

Choose the Right Insulation Materials

When it comes to keeping your cozy abode warm, selecting the perfect materials for insulation is a crucial step in creating a snug and energy-efficient living space. Choosing the right insulation materials is essential for maximizing energy efficiency and maintaining a comfortable temperature inside your tiny house.

There are various options available, such as fiberglass batts, spray foam, rigid foam boards, and cellulose insulation. Each material has its own unique properties and benefits, so it’s important to consider factors like cost, R-value, and ease of installation.

Fiberglass batts are affordable and easy to install, while spray foam provides excellent air sealing and insulation. Rigid foam boards offer high R-values, and cellulose insulation is eco-friendly.

By selecting the appropriate insulation materials based on your budget and needs, you can ensure that your tiny house remains cozy and energy-efficient. Now, let’s move on to planning your insulation strategy.

Plan Your Insulation Strategy

To effectively create a snug and energy-efficient living space, it’s crucial to carefully plan out your insulation strategy. One key aspect to consider is the cost of insulation. Different materials come at varying prices, so it’s essential to find a balance between affordability and effectiveness.

Advertisement

Take into account the long-term energy savings that high-quality insulation can provide. Additionally, consider the insulation techniques that will work best for your tiny house. Whether it’s using batts, spray foam, or rigid foam boards, each option has its benefits and drawbacks. Understanding the pros and cons of each technique will help you make an informed decision.

By carefully considering the insulation cost and techniques, you can ensure that your tiny house is properly insulated for maximum comfort and energy efficiency.

Now, let’s move on to how to prep your tiny house for insulation.

Prep Your Tiny House for Insulation

Before starting the insulation process, it’s important to ensure that your tiny home is properly sealed. A study found that air leaks can account for up to 40% of energy loss in a house. To prep your tiny house for insulation, here are some helpful tips:

  • Check for any gaps or cracks in the walls, ceilings, and floors, and seal them with caulk or weatherstripping.
  • Inspect the windows and doors for any drafts, and consider adding weatherstripping or installing insulated curtains.
  • Remove any existing insulation that may be damaged or ineffective, and clean the surfaces to create a smooth and even base for the new insulation.

When your tiny house is properly sealed and prepped, you can move on to the next step of installing insulation in the walls and ceilings.

Install Insulation in Walls and Ceilings

When it comes to installing insulation in the walls and ceilings of my tiny house, I always make sure to use proper installation techniques. This ensures that the insulation is effective in keeping my home warm in the winter and cool in the summer.

Advertisement

Additionally, I consider different insulation types for various areas of my tiny house. For example, I use spray foam insulation for hard-to-reach spaces and batt insulation for walls and ceilings.

By following these practices, I can create a well-insulated and comfortable living space in my tiny house.

Use Proper Installation Techniques

Make sure you’re using proper insulation techniques to effectively insulate your tiny house. Proper installation techniques are crucial in achieving optimal insulation performance. Here are some key techniques to consider:

Technique Description Benefits
Air sealing Seal all gaps and cracks to prevent air leakage, improving energy efficiency and thermal comfort. Reduces drafts and heat loss.
Vapor barrier Install a vapor barrier to prevent moisture buildup, protecting your tiny house from damage. Prevents mold and mildew growth.
Proper compression Ensure insulation is compressed just enough to fill the space without causing air gaps. Maximizes thermal efficiency.

By employing these proper installation techniques, you can enhance the insulation performance of your tiny house. However, it’s also crucial to consider different insulation types for various areas. This will be discussed further in the subsequent section.

Consider Different Insulation Types for Various Areas

It’s essential to explore different insulation types for different areas to ensure maximum comfort and energy efficiency in your cozy sanctuary.

Advertisement

When it comes to insulating the roof of your tiny house, consider options like spray foam insulation or rigid foam boards. These types of insulation provide excellent thermal resistance and can effectively seal any gaps or cracks.

For the floors, you have a few choices. One option is to use fiberglass batts, which are easy to install and provide good insulation. Another option is to use rigid foam insulation boards, which offer high thermal resistance and can help reduce noise transmission.

When insulating the floors, it’s crucial to consider the specific needs and requirements of your tiny house.

By carefully selecting the right insulation types for both the roof and the floors, you can create a well-insulated and comfortable living space.
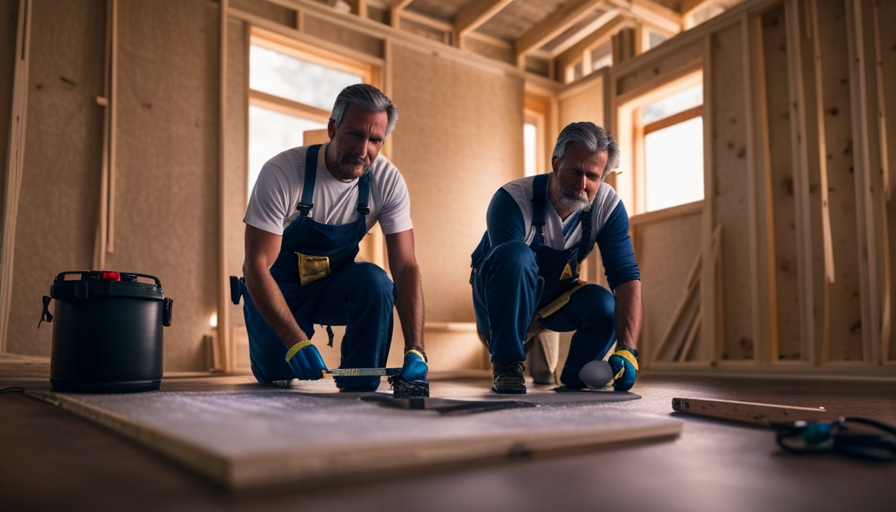
Insulate the Floors

To ensure maximum comfort and energy efficiency, one must insulate the floors of a tiny house. Insulating the floors not only helps to regulate the temperature inside the house, but it also provides a barrier against moisture and sound. There are several benefits of floor insulation, including improved thermal performance, reduced energy costs, and enhanced acoustic insulation.

Advertisement

To further understand the advantages of insulating the floors, let’s take a look at the following table:

Benefits of Floor Insulation
Increased energy efficiency
Improved temperature control
Enhanced soundproofing

By insulating the floors, you can significantly reduce heat loss and prevent drafts, resulting in lower heating bills. Additionally, a well-insulated floor helps maintain a comfortable temperature throughout the year. It also acts as a sound barrier, reducing noise transmission from the outside or between different areas within the tiny house.

Now, let’s move on to the next section and discuss how to insulate windows and doors effectively.

Insulate Windows and Doors

Ensure maximum comfort and energy efficiency in your tiny home by effectively insulating the windows and doors, creating a cozy and peaceful living space.

To insulate windows, consider using weatherstripping or caulking to seal any gaps or cracks around the frames. Adding window film or thermal curtains can also help to reduce heat loss.

Advertisement

For the doors, install door sweeps to seal the bottom and weatherstripping around the edges. Additionally, use draft stoppers or door snakes to further prevent drafts.

Remember to insulate the glass panes by applying window insulation film or using thermal blinds.

By insulating the windows and doors, you can significantly decrease heat loss and minimize air infiltration, leading to lower energy bills and a more comfortable living environment.

Consider additional insulation strategies to further enhance the energy efficiency of your tiny home.

Consider Additional Insulation Strategies

Consider implementing additional insulation strategies in order to maximize energy efficiency and create a more comfortable living environment in your compact dwelling. There are several additional insulation options that can be considered to further improve the insulation of your tiny house. These options include insulating the floor, ceiling, and walls with materials such as foam board insulation or spray foam. Adding insulation to these areas can significantly reduce heat loss and gain, resulting in lower energy bills and increased comfort. Additionally, using insulated curtains or blinds can help to further insulate windows and minimize heat transfer. By incorporating these additional insulation strategies, you can enhance the energy efficiency benefits of your tiny house and create a cozy living space. In the next section, we will discuss how to test and evaluate the effectiveness of your insulation.

Advertisement

Test and Evaluate Your Insulation

Evaluate the effectiveness of your insulation by conducting tests and measurements to determine if your compact dwelling is truly a cozy oasis. To accurately assess the performance of your insulation, consider the following:

  1. Thermal imaging: Use a thermal camera to identify any areas where heat is escaping or cold air is seeping in. This will help you pinpoint any weak spots in your insulation system.

  2. Blower door test: Conduct a blower door test to measure the air leakage in your tiny house. This will help you gauge the effectiveness of your insulation in preventing drafts and maintaining a comfortable indoor environment.

  3. R-value comparison: Compare the R-values of different insulation materials to determine which option provides the best thermal resistance for your specific needs.

  4. Energy consumption monitoring: Track your energy usage to see if your insulation is helping to reduce heating and cooling costs.

By evaluating the effectiveness of your insulation and comparing different options, you can ensure that your tiny house remains energy-efficient and comfortable.

Moving on to maintaining and updating your insulation, it’s important to regularly check for any wear and tear that may compromise its performance.

Maintain and Update Your Insulation

To keep your insulation in top shape and guarantee a cozy and energy-efficient living environment, it’s crucial that you regularly inspect and update it. Over time, insulation can become worn or damaged, reducing its effectiveness. By staying proactive and maintaining your insulation, you can ensure that it continues to provide the desired level of thermal protection.

There are several update techniques you can employ to maximize the efficiency of your insulation. One option is to add additional layers of insulation to areas that may be lacking. This can be done by using batt insulation or blown-in insulation. Another alternative is to consider using eco-friendly insulation materials, such as cellulose or recycled denim, which offer excellent thermal performance and are more sustainable.

Advertisement

By regularly maintaining and updating your insulation, you can create a comfortable and energy-efficient living space in your tiny house. Don’t forget to inspect your insulation periodically and consider incorporating insulation alternatives to further enhance its performance.

Frequently Asked Questions

Can I use the same insulation material for both the walls and the ceilings?

Using different insulation materials for walls and ceilings can have its pros and cons. The benefit of using the same insulation material for both is that it simplifies the installation process and ensures consistent insulation throughout the tiny house. However, it may not be the most efficient solution as walls and ceilings have different insulation needs.

Walls require higher R-values for better heat retention, while ceilings need insulation that prevents heat from escaping. It’s important to consider these factors when deciding on insulation materials for your tiny house.

How do I insulate the windows and doors in my tiny house?

Insulating windows and doors in a tiny house is crucial for maintaining energy efficiency and comfort. To insulate windows, I recommend using weatherstripping to seal any gaps and installing thermal curtains or window film for extra insulation.

For doors, adding weatherstripping and using door sweeps can help prevent drafts. Additionally, using insulated or solid-core doors can further enhance insulation.

Advertisement

By properly insulating windows and doors, you can greatly improve the overall insulation of your tiny house.

Are there any additional insulation strategies that I should consider for my tiny house?

When it comes to insulating a tiny house, there are various insulation materials and alternative methods that you should consider. Some popular insulation materials include fiberglass, spray foam, and cellulose.

Additionally, you can explore alternative insulation methods such as using recycled denim or sheep’s wool. These materials provide excellent thermal insulation and are eco-friendly choices.

It’s important to research and choose the insulation materials and methods that best suit your tiny house’s needs and budget.

How do I test and evaluate the effectiveness of the insulation in my tiny house?

Testing methods are crucial to evaluate insulation effectiveness in a tiny house. To do so, I employ an allegorical approach akin to a detective investigating a case.

Advertisement

Using thermal imaging cameras, I scan the walls and ceilings to identify any heat leaks.

I also conduct blower door tests to measure air infiltration.

These methods provide precise data on the insulation’s performance, allowing me to make necessary adjustments and ensure my tiny house stays cozy and energy-efficient.

How often should I update or replace the insulation in my tiny house?

I should update or replace the insulation in my tiny house when it starts to show signs of wear and tear or when it no longer effectively insulates the space. The lifespan of insulation can vary depending on the type and quality, but generally, it’s recommended to inspect and maintain the insulation every few years.

Regular maintenance, such as checking for any damage or gaps, can help ensure optimal insulation performance and energy efficiency.

Advertisement

Conclusion

In conclusion, insulating a tiny house is crucial for maintaining comfort and energy efficiency. By assessing insulation needs, choosing the right materials, and planning a strategy, you can effectively insulate your tiny home.

Remember, "a stitch in time saves nine," so investing in proper insulation now will save you from future headaches and costly repairs.

Regularly testing, evaluating, and maintaining your insulation will ensure its effectiveness over time.

Keep your tiny house cozy and warm with these practical insulation tips.

Advertisement

Continue Reading
Advertisement

Beginners Guides

Episode Where Coyote Buys Tiny House On Grace And Frankie

Published

on

By

An image capturing the essence of the episode where Coyote purchases a charming, rustic tiny house on "Grace and Frankie

Get ready to be completely blown away by the most hilarious and heartwarming episode of Grace and Frankie yet!

In the episode where Coyote buys a tiny house, prepare for a rollercoaster of emotions as we delve into the world of minimalist living.

This episode takes us on a journey through the challenges and triumphs of living in a tiny home, showcasing the incredible transformation that takes place in Coyote’s life.

From navigating the ups and downs of minimalistic living to the lessons learned along the way, this episode is packed with insightful moments that will leave you questioning your own relationship with material possessions.

Brace yourself for the impact of Coyote’s tiny house on the show’s dynamic, as this decision shakes things up in unexpected ways.

Advertisement

So grab your popcorn and get ready to laugh, cry, and be inspired by the incredible story of Coyote’s tiny house adventure!

Key Takeaways

  • Coyote’s decision to buy a tiny house brings a rollercoaster of emotions and insights into minimalist living.
  • The challenges and triumphs of living in a tiny home transform Coyote’s life and question viewers’ relationship with material possessions.
  • Minimalist living in a tiny house has benefits for mental health and offers practical tips for transitioning to a simpler lifestyle.
  • Coyote’s motivation to embrace a minimalist lifestyle includes downsizing, sustainability, and detachment from material possessions, with challenges including letting go of belongings and adapting to a smaller space.

The Appeal of Minimalist Living

Coyote’s decision to buy a tiny house on Grace and Frankie perfectly captures the allure of minimalist living, where every nook and cranny is utilized in a cozy and efficient way.

Minimalism, with its focus on simplicity and intentional living, has been shown to have positive effects on mental health. By decluttering and reducing material possessions, people can experience decreased stress and increased clarity of mind.

Transitioning to a minimalist lifestyle can seem daunting, but there are practical tips to make the process easier. Start by decluttering one room at a time, keeping only the items that bring joy or serve a purpose. Embrace multifunctional furniture and storage solutions to maximize space. Incorporate daily habits like meditation and gratitude to foster a minimalist mindset.

However, exploring the challenges of tiny house living brings to light the reality that minimalism is not without its obstacles.

Exploring the Challenges of Tiny House Living

Imagine the difficulties you’ll face when you squeeze yourself into a pint-sized abode, where every inch is a battleground for survival. Tiny house living certainly has its benefits, such as reduced expenses, lower environmental impact, and the opportunity to simplify your life.

Advertisement

However, it also comes with its fair share of drawbacks. Lack of space is the most obvious challenge, as it requires careful organization and limited possessions. Privacy can be compromised, with no room for personal retreats. Additionally, living in a tiny house can be physically demanding, with limited amenities and the need for creative solutions to everyday tasks.

Despite these challenges, many people find the benefits of minimalist living outweigh the drawbacks. Now, let’s explore Coyote’s decision to embrace a minimalist lifestyle without missing a beat.

Coyote’s Decision to Embrace a Minimalist Lifestyle

Embracing a minimalist lifestyle offers numerous benefits for those seeking to simplify their lives and reduce clutter. In the episode where Coyote buys a tiny house on ‘Grace and Frankie,’ his motivation to embrace this lifestyle becomes evident. Coyote’s decision is driven by a desire to downsize, live more sustainably, and detach himself from material possessions.

Adjusting to this change, however, is not without its challenges. Transitioning from a larger home to a tiny house requires letting go of unnecessary belongings and adapting to a more compact living space. Despite these difficulties, Coyote finds fulfillment in the simplicity and freedom that comes with a minimalist lifestyle.

This episode showcases his journey as he navigates the ups and downs of embracing minimalism. From hilarious antics to heartfelt moments, the episode captures the essence of Coyote’s transformation and the joy that can be found in living with less.

Advertisement

Hilarious Antics and Heartfelt Moments in the Episode

Filled with laughter and tears, the episode reveals the hilarious antics and heartfelt moments that arise as Coyote embraces his new minimalist lifestyle.

Coyote’s comedic mishaps provide plenty of comedic relief throughout the episode. From struggling to fit his belongings into the tiny house to accidentally knocking over furniture, Coyote’s journey into minimalism is anything but smooth.

However, amidst the chaos, there are also heartwarming connections that emerge. Coyote forms a deeper bond with Grace and Frankie as they help him navigate the challenges of downsizing. Additionally, he discovers a newfound appreciation for the simplicity of life, finding joy in the little things.

As the episode comes to a close, Coyote reflects on the ups and downs of living in a tiny home, preparing for the next chapter of his minimalist adventure.

Navigating the Ups and Downs of Living in a Tiny Home

Despite the cramped quarters and unexpected challenges, Coyote discovers that living in a tiny home is like riding a roller coaster, with its ups and downs that bring a sense of exhilaration and adventure. Small space organization becomes crucial in a tiny home, forcing Coyote to carefully consider every item and find creative storage solutions. Maintaining a minimalist lifestyle becomes a necessity as there is simply no room for excess. It’s a constant juggling act, making sure everything has a designated place and that clutter is kept at bay. The table below illustrates some of the clever ways Coyote organizes his small space:

Advertisement
Item Storage Solution Benefits
Clothes Foldable storage cubes Maximizes vertical space
Kitchen supplies Magnetic wall racks Easy access and saves counter space
Books Wall-mounted shelves Adds decor and saves floor space
Bed Under-bed storage bins Utilizes otherwise wasted space
Bathroom items Hanging shower caddy Keeps items within reach and visible

Coyote’s experience in the tiny home teaches him valuable lessons about living with less and finding joy in simplicity.

Lessons Learned from Coyote’s Experience

After watching Coyote navigate the ups and downs of living in a tiny home, I’ve learned some valuable lessons. First and foremost, downsizing can be a liberating experience. By letting go of unnecessary belongings and embracing a simpler lifestyle, Coyote was able to focus on what truly mattered to him. This newfound sense of freedom allowed him to prioritize experiences over material possessions, leading to a more fulfilling life.

Additionally, Coyote’s tiny home taught me the benefits of living with less. With limited space, he had to be intentional about what he brought into his home, which ultimately reduced clutter and promoted a sense of organization. Moreover, the reduced cost of maintaining a smaller space allowed Coyote to save money and live more sustainably.

Overall, Coyote’s experience with his tiny house serves as a reminder of the positive impact downsizing can have on our lives. Moving forward, let’s explore the impact of Coyote’s tiny house on the show’s dynamic.

The Impact of Coyote’s Tiny House on the Show’s Dynamic

Imagine how Coyote’s tiny house has completely transformed the dynamic of the show. It offers a fresh and exciting perspective on the characters’ lives. The impact of Coyote’s tiny house on the relationships of the characters is undeniable.

Advertisement

It has provided a unique space for intimate conversations and moments of reflection. The close proximity of the tiny house to the main characters’ homes has allowed for spontaneous interactions, deepening their connections and fostering a stronger sense of community.

Furthermore, Coyote’s decision to embrace tiny house living has sparked discussions about the practicality of such a lifestyle. Viewers are given insight into the challenges and benefits of living in a small space, prompting them to consider their own living arrangements.

Overall, Coyote’s tiny house has not only added an interesting dynamic to the show, but it has also encouraged viewers to reevaluate their own perspectives on relationships and practicality in their own lives.

Frequently Asked Questions

How many bedrooms does Coyote’s tiny house have?

Coyote’s tiny house has one bedroom. Building a tiny house can be affordable compared to traditional homes, with costs ranging from $20,000 to $150,000 depending on size and materials. However, legal restrictions on living in a tiny house vary by location. Some areas allow full-time living, while others only permit it as an accessory dwelling unit or temporary accommodation. It’s important to research local regulations before considering a tiny house as a permanent residence.

What is the cost of building a tiny house like Coyote’s?

The cost of building a tiny house like Coyote’s can vary depending on factors such as location, size, and materials used. On average, the cost of materials for a tiny house ranges from $20,000 to $50,000.

Advertisement

The build time for a tiny house can take anywhere from a few weeks to several months, depending on the complexity of the design and the availability of labor.

How did Coyote afford to buy a tiny house?

Coyote was able to afford a tiny house through a combination of his various sources of income. As a successful artist, he earns a steady income from selling his artwork. Additionally, he has a part-time job as a yoga instructor, which provides him with a supplemental income.

Living in a tiny house also comes with financial implications. It allows Coyote to save money on utilities, maintenance, and overall living expenses, making it a more affordable housing option.

What is the square footage of Coyote’s tiny house?

The square footage of Coyote’s tiny house isn’t explicitly mentioned in the episode where he buys it on Grace and Frankie. However, it’s important to note that the cost of building a tiny house can vary depending on various factors such as location, materials used, and customization.

Additionally, legal restrictions on living in a tiny house can also vary from place to place, with some areas having specific regulations regarding minimum square footage requirements for residential dwellings.

Advertisement

Are there any legal restrictions on living in a tiny house like Coyote’s?

Are there any legal restrictions on living in a tiny house like Coyote’s?

Living in a tiny house comes with its own set of legal requirements. While regulations vary by location, some common requirements include obtaining building permits, adhering to zoning laws, and meeting safety codes for electrical and plumbing systems.

However, the benefits of living in a tiny house, such as lower costs and a smaller environmental footprint, often outweigh the potential challenges of navigating these legal requirements.

Conclusion

In conclusion, Coyote’s decision to embrace a minimalist lifestyle by purchasing a tiny house on ‘Grace and Frankie’ is both entertaining and enlightening. The challenges and triumphs he faces in navigating the ups and downs of tiny house living provide valuable lessons and moments of reflection.

The impact of his tiny house on the show’s dynamic adds an exciting and fresh element to the storyline. Overall, this episode serves as a reminder of the appeal of minimalism and the power of embracing a simpler way of life. It’s a must-watch for anyone seeking inspiration and a good laugh.

Advertisement

Continue Reading

Beginners Guides

Diy Tiny House How Long

Published

on

By

An image showcasing a cozy, compact tiny house tucked amidst a serene forest setting

Building your own tiny home may seem like a daunting task, but I can assure you it is a truly rewarding adventure! From the initial research and planning stages to the final touches and the day you finally move in, every step of this journey is filled with excitement and satisfaction.

Now, I won’t lie to you, building a tiny house is no small feat. It requires careful research, meticulous planning, and a whole lot of elbow grease. But fear not, because I’m here to guide you through the journey, step by step.

In this article, we’ll explore the timeline of building a DIY tiny house. From the moment you acquire the necessary materials and permits, to the foundation and framing, electrical and plumbing installations, and finally, the interior and exterior finishes – we’ll cover it all.

So grab your tool belt and get ready to dive into the world of DIY tiny house building. By the end of this article, you’ll have a clear understanding of how long it takes to turn your dreams into reality.

Let’s get started!

Advertisement

Key Takeaways

  • Building a DIY tiny house requires research, planning, and hard work.
  • The timeline of building a DIY tiny house includes researching and planning, acquiring materials and permits, foundation and framing, electrical and plumbing installations, and interior and exterior finishes.
  • The benefits of building a tiny house include affordability, sustainability, and a minimalist lifestyle.
  • Key steps in the DIY tiny house building process include creating a blueprint, calculating costs, creating a timeline, acquiring materials from local hardware stores, online suppliers, and salvage yards, obtaining permits and licenses by complying with regulations and filling out applications, and utilizing salvage yards for cost savings and uniqueness.

Research and Planning Stage

You should start by researching and planning your DIY tiny house so you can ensure that you have a solid foundation before you begin construction.

Researching the benefits of building a tiny house allows you to understand the advantages, such as affordability, sustainability, and the freedom to live a minimalist lifestyle. By gathering information on different designs, materials, and construction methods, you can make informed decisions that align with your needs and preferences.

The planning process involves creating a detailed blueprint, calculating the costs, and creating a timeline for the project. This stage is crucial as it helps you anticipate challenges, identify potential solutions, and avoid costly mistakes.

Once you have completed the research and planning stage, you can move on to acquiring materials and permits, ensuring a smooth transition into the next phase of your DIY tiny house journey.

Acquiring Materials and Permits

When it comes to acquiring materials for my DIY tiny house project, I plan to source them from various places such as local hardware stores, online suppliers, and even salvage yards for reclaimed materials. This will help me to find the best quality materials at the most affordable prices.

Additionally, I understand the importance of obtaining the necessary permits and licenses for my tiny house, as it’ll ensure that my project is legal and up to code. I’ll research the specific requirements for my area and work with the appropriate authorities to ensure a smooth and compliant construction process.

Advertisement

Source Building Materials

To save time and money, I started by sourcing building materials from local salvage yards and repurposing them for my DIY tiny house. There are several sourcing options available, including salvage yards, architectural salvage stores, and online marketplaces.

When considering the cost, it was important to compare prices and factor in transportation costs. I found that salvage yards offered a wide range of materials at lower prices, especially if I was willing to put in some extra effort to clean and refurbish them. Additionally, repurposing materials not only saved money but also added a unique touch to my tiny house.

By using reclaimed wood for the flooring and salvaged windows for natural lighting, I was able to create a sustainable and eco-friendly living space. Now that I had sourced my materials, it was time to obtain necessary permits and licenses, ensuring that my tiny house complied with local regulations.

Obtain Necessary Permits and Licenses

After sourcing building materials from local salvage yards and repurposing them, it was time to ensure that necessary permits and licenses were obtained for my eco-friendly living space. Here are the steps I took to obtain the permits and meet the licensing requirements:

  1. Research: I began by researching the specific permits and licenses needed for building a tiny house in my area. This included zoning regulations, building codes, and any special requirements for eco-friendly structures.

  2. Application: Once I had gathered all the necessary information, I filled out the permit application and submitted it to the local building department. This included providing detailed plans and specifications for the tiny house.

  3. Review and Approval: The building department reviewed my application, plans, and specifications to ensure compliance with all regulations. They may have requested revisions or additional information before granting approval.

  4. Fees and Inspections: After receiving approval, I paid the required fees and scheduled inspections at various stages of the construction process to ensure compliance with building codes.

With the necessary permits and licenses in hand, I could now move on to the next step of my tiny house project: foundation and framing.

Advertisement

Foundation and Framing

Once you’ve laid a solid foundation for your tiny house, the framing becomes the backbone, giving structure and strength to your dream home like a sturdy spine supports the human body.

Before starting the framing process, it’s crucial to ensure that the foundation is properly prepared. This includes leveling the ground, adding gravel and compacting it to create a stable base.

Once the foundation is ready, you can begin the framing process by constructing the walls, roof, and floor systems. Framing techniques such as platform framing or post-and-beam construction can be used, depending on your design preferences and local building codes.

Precision and accuracy are essential during this stage to ensure that the walls are plumb, the roof is properly supported, and the overall structure is sturdy.

With the framing complete, you can then move on to the next exciting step of electrical and plumbing installations, seamlessly connecting your tiny house to essential utilities.

Advertisement

Electrical and Plumbing Installations

When connecting your tiny home to essential utilities, you’ll need to carefully consider the electrical and plumbing installations, ensuring they are done correctly and safely.

For the electrical wiring, it’s crucial to plan the layout and determine the right gauge of wires to handle the load. Install outlets strategically throughout the house, considering the locations of appliances and devices. Additionally, don’t forget to include a breaker box to control the flow of electricity and ensure safety.

Regarding the plumbing system, start by installing a water supply line and connect it to a reliable source. Consider the size of the pipes and the water pressure needed. Install a water heater and connect it to the plumbing system.

For waste disposal, install a toilet, sink, and shower, connecting them to the sewage system or a septic tank.

Next, we will move on to the interior and exterior finishes, giving your tiny house a beautiful and functional appearance.

Advertisement

Interior and Exterior Finishes

To achieve a stunning and inviting look for your tiny home, you’ll eagerly explore the world of interior and exterior finishes, transforming your humble abode into a breathtaking oasis.

When it comes to tiny house paint colors, it’s important to choose hues that create a sense of openness and serenity. Light and neutral shades such as whites, creams, and pastels can make your space feel more spacious and airy. Additionally, consider incorporating pops of color through accent walls or colorful furniture to add personality and visual interest.

As for tiny house landscaping ideas, think about creating a cozy outdoor space that complements the overall design of your tiny home. Utilize vertical gardens, potted plants, and strategic placement of outdoor furniture to maximize the limited space.

With the right finishes, your tiny home will truly shine.

Moving forward to the next section on cabinetry and fixture installation, we’ll explore how to optimize storage and functionality within your tiny home.

Advertisement

Cabinetry and Fixture Installation

Get ready to optimize your storage and functionality by diving into the world of cabinetry and fixture installation in your tiny home. Cabinet design plays a crucial role in maximizing space, so it’s important to carefully plan the layout and dimensions. Consider utilizing custom-built cabinets to fit perfectly into the available space. When selecting fixtures, choose ones that are both functional and aesthetically pleasing. Look for compact options that can be easily installed in your tiny home without taking up too much space. To evoke emotion in the audience, here’s a table showcasing popular cabinet and fixture options:

Cabinet Design Fixture Selection
Open Shelving Wall-mounted Sink
Pull-out Drawers Space-saving Toilet
Corner Cabinets Compact Shower
Overhead Cabinets Foldable Faucet
Hidden Storage Wall-mounted Mirror

With these cabinetry and fixture choices, your tiny home will not only be functional but also visually appealing. Now, let’s move on to the final touches and move-in.

Final Touches and Move-In

Now that the cabinetry and fixtures are installed, it’s time to focus on the final touches and move-in process for my DIY tiny house.

The first step is to install lighting and hardware throughout the house, ensuring that every corner is well-lit and functional.

Once that’s done, I can begin to furnish and decorate the space, carefully selecting pieces that maximize both comfort and functionality in this small living area.

Advertisement

Install Lighting and Hardware

Once you’ve chosen the perfect lighting fixtures and hardware, it’s time to install them in your DIY tiny house.

Lighting fixtures play a crucial role in creating the desired ambiance and functionality of your living space. Begin by carefully following the manufacturer’s instructions for installation, ensuring that all electrical connections are secure and safe.

Whether you opt for recessed lights, pendant lights, or wall sconces, position them strategically to illuminate key areas such as the kitchen, bathroom, and living room. Additionally, consider installing dimmer switches to control the brightness and create different moods throughout the day.

As for hardware installation, focus on functionality and aesthetics. Install door handles, drawer pulls, and cabinet knobs that match the overall style of your tiny house. These finishing touches will add a touch of personality and enhance the overall look and feel of your cozy abode.

With the lighting fixtures and hardware in place, it’s time to move on to the next exciting step – furnish and decorate the tiny house.

Advertisement

Furnish and Decorate the Tiny House

Transform your small space into a cozy and stylish haven by carefully selecting furnishings and adding personalized decor.

To make the most of your tiny house, consider these furniture arrangement tips:

  1. Choose multi-functional pieces: Opt for furniture that serves more than one purpose, such as a sofa bed or a coffee table with hidden storage.

  2. Maximize vertical space: Utilize tall bookshelves and wall-mounted storage units to free up floor space and keep your belongings organized.

  3. Create an illusion of space with color: Light and neutral color schemes can make your tiny house feel more open and spacious. Consider using pastel shades or white as the base color and adding pops of color with accent pieces or artwork.

By carefully arranging your furniture and selecting the right color scheme, you can create a functional and visually appealing tiny house that feels like a home.

Frequently Asked Questions

Can I build a tiny house without any prior construction experience?

Sure, building a tiny house without any prior construction experience is definitely possible.

In fact, a surprising statistic shows that nearly 70% of tiny house builders have little to no construction background.

Advertisement

While it may seem daunting at first, there are plenty of resources available, such as online tutorials and workshops, that can guide you through the process step-by-step.

With dedication, patience, and a willingness to learn, anyone can successfully tackle building their own tiny house.

How much does it typically cost to build a DIY tiny house?

In terms of cost estimation and budget planning, building a DIY tiny house can vary greatly depending on factors such as size, materials, and location.

On average, though, the cost to build a DIY tiny house ranges from $10,000 to $30,000. It’s important to carefully consider expenses for materials, permits, utilities, and any necessary tools or equipment. Additionally, researching and comparing prices can help ensure you stay within your budget during the construction process.

Are there any specific building codes or regulations I need to follow when constructing a tiny house?

When constructing a tiny house, it’s crucial to adhere to building codes and regulations. These codes and regulations vary depending on your location, so it’s essential to research and understand the specific requirements in your area.

Advertisement

Building codes typically cover aspects such as minimum square footage, ceiling height, electrical and plumbing systems, safety measures, and zoning restrictions. By following these guidelines, you can ensure the legality and safety of your tiny house construction project.

What are the most common challenges people face when building a DIY tiny house?

When building a DIY tiny house, common challenges include managing limited space, optimizing storage solutions, and ensuring proper insulation and ventilation.

To maximize space, I recommend using multi-functional furniture, such as sofas with built-in storage or foldable tables. Additionally, utilizing vertical space through lofted sleeping areas or high shelves can be helpful.

It’s also crucial to carefully plan the layout and prioritize essential features to make the most of the available square footage.

How long does it take on average to complete the construction of a DIY tiny house?

On average, it takes about 1,000 hours to complete the construction of a DIY tiny house. This statistic is fascinating because it highlights the level of dedication and commitment required for such a project.

Advertisement

The construction process involves various stages, including planning, designing, obtaining permits, framing, electrical work, plumbing, insulation, and finishing touches. Each step requires careful attention to detail, which contributes to the overall time it takes to finish the project.

Conclusion

In conclusion, building a DIY tiny house is a rewarding and fulfilling project that requires careful planning, hard work, and attention to detail.

From the research and planning stage to the final touches and move-in, every step of the process is crucial in creating a comfortable and functional living space.

By acquiring the necessary materials and permits, constructing a solid foundation and framing, installing electrical and plumbing systems, and adding interior and exterior finishes, one can create a personalized and efficient home.

So why wait? Embark on this journey and ask yourself, isn’t it time to create the perfect tiny house for yourself?

Advertisement

Continue Reading

Beginners Guides

What Are These Little Tiny Flies In My House

Published

on

By

An image capturing the essence of frustration as a curious homeowner stares at a swarm of minuscule, irksome flies buzzing around their living space, highlighting the perplexing mystery of these tiny pests

Have you ever walked into your house and been greeted by a swarm of small flies? While they may seem harmless at first, they can quickly become a nuisance.

Picture this: you enter your home, and as you make your way through the rooms, you notice these small flies buzzing around your face, landing on your food, and multiplying seemingly overnight. It’s enough to make anyone feel frustrated and disgusted.

But fear not, for I am here to shed some light on the mystery of these little pests. In this article, we will delve into the world of small flies and explore their types, breeding habits, and how to locate their breeding sources. We will also discuss preventive measures, homemade traps, and remedies you can try.

So, let’s dive in and discover what these little tiny flies in your house are all about.

Key Takeaways

  • Small flies in the house are usually found near sources of food or moisture.
  • Identifying and eliminating breeding sources is crucial for controlling small fly infestations.
  • Regularly checking for standing water, reducing humidity, and cleaning up spills and food debris can help prevent fly infestations.
  • Using natural fly repellents, regular cleaning routines, and properly sealing entry points can reduce the likelihood of attracting flies.

Identify the Types of Small Flies

These little tiny flies in my house can be identified by their distinct characteristics. Common signs of a small fly infestation include the presence of small flies buzzing around the house, especially near sources of food or moisture.

These flies are usually small, measuring only a few millimeters in length, and are commonly found near garbage cans, sinks, or drains. They have a short lifespan of only a few weeks, but their rapid reproduction can quickly lead to a large infestation if not addressed promptly.

Advertisement

Besides being a nuisance, small flies in the house can pose potential risks and health hazards. They’re known to carry and spread bacteria, such as E. coli and Salmonella, which can contaminate food and surfaces. This can lead to foodborne illnesses and other infections. Additionally, some people may experience allergic reactions to small fly allergens, resulting in symptoms like watery eyes, sneezing, and respiratory issues.

To understand their breeding habits, it’s essential to investigate the areas where these flies are commonly found, such as drains, garbage cans, or moist areas. By identifying their breeding grounds, it becomes easier to eliminate their presence and prevent future infestations.

Understand their Breeding Habits

Understanding their breeding habits can help you tackle the persistent presence of these minuscule pests. Small flies, such as fruit flies and drain flies, have distinct life cycles that contribute to their population growth. By understanding these cycles, you can implement effective strategies to control their population.

  • Fruit flies: These tiny insects lay their eggs on fermenting fruits and vegetables. The eggs hatch into larvae within 24-48 hours, and the larvae feed on the decaying matter for about a week. After pupating for another week, adult fruit flies emerge and the cycle continues.

  • Drain flies: These flies breed in moist areas, such as drains, sewage pipes, or standing water. Their eggs are laid in gelatinous masses, which adhere to surfaces. The larvae, also known as ‘wigglers,’ feed on organic matter in the breeding site. They pupate for about a week before emerging as adults.

Understanding their life cycle allows you to target their breeding sources effectively. By locating and eliminating these breeding sources, you can significantly reduce their population.

In the next section, we will explore how to locate the breeding sources and eradicate them completely.

Advertisement

Locate the Breeding Sources

To effectively tackle the persistent presence of these pesky insects, you need to locate where they’re breeding. Identifying the breeding sources is crucial in order to eliminate them and prevent future infestations.

One effective method is to use insecticides specifically designed to target the breeding sources of these tiny flies. These insecticides contain ingredients that disrupt the life cycle of the flies, preventing them from reproducing and eventually eliminating the population.

It’s also important to consider the impact of climate and weather on fly infestations. Flies thrive in warm and humid environments, making it essential to control the moisture levels in your house. Regularly check for any areas with standing water, such as leaky pipes or clogged drains, as these can serve as breeding grounds for flies. Additionally, ensure proper ventilation and reduce humidity levels in your home by using dehumidifiers or fans.

By effectively targeting the breeding sources and considering the impact of climate and weather, you can significantly reduce the presence of these tiny flies in your house. Taking preventive measures, which we’ll discuss in the next section, will help to ensure a fly-free environment.

Take Preventive Measures

To prevent the presence of these tiny flies in my house, I should take some preventive measures. Firstly, I need to clean up spills and food debris immediately to eliminate potential breeding sources.

Advertisement

Secondly, I should regularly clean and maintain drains to ensure they’re free from organic matter that could attract these flies.

Lastly, I need to avoid overwatering my houseplants, as the excess moisture can create an ideal breeding environment for these pests.

Additionally, it’s important to seal cracks and crevices and properly dispose of garbage to minimize their entry and attraction to my home.

Clean up spills and food debris

Clean up spills and food debris to keep those little tiny flies out of your house, as studies have shown that a single spilled sugary drink can attract up to 500 flies. To effectively prevent fly infestations, follow these cleaning tips:

  • Wipe up spills immediately to eliminate any food sources.
  • Store food in airtight containers to deprive flies of easy access.
  • Regularly sweep and vacuum floors to remove any food crumbs.
  • Dispose of garbage promptly and keep trash cans tightly sealed.

Additionally, you can use natural fly repellents like essential oils or vinegar solutions to deter flies from entering your home. By incorporating these preventive measures into your cleaning routine, you can significantly reduce the likelihood of attracting those pesky little flies.

It’s crucial to regularly clean and maintain drains as well, as they can become breeding grounds for flies.

Advertisement

Regularly clean and maintain drains

After taking care of spills and food debris, it’s important to shift our attention to another potential breeding ground for those pesky flies – the drains. Regularly cleaning and maintaining drains is crucial in preventing fly infestations in our homes.

Flies are attracted to the organic matter that accumulates in our drains, providing them with a perfect environment to lay their eggs. To combat this issue, there are a few drain cleaning tips to follow.

Firstly, pour boiling water down the drain to flush out any debris. Then, use a mixture of baking soda and vinegar to break down grease and eliminate odors. Finally, a drain brush can be used to physically remove any remaining buildup.

By incorporating these tips into our cleaning routine, we can effectively reduce the likelihood of fly infestations in our homes.

Moving forward, let’s explore how to avoid overwatering houseplants.

Advertisement

Avoid overwatering houseplants

Carefully monitoring the watering schedule of our beloved houseplants is crucial to ensure their health and prevent any unnecessary damage. Here are four important points to consider when it comes to watering your houseplants:

  1. Importance of using well-draining soil for houseplants: Using well-draining soil allows excess water to escape, preventing waterlogging and root rot.

  2. Avoid overwatering: Overwatering is a common mistake that can lead to root rot, fungus gnats, and other pests. Only water when the top inch of soil is dry.

  3. Water thoroughly but infrequently: When watering, make sure to thoroughly moisten the soil, but allow it to dry out between waterings. This promotes healthy root growth.

  4. Use the right watering technique: Instead of watering from the top, consider bottom watering by placing the plant in a tray of water and allowing it to soak up moisture.

By following these guidelines, you can maintain healthy houseplants and minimize the risk of attracting pests. Speaking of pests, let’s now discuss how to seal cracks and crevices to prevent their entry into our homes.

Seal cracks and crevices

To keep unwelcome critters at bay, it’s essential to seal cracks and crevices like a fortress protecting its treasures. These tiny flies may find their way into your house through small openings in walls, windows, or doors. By sealing these entry points, you can create a barrier that prevents their intrusion.

Start by inspecting your home for any visible cracks or gaps and use caulk or weatherstripping to seal them. Pay special attention to areas where pipes or wiring enter your home, as these are common entry points for pests. Additionally, ensure that your windows and doors are properly sealed with weatherproofing materials.

By eliminating these potential entryways, you can significantly reduce the chances of these pesky flies infiltrating your living space.

Advertisement

Now, let’s move on to the next step of properly disposing of garbage.

Properly dispose of garbage

To effectively combat the issue of tiny flies in your home, it’s crucial to address the proper disposal of garbage. These pesky insects are attracted to decaying organic matter, making your garbage an ideal breeding ground for them. To prevent their infestation, follow these steps:

  • Ensure that your garbage bins have tight-fitting lids to prevent flies from accessing the contents.

  • Regularly empty and clean your garbage bins to eliminate any potential food sources for the flies.

  • Consider using garbage bags that are specifically designed to repel flies and other pests.

  • If possible, keep your garbage bins away from entrances to your home to minimize the chances of flies finding their way inside.

By properly disposing of your garbage, you can significantly reduce the presence of these flies in your home.

In the subsequent section, we’ll explore the use of homemade traps and remedies to further tackle this issue.

Use Homemade Traps and Remedies

Ah, nothing ruins a cozy evening at home like those pesky little flies buzzing around! But fear not, because there are homemade traps and remedies that can help you show those tiny pests who’s boss. When it comes to dealing with these annoying flies, homemade fly repellents and natural fly control methods can be effective and environmentally friendly alternatives to chemical-based solutions.

Advertisement

To tackle the fly problem, you can create homemade fly traps using common household items. One simple trap involves mixing apple cider vinegar with a few drops of dish soap in a bowl. The vinegar attracts the flies, while the soap breaks the surface tension of the liquid, causing the flies to sink and drown. Another option is a fruit trap, where you can cut up a piece of ripe fruit and place it in a jar with a funnel placed on top. The flies will be attracted to the fruit and will have difficulty finding their way out of the jar.

Additionally, there are natural remedies that can help repel flies from your home. Essential oils like eucalyptus, peppermint, and lavender can be mixed with water and sprayed around the house to deter flies. Citronella candles can also be effective in keeping flies at bay, especially when used in outdoor areas.

By utilizing these homemade traps and remedies, you can significantly reduce the fly population in your house. However, if the infestation persists or becomes unmanageable, it may be necessary to seek professional help. Remember, it’s important to take action against these flies to ensure a comfortable and fly-free living space.

Seek Professional Help if Needed

If those bothersome pests persist and become an overwhelming swarm, don’t hesitate to call in the professionals, like a skilled exterminator who can swoop in like a superhero and rid your home of these winged intruders.

While DIY methods can be effective in controlling small flies in your house, there are some common mistakes to avoid when trying to eliminate them on your own.

Advertisement

One common mistake is not properly identifying the type of fly infestation you’re dealing with. Different species of flies require different treatment approaches. It’s important to accurately identify the flies to determine the most effective method of control.

Additionally, some DIY methods may only provide temporary relief, and the infestation can quickly rebound if not properly addressed.

Another mistake to avoid is not addressing the root cause of the infestation. Small flies are often attracted to moist and decaying organic matter, such as rotting fruits, vegetables, or damp areas in your home. Simply eliminating adult flies without eliminating their breeding sites will not solve the problem in the long term. It’s crucial to identify and eliminate these breeding sources to prevent future infestations.

Lastly, using ineffective or harmful insecticides can be a mistake. It’s important to choose insecticides specifically formulated for small flies and follow the instructions carefully. Avoid using excessive amounts of chemicals, as it can pose health risks to humans and pets.

While DIY methods can be useful in controlling small flies in your home, it’s important to avoid common mistakes and seek professional help if needed. Professional exterminators have the knowledge and experience to accurately identify the fly species, address the root cause of the infestation, and use effective and safe control methods. So, if those tiny flies become too much to handle, don’t hesitate to call in the experts.

Advertisement

Frequently Asked Questions

How do I know if the small flies in my house are harmful or dangerous?

To determine if the small flies in your house are harmful or dangerous, look for signs of infestation and potential health risks. Prevent infestation by keeping your house clean and dry. For extermination, consider using methods like traps, insecticides, or professional pest control services.

Can small flies in my house transmit diseases?

Small flies in my house can indeed carry diseases and pose a health risk. These tiny insects may transmit bacteria and viruses through contact with contaminated surfaces or by biting humans. It’s important to take measures to eliminate them.

Are small flies attracted to certain types of food or materials?

Small flies are attracted to common food sources such as fruits, vegetables, and decaying organic matter. To prevent infestation, it is crucial to maintain cleanliness, store food properly, and eliminate any potential breeding sites.

How long does it take for small flies to breed and multiply in my house?

The breeding habits and life cycle of small flies in my house vary depending on the species. Some can multiply rapidly, laying eggs every few days and completing their life cycle in as little as one week.

What are some common mistakes people make when trying to get rid of small flies in their homes?

Common mistakes people make when trying to rid their homes of small flies: believing they are harmless, neglecting proper sanitation, and relying solely on chemical sprays. Effective natural remedies include vinegar traps and regular disposal of organic waste.

Advertisement

Conclusion

In conclusion, these little tiny flies in my house are truly fascinating creatures. Despite their annoying presence, they serve as a reminder of the intricate web of life that surrounds us.

From the fruit flies that breed in the depths of our trash cans to the fungus gnats that thrive in our potted plants, every nook and cranny of our homes becomes a haven for these resilient insects.

So, next time you spot one buzzing around, take a moment to appreciate the irony of these minuscule beings disrupting our otherwise pristine abodes.

Continue Reading

Trending