

We know what you’re thinking: waterproofing can be a daunting task. But fear not! We’ve got you covered.
In this article, we will guide you through the art of waterproofing your tiny house interior with ease and expertise.
From identifying potential problem areas to choosing the right materials, sealing gaps and joints, and waterproofing specific areas like the bathroom and kitchen, we’ve got all the tips and tricks you need.
Get ready to master the art of waterproofing and protect your tiny house from any water damage.

Key Takeaways
- Identify potential problem areas and take proactive measures to address them.
- Choose the right waterproof materials that are specifically designed for the purpose.
- Seal gaps and joints to prevent water from entering the interior.
- Implement specific waterproofing techniques in areas like the bathroom and kitchen to protect against water damage.
Identifying Potential Problem Areas
We’ll start by pinpointing any potential problem areas in our tiny house interior.
When it comes to waterproofing the interior, it’s essential to consider the exterior walls and prevent moisture buildup. One common problem area is around windows and doors, where water can seep in if not properly sealed.
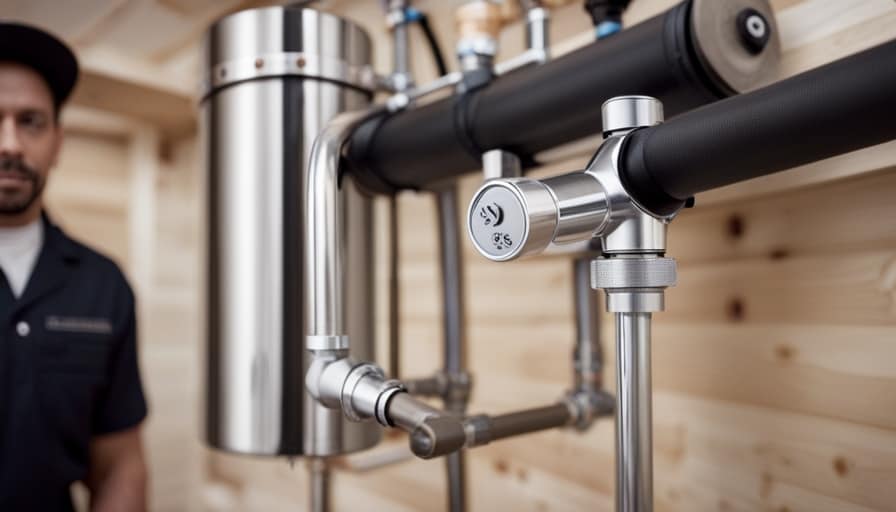
Another area to check is the bathroom, where water splashes and humidity can lead to moisture issues. Additionally, inspect any areas where plumbing or electrical lines enter the walls, as these can be potential entry points for water.
By identifying these problem areas, we can take proactive measures to address them and ensure a watertight interior.

Now, let’s move on to the next section where we’ll discuss choosing the right waterproof materials.
Choosing the Right Waterproof Materials
To ensure a watertight interior, we need to carefully select and use the right waterproof materials. When it comes to choosing the right materials, there are several factors to consider.
First and foremost, you want to look for materials that have been specifically designed for waterproofing purposes. This could include waterproof membranes, sealants, and paints. These materials are specially formulated to create a barrier against moisture and prevent any water from seeping through.
Additionally, it’s important to choose materials that are durable and long-lasting. You want your waterproofing techniques to stand the test of time and continue to provide moisture prevention for years to come.

Sealing Gaps and Joints
By sealing gaps and joints, we can effectively prevent water from entering our tiny house interior. Waterproofing techniques play a crucial role in preventing water damage and maintaining the integrity of our living space. To help you understand the importance of sealing gaps and joints, let’s take a look at the following table:
| Gap/Joint | Waterproofing Technique | Preventing Water Damage |
|---|---|---|
| Windows | Caulking | Leakage and drafts |
| Doors | Weatherstripping | Moisture and drafts |
| Roof | Flashing | Roof leaks |
| Plumbing | Sealant | Leaks and water damage |
Ensuring that these gaps and joints are properly sealed will not only keep water out but also improve energy efficiency and overall comfort in your tiny house. Remember to regularly inspect and maintain these seals to prevent any potential water damage.
Waterproofing the Bathroom
When it comes to waterproofing the bathroom in your tiny house, there are a few key points to consider.
First, it’s important to properly seal the shower corners to prevent any water leakage.

Additionally, choosing the right flooring options, such as waterproof tiles or vinyl, can help ensure that your bathroom stays dry and protected.
Sealing Shower Corners
We can ensure a watertight seal in the shower corners by using the right techniques and materials. Properly sealing the corners is crucial for preventing mold growth and maintaining the waterproofing integrity of the bathroom.
To achieve this, start by applying a waterproofing membrane or sealing tape to the corners, ensuring full coverage. Next, embed the membrane or tape into a layer of waterproofing compound, ensuring a secure bond. Pay close attention to detail, making sure there are no gaps or openings where water can penetrate.
Finally, apply a second layer of waterproofing compound to reinforce the seal. By following these steps, you can effectively waterproof the shower corners and protect your tiny house interior from water damage.

Now, let’s move on to discussing waterproof flooring options.
Waterproof Flooring Options
Let’s explore the various waterproof flooring options available for waterproofing our bathroom in the tiny house. When it comes to creating a waterproof bathroom floor, there are several options to consider:
-
Vinyl Flooring: This durable and waterproof option is easy to install and maintain. It comes in a variety of styles, colors, and patterns, allowing you to choose the perfect design for your tiny house bathroom.
-
Ceramic or Porcelain Tiles: These tiles aren’t only waterproof but also resistant to stains and scratches. They provide a sleek and elegant look to your bathroom floor.

-
Epoxy Flooring: This seamless and waterproof flooring option is perfect for those looking for a modern and industrial aesthetic. It’s also easy to clean and maintain.
-
Rubber Flooring: Ideal for bathrooms with high moisture levels, rubber flooring is slip-resistant and provides excellent waterproofing.
Waterproofing the Kitchen
When it comes to waterproofing the kitchen in your tiny house, there are a few key points to consider.
First, choosing the right sealant for your kitchen counters is essential in preventing water damage and stains.
Additionally, selecting waterproof flooring options will help protect against spills and leaks.
Sealant for Kitchen Counters
Our favorite sealant for kitchen counters is a high-quality silicone-based product that provides excellent waterproofing and durability. When it comes to waterproofing your kitchen counters, it’s important to choose the right sealant to prevent water damage and ensure longevity. Here are some key reasons why we recommend this particular sealant:
-
Superior waterproofing capabilities: This sealant forms a tight barrier that prevents water from seeping into the countertop, protecting it from damage caused by moisture.
-
Long-lasting durability: With its strong adhesive properties, this sealant creates a long-lasting bond, ensuring that it remains intact even with regular use and cleaning.

-
Easy application: The smooth consistency of this sealant allows for easy application, ensuring a seamless and professional finish.
-
Versatile use: This sealant is suitable for a variety of countertop materials, including granite, quartz, and laminate.
Waterproof Flooring Options
We can explore various waterproof flooring options for the kitchen, so let’s dive in and discover the best choices for your tiny house.
When it comes to waterproof flooring, two popular options stand out: waterproof laminate and vinyl plank.

Waterproof laminate flooring is designed to resist water damage, making it a great choice for kitchens. It’s composed of multiple layers, including a moisture-resistant core, which prevents water from seeping through.
Vinyl plank flooring, on the other hand, is made from synthetic materials that are highly resistant to water. It’s also durable and easy to clean, making it ideal for kitchen use.
Both options come in a variety of styles and designs, allowing you to find one that suits your taste and complements your tiny house interior.
Checking Window and Door Seals
Let’s start by examining the condition of the window and door seals in our tiny house. Checking these seals is crucial in maintaining a waterproof interior and preventing water damage and mold growth. Here are a few key things to look out for:

-
Cracked or peeling caulk: Inspect the caulk around your windows and doors for any signs of damage. Cracks or peeling caulk can allow water to seep in, leading to potential water damage and mold growth.
-
Gaps or drafts: Check for any gaps or drafts around the windows and doors. These can’t only let water in but also affect the insulation of your tiny house.
-
Broken or damaged seals: Ensure that the seals around the windows and doors are intact and free from any damage. Broken or damaged seals can compromise the waterproofing of your tiny house.
-
Proper drainage: Make sure that the windows and doors have proper drainage systems to direct water away from the interior of your tiny house.
Frequently Asked Questions
How Do I Prevent Mold and Mildew Growth in My Tiny House?
To prevent mold and mildew growth in our tiny house, we focus on preventing condensation by using moisture resistant materials. This ensures a dry and healthy environment, allowing us to fully enjoy our cozy living space.
What Are the Best Practices for Waterproofing the Roof of a Tiny House?
To keep your tiny house dry, we’ve mastered the art of waterproofing. The best products? Silicone sealant and waterproof paint. Maintain your waterproofing with regular inspections and reapplication. Trust us, your tiny house will stay cozy and dry.
Can I Use Regular Paint for Waterproofing the Interior Walls?
Regular paint is not sufficient for waterproofing interior walls. We recommend using specialized waterproofing techniques to protect your tiny house from moisture damage. These techniques ensure long-lasting results and a comfortable living environment.
How Often Do I Need to Reapply Waterproofing Materials in My Tiny House?
We recommend reapplying waterproofing materials in your tiny house every 2-3 years to maintain optimal protection. When choosing waterproofing materials, consider their durability, ease of application, and compatibility with your interior surfaces.

Are There Any Specific Considerations for Waterproofing the Flooring in a Tiny House?
When waterproofing the flooring in a tiny house, it’s important to consider the type of flooring and choose appropriate waterproofing methods. We have experience in this area and can provide detailed guidance.
Conclusion
In conclusion, mastering the art of waterproofing your tiny house interior is essential to ensure its longevity and protect it from potential water damage. By identifying potential problem areas, choosing the right waterproof materials, and sealing gaps and joints, you can create a watertight sanctuary.
Another important aspect of waterproofing is focusing on the bathroom and kitchen. These areas are prone to moisture and water splashes, making them more susceptible to damage. By using waterproof paints, tiles, and sealants, you can prevent water from seeping into the walls and floors, keeping these spaces dry and mold-free.
Additionally, checking window and door seals is crucial. These openings can be entry points for water if not properly sealed. By regularly inspecting and resealing them as needed, you can ensure that no water infiltrates your tiny house through these vulnerable areas.

So, don’t let water seep in and rain on your parade. By following these steps and becoming a waterproofing expert, you can keep your tiny house dry as a bone!