Connect with us

Beginners Guides

How Does Tiny House Get Water

Published

on

An image showcasing a tiny house's water supply system

Were you aware that the typical American consumes between 80-100 gallons of water daily? This is a considerable quantity, particularly when reflecting on the reduced space and resources commonly associated with tiny homes.

So, how does a tiny house get water?

In this article, I will delve into the various methods and solutions that tiny house owners employ to ensure a steady supply of water. From traditional plumbing connections to off-grid water solutions, there are several options available to meet the unique needs of tiny house living.

I will explore rainwater harvesting, a method that allows homeowners to collect and store rainwater for everyday use. Greywater recycling is another technique that involves treating and reusing water from sinks, showers, and laundry. Composting toilets offer a sustainable alternative to traditional flush toilets, while portable water tanks provide mobility and flexibility.

Additionally, I will discuss water filtration and purification systems, as well as the importance of winterizing water systems in cold climates. Finally, I will touch upon maintenance and troubleshooting tips to ensure a smooth and efficient water supply.

Advertisement

Join me on this journey as we explore the fascinating world of how tiny houses get water.

Key Takeaways

  • Tiny houses have limited space and resources, so various methods and solutions are utilized for water supply.
  • These methods include rainwater harvesting, greywater recycling, composting toilets, and portable water tanks.
  • Proper maintenance and troubleshooting are necessary for efficient water supply in tiny houses.
  • Winterizing water systems in cold climates is important to prevent frozen pipes and ensure continuous access to safe drinking water.

Traditional Plumbing Connections

So, how exactly does a tiny house manage to get water? Well, it’s all about the traditional plumbing connections. In a tiny house, the plumbing system is similar to that of a regular house, just on a smaller scale. It consists of pipes, valves, and fixtures that allow water to flow in and out of the house.

To ensure traditional plumbing maintenance in a tiny house, it’s crucial to have a water supply connection. This typically involves connecting the tiny house to a municipal water source or a well. The connection is made using a water line that runs from the source to the tiny house. It’s important to install pressure regulators to control the water pressure, as excessive pressure can cause damage to the plumbing system.

Inside the tiny house, the water is distributed through a network of pipes. These pipes are usually made of copper or PEX (cross-linked polyethylene) and are connected to fixtures such as faucets, showers, and toilets. To ensure efficient water flow, it’s essential to properly size the pipes and use the correct fittings.

Now that we understand how traditional plumbing connections work in a tiny house, let’s delve into another water source option: rainwater harvesting. This method allows tiny house owners to collect and utilize rainwater for various purposes.

Rainwater Harvesting

Rainwater harvesting allows these compact homes to efficiently collect and utilize precipitation. This sustainable method of water collection involves capturing rainwater from the roof of the tiny house and directing it into a storage system for later use.

Advertisement

The process begins with the installation of gutters and downspouts, which collect the rainwater as it falls. The collected rainwater is then channeled into a filtration system to remove debris and impurities. Once filtered, the water is stored in a specially designed tank or cistern for future use. These tanks are typically made from food-grade materials to ensure the water remains safe for consumption.

Rainwater collection systems in tiny houses can vary in size and complexity depending on the needs of the occupants. Some systems may be as simple as a barrel positioned under a downspout, while others may incorporate larger underground tanks or multiple storage containers.

The collected rainwater can be used for a variety of purposes, including washing dishes, flushing toilets, or even providing water for showers.

Transitioning into the subsequent section about greywater recycling, it is important to note that rainwater harvesting is just one method of water conservation in tiny houses. Another sustainable practice is the recycling of greywater, which involves reusing water from sinks, showers, and laundry for irrigation or toilet flushing.

Greywater Recycling

Transitioning to greywater recycling, occupants of compact homes can repurpose water from sinks, showers, and laundry for irrigation or toilet flushing, further contributing to sustainable water usage. Greywater treatment is an essential part of this process to ensure that the recycled water is safe for reuse.

Advertisement

Here’s how it works:

  1. Collection: Greywater is collected from the various sources mentioned earlier, excluding water from toilets and kitchen sinks which may contain contaminants.

  2. Filtration: The collected greywater goes through a filtration system to remove larger particles, such as hair and lint. This helps prevent clogging in the pipes and irrigation system.

  3. Biological treatment: After filtration, the greywater undergoes biological treatment. This involves the use of bacteria and other microorganisms to break down organic matter and remove harmful pathogens.

  4. Disinfection: To ensure the water is safe for reuse, it is disinfected using methods like UV light or chlorine. This kills any remaining bacteria and viruses, making the water suitable for irrigation or flushing toilets.

Transitioning to the subsequent section about composting toilets, it’s important to consider sustainable waste management in compact homes.

Composting Toilets

When it comes to living in a tiny house, one of the key considerations is how to manage waste without access to traditional plumbing systems. This is where a waterless toilet system, also known as a composting toilet, comes in handy. These toilets use a natural process of decomposition to break down waste into compost, eliminating the need for water and sewer connections.

Additionally, managing waste and odor in a composting toilet involves a careful balance of adding carbon-rich materials like sawdust or coconut coir to absorb moisture and neutralize odors, as well as regularly emptying and maintaining the composting chamber.

Using a Waterless Toilet System

In the miraculous world of tiny house living, even the tiniest of abodes can possess a remarkable waterless toilet system that defies traditional plumbing methods. Waterless toilet systems offer numerous benefits, making them an attractive option for those seeking sustainable and low-maintenance alternatives.

Advertisement

These systems eliminate the need for water usage, minimizing environmental impact and reducing water bills. Additionally, they provide DIY enthusiasts with various options to create their own customized waterless toilet system, allowing for flexibility and creativity in design.

Managing waste and odor in a composting toilet is the next crucial step in maintaining a hygienic and odor-free living space. By implementing proper waste management techniques and utilizing odor control methods such as ventilation, carbon filters, and natural additives, one can effectively manage waste and eliminate any unpleasant odors.

These strategies ensure a clean and comfortable living environment while taking advantage of the benefits of composting toilets.

Managing Waste and Odor in a Composting Toilet

To effectively manage waste and eliminate unpleasant odors in a composting toilet, you’ll need to implement proper waste management techniques and utilize odor control methods.

One crucial aspect is ventilation. It helps remove moisture and odors from the toilet area, keeping your tiny house fresh-smelling. It is recommended to install a fan or vent system that directs air outside the house.

Advertisement

Carbon filters can be added to the ventilation system to further reduce odors. They trap and neutralize odors, enhancing the effectiveness of the system.

In addition to ventilation and carbon filters, using natural additives can help control odors and absorb moisture in the composting chamber. Sawdust or coconut coir are popular choices for this purpose.

Regular maintenance of the composting toilet is essential for proper functioning and odor control. This includes emptying and cleaning the composting chamber.

Now, let’s transition to the next section about portable water tanks and discuss the importance of having a reliable water source in a tiny house.

Portable Water Tanks

Portable water tanks provide a practical solution for tiny houses to access and store water. When living in a small space, it is crucial to have efficient and reliable water supply options. These tanks can hold a significant amount of water and can be easily transported and connected to a tiny house’s plumbing system.

Advertisement

To illustrate the benefits of portable water tanks, I have created a table showcasing different options available in the market:

Option Capacity (gallons) Material Weight (lbs) Price ($)
Tank A 30 Plastic 25 100
Tank B 50 Stainless Steel 40 150
Tank C 100 Polyethylene 70 200
Tank D 150 Fiberglass 100 300
Tank E 200 Polypropylene 120 400

These portable water tanks offer a range of options to suit different needs and budgets. After securing a reliable water supply, it is important to conserve water in a tiny house. In the next section, we will explore water conservation techniques that can be implemented to ensure sustainable water usage.

[Water conservation techniques] can help maximize the use of the available water resources while minimizing waste.

Water Conservation Techniques

Implementing water conservation techniques can help maximize the use of available water resources while minimizing waste in a tiny home. Here are four water-saving tips that can be applied in an eco-friendly tiny house:

  1. Install low-flow fixtures: Replace traditional faucets and showerheads with low-flow alternatives to reduce water consumption. These fixtures restrict the flow of water without compromising functionality.

  2. Harvest rainwater: Set up a rainwater collection system to capture and store rainwater for various uses such as flushing toilets, watering plants, or doing laundry. This not only reduces reliance on the main water supply but also utilizes a sustainable water source.

  3. Greywater recycling: Treat and reuse greywater from sinks, showers, and washing machines for irrigation purposes. By diverting this water from the sewage system, you can significantly reduce water wastage.

  4. Insulate pipes: Insulating water pipes helps prevent heat loss, ensuring hot water reaches the desired location more quickly. This reduces the need to let water run to achieve the desired temperature, saving both water and energy.

Implementing these water conservation techniques in a tiny house promotes sustainability and efficient resource utilization. Transitioning into the subsequent section about ‘off-grid water solutions,’ it’s crucial to explore additional methods for obtaining water independently.

Advertisement

Off-Grid Water Solutions

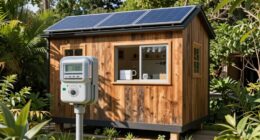
When it comes to off-grid water solutions for a tiny house, there are two key points to consider. One is using solar-powered water pumps, which are a great option for those who want a sustainable and energy-efficient way to pump water. These pumps use solar energy to power the pump, eliminating the need for electricity or fuel.

The other point is utilizing gravity-fed systems. Gravity-fed systems make use of the natural force of gravity to supply water to the tiny house. This is done by placing water storage tanks at a higher elevation than the house. The water then flows down through pipes, providing a constant and reliable water source.

Using Solar-Powered Water Pumps

Solar-powered water pumps provide a sustainable solution for tiny houses to access water. These pumps utilize solar energy to power the pumping mechanism, allowing for a consistent and reliable water supply.

With solar powered irrigation systems, tiny house owners can effectively water their gardens and plants without relying on traditional electricity sources. These pumps are designed to be energy-efficient, utilizing solar panels to convert sunlight into electricity and store it in batteries for later use. This ensures that water can be accessed even during periods of low sunlight.

By incorporating solar-powered water pumps into their off-grid water systems, tiny house owners can achieve a sustainable water sourcing solution that minimizes their environmental impact.

Advertisement

In the subsequent section, I will discuss how tiny houses can utilize gravity-fed systems to further enhance their water supply.

Utilizing Gravity-Fed Systems

In my previous discussion on using solar-powered water pumps for tiny houses, I highlighted the benefits of harnessing renewable energy to pump water. Now, let’s delve into another efficient method: utilizing gravity-fed systems.

These systems rely on the natural force of gravity to provide water pressure for various needs in a tiny house. By positioning water storage tanks at a higher elevation than the fixtures, water flows down through pipes, creating sufficient pressure for tasks such as showering, washing dishes, or flushing toilets.

Gravity-fed irrigation systems also work in a similar way, allowing water to flow through channels to water plants and crops. This method is not only cost-effective but also eco-friendly, as it doesn’t require any electricity or additional equipment.

Moving forward, let’s explore how water filtration and purification play a crucial role in ensuring a clean and safe water supply for tiny houses.

Advertisement

Water Filtration and Purification

When it comes to choosing the right water filtration system for my tiny house, I need to consider several factors.

I need to assess the quality of the water source, the specific contaminants present, and the flow rate required.

Additionally, I must ensure that the filtration system I choose is capable of removing bacteria, viruses, and other harmful pathogens to ensure safe and clean drinking water.

With careful consideration and proper research, I can find the perfect water filtration system for my needs.

Choosing the Right Water Filtration System

Water filtration systems for tiny houses are like the unsung heroes, quietly ensuring that the purest drops of water flow through the home’s faucets. When choosing water storage and treatment options for a tiny house, it’s essential to consider the specific needs and limitations of the space.

Advertisement

Here are four key factors to consider:

  1. Space: Since tiny houses have limited space, it’s crucial to select a filtration system that’s compact and can fit within the available area.

  2. Efficiency: Look for a filtration system that can effectively remove contaminants such as sediment, bacteria, and chemicals, ensuring the water’s safe for consumption.

  3. Maintenance: Consider the ease of maintenance for the chosen system. Systems with replaceable filters or cartridges are convenient and cost-effective in the long run.

  4. Water Source: Assess the quality of the water source and select a filtration system that targets specific contaminants present in the water supply.

Choosing the right water filtration system ensures safe and clean drinking water, ensuring a healthy and comfortable living environment in a tiny house.

Ensuring Safe and Clean Drinking Water

With a reliable water filtration system, you can savor every sip of refreshing, crystal-clear water in your tiny oasis. Ensuring safe and clean drinking water is essential when living in a tiny house.

There are various clean water sources available for tiny homes, such as municipal water supply, well water, or rainwater harvesting. It’s important to choose the right water storage options based on your needs and available space. Some common options include water tanks, containers, or even built-in storage systems. These storage options should be properly sealed and insulated to prevent contamination and freezing during colder months.

Winterizing water systems is crucial to ensure continuous access to safe drinking water. By following proper maintenance procedures and insulating pipes, you can enjoy clean water even during the harshest winter conditions.

Advertisement

Transitioning into the subsequent section, let’s explore how to winterize your tiny house water systems.

Winterizing Water Systems

To ensure the tiny house water systems are well-prepared for the winter season, it’s crucial to implement effective insulation techniques and regularly maintain the plumbing.

Winterizing plumbing systems is essential to prevent frozen pipes, which can lead to costly repairs and potential water damage. Insulating the pipes with foam sleeves or heat tape can help protect them from freezing temperatures. It’s also important to insulate any exposed areas, such as crawl spaces or cabinets, where pipes are located. Additionally, sealing any gaps or cracks in the walls can prevent cold air from infiltrating and affecting the water lines.

Regular maintenance is key to ensuring the water systems remain in optimal condition throughout the winter. This includes checking for any leaks or drips and promptly repairing them. Drain and disconnect any outdoor hoses to prevent water from freezing and causing damage to the hose and the connected pipes. It’s also advisable to keep the tiny house heated above freezing temperatures to further safeguard the water systems.

Winterizing the plumbing systems in a tiny house is vital to prevent frozen pipes and potential water damage. By implementing insulation techniques, regularly maintaining the plumbing, and taking necessary precautions, the water systems can withstand the winter season.

Advertisement

In the next section about maintenance and troubleshooting, we’ll explore additional steps to ensure the proper functioning of the tiny house water systems.

Maintenance and Troubleshooting

Maintaining and troubleshooting the water systems in a tiny house is like keeping a high-performance race car in top shape – it requires constant attention and fine-tuning. To ensure the water systems in your tiny house function properly, here are some maintenance tips and common issues to be aware of:

Regularly inspect for leaks: Check all connections, pipes, and faucets for any signs of leakage. Even a small leak can cause significant damage over time, so it’s crucial to address them promptly.

Clean and sanitize the water tank: Tiny houses often have limited water storage, so it’s essential to keep the tank clean and free from bacteria or sediment buildup. Regularly flush and sanitize the tank using a bleach solution or specialized water tank cleaner.

Check the water pump: The water pump is a critical component of the water system. Ensure it’s functioning correctly by listening for any unusual noises or vibrations. Also, check the pump’s pressure and adjust it if necessary.

Advertisement

Common issues that may arise with tiny house water systems include low water pressure, clogged filters, and frozen pipes during winter. These issues can be resolved by cleaning or replacing filters, insulating pipes, and using heat tape or space heaters to prevent freezing.

Regular maintenance and prompt troubleshooting will help keep your tiny house’s water systems running smoothly.

Frequently Asked Questions

Can a tiny house be connected to a traditional city water supply?

Connecting a tiny house to a traditional city water supply is feasible and offers numerous benefits. It provides a reliable and convenient source of water, eliminating the need for alternative water sources. By tapping into the city water supply, tiny house owners can access clean and treated water without the hassle of installing and maintaining their own water systems.

This connection ensures a constant water supply, making daily activities such as cooking, cleaning, and bathing much easier and more efficient.

How much rainwater can be harvested from a tiny house roof?

Harvesting rainwater from a tiny house roof can be a great way to supplement your water supply. On average, a tiny house roof can collect around 600 gallons of rainwater per inch of rainfall. However, the actual amount will depend on the size and shape of the roof.

Advertisement

To ensure the water is safe for use, it’s important to install water filters to remove any contaminants. These filters will help provide clean and usable water for everyday needs.

Is it possible to recycle greywater in a tiny house without extensive plumbing modifications?

Recycling greywater in a tiny house without extensive plumbing modifications is indeed possible, promoting water conservation. Greywater, which includes water from sinks, showers, and laundry, can be collected and treated for reuse. By installing a greywater system, water can be filtered and disinfected for non-potable purposes such as toilet flushing, irrigation, or even cleaning. This sustainable approach reduces water consumption and minimizes the strain on freshwater resources, making it an efficient choice for tiny house dwellers.

What is the process of composting toilets in a tiny house and how often does it need to be emptied?

Composting toilet maintenance in a tiny house involves regular emptying to ensure proper functioning. The frequency of emptying depends on factors such as the size of the composting chamber and the number of occupants. Generally, it’s recommended to empty the composting toilet every 2-3 weeks.

This process entails removing the composted material from the chamber and transferring it to an outdoor composting bin. It’s essential to follow proper sanitation protocols to prevent any odors or contamination.

How long does the water supply from portable water tanks typically last in a tiny house?

Water is a precious resource and it’s important to conserve it in a tiny house. With portable water tanks, the duration of water supply varies depending on usage and tank capacity. However, it’s essential to adopt water conservation practices to prolong supply.

Advertisement

Additionally, alternative water sources like rainwater harvesting or greywater recycling can be utilized to enhance sustainability. Remember, in a tiny house, every drop counts!

Conclusion

In conclusion, ensuring a reliable water supply in a tiny house requires careful consideration of various options.

From traditional plumbing connections to innovative rainwater harvesting and greywater recycling systems, there are numerous ways to meet your water needs.

Composting toilets and portable water tanks offer additional flexibility, while off-grid water solutions provide independence.

Remember to prioritize water filtration and purification for safe consumption.

Advertisement

Lastly, don’t forget to winterize your water systems and perform regular maintenance to avoid any issues.

As the saying goes, a tiny house’s water supply is like a delicate ecosystem, requiring precise care and attention to keep it flowing smoothly.

Continue Reading
Advertisement

Beginners Guides

Episode Where Coyote Buys Tiny House On Grace And Frankie

Published

on

By

An image capturing the essence of the episode where Coyote purchases a charming, rustic tiny house on "Grace and Frankie

Get ready to be completely blown away by the most hilarious and heartwarming episode of Grace and Frankie yet!

In the episode where Coyote buys a tiny house, prepare for a rollercoaster of emotions as we delve into the world of minimalist living.

This episode takes us on a journey through the challenges and triumphs of living in a tiny home, showcasing the incredible transformation that takes place in Coyote’s life.

From navigating the ups and downs of minimalistic living to the lessons learned along the way, this episode is packed with insightful moments that will leave you questioning your own relationship with material possessions.

Brace yourself for the impact of Coyote’s tiny house on the show’s dynamic, as this decision shakes things up in unexpected ways.

Advertisement

So grab your popcorn and get ready to laugh, cry, and be inspired by the incredible story of Coyote’s tiny house adventure!

Key Takeaways

  • Coyote’s decision to buy a tiny house brings a rollercoaster of emotions and insights into minimalist living.
  • The challenges and triumphs of living in a tiny home transform Coyote’s life and question viewers’ relationship with material possessions.
  • Minimalist living in a tiny house has benefits for mental health and offers practical tips for transitioning to a simpler lifestyle.
  • Coyote’s motivation to embrace a minimalist lifestyle includes downsizing, sustainability, and detachment from material possessions, with challenges including letting go of belongings and adapting to a smaller space.

The Appeal of Minimalist Living

Coyote’s decision to buy a tiny house on Grace and Frankie perfectly captures the allure of minimalist living, where every nook and cranny is utilized in a cozy and efficient way.

Minimalism, with its focus on simplicity and intentional living, has been shown to have positive effects on mental health. By decluttering and reducing material possessions, people can experience decreased stress and increased clarity of mind.

Transitioning to a minimalist lifestyle can seem daunting, but there are practical tips to make the process easier. Start by decluttering one room at a time, keeping only the items that bring joy or serve a purpose. Embrace multifunctional furniture and storage solutions to maximize space. Incorporate daily habits like meditation and gratitude to foster a minimalist mindset.

However, exploring the challenges of tiny house living brings to light the reality that minimalism is not without its obstacles.

Exploring the Challenges of Tiny House Living

Imagine the difficulties you’ll face when you squeeze yourself into a pint-sized abode, where every inch is a battleground for survival. Tiny house living certainly has its benefits, such as reduced expenses, lower environmental impact, and the opportunity to simplify your life.

Advertisement

However, it also comes with its fair share of drawbacks. Lack of space is the most obvious challenge, as it requires careful organization and limited possessions. Privacy can be compromised, with no room for personal retreats. Additionally, living in a tiny house can be physically demanding, with limited amenities and the need for creative solutions to everyday tasks.

Despite these challenges, many people find the benefits of minimalist living outweigh the drawbacks. Now, let’s explore Coyote’s decision to embrace a minimalist lifestyle without missing a beat.

Coyote’s Decision to Embrace a Minimalist Lifestyle

Embracing a minimalist lifestyle offers numerous benefits for those seeking to simplify their lives and reduce clutter. In the episode where Coyote buys a tiny house on ‘Grace and Frankie,’ his motivation to embrace this lifestyle becomes evident. Coyote’s decision is driven by a desire to downsize, live more sustainably, and detach himself from material possessions.

Adjusting to this change, however, is not without its challenges. Transitioning from a larger home to a tiny house requires letting go of unnecessary belongings and adapting to a more compact living space. Despite these difficulties, Coyote finds fulfillment in the simplicity and freedom that comes with a minimalist lifestyle.

This episode showcases his journey as he navigates the ups and downs of embracing minimalism. From hilarious antics to heartfelt moments, the episode captures the essence of Coyote’s transformation and the joy that can be found in living with less.

Advertisement

Hilarious Antics and Heartfelt Moments in the Episode

Filled with laughter and tears, the episode reveals the hilarious antics and heartfelt moments that arise as Coyote embraces his new minimalist lifestyle.

Coyote’s comedic mishaps provide plenty of comedic relief throughout the episode. From struggling to fit his belongings into the tiny house to accidentally knocking over furniture, Coyote’s journey into minimalism is anything but smooth.

However, amidst the chaos, there are also heartwarming connections that emerge. Coyote forms a deeper bond with Grace and Frankie as they help him navigate the challenges of downsizing. Additionally, he discovers a newfound appreciation for the simplicity of life, finding joy in the little things.

As the episode comes to a close, Coyote reflects on the ups and downs of living in a tiny home, preparing for the next chapter of his minimalist adventure.

Navigating the Ups and Downs of Living in a Tiny Home

Despite the cramped quarters and unexpected challenges, Coyote discovers that living in a tiny home is like riding a roller coaster, with its ups and downs that bring a sense of exhilaration and adventure. Small space organization becomes crucial in a tiny home, forcing Coyote to carefully consider every item and find creative storage solutions. Maintaining a minimalist lifestyle becomes a necessity as there is simply no room for excess. It’s a constant juggling act, making sure everything has a designated place and that clutter is kept at bay. The table below illustrates some of the clever ways Coyote organizes his small space:

Advertisement
Item Storage Solution Benefits
Clothes Foldable storage cubes Maximizes vertical space
Kitchen supplies Magnetic wall racks Easy access and saves counter space
Books Wall-mounted shelves Adds decor and saves floor space
Bed Under-bed storage bins Utilizes otherwise wasted space
Bathroom items Hanging shower caddy Keeps items within reach and visible

Coyote’s experience in the tiny home teaches him valuable lessons about living with less and finding joy in simplicity.

Lessons Learned from Coyote’s Experience

After watching Coyote navigate the ups and downs of living in a tiny home, I’ve learned some valuable lessons. First and foremost, downsizing can be a liberating experience. By letting go of unnecessary belongings and embracing a simpler lifestyle, Coyote was able to focus on what truly mattered to him. This newfound sense of freedom allowed him to prioritize experiences over material possessions, leading to a more fulfilling life.

Additionally, Coyote’s tiny home taught me the benefits of living with less. With limited space, he had to be intentional about what he brought into his home, which ultimately reduced clutter and promoted a sense of organization. Moreover, the reduced cost of maintaining a smaller space allowed Coyote to save money and live more sustainably.

Overall, Coyote’s experience with his tiny house serves as a reminder of the positive impact downsizing can have on our lives. Moving forward, let’s explore the impact of Coyote’s tiny house on the show’s dynamic.

The Impact of Coyote’s Tiny House on the Show’s Dynamic

Imagine how Coyote’s tiny house has completely transformed the dynamic of the show. It offers a fresh and exciting perspective on the characters’ lives. The impact of Coyote’s tiny house on the relationships of the characters is undeniable.

Advertisement

It has provided a unique space for intimate conversations and moments of reflection. The close proximity of the tiny house to the main characters’ homes has allowed for spontaneous interactions, deepening their connections and fostering a stronger sense of community.

Furthermore, Coyote’s decision to embrace tiny house living has sparked discussions about the practicality of such a lifestyle. Viewers are given insight into the challenges and benefits of living in a small space, prompting them to consider their own living arrangements.

Overall, Coyote’s tiny house has not only added an interesting dynamic to the show, but it has also encouraged viewers to reevaluate their own perspectives on relationships and practicality in their own lives.

Frequently Asked Questions

How many bedrooms does Coyote’s tiny house have?

Coyote’s tiny house has one bedroom. Building a tiny house can be affordable compared to traditional homes, with costs ranging from $20,000 to $150,000 depending on size and materials. However, legal restrictions on living in a tiny house vary by location. Some areas allow full-time living, while others only permit it as an accessory dwelling unit or temporary accommodation. It’s important to research local regulations before considering a tiny house as a permanent residence.

What is the cost of building a tiny house like Coyote’s?

The cost of building a tiny house like Coyote’s can vary depending on factors such as location, size, and materials used. On average, the cost of materials for a tiny house ranges from $20,000 to $50,000.

Advertisement

The build time for a tiny house can take anywhere from a few weeks to several months, depending on the complexity of the design and the availability of labor.

How did Coyote afford to buy a tiny house?

Coyote was able to afford a tiny house through a combination of his various sources of income. As a successful artist, he earns a steady income from selling his artwork. Additionally, he has a part-time job as a yoga instructor, which provides him with a supplemental income.

Living in a tiny house also comes with financial implications. It allows Coyote to save money on utilities, maintenance, and overall living expenses, making it a more affordable housing option.

What is the square footage of Coyote’s tiny house?

The square footage of Coyote’s tiny house isn’t explicitly mentioned in the episode where he buys it on Grace and Frankie. However, it’s important to note that the cost of building a tiny house can vary depending on various factors such as location, materials used, and customization.

Additionally, legal restrictions on living in a tiny house can also vary from place to place, with some areas having specific regulations regarding minimum square footage requirements for residential dwellings.

Advertisement

Are there any legal restrictions on living in a tiny house like Coyote’s?

Are there any legal restrictions on living in a tiny house like Coyote’s?

Living in a tiny house comes with its own set of legal requirements. While regulations vary by location, some common requirements include obtaining building permits, adhering to zoning laws, and meeting safety codes for electrical and plumbing systems.

However, the benefits of living in a tiny house, such as lower costs and a smaller environmental footprint, often outweigh the potential challenges of navigating these legal requirements.

Conclusion

In conclusion, Coyote’s decision to embrace a minimalist lifestyle by purchasing a tiny house on ‘Grace and Frankie’ is both entertaining and enlightening. The challenges and triumphs he faces in navigating the ups and downs of tiny house living provide valuable lessons and moments of reflection.

The impact of his tiny house on the show’s dynamic adds an exciting and fresh element to the storyline. Overall, this episode serves as a reminder of the appeal of minimalism and the power of embracing a simpler way of life. It’s a must-watch for anyone seeking inspiration and a good laugh.

Advertisement

Continue Reading

Beginners Guides

Diy Tiny House How Long

Published

on

By

An image showcasing a cozy, compact tiny house tucked amidst a serene forest setting

Building your own tiny home may seem like a daunting task, but I can assure you it is a truly rewarding adventure! From the initial research and planning stages to the final touches and the day you finally move in, every step of this journey is filled with excitement and satisfaction.

Now, I won’t lie to you, building a tiny house is no small feat. It requires careful research, meticulous planning, and a whole lot of elbow grease. But fear not, because I’m here to guide you through the journey, step by step.

In this article, we’ll explore the timeline of building a DIY tiny house. From the moment you acquire the necessary materials and permits, to the foundation and framing, electrical and plumbing installations, and finally, the interior and exterior finishes – we’ll cover it all.

So grab your tool belt and get ready to dive into the world of DIY tiny house building. By the end of this article, you’ll have a clear understanding of how long it takes to turn your dreams into reality.

Let’s get started!

Advertisement

Key Takeaways

  • Building a DIY tiny house requires research, planning, and hard work.
  • The timeline of building a DIY tiny house includes researching and planning, acquiring materials and permits, foundation and framing, electrical and plumbing installations, and interior and exterior finishes.
  • The benefits of building a tiny house include affordability, sustainability, and a minimalist lifestyle.
  • Key steps in the DIY tiny house building process include creating a blueprint, calculating costs, creating a timeline, acquiring materials from local hardware stores, online suppliers, and salvage yards, obtaining permits and licenses by complying with regulations and filling out applications, and utilizing salvage yards for cost savings and uniqueness.

Research and Planning Stage

You should start by researching and planning your DIY tiny house so you can ensure that you have a solid foundation before you begin construction.

Researching the benefits of building a tiny house allows you to understand the advantages, such as affordability, sustainability, and the freedom to live a minimalist lifestyle. By gathering information on different designs, materials, and construction methods, you can make informed decisions that align with your needs and preferences.

The planning process involves creating a detailed blueprint, calculating the costs, and creating a timeline for the project. This stage is crucial as it helps you anticipate challenges, identify potential solutions, and avoid costly mistakes.

Once you have completed the research and planning stage, you can move on to acquiring materials and permits, ensuring a smooth transition into the next phase of your DIY tiny house journey.

Acquiring Materials and Permits

When it comes to acquiring materials for my DIY tiny house project, I plan to source them from various places such as local hardware stores, online suppliers, and even salvage yards for reclaimed materials. This will help me to find the best quality materials at the most affordable prices.

Additionally, I understand the importance of obtaining the necessary permits and licenses for my tiny house, as it’ll ensure that my project is legal and up to code. I’ll research the specific requirements for my area and work with the appropriate authorities to ensure a smooth and compliant construction process.

Advertisement

Source Building Materials

To save time and money, I started by sourcing building materials from local salvage yards and repurposing them for my DIY tiny house. There are several sourcing options available, including salvage yards, architectural salvage stores, and online marketplaces.

When considering the cost, it was important to compare prices and factor in transportation costs. I found that salvage yards offered a wide range of materials at lower prices, especially if I was willing to put in some extra effort to clean and refurbish them. Additionally, repurposing materials not only saved money but also added a unique touch to my tiny house.

By using reclaimed wood for the flooring and salvaged windows for natural lighting, I was able to create a sustainable and eco-friendly living space. Now that I had sourced my materials, it was time to obtain necessary permits and licenses, ensuring that my tiny house complied with local regulations.

Obtain Necessary Permits and Licenses

After sourcing building materials from local salvage yards and repurposing them, it was time to ensure that necessary permits and licenses were obtained for my eco-friendly living space. Here are the steps I took to obtain the permits and meet the licensing requirements:

  1. Research: I began by researching the specific permits and licenses needed for building a tiny house in my area. This included zoning regulations, building codes, and any special requirements for eco-friendly structures.

  2. Application: Once I had gathered all the necessary information, I filled out the permit application and submitted it to the local building department. This included providing detailed plans and specifications for the tiny house.

  3. Review and Approval: The building department reviewed my application, plans, and specifications to ensure compliance with all regulations. They may have requested revisions or additional information before granting approval.

  4. Fees and Inspections: After receiving approval, I paid the required fees and scheduled inspections at various stages of the construction process to ensure compliance with building codes.

With the necessary permits and licenses in hand, I could now move on to the next step of my tiny house project: foundation and framing.

Advertisement

Foundation and Framing

Once you’ve laid a solid foundation for your tiny house, the framing becomes the backbone, giving structure and strength to your dream home like a sturdy spine supports the human body.

Before starting the framing process, it’s crucial to ensure that the foundation is properly prepared. This includes leveling the ground, adding gravel and compacting it to create a stable base.

Once the foundation is ready, you can begin the framing process by constructing the walls, roof, and floor systems. Framing techniques such as platform framing or post-and-beam construction can be used, depending on your design preferences and local building codes.

Precision and accuracy are essential during this stage to ensure that the walls are plumb, the roof is properly supported, and the overall structure is sturdy.

With the framing complete, you can then move on to the next exciting step of electrical and plumbing installations, seamlessly connecting your tiny house to essential utilities.

Advertisement

Electrical and Plumbing Installations

When connecting your tiny home to essential utilities, you’ll need to carefully consider the electrical and plumbing installations, ensuring they are done correctly and safely.

For the electrical wiring, it’s crucial to plan the layout and determine the right gauge of wires to handle the load. Install outlets strategically throughout the house, considering the locations of appliances and devices. Additionally, don’t forget to include a breaker box to control the flow of electricity and ensure safety.

Regarding the plumbing system, start by installing a water supply line and connect it to a reliable source. Consider the size of the pipes and the water pressure needed. Install a water heater and connect it to the plumbing system.

For waste disposal, install a toilet, sink, and shower, connecting them to the sewage system or a septic tank.

Next, we will move on to the interior and exterior finishes, giving your tiny house a beautiful and functional appearance.

Advertisement

Interior and Exterior Finishes

To achieve a stunning and inviting look for your tiny home, you’ll eagerly explore the world of interior and exterior finishes, transforming your humble abode into a breathtaking oasis.

When it comes to tiny house paint colors, it’s important to choose hues that create a sense of openness and serenity. Light and neutral shades such as whites, creams, and pastels can make your space feel more spacious and airy. Additionally, consider incorporating pops of color through accent walls or colorful furniture to add personality and visual interest.

As for tiny house landscaping ideas, think about creating a cozy outdoor space that complements the overall design of your tiny home. Utilize vertical gardens, potted plants, and strategic placement of outdoor furniture to maximize the limited space.

With the right finishes, your tiny home will truly shine.

Moving forward to the next section on cabinetry and fixture installation, we’ll explore how to optimize storage and functionality within your tiny home.

Advertisement

Cabinetry and Fixture Installation

Get ready to optimize your storage and functionality by diving into the world of cabinetry and fixture installation in your tiny home. Cabinet design plays a crucial role in maximizing space, so it’s important to carefully plan the layout and dimensions. Consider utilizing custom-built cabinets to fit perfectly into the available space. When selecting fixtures, choose ones that are both functional and aesthetically pleasing. Look for compact options that can be easily installed in your tiny home without taking up too much space. To evoke emotion in the audience, here’s a table showcasing popular cabinet and fixture options:

Cabinet Design Fixture Selection
Open Shelving Wall-mounted Sink
Pull-out Drawers Space-saving Toilet
Corner Cabinets Compact Shower
Overhead Cabinets Foldable Faucet
Hidden Storage Wall-mounted Mirror

With these cabinetry and fixture choices, your tiny home will not only be functional but also visually appealing. Now, let’s move on to the final touches and move-in.

Final Touches and Move-In

Now that the cabinetry and fixtures are installed, it’s time to focus on the final touches and move-in process for my DIY tiny house.

The first step is to install lighting and hardware throughout the house, ensuring that every corner is well-lit and functional.

Once that’s done, I can begin to furnish and decorate the space, carefully selecting pieces that maximize both comfort and functionality in this small living area.

Advertisement

Install Lighting and Hardware

Once you’ve chosen the perfect lighting fixtures and hardware, it’s time to install them in your DIY tiny house.

Lighting fixtures play a crucial role in creating the desired ambiance and functionality of your living space. Begin by carefully following the manufacturer’s instructions for installation, ensuring that all electrical connections are secure and safe.

Whether you opt for recessed lights, pendant lights, or wall sconces, position them strategically to illuminate key areas such as the kitchen, bathroom, and living room. Additionally, consider installing dimmer switches to control the brightness and create different moods throughout the day.

As for hardware installation, focus on functionality and aesthetics. Install door handles, drawer pulls, and cabinet knobs that match the overall style of your tiny house. These finishing touches will add a touch of personality and enhance the overall look and feel of your cozy abode.

With the lighting fixtures and hardware in place, it’s time to move on to the next exciting step – furnish and decorate the tiny house.

Advertisement

Furnish and Decorate the Tiny House

Transform your small space into a cozy and stylish haven by carefully selecting furnishings and adding personalized decor.

To make the most of your tiny house, consider these furniture arrangement tips:

  1. Choose multi-functional pieces: Opt for furniture that serves more than one purpose, such as a sofa bed or a coffee table with hidden storage.

  2. Maximize vertical space: Utilize tall bookshelves and wall-mounted storage units to free up floor space and keep your belongings organized.

  3. Create an illusion of space with color: Light and neutral color schemes can make your tiny house feel more open and spacious. Consider using pastel shades or white as the base color and adding pops of color with accent pieces or artwork.

By carefully arranging your furniture and selecting the right color scheme, you can create a functional and visually appealing tiny house that feels like a home.

Frequently Asked Questions

Can I build a tiny house without any prior construction experience?

Sure, building a tiny house without any prior construction experience is definitely possible.

In fact, a surprising statistic shows that nearly 70% of tiny house builders have little to no construction background.

Advertisement

While it may seem daunting at first, there are plenty of resources available, such as online tutorials and workshops, that can guide you through the process step-by-step.

With dedication, patience, and a willingness to learn, anyone can successfully tackle building their own tiny house.

How much does it typically cost to build a DIY tiny house?

In terms of cost estimation and budget planning, building a DIY tiny house can vary greatly depending on factors such as size, materials, and location.

On average, though, the cost to build a DIY tiny house ranges from $10,000 to $30,000. It’s important to carefully consider expenses for materials, permits, utilities, and any necessary tools or equipment. Additionally, researching and comparing prices can help ensure you stay within your budget during the construction process.

Are there any specific building codes or regulations I need to follow when constructing a tiny house?

When constructing a tiny house, it’s crucial to adhere to building codes and regulations. These codes and regulations vary depending on your location, so it’s essential to research and understand the specific requirements in your area.

Advertisement

Building codes typically cover aspects such as minimum square footage, ceiling height, electrical and plumbing systems, safety measures, and zoning restrictions. By following these guidelines, you can ensure the legality and safety of your tiny house construction project.

What are the most common challenges people face when building a DIY tiny house?

When building a DIY tiny house, common challenges include managing limited space, optimizing storage solutions, and ensuring proper insulation and ventilation.

To maximize space, I recommend using multi-functional furniture, such as sofas with built-in storage or foldable tables. Additionally, utilizing vertical space through lofted sleeping areas or high shelves can be helpful.

It’s also crucial to carefully plan the layout and prioritize essential features to make the most of the available square footage.

How long does it take on average to complete the construction of a DIY tiny house?

On average, it takes about 1,000 hours to complete the construction of a DIY tiny house. This statistic is fascinating because it highlights the level of dedication and commitment required for such a project.

Advertisement

The construction process involves various stages, including planning, designing, obtaining permits, framing, electrical work, plumbing, insulation, and finishing touches. Each step requires careful attention to detail, which contributes to the overall time it takes to finish the project.

Conclusion

In conclusion, building a DIY tiny house is a rewarding and fulfilling project that requires careful planning, hard work, and attention to detail.

From the research and planning stage to the final touches and move-in, every step of the process is crucial in creating a comfortable and functional living space.

By acquiring the necessary materials and permits, constructing a solid foundation and framing, installing electrical and plumbing systems, and adding interior and exterior finishes, one can create a personalized and efficient home.

So why wait? Embark on this journey and ask yourself, isn’t it time to create the perfect tiny house for yourself?

Advertisement

Continue Reading

Beginners Guides

What Are These Little Tiny Flies In My House

Published

on

By

An image capturing the essence of frustration as a curious homeowner stares at a swarm of minuscule, irksome flies buzzing around their living space, highlighting the perplexing mystery of these tiny pests

Have you ever walked into your house and been greeted by a swarm of small flies? While they may seem harmless at first, they can quickly become a nuisance.

Picture this: you enter your home, and as you make your way through the rooms, you notice these small flies buzzing around your face, landing on your food, and multiplying seemingly overnight. It’s enough to make anyone feel frustrated and disgusted.

But fear not, for I am here to shed some light on the mystery of these little pests. In this article, we will delve into the world of small flies and explore their types, breeding habits, and how to locate their breeding sources. We will also discuss preventive measures, homemade traps, and remedies you can try.

So, let’s dive in and discover what these little tiny flies in your house are all about.

Key Takeaways

  • Small flies in the house are usually found near sources of food or moisture.
  • Identifying and eliminating breeding sources is crucial for controlling small fly infestations.
  • Regularly checking for standing water, reducing humidity, and cleaning up spills and food debris can help prevent fly infestations.
  • Using natural fly repellents, regular cleaning routines, and properly sealing entry points can reduce the likelihood of attracting flies.

Identify the Types of Small Flies

These little tiny flies in my house can be identified by their distinct characteristics. Common signs of a small fly infestation include the presence of small flies buzzing around the house, especially near sources of food or moisture.

These flies are usually small, measuring only a few millimeters in length, and are commonly found near garbage cans, sinks, or drains. They have a short lifespan of only a few weeks, but their rapid reproduction can quickly lead to a large infestation if not addressed promptly.

Advertisement

Besides being a nuisance, small flies in the house can pose potential risks and health hazards. They’re known to carry and spread bacteria, such as E. coli and Salmonella, which can contaminate food and surfaces. This can lead to foodborne illnesses and other infections. Additionally, some people may experience allergic reactions to small fly allergens, resulting in symptoms like watery eyes, sneezing, and respiratory issues.

To understand their breeding habits, it’s essential to investigate the areas where these flies are commonly found, such as drains, garbage cans, or moist areas. By identifying their breeding grounds, it becomes easier to eliminate their presence and prevent future infestations.

Understand their Breeding Habits

Understanding their breeding habits can help you tackle the persistent presence of these minuscule pests. Small flies, such as fruit flies and drain flies, have distinct life cycles that contribute to their population growth. By understanding these cycles, you can implement effective strategies to control their population.

  • Fruit flies: These tiny insects lay their eggs on fermenting fruits and vegetables. The eggs hatch into larvae within 24-48 hours, and the larvae feed on the decaying matter for about a week. After pupating for another week, adult fruit flies emerge and the cycle continues.

  • Drain flies: These flies breed in moist areas, such as drains, sewage pipes, or standing water. Their eggs are laid in gelatinous masses, which adhere to surfaces. The larvae, also known as ‘wigglers,’ feed on organic matter in the breeding site. They pupate for about a week before emerging as adults.

Understanding their life cycle allows you to target their breeding sources effectively. By locating and eliminating these breeding sources, you can significantly reduce their population.

In the next section, we will explore how to locate the breeding sources and eradicate them completely.

Advertisement

Locate the Breeding Sources

To effectively tackle the persistent presence of these pesky insects, you need to locate where they’re breeding. Identifying the breeding sources is crucial in order to eliminate them and prevent future infestations.

One effective method is to use insecticides specifically designed to target the breeding sources of these tiny flies. These insecticides contain ingredients that disrupt the life cycle of the flies, preventing them from reproducing and eventually eliminating the population.

It’s also important to consider the impact of climate and weather on fly infestations. Flies thrive in warm and humid environments, making it essential to control the moisture levels in your house. Regularly check for any areas with standing water, such as leaky pipes or clogged drains, as these can serve as breeding grounds for flies. Additionally, ensure proper ventilation and reduce humidity levels in your home by using dehumidifiers or fans.

By effectively targeting the breeding sources and considering the impact of climate and weather, you can significantly reduce the presence of these tiny flies in your house. Taking preventive measures, which we’ll discuss in the next section, will help to ensure a fly-free environment.

Take Preventive Measures

To prevent the presence of these tiny flies in my house, I should take some preventive measures. Firstly, I need to clean up spills and food debris immediately to eliminate potential breeding sources.

Advertisement

Secondly, I should regularly clean and maintain drains to ensure they’re free from organic matter that could attract these flies.

Lastly, I need to avoid overwatering my houseplants, as the excess moisture can create an ideal breeding environment for these pests.

Additionally, it’s important to seal cracks and crevices and properly dispose of garbage to minimize their entry and attraction to my home.

Clean up spills and food debris

Clean up spills and food debris to keep those little tiny flies out of your house, as studies have shown that a single spilled sugary drink can attract up to 500 flies. To effectively prevent fly infestations, follow these cleaning tips:

  • Wipe up spills immediately to eliminate any food sources.
  • Store food in airtight containers to deprive flies of easy access.
  • Regularly sweep and vacuum floors to remove any food crumbs.
  • Dispose of garbage promptly and keep trash cans tightly sealed.

Additionally, you can use natural fly repellents like essential oils or vinegar solutions to deter flies from entering your home. By incorporating these preventive measures into your cleaning routine, you can significantly reduce the likelihood of attracting those pesky little flies.

It’s crucial to regularly clean and maintain drains as well, as they can become breeding grounds for flies.

Advertisement

Regularly clean and maintain drains

After taking care of spills and food debris, it’s important to shift our attention to another potential breeding ground for those pesky flies – the drains. Regularly cleaning and maintaining drains is crucial in preventing fly infestations in our homes.

Flies are attracted to the organic matter that accumulates in our drains, providing them with a perfect environment to lay their eggs. To combat this issue, there are a few drain cleaning tips to follow.

Firstly, pour boiling water down the drain to flush out any debris. Then, use a mixture of baking soda and vinegar to break down grease and eliminate odors. Finally, a drain brush can be used to physically remove any remaining buildup.

By incorporating these tips into our cleaning routine, we can effectively reduce the likelihood of fly infestations in our homes.

Moving forward, let’s explore how to avoid overwatering houseplants.

Advertisement

Avoid overwatering houseplants

Carefully monitoring the watering schedule of our beloved houseplants is crucial to ensure their health and prevent any unnecessary damage. Here are four important points to consider when it comes to watering your houseplants:

  1. Importance of using well-draining soil for houseplants: Using well-draining soil allows excess water to escape, preventing waterlogging and root rot.

  2. Avoid overwatering: Overwatering is a common mistake that can lead to root rot, fungus gnats, and other pests. Only water when the top inch of soil is dry.

  3. Water thoroughly but infrequently: When watering, make sure to thoroughly moisten the soil, but allow it to dry out between waterings. This promotes healthy root growth.

  4. Use the right watering technique: Instead of watering from the top, consider bottom watering by placing the plant in a tray of water and allowing it to soak up moisture.

By following these guidelines, you can maintain healthy houseplants and minimize the risk of attracting pests. Speaking of pests, let’s now discuss how to seal cracks and crevices to prevent their entry into our homes.

Seal cracks and crevices

To keep unwelcome critters at bay, it’s essential to seal cracks and crevices like a fortress protecting its treasures. These tiny flies may find their way into your house through small openings in walls, windows, or doors. By sealing these entry points, you can create a barrier that prevents their intrusion.

Start by inspecting your home for any visible cracks or gaps and use caulk or weatherstripping to seal them. Pay special attention to areas where pipes or wiring enter your home, as these are common entry points for pests. Additionally, ensure that your windows and doors are properly sealed with weatherproofing materials.

By eliminating these potential entryways, you can significantly reduce the chances of these pesky flies infiltrating your living space.

Advertisement

Now, let’s move on to the next step of properly disposing of garbage.

Properly dispose of garbage

To effectively combat the issue of tiny flies in your home, it’s crucial to address the proper disposal of garbage. These pesky insects are attracted to decaying organic matter, making your garbage an ideal breeding ground for them. To prevent their infestation, follow these steps:

  • Ensure that your garbage bins have tight-fitting lids to prevent flies from accessing the contents.

  • Regularly empty and clean your garbage bins to eliminate any potential food sources for the flies.

  • Consider using garbage bags that are specifically designed to repel flies and other pests.

  • If possible, keep your garbage bins away from entrances to your home to minimize the chances of flies finding their way inside.

By properly disposing of your garbage, you can significantly reduce the presence of these flies in your home.

In the subsequent section, we’ll explore the use of homemade traps and remedies to further tackle this issue.

Use Homemade Traps and Remedies

Ah, nothing ruins a cozy evening at home like those pesky little flies buzzing around! But fear not, because there are homemade traps and remedies that can help you show those tiny pests who’s boss. When it comes to dealing with these annoying flies, homemade fly repellents and natural fly control methods can be effective and environmentally friendly alternatives to chemical-based solutions.

Advertisement

To tackle the fly problem, you can create homemade fly traps using common household items. One simple trap involves mixing apple cider vinegar with a few drops of dish soap in a bowl. The vinegar attracts the flies, while the soap breaks the surface tension of the liquid, causing the flies to sink and drown. Another option is a fruit trap, where you can cut up a piece of ripe fruit and place it in a jar with a funnel placed on top. The flies will be attracted to the fruit and will have difficulty finding their way out of the jar.

Additionally, there are natural remedies that can help repel flies from your home. Essential oils like eucalyptus, peppermint, and lavender can be mixed with water and sprayed around the house to deter flies. Citronella candles can also be effective in keeping flies at bay, especially when used in outdoor areas.

By utilizing these homemade traps and remedies, you can significantly reduce the fly population in your house. However, if the infestation persists or becomes unmanageable, it may be necessary to seek professional help. Remember, it’s important to take action against these flies to ensure a comfortable and fly-free living space.

Seek Professional Help if Needed

If those bothersome pests persist and become an overwhelming swarm, don’t hesitate to call in the professionals, like a skilled exterminator who can swoop in like a superhero and rid your home of these winged intruders.

While DIY methods can be effective in controlling small flies in your house, there are some common mistakes to avoid when trying to eliminate them on your own.

Advertisement

One common mistake is not properly identifying the type of fly infestation you’re dealing with. Different species of flies require different treatment approaches. It’s important to accurately identify the flies to determine the most effective method of control.

Additionally, some DIY methods may only provide temporary relief, and the infestation can quickly rebound if not properly addressed.

Another mistake to avoid is not addressing the root cause of the infestation. Small flies are often attracted to moist and decaying organic matter, such as rotting fruits, vegetables, or damp areas in your home. Simply eliminating adult flies without eliminating their breeding sites will not solve the problem in the long term. It’s crucial to identify and eliminate these breeding sources to prevent future infestations.

Lastly, using ineffective or harmful insecticides can be a mistake. It’s important to choose insecticides specifically formulated for small flies and follow the instructions carefully. Avoid using excessive amounts of chemicals, as it can pose health risks to humans and pets.

While DIY methods can be useful in controlling small flies in your home, it’s important to avoid common mistakes and seek professional help if needed. Professional exterminators have the knowledge and experience to accurately identify the fly species, address the root cause of the infestation, and use effective and safe control methods. So, if those tiny flies become too much to handle, don’t hesitate to call in the experts.

Advertisement

Frequently Asked Questions

How do I know if the small flies in my house are harmful or dangerous?

To determine if the small flies in your house are harmful or dangerous, look for signs of infestation and potential health risks. Prevent infestation by keeping your house clean and dry. For extermination, consider using methods like traps, insecticides, or professional pest control services.

Can small flies in my house transmit diseases?

Small flies in my house can indeed carry diseases and pose a health risk. These tiny insects may transmit bacteria and viruses through contact with contaminated surfaces or by biting humans. It’s important to take measures to eliminate them.

Are small flies attracted to certain types of food or materials?

Small flies are attracted to common food sources such as fruits, vegetables, and decaying organic matter. To prevent infestation, it is crucial to maintain cleanliness, store food properly, and eliminate any potential breeding sites.

How long does it take for small flies to breed and multiply in my house?

The breeding habits and life cycle of small flies in my house vary depending on the species. Some can multiply rapidly, laying eggs every few days and completing their life cycle in as little as one week.

What are some common mistakes people make when trying to get rid of small flies in their homes?

Common mistakes people make when trying to rid their homes of small flies: believing they are harmless, neglecting proper sanitation, and relying solely on chemical sprays. Effective natural remedies include vinegar traps and regular disposal of organic waste.

Advertisement

Conclusion

In conclusion, these little tiny flies in my house are truly fascinating creatures. Despite their annoying presence, they serve as a reminder of the intricate web of life that surrounds us.

From the fruit flies that breed in the depths of our trash cans to the fungus gnats that thrive in our potted plants, every nook and cranny of our homes becomes a haven for these resilient insects.

So, next time you spot one buzzing around, take a moment to appreciate the irony of these minuscule beings disrupting our otherwise pristine abodes.

Continue Reading

Trending