Connect with us

Beginners Guides

How Do You Make A Flat Bed Trailer Ready For A Tiny House

Published

on

An image depicting a flatbed trailer transformed into a tiny house foundation

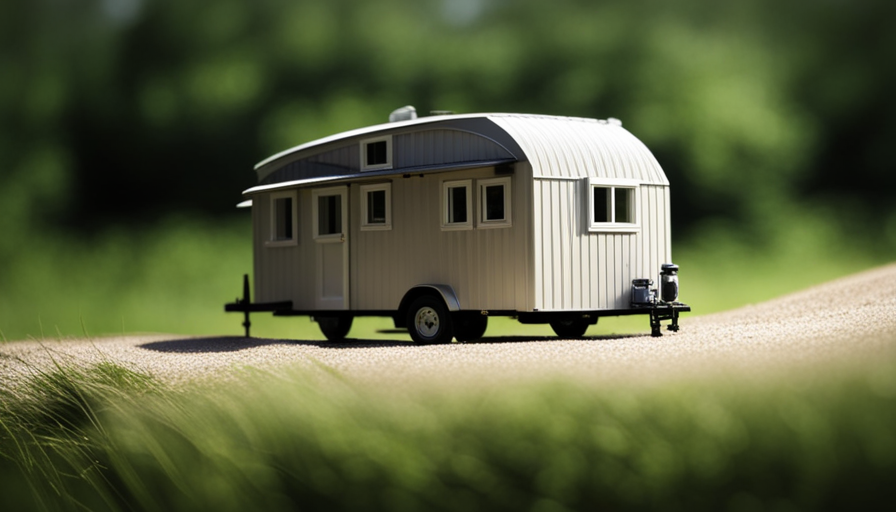
Are you ready to transform your flatbed trailer into a cozy and functional living area? By carefully planning and putting in the effort, you can create your perfect tiny home that suits your preferences and lifestyle.

Just like a sculptor molding clay into a masterpiece, you have the power to shape your trailer into a sanctuary that reflects your unique taste and lifestyle. But before you embark on this exciting journey, it’s important to ensure the structural integrity of your trailer. You need a solid foundation to build upon, just like a strong base supports a towering skyscraper.

Once you’ve assessed the trailer’s condition, it’s time to dive into the nitty-gritty details of planning, designing, and constructing your tiny house. From insulating to wiring, from building walls to installing windows, we’ll guide you through each step of the process, equipping you with the knowledge and skills to create a tiny house that is both functional and beautiful.

So, let’s get started and bring your vision to life!

Key Takeaways

  • Inspect the structural integrity of the trailer before starting the transformation process, focusing on areas such as the frame, axle, suspension system, and flooring.
  • Plan and design the layout of the tiny house carefully to maximize space utilization and consider the placement of rooms and amenities.
  • Choose appropriate insulation materials with suitable R-value for the climate to maintain a comfortable temperature and reduce energy consumption.
  • Level the trailer using a bubble level and adjust if necessary to ensure a stable foundation for the tiny house.

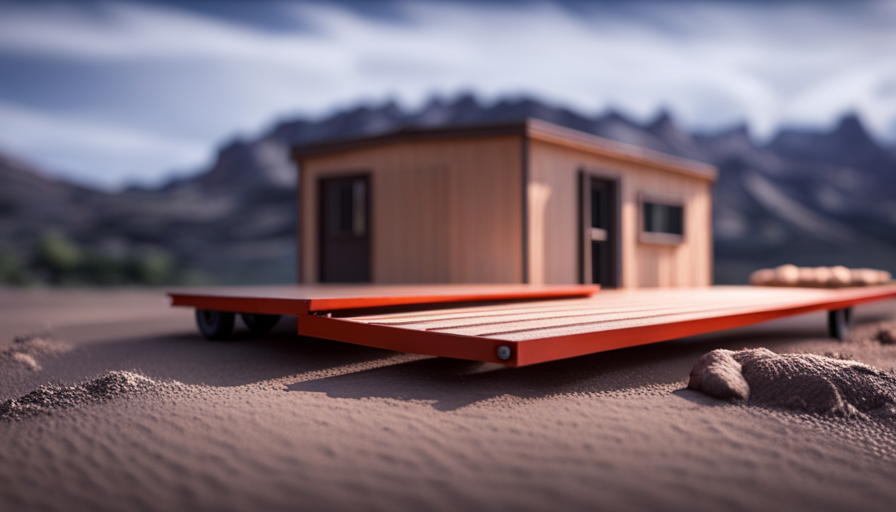
Assess the Trailer’s Structural Integrity

Now, it’s time for you to take a close look at your flatbed trailer and assess its structural integrity before transforming it into the perfect foundation for your tiny house.

Assessing the safety and evaluating the durability of the trailer is crucial to ensure a sturdy and reliable base for your tiny house project. Begin by inspecting the trailer’s frame for any signs of rust, cracks, or damage. Look for any compromised areas that may weaken the overall structure. Pay special attention to the tongue and hitch, as they bear the weight and provide stability during transportation.

Advertisement

Next, examine the axle and suspension system. Check for any signs of wear and tear, such as bent axles or worn-out springs. It’s essential to confirm that these components are in good condition to support the weight of your tiny house and provide a smooth ride.

Inspect the flooring of the trailer thoroughly. Look for any signs of rot, water damage, or weak spots. Ensure that the flooring is sturdy and can withstand the weight of the tiny house without compromising its structural integrity.

Assessing the safety and evaluating the durability of your flatbed trailer is the first crucial step in making it ready for your tiny house. Once you’re confident in its structural integrity, you can proceed to plan and design the layout of your future tiny home.

Plan and Design the Layout

When planning and designing the layout of your tiny house on a flat bed trailer, it’s crucial to determine the optimal placement of rooms and amenities. Carefully consider the flow of the space and how each area will function efficiently within the limited square footage. Additionally, incorporate space-saving solutions such as built-in storage, multi-purpose furniture, and clever organization systems to maximize the functionality of your small living area.

Determine the placement of rooms and amenities

First and foremost, it’s essential to strategically allocate the available space on the flat bed trailer in order to determine the optimal placement of rooms and amenities for the tiny house.

Advertisement

To achieve this, consider the following:

  • Placement of furniture: Carefully plan where each piece of furniture will go to maximize the use of space. Consider multi-functional furniture, such as a sofa that can also serve as a bed or storage.

  • Maximize natural light: Position windows and skylights strategically to let in as much natural light as possible. This will make the tiny house feel more open and spacious.

  • Efficient room layout: Arrange the rooms in a way that allows for smooth traffic flow and easy access to amenities. Consider placing the kitchen near the entrance for convenience.

  • Utilize vertical space: Take advantage of the vertical space by installing shelves, cabinets, and storage units that go up to the ceiling.

Now, let’s consider space-saving solutions for a small living area.

Consider space-saving solutions for a small living area

One important aspect to consider in a small living area is utilizing clever space-saving solutions. When designing your tiny house on a flatbed trailer, it’s crucial to maximize every inch of space.

Space-saving furniture is a great way to achieve this. Look for multifunctional pieces such as foldable tables, wall-mounted desks, and sofa beds. These versatile furniture items can easily be transformed to meet your changing needs throughout the day.

Another key consideration is creative storage solutions. Utilize every nook and cranny by incorporating built-in shelves, under-bed storage, and hidden compartments. Think vertically by utilizing walls for hanging storage solutions, such as pegboards or magnetic strips.

Advertisement

By incorporating these space-saving techniques, you can optimize the functionality of your tiny house. Transitioning into the subsequent section about insulating the trailer, it’s important to ensure that your space-saving solutions are also energy-efficient.

Insulate the Trailer

To properly insulate your trailer, start by selecting the appropriate insulation materials based on their R-value and suitability for your climate. Once you’ve chosen the insulation, install it in the walls, floor, and ceiling, making sure it fits tightly to minimize air leakage. Pay attention to any gaps or seams, and use insulation tape or caulk to seal them. Properly insulating your trailer will help maintain a comfortable temperature inside your tiny house and reduce energy consumption.

Choose the appropriate insulation materials

When preparing your flatbed trailer for a tiny house, you’ll want to pick out the perfect insulation materials that’ll keep your home warm and cozy in any weather conditions.

To make the right choice, consider the following options:

  • Fiberglass insulation: This popular choice is cost-effective and provides excellent thermal performance. It’s available in rolls or batts and can easily be installed between studs or joists.

  • Spray foam insulation: This versatile option expands to fill any gaps or cavities, creating an airtight seal. While it’s more expensive, it offers superior insulation and soundproofing capabilities.

  • Cellulose insulation: Made from recycled materials, this eco-friendly option provides good thermal performance and is resistant to pests. It can be blown into walls or attics for effective insulation.

  • Reflective insulation: This type of insulation reflects radiant heat, making it ideal for hot climates. It can be installed in the roof or walls to reduce heat gain.

Now that you’ve chosen the appropriate insulation materials, it’s time to move on to the next step: installing insulation in the walls, floor, and ceiling.

Advertisement

Install insulation in the walls, floor, and ceiling

Now that you’ve picked out the perfect insulation materials, it’s time to transform your humble trailer into a warm and cozy sanctuary by installing insulation in every nook and cranny of the walls, floor, and ceiling. To ensure maximum efficiency, it is crucial to choose the right insulation materials that provide excellent thermal resistance while also being space-saving solutions.

In the walls, you can use rigid foam insulation boards or mineral wool batts, which offer high R-values and excellent soundproofing properties. For the floor, consider using spray foam insulation or rigid foam panels, as they provide superior insulation and can withstand heavy loads. Lastly, insulate the ceiling with fiberglass batts or blown-in cellulose insulation to create a barrier against heat loss.

To help you visualize the different insulation materials and their benefits, here is a table highlighting their features:

Insulation Material R-Value Soundproofing Space-saving
Rigid Foam Insulation High Excellent Yes
Mineral Wool Batts High Excellent Yes
Spray Foam Insulation High Good No
Fiberglass Batts Medium Good No

By incorporating these insulation materials, you can create a well-insulated tiny house on your flatbed trailer. Next, we will discuss how to level the trailer to ensure a stable foundation for your tiny house.

Level the Trailer

First, make sure the trailer is leveled by using a bubble level and adjusting the height of the trailer’s legs accordingly. This is an important step in preparing the flatbed trailer for a tiny house. Leveling the trailer ensures a solid foundation for the structure and prevents any potential issues down the line.

Advertisement

If the ground is uneven, you may need to place blocks under the low side of the trailer to achieve a level surface. This will help distribute the weight evenly and provide stability.

Securing the foundation of the trailer is crucial to ensure the structural integrity of the tiny house. Once the trailer is leveled, it’s important to secure it properly to prevent any movement during transportation or while the tiny house is in use. This can be done by using anchors or tie-downs to attach the trailer to the ground, ensuring it stays in place.

With the trailer leveled and the foundation secured, you can now move on to the next step of installing electrical wiring. This is a vital aspect of making the flatbed trailer ready for a tiny house, as it allows for the connection of power sources and the installation of lighting fixtures, outlets, and appliances.

Install Electrical Wiring

To ensure safety and compliance, it’s crucial to hire a professional electrician to install the electrical wiring in your tiny house. They have the expertise and knowledge to handle the complexities of electrical work and ensure that everything is done according to code.

Before starting the installation, you need to determine the power needs of your tiny house, taking into account the appliances and systems that will be powered. This will help the electrician design and install an electrical system that meets your specific requirements.

Advertisement

Hire a professional electrician for safety and compliance

Ensure that you hire a professional electrician to guarantee the safety and compliance of your flatbed trailer for your tiny house. Hiring professionals is crucial when it comes to electrical work, as they have the expertise and knowledge to handle the complexities of wiring and ensure everything is done correctly.

Safety precautions are of utmost importance in this process, as faulty wiring can lead to electrical hazards, fires, or even electrocution. A professional electrician will ensure that all wiring is up to code and meets the necessary safety standards. They will also be able to advise you on the appropriate electrical components and systems for your tiny house, taking into consideration your power needs and usage.

With the expertise of a professional electrician, you can rest assured that your electrical system will be safe and compliant. Moving on to the next step, it is important to determine the power needs of your tiny house.

Determine the power needs of your tiny house

Now that you’ve hired a professional electrician, it’s time to figure out how much power your tiny house needs to keep everything running smoothly and efficiently. Power management is crucial to ensure that your electrical system can handle all your appliances and devices without overloading. To determine your power needs, you should assess the energy requirements of each item in your tiny house. Create a table with two columns and three rows to visualize this information. In the first column, list all your appliances and devices, including their wattage or amperage ratings. In the second column, calculate the total power consumption for each item by multiplying the wattage or amperage by the estimated usage hours per day. Sum up the total power consumption to determine your overall power needs. Once you have this information, you can explore renewable energy options to meet your power requirements. Transitioning into the subsequent section about setting up the plumbing system, you’ll want to ensure a seamless integration of both electrical and plumbing systems for a fully functional tiny house.

Set Up Plumbing System

To set up the plumbing system for your tiny house, you’ll need to install water supply and drainage pipes. This involves connecting the pipes to a water source and ensuring proper water flow throughout the house.

Advertisement

Additionally, when considering wastewater solutions, you may want to explore the option of composting toilets or alternative systems that efficiently manage and dispose of waste.

Install water supply and drainage pipes

First things first, let’s get those water supply and drainage pipes all set up on your flatbed trailer for your tiny house! To ensure a smooth installation process, follow these steps for water supply installation:

  1. Determine the location: Choose a spot on your trailer where the water inlet will be easily accessible.
  2. Install the water inlet: Connect the water inlet to the main water source and secure it to the trailer.
  3. Connect the pipes: Use durable PEX or PVC pipes to connect the water inlet to the fixtures inside your tiny house.

For drainage pipe installation, here’s what you need to do:

  1. Plan the layout: Map out the drainage system, considering the locations of sinks, showers, and toilets.
  2. Install the drainpipes: Secure the drainpipes underneath the trailer, connecting them to the fixtures using proper fittings.
  3. Test for leaks: Run water through the pipes and check for any leaks or blockages.

After setting up the water supply and drainage pipes, consider using composting toilets or alternative wastewater solutions to minimize environmental impact.

Consider using composting toilets or alternative wastewater solutions

Consider utilizing composting toilets or exploring alternative wastewater solutions to minimize the environmental impact of your tiny house. Composting toilets offer numerous benefits, including reduced water consumption, elimination of sewage infrastructure requirements, and the production of nutrient-rich compost for gardening. These toilets use a combination of natural processes, such as decomposition and evaporation, to break down waste into compost. They are odorless, require minimal maintenance, and are suitable for off-grid living.

Alternatively, you can explore alternative wastewater treatment options, such as greywater systems or aerobic treatment units, which treat and reuse wastewater for non-potable purposes. These systems can help conserve water and reduce the strain on traditional sewage systems.

By implementing these environmentally-friendly solutions, you can create a sustainable living space while minimizing your ecological footprint.

Advertisement

Now, let’s move on to the next step: building interior walls and flooring.

Build Interior Walls and Flooring

Get your flatbed trailer ready for a tiny house by starting with building the interior walls and flooring. This will create a solid foundation for your cozy living space. Follow these building techniques and interior design tips to ensure a functional and aesthetically pleasing interior:

  1. Frame the walls: Begin by installing the wall studs, using pressure-treated lumber for durability. Use a level to ensure the walls are plumb and square. Attach the studs to the trailer’s frame using appropriate fasteners.

  2. Insulate the walls: Enhance energy efficiency and comfort by insulating the interior walls. Consider using rigid foam insulation for its high insulating value and moisture resistance. Install it between the studs, sealing any gaps to prevent air leakage.

  3. Install the interior finishes: Once the walls are insulated, it’s time to install the interior finishes. Choose lightweight materials like gypsum board or plywood for the walls. Secure them to the studs using screws or nails.

  4. Lay the flooring: Select a durable flooring material that suits your style and preferences. Options like vinyl planks, laminate, or engineered hardwood work well in tiny houses. Install the flooring starting from one end of the trailer, making sure it’s level and secure.

After completing the interior walls and flooring, you can move on to the next step of constructing the exterior cladding. This will protect your tiny house from the elements and give it a finished look.

Construct Exterior Cladding

Now that you’ve successfully built the interior walls and flooring of your tiny house on a flatbed trailer, it’s time to move on to the next crucial step: constructing the exterior cladding.

Installing the exterior cladding is essential for protecting your tiny house from the elements and ensuring its durability. It not only enhances the aesthetic appeal but also provides insulation and weatherproofing.

Advertisement

To begin the exterior cladding installation, you need to select the appropriate materials based on your design preferences and climate conditions. Common options include wood, vinyl, fiber cement, or metal siding. Once you’ve chosen the material, measure and cut the cladding panels to fit the dimensions of your tiny house.

Next, attach the cladding panels securely to the frame of the house using screws or nails, following the manufacturer’s instructions. Ensure that each panel overlaps the previous one to prevent water seepage. Apply a weatherproofing barrier, such as a housewrap or waterproof membrane, before installing the cladding to further protect against moisture.

After the cladding is in place, seal any gaps or joints with caulk or weatherproof tape to create a tight seal. This step is crucial to prevent air leaks and maintain energy efficiency.

With the exterior cladding installed, your tiny house is now ready for the next phase: installing windows and doors.

Install Windows and Doors

Once you’ve completed the exterior cladding, it’s time to invite the sunshine and fresh air into your cozy haven by installing windows and doors that will serve as the welcoming portals to your tiny dream home.

Advertisement

Installing windows is a crucial step in creating a comfortable and well-lit living space. Start by measuring the window openings and selecting windows that fit your design aesthetic and functional needs. Consider factors such as insulation, energy efficiency, and durability when choosing the right windows for your tiny house.

Once you have your windows, carefully position them in the openings, ensuring they’re level and plumb. Secure them in place with screws or nails, making sure to seal any gaps with weatherstripping for optimal insulation.

Next, let’s talk about choosing doors. Your choice of doors will not only impact the aesthetics of your tiny house but also its security and functionality. Decide whether you want a traditional hinged door or a space-saving sliding door. Consider the material, size, and style that best complements your overall design.

Install the door frame securely, ensuring it’s level and square. Attach the door to the frame, making sure it opens and closes smoothly. Finally, add weatherstripping to seal any gaps and enhance insulation.

With the windows and doors in place, you’ve created the foundation for a bright and welcoming space. Now it’s time to move on to personalizing and decorating your tiny house to make it uniquely yours.

Advertisement

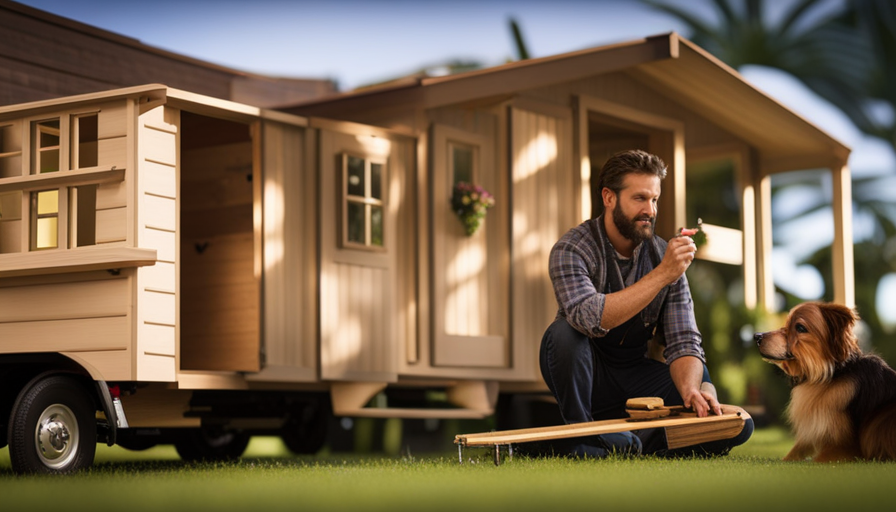
Personalize and Decorate

When personalizing and decorating your tiny house, you can add your personal touch with furniture and decor. Choose pieces that fit your style and make the space feel like home. Additionally, it’s important to optimize storage solutions for a compact living space.

Utilize creative storage options such as built-in shelves, under-bed storage, and multi-functional furniture to maximize the use of every inch.

Add your personal touch with furniture and decor

Make your flat bed trailer ready for a tiny house by adding your personal touch with furniture and decor – it’s the perfect opportunity to showcase your unique style and make it truly feel like home.

When selecting furniture, consider the size and functionality of each piece. Opt for multipurpose items, such as a sofa that can double as a guest bed or storage ottomans that provide hidden storage options.

Choose a color scheme that reflects your taste and creates a cohesive look throughout the space. Consider using neutral tones as a base and adding pops of color with accent pieces.

Advertisement

Incorporate your personal style through decorative items such as artwork, throw pillows, and curtains. These elements will not only add visual interest but also create a sense of comfort and warmth.

As you optimize storage solutions for a compact living space, keep in mind that every item should serve a purpose and contribute to an organized environment.

Optimize storage solutions for a compact living space

Get creative and maximize storage in your compact living space to make the most of every inch. When it comes to optimizing storage solutions for a tiny house on a flat bed trailer, it’s essential to prioritize space efficiency.

Start by utilizing vertical space with tall cabinets or shelves that reach the ceiling. Install hooks on walls or inside cupboard doors to hang items such as pots, pans, and cleaning supplies. Consider incorporating multifunctional furniture, like a bed frame with built-in drawers or a coffee table that doubles as a storage ottoman.

Utilize under-bed storage for items that are used less frequently. Think outside the box and utilize unconventional spaces, like the area above the bathroom or kitchen cabinets. By implementing these compact storage solutions, you can ensure that every nook and cranny of your tiny house is utilized effectively.

Advertisement

Frequently Asked Questions

What are the dimensions of a standard flat bed trailer?

To determine the dimensions of a standard flatbed trailer, you need to consider its length, width, and height. Typically, these trailers measure around 48 to 53 feet in length, 8.5 to 9.5 feet in width, and have a height clearance of approximately 13.5 feet.

As for weight capacity, standard flatbed trailers can typically handle loads ranging from 48,000 to 80,000 pounds, depending on the specific model and configuration.

How much weight can a flat bed trailer typically hold?

To calculate the weight capacity of a flatbed trailer, you need to know its gross vehicle weight rating (GVWR). This is the maximum weight the trailer can safely carry, including its own weight.

To reinforce a flatbed trailer for heavy loads, consider upgrading the axle, suspension, and frame. Additionally, ensure the trailer has proper tie-down points and a sturdy hitch. Consult a professional for specific modifications based on your trailer’s make and model.

Are there any legal requirements or permits needed to convert a flat bed trailer into a tiny house?

Legal requirements and building codes play a crucial role when converting a flatbed trailer into a tiny house. It’s important to comply with these regulations to ensure safety and avoid legal issues.

Advertisement

One interesting statistic to visualize the significance of these requirements is that 85% of tiny house owners encounter legal issues during the construction process. Therefore, it’s essential to research local laws, obtain necessary permits, and adhere to building codes to successfully convert a flatbed trailer into a tiny house.

What tools and equipment are necessary for the conversion process?

To convert a flat bed trailer into a tiny house, you’ll need various tools and equipment. Some essential tools include a circular saw, power drill, hammer, and screwdriver. Additionally, you’ll require a level, measuring tape, and a staple gun.

Safety precautions are crucial, so make sure to wear protective gear such as safety goggles, gloves, and a dust mask. It’s also advisable to have a fire extinguisher on hand and to work in a well-ventilated area.

Are there any specific safety precautions to consider when converting a flat bed trailer into a tiny house?

When converting a flatbed trailer into a tiny house, safety precautions are of utmost importance. One common mistake is underestimating the weight distribution. Imagine driving a car with all the weight in the back – the handling would be compromised, right?

The same goes for a tiny house on a trailer. Ensure a proper balance by distributing the weight evenly, securing heavy items properly, and reinforcing the structure to avoid any accidents on the road.

Advertisement

Conclusion

In conclusion, preparing a flat bed trailer for a tiny house requires careful assessment of its structural integrity. It also involves planning and designing the layout, insulating and leveling the trailer, installing electrical wiring, building interior walls and flooring, constructing exterior cladding, and installing windows and doors.

One interesting statistic to note is that, according to a survey conducted by the American Tiny House Association, the average cost of converting a flat bed trailer into a tiny house is around $25,000. This highlights the investment and attention to detail required to create a comfortable and functional living space on a trailer.

Continue Reading
Advertisement

Beginners Guides

Episode Where Coyote Buys Tiny House On Grace And Frankie

Published

on

By

An image capturing the essence of the episode where Coyote purchases a charming, rustic tiny house on "Grace and Frankie

Get ready to be completely blown away by the most hilarious and heartwarming episode of Grace and Frankie yet!

In the episode where Coyote buys a tiny house, prepare for a rollercoaster of emotions as we delve into the world of minimalist living.

This episode takes us on a journey through the challenges and triumphs of living in a tiny home, showcasing the incredible transformation that takes place in Coyote’s life.

From navigating the ups and downs of minimalistic living to the lessons learned along the way, this episode is packed with insightful moments that will leave you questioning your own relationship with material possessions.

Brace yourself for the impact of Coyote’s tiny house on the show’s dynamic, as this decision shakes things up in unexpected ways.

Advertisement

So grab your popcorn and get ready to laugh, cry, and be inspired by the incredible story of Coyote’s tiny house adventure!

Key Takeaways

  • Coyote’s decision to buy a tiny house brings a rollercoaster of emotions and insights into minimalist living.
  • The challenges and triumphs of living in a tiny home transform Coyote’s life and question viewers’ relationship with material possessions.
  • Minimalist living in a tiny house has benefits for mental health and offers practical tips for transitioning to a simpler lifestyle.
  • Coyote’s motivation to embrace a minimalist lifestyle includes downsizing, sustainability, and detachment from material possessions, with challenges including letting go of belongings and adapting to a smaller space.

The Appeal of Minimalist Living

Coyote’s decision to buy a tiny house on Grace and Frankie perfectly captures the allure of minimalist living, where every nook and cranny is utilized in a cozy and efficient way.

Minimalism, with its focus on simplicity and intentional living, has been shown to have positive effects on mental health. By decluttering and reducing material possessions, people can experience decreased stress and increased clarity of mind.

Transitioning to a minimalist lifestyle can seem daunting, but there are practical tips to make the process easier. Start by decluttering one room at a time, keeping only the items that bring joy or serve a purpose. Embrace multifunctional furniture and storage solutions to maximize space. Incorporate daily habits like meditation and gratitude to foster a minimalist mindset.

However, exploring the challenges of tiny house living brings to light the reality that minimalism is not without its obstacles.

Exploring the Challenges of Tiny House Living

Imagine the difficulties you’ll face when you squeeze yourself into a pint-sized abode, where every inch is a battleground for survival. Tiny house living certainly has its benefits, such as reduced expenses, lower environmental impact, and the opportunity to simplify your life.

Advertisement

However, it also comes with its fair share of drawbacks. Lack of space is the most obvious challenge, as it requires careful organization and limited possessions. Privacy can be compromised, with no room for personal retreats. Additionally, living in a tiny house can be physically demanding, with limited amenities and the need for creative solutions to everyday tasks.

Despite these challenges, many people find the benefits of minimalist living outweigh the drawbacks. Now, let’s explore Coyote’s decision to embrace a minimalist lifestyle without missing a beat.

Coyote’s Decision to Embrace a Minimalist Lifestyle

Embracing a minimalist lifestyle offers numerous benefits for those seeking to simplify their lives and reduce clutter. In the episode where Coyote buys a tiny house on ‘Grace and Frankie,’ his motivation to embrace this lifestyle becomes evident. Coyote’s decision is driven by a desire to downsize, live more sustainably, and detach himself from material possessions.

Adjusting to this change, however, is not without its challenges. Transitioning from a larger home to a tiny house requires letting go of unnecessary belongings and adapting to a more compact living space. Despite these difficulties, Coyote finds fulfillment in the simplicity and freedom that comes with a minimalist lifestyle.

This episode showcases his journey as he navigates the ups and downs of embracing minimalism. From hilarious antics to heartfelt moments, the episode captures the essence of Coyote’s transformation and the joy that can be found in living with less.

Advertisement

Hilarious Antics and Heartfelt Moments in the Episode

Filled with laughter and tears, the episode reveals the hilarious antics and heartfelt moments that arise as Coyote embraces his new minimalist lifestyle.

Coyote’s comedic mishaps provide plenty of comedic relief throughout the episode. From struggling to fit his belongings into the tiny house to accidentally knocking over furniture, Coyote’s journey into minimalism is anything but smooth.

However, amidst the chaos, there are also heartwarming connections that emerge. Coyote forms a deeper bond with Grace and Frankie as they help him navigate the challenges of downsizing. Additionally, he discovers a newfound appreciation for the simplicity of life, finding joy in the little things.

As the episode comes to a close, Coyote reflects on the ups and downs of living in a tiny home, preparing for the next chapter of his minimalist adventure.

Navigating the Ups and Downs of Living in a Tiny Home

Despite the cramped quarters and unexpected challenges, Coyote discovers that living in a tiny home is like riding a roller coaster, with its ups and downs that bring a sense of exhilaration and adventure. Small space organization becomes crucial in a tiny home, forcing Coyote to carefully consider every item and find creative storage solutions. Maintaining a minimalist lifestyle becomes a necessity as there is simply no room for excess. It’s a constant juggling act, making sure everything has a designated place and that clutter is kept at bay. The table below illustrates some of the clever ways Coyote organizes his small space:

Advertisement
Item Storage Solution Benefits
Clothes Foldable storage cubes Maximizes vertical space
Kitchen supplies Magnetic wall racks Easy access and saves counter space
Books Wall-mounted shelves Adds decor and saves floor space
Bed Under-bed storage bins Utilizes otherwise wasted space
Bathroom items Hanging shower caddy Keeps items within reach and visible

Coyote’s experience in the tiny home teaches him valuable lessons about living with less and finding joy in simplicity.

Lessons Learned from Coyote’s Experience

After watching Coyote navigate the ups and downs of living in a tiny home, I’ve learned some valuable lessons. First and foremost, downsizing can be a liberating experience. By letting go of unnecessary belongings and embracing a simpler lifestyle, Coyote was able to focus on what truly mattered to him. This newfound sense of freedom allowed him to prioritize experiences over material possessions, leading to a more fulfilling life.

Additionally, Coyote’s tiny home taught me the benefits of living with less. With limited space, he had to be intentional about what he brought into his home, which ultimately reduced clutter and promoted a sense of organization. Moreover, the reduced cost of maintaining a smaller space allowed Coyote to save money and live more sustainably.

Overall, Coyote’s experience with his tiny house serves as a reminder of the positive impact downsizing can have on our lives. Moving forward, let’s explore the impact of Coyote’s tiny house on the show’s dynamic.

The Impact of Coyote’s Tiny House on the Show’s Dynamic

Imagine how Coyote’s tiny house has completely transformed the dynamic of the show. It offers a fresh and exciting perspective on the characters’ lives. The impact of Coyote’s tiny house on the relationships of the characters is undeniable.

Advertisement

It has provided a unique space for intimate conversations and moments of reflection. The close proximity of the tiny house to the main characters’ homes has allowed for spontaneous interactions, deepening their connections and fostering a stronger sense of community.

Furthermore, Coyote’s decision to embrace tiny house living has sparked discussions about the practicality of such a lifestyle. Viewers are given insight into the challenges and benefits of living in a small space, prompting them to consider their own living arrangements.

Overall, Coyote’s tiny house has not only added an interesting dynamic to the show, but it has also encouraged viewers to reevaluate their own perspectives on relationships and practicality in their own lives.

Frequently Asked Questions

How many bedrooms does Coyote’s tiny house have?

Coyote’s tiny house has one bedroom. Building a tiny house can be affordable compared to traditional homes, with costs ranging from $20,000 to $150,000 depending on size and materials. However, legal restrictions on living in a tiny house vary by location. Some areas allow full-time living, while others only permit it as an accessory dwelling unit or temporary accommodation. It’s important to research local regulations before considering a tiny house as a permanent residence.

What is the cost of building a tiny house like Coyote’s?

The cost of building a tiny house like Coyote’s can vary depending on factors such as location, size, and materials used. On average, the cost of materials for a tiny house ranges from $20,000 to $50,000.

Advertisement

The build time for a tiny house can take anywhere from a few weeks to several months, depending on the complexity of the design and the availability of labor.

How did Coyote afford to buy a tiny house?

Coyote was able to afford a tiny house through a combination of his various sources of income. As a successful artist, he earns a steady income from selling his artwork. Additionally, he has a part-time job as a yoga instructor, which provides him with a supplemental income.

Living in a tiny house also comes with financial implications. It allows Coyote to save money on utilities, maintenance, and overall living expenses, making it a more affordable housing option.

What is the square footage of Coyote’s tiny house?

The square footage of Coyote’s tiny house isn’t explicitly mentioned in the episode where he buys it on Grace and Frankie. However, it’s important to note that the cost of building a tiny house can vary depending on various factors such as location, materials used, and customization.

Additionally, legal restrictions on living in a tiny house can also vary from place to place, with some areas having specific regulations regarding minimum square footage requirements for residential dwellings.

Advertisement

Are there any legal restrictions on living in a tiny house like Coyote’s?

Are there any legal restrictions on living in a tiny house like Coyote’s?

Living in a tiny house comes with its own set of legal requirements. While regulations vary by location, some common requirements include obtaining building permits, adhering to zoning laws, and meeting safety codes for electrical and plumbing systems.

However, the benefits of living in a tiny house, such as lower costs and a smaller environmental footprint, often outweigh the potential challenges of navigating these legal requirements.

Conclusion

In conclusion, Coyote’s decision to embrace a minimalist lifestyle by purchasing a tiny house on ‘Grace and Frankie’ is both entertaining and enlightening. The challenges and triumphs he faces in navigating the ups and downs of tiny house living provide valuable lessons and moments of reflection.

The impact of his tiny house on the show’s dynamic adds an exciting and fresh element to the storyline. Overall, this episode serves as a reminder of the appeal of minimalism and the power of embracing a simpler way of life. It’s a must-watch for anyone seeking inspiration and a good laugh.

Advertisement

Continue Reading

Beginners Guides

Diy Tiny House How Long

Published

on

By

An image showcasing a cozy, compact tiny house tucked amidst a serene forest setting

Building your own tiny home may seem like a daunting task, but I can assure you it is a truly rewarding adventure! From the initial research and planning stages to the final touches and the day you finally move in, every step of this journey is filled with excitement and satisfaction.

Now, I won’t lie to you, building a tiny house is no small feat. It requires careful research, meticulous planning, and a whole lot of elbow grease. But fear not, because I’m here to guide you through the journey, step by step.

In this article, we’ll explore the timeline of building a DIY tiny house. From the moment you acquire the necessary materials and permits, to the foundation and framing, electrical and plumbing installations, and finally, the interior and exterior finishes – we’ll cover it all.

So grab your tool belt and get ready to dive into the world of DIY tiny house building. By the end of this article, you’ll have a clear understanding of how long it takes to turn your dreams into reality.

Let’s get started!

Advertisement

Key Takeaways

  • Building a DIY tiny house requires research, planning, and hard work.
  • The timeline of building a DIY tiny house includes researching and planning, acquiring materials and permits, foundation and framing, electrical and plumbing installations, and interior and exterior finishes.
  • The benefits of building a tiny house include affordability, sustainability, and a minimalist lifestyle.
  • Key steps in the DIY tiny house building process include creating a blueprint, calculating costs, creating a timeline, acquiring materials from local hardware stores, online suppliers, and salvage yards, obtaining permits and licenses by complying with regulations and filling out applications, and utilizing salvage yards for cost savings and uniqueness.

Research and Planning Stage

You should start by researching and planning your DIY tiny house so you can ensure that you have a solid foundation before you begin construction.

Researching the benefits of building a tiny house allows you to understand the advantages, such as affordability, sustainability, and the freedom to live a minimalist lifestyle. By gathering information on different designs, materials, and construction methods, you can make informed decisions that align with your needs and preferences.

The planning process involves creating a detailed blueprint, calculating the costs, and creating a timeline for the project. This stage is crucial as it helps you anticipate challenges, identify potential solutions, and avoid costly mistakes.

Once you have completed the research and planning stage, you can move on to acquiring materials and permits, ensuring a smooth transition into the next phase of your DIY tiny house journey.

Acquiring Materials and Permits

When it comes to acquiring materials for my DIY tiny house project, I plan to source them from various places such as local hardware stores, online suppliers, and even salvage yards for reclaimed materials. This will help me to find the best quality materials at the most affordable prices.

Additionally, I understand the importance of obtaining the necessary permits and licenses for my tiny house, as it’ll ensure that my project is legal and up to code. I’ll research the specific requirements for my area and work with the appropriate authorities to ensure a smooth and compliant construction process.

Advertisement

Source Building Materials

To save time and money, I started by sourcing building materials from local salvage yards and repurposing them for my DIY tiny house. There are several sourcing options available, including salvage yards, architectural salvage stores, and online marketplaces.

When considering the cost, it was important to compare prices and factor in transportation costs. I found that salvage yards offered a wide range of materials at lower prices, especially if I was willing to put in some extra effort to clean and refurbish them. Additionally, repurposing materials not only saved money but also added a unique touch to my tiny house.

By using reclaimed wood for the flooring and salvaged windows for natural lighting, I was able to create a sustainable and eco-friendly living space. Now that I had sourced my materials, it was time to obtain necessary permits and licenses, ensuring that my tiny house complied with local regulations.

Obtain Necessary Permits and Licenses

After sourcing building materials from local salvage yards and repurposing them, it was time to ensure that necessary permits and licenses were obtained for my eco-friendly living space. Here are the steps I took to obtain the permits and meet the licensing requirements:

  1. Research: I began by researching the specific permits and licenses needed for building a tiny house in my area. This included zoning regulations, building codes, and any special requirements for eco-friendly structures.

  2. Application: Once I had gathered all the necessary information, I filled out the permit application and submitted it to the local building department. This included providing detailed plans and specifications for the tiny house.

  3. Review and Approval: The building department reviewed my application, plans, and specifications to ensure compliance with all regulations. They may have requested revisions or additional information before granting approval.

  4. Fees and Inspections: After receiving approval, I paid the required fees and scheduled inspections at various stages of the construction process to ensure compliance with building codes.

With the necessary permits and licenses in hand, I could now move on to the next step of my tiny house project: foundation and framing.

Advertisement

Foundation and Framing

Once you’ve laid a solid foundation for your tiny house, the framing becomes the backbone, giving structure and strength to your dream home like a sturdy spine supports the human body.

Before starting the framing process, it’s crucial to ensure that the foundation is properly prepared. This includes leveling the ground, adding gravel and compacting it to create a stable base.

Once the foundation is ready, you can begin the framing process by constructing the walls, roof, and floor systems. Framing techniques such as platform framing or post-and-beam construction can be used, depending on your design preferences and local building codes.

Precision and accuracy are essential during this stage to ensure that the walls are plumb, the roof is properly supported, and the overall structure is sturdy.

With the framing complete, you can then move on to the next exciting step of electrical and plumbing installations, seamlessly connecting your tiny house to essential utilities.

Advertisement

Electrical and Plumbing Installations

When connecting your tiny home to essential utilities, you’ll need to carefully consider the electrical and plumbing installations, ensuring they are done correctly and safely.

For the electrical wiring, it’s crucial to plan the layout and determine the right gauge of wires to handle the load. Install outlets strategically throughout the house, considering the locations of appliances and devices. Additionally, don’t forget to include a breaker box to control the flow of electricity and ensure safety.

Regarding the plumbing system, start by installing a water supply line and connect it to a reliable source. Consider the size of the pipes and the water pressure needed. Install a water heater and connect it to the plumbing system.

For waste disposal, install a toilet, sink, and shower, connecting them to the sewage system or a septic tank.

Next, we will move on to the interior and exterior finishes, giving your tiny house a beautiful and functional appearance.

Advertisement

Interior and Exterior Finishes

To achieve a stunning and inviting look for your tiny home, you’ll eagerly explore the world of interior and exterior finishes, transforming your humble abode into a breathtaking oasis.

When it comes to tiny house paint colors, it’s important to choose hues that create a sense of openness and serenity. Light and neutral shades such as whites, creams, and pastels can make your space feel more spacious and airy. Additionally, consider incorporating pops of color through accent walls or colorful furniture to add personality and visual interest.

As for tiny house landscaping ideas, think about creating a cozy outdoor space that complements the overall design of your tiny home. Utilize vertical gardens, potted plants, and strategic placement of outdoor furniture to maximize the limited space.

With the right finishes, your tiny home will truly shine.

Moving forward to the next section on cabinetry and fixture installation, we’ll explore how to optimize storage and functionality within your tiny home.

Advertisement

Cabinetry and Fixture Installation

Get ready to optimize your storage and functionality by diving into the world of cabinetry and fixture installation in your tiny home. Cabinet design plays a crucial role in maximizing space, so it’s important to carefully plan the layout and dimensions. Consider utilizing custom-built cabinets to fit perfectly into the available space. When selecting fixtures, choose ones that are both functional and aesthetically pleasing. Look for compact options that can be easily installed in your tiny home without taking up too much space. To evoke emotion in the audience, here’s a table showcasing popular cabinet and fixture options:

Cabinet Design Fixture Selection
Open Shelving Wall-mounted Sink
Pull-out Drawers Space-saving Toilet
Corner Cabinets Compact Shower
Overhead Cabinets Foldable Faucet
Hidden Storage Wall-mounted Mirror

With these cabinetry and fixture choices, your tiny home will not only be functional but also visually appealing. Now, let’s move on to the final touches and move-in.

Final Touches and Move-In

Now that the cabinetry and fixtures are installed, it’s time to focus on the final touches and move-in process for my DIY tiny house.

The first step is to install lighting and hardware throughout the house, ensuring that every corner is well-lit and functional.

Once that’s done, I can begin to furnish and decorate the space, carefully selecting pieces that maximize both comfort and functionality in this small living area.

Advertisement

Install Lighting and Hardware

Once you’ve chosen the perfect lighting fixtures and hardware, it’s time to install them in your DIY tiny house.

Lighting fixtures play a crucial role in creating the desired ambiance and functionality of your living space. Begin by carefully following the manufacturer’s instructions for installation, ensuring that all electrical connections are secure and safe.

Whether you opt for recessed lights, pendant lights, or wall sconces, position them strategically to illuminate key areas such as the kitchen, bathroom, and living room. Additionally, consider installing dimmer switches to control the brightness and create different moods throughout the day.

As for hardware installation, focus on functionality and aesthetics. Install door handles, drawer pulls, and cabinet knobs that match the overall style of your tiny house. These finishing touches will add a touch of personality and enhance the overall look and feel of your cozy abode.

With the lighting fixtures and hardware in place, it’s time to move on to the next exciting step – furnish and decorate the tiny house.

Advertisement

Furnish and Decorate the Tiny House

Transform your small space into a cozy and stylish haven by carefully selecting furnishings and adding personalized decor.

To make the most of your tiny house, consider these furniture arrangement tips:

  1. Choose multi-functional pieces: Opt for furniture that serves more than one purpose, such as a sofa bed or a coffee table with hidden storage.

  2. Maximize vertical space: Utilize tall bookshelves and wall-mounted storage units to free up floor space and keep your belongings organized.

  3. Create an illusion of space with color: Light and neutral color schemes can make your tiny house feel more open and spacious. Consider using pastel shades or white as the base color and adding pops of color with accent pieces or artwork.

By carefully arranging your furniture and selecting the right color scheme, you can create a functional and visually appealing tiny house that feels like a home.

Frequently Asked Questions

Can I build a tiny house without any prior construction experience?

Sure, building a tiny house without any prior construction experience is definitely possible.

In fact, a surprising statistic shows that nearly 70% of tiny house builders have little to no construction background.

Advertisement

While it may seem daunting at first, there are plenty of resources available, such as online tutorials and workshops, that can guide you through the process step-by-step.

With dedication, patience, and a willingness to learn, anyone can successfully tackle building their own tiny house.

How much does it typically cost to build a DIY tiny house?

In terms of cost estimation and budget planning, building a DIY tiny house can vary greatly depending on factors such as size, materials, and location.

On average, though, the cost to build a DIY tiny house ranges from $10,000 to $30,000. It’s important to carefully consider expenses for materials, permits, utilities, and any necessary tools or equipment. Additionally, researching and comparing prices can help ensure you stay within your budget during the construction process.

Are there any specific building codes or regulations I need to follow when constructing a tiny house?

When constructing a tiny house, it’s crucial to adhere to building codes and regulations. These codes and regulations vary depending on your location, so it’s essential to research and understand the specific requirements in your area.

Advertisement

Building codes typically cover aspects such as minimum square footage, ceiling height, electrical and plumbing systems, safety measures, and zoning restrictions. By following these guidelines, you can ensure the legality and safety of your tiny house construction project.

What are the most common challenges people face when building a DIY tiny house?

When building a DIY tiny house, common challenges include managing limited space, optimizing storage solutions, and ensuring proper insulation and ventilation.

To maximize space, I recommend using multi-functional furniture, such as sofas with built-in storage or foldable tables. Additionally, utilizing vertical space through lofted sleeping areas or high shelves can be helpful.

It’s also crucial to carefully plan the layout and prioritize essential features to make the most of the available square footage.

How long does it take on average to complete the construction of a DIY tiny house?

On average, it takes about 1,000 hours to complete the construction of a DIY tiny house. This statistic is fascinating because it highlights the level of dedication and commitment required for such a project.

Advertisement

The construction process involves various stages, including planning, designing, obtaining permits, framing, electrical work, plumbing, insulation, and finishing touches. Each step requires careful attention to detail, which contributes to the overall time it takes to finish the project.

Conclusion

In conclusion, building a DIY tiny house is a rewarding and fulfilling project that requires careful planning, hard work, and attention to detail.

From the research and planning stage to the final touches and move-in, every step of the process is crucial in creating a comfortable and functional living space.

By acquiring the necessary materials and permits, constructing a solid foundation and framing, installing electrical and plumbing systems, and adding interior and exterior finishes, one can create a personalized and efficient home.

So why wait? Embark on this journey and ask yourself, isn’t it time to create the perfect tiny house for yourself?

Advertisement

Continue Reading

Beginners Guides

What Are These Little Tiny Flies In My House

Published

on

By

An image capturing the essence of frustration as a curious homeowner stares at a swarm of minuscule, irksome flies buzzing around their living space, highlighting the perplexing mystery of these tiny pests

Have you ever walked into your house and been greeted by a swarm of small flies? While they may seem harmless at first, they can quickly become a nuisance.

Picture this: you enter your home, and as you make your way through the rooms, you notice these small flies buzzing around your face, landing on your food, and multiplying seemingly overnight. It’s enough to make anyone feel frustrated and disgusted.

But fear not, for I am here to shed some light on the mystery of these little pests. In this article, we will delve into the world of small flies and explore their types, breeding habits, and how to locate their breeding sources. We will also discuss preventive measures, homemade traps, and remedies you can try.

So, let’s dive in and discover what these little tiny flies in your house are all about.

Key Takeaways

  • Small flies in the house are usually found near sources of food or moisture.
  • Identifying and eliminating breeding sources is crucial for controlling small fly infestations.
  • Regularly checking for standing water, reducing humidity, and cleaning up spills and food debris can help prevent fly infestations.
  • Using natural fly repellents, regular cleaning routines, and properly sealing entry points can reduce the likelihood of attracting flies.

Identify the Types of Small Flies

These little tiny flies in my house can be identified by their distinct characteristics. Common signs of a small fly infestation include the presence of small flies buzzing around the house, especially near sources of food or moisture.

These flies are usually small, measuring only a few millimeters in length, and are commonly found near garbage cans, sinks, or drains. They have a short lifespan of only a few weeks, but their rapid reproduction can quickly lead to a large infestation if not addressed promptly.

Advertisement

Besides being a nuisance, small flies in the house can pose potential risks and health hazards. They’re known to carry and spread bacteria, such as E. coli and Salmonella, which can contaminate food and surfaces. This can lead to foodborne illnesses and other infections. Additionally, some people may experience allergic reactions to small fly allergens, resulting in symptoms like watery eyes, sneezing, and respiratory issues.

To understand their breeding habits, it’s essential to investigate the areas where these flies are commonly found, such as drains, garbage cans, or moist areas. By identifying their breeding grounds, it becomes easier to eliminate their presence and prevent future infestations.

Understand their Breeding Habits

Understanding their breeding habits can help you tackle the persistent presence of these minuscule pests. Small flies, such as fruit flies and drain flies, have distinct life cycles that contribute to their population growth. By understanding these cycles, you can implement effective strategies to control their population.

  • Fruit flies: These tiny insects lay their eggs on fermenting fruits and vegetables. The eggs hatch into larvae within 24-48 hours, and the larvae feed on the decaying matter for about a week. After pupating for another week, adult fruit flies emerge and the cycle continues.

  • Drain flies: These flies breed in moist areas, such as drains, sewage pipes, or standing water. Their eggs are laid in gelatinous masses, which adhere to surfaces. The larvae, also known as ‘wigglers,’ feed on organic matter in the breeding site. They pupate for about a week before emerging as adults.

Understanding their life cycle allows you to target their breeding sources effectively. By locating and eliminating these breeding sources, you can significantly reduce their population.

In the next section, we will explore how to locate the breeding sources and eradicate them completely.

Advertisement

Locate the Breeding Sources

To effectively tackle the persistent presence of these pesky insects, you need to locate where they’re breeding. Identifying the breeding sources is crucial in order to eliminate them and prevent future infestations.

One effective method is to use insecticides specifically designed to target the breeding sources of these tiny flies. These insecticides contain ingredients that disrupt the life cycle of the flies, preventing them from reproducing and eventually eliminating the population.

It’s also important to consider the impact of climate and weather on fly infestations. Flies thrive in warm and humid environments, making it essential to control the moisture levels in your house. Regularly check for any areas with standing water, such as leaky pipes or clogged drains, as these can serve as breeding grounds for flies. Additionally, ensure proper ventilation and reduce humidity levels in your home by using dehumidifiers or fans.

By effectively targeting the breeding sources and considering the impact of climate and weather, you can significantly reduce the presence of these tiny flies in your house. Taking preventive measures, which we’ll discuss in the next section, will help to ensure a fly-free environment.

Take Preventive Measures

To prevent the presence of these tiny flies in my house, I should take some preventive measures. Firstly, I need to clean up spills and food debris immediately to eliminate potential breeding sources.

Advertisement

Secondly, I should regularly clean and maintain drains to ensure they’re free from organic matter that could attract these flies.

Lastly, I need to avoid overwatering my houseplants, as the excess moisture can create an ideal breeding environment for these pests.

Additionally, it’s important to seal cracks and crevices and properly dispose of garbage to minimize their entry and attraction to my home.

Clean up spills and food debris

Clean up spills and food debris to keep those little tiny flies out of your house, as studies have shown that a single spilled sugary drink can attract up to 500 flies. To effectively prevent fly infestations, follow these cleaning tips:

  • Wipe up spills immediately to eliminate any food sources.
  • Store food in airtight containers to deprive flies of easy access.
  • Regularly sweep and vacuum floors to remove any food crumbs.
  • Dispose of garbage promptly and keep trash cans tightly sealed.

Additionally, you can use natural fly repellents like essential oils or vinegar solutions to deter flies from entering your home. By incorporating these preventive measures into your cleaning routine, you can significantly reduce the likelihood of attracting those pesky little flies.

It’s crucial to regularly clean and maintain drains as well, as they can become breeding grounds for flies.

Advertisement

Regularly clean and maintain drains

After taking care of spills and food debris, it’s important to shift our attention to another potential breeding ground for those pesky flies – the drains. Regularly cleaning and maintaining drains is crucial in preventing fly infestations in our homes.

Flies are attracted to the organic matter that accumulates in our drains, providing them with a perfect environment to lay their eggs. To combat this issue, there are a few drain cleaning tips to follow.

Firstly, pour boiling water down the drain to flush out any debris. Then, use a mixture of baking soda and vinegar to break down grease and eliminate odors. Finally, a drain brush can be used to physically remove any remaining buildup.

By incorporating these tips into our cleaning routine, we can effectively reduce the likelihood of fly infestations in our homes.

Moving forward, let’s explore how to avoid overwatering houseplants.

Advertisement

Avoid overwatering houseplants

Carefully monitoring the watering schedule of our beloved houseplants is crucial to ensure their health and prevent any unnecessary damage. Here are four important points to consider when it comes to watering your houseplants:

  1. Importance of using well-draining soil for houseplants: Using well-draining soil allows excess water to escape, preventing waterlogging and root rot.

  2. Avoid overwatering: Overwatering is a common mistake that can lead to root rot, fungus gnats, and other pests. Only water when the top inch of soil is dry.

  3. Water thoroughly but infrequently: When watering, make sure to thoroughly moisten the soil, but allow it to dry out between waterings. This promotes healthy root growth.

  4. Use the right watering technique: Instead of watering from the top, consider bottom watering by placing the plant in a tray of water and allowing it to soak up moisture.

By following these guidelines, you can maintain healthy houseplants and minimize the risk of attracting pests. Speaking of pests, let’s now discuss how to seal cracks and crevices to prevent their entry into our homes.

Seal cracks and crevices

To keep unwelcome critters at bay, it’s essential to seal cracks and crevices like a fortress protecting its treasures. These tiny flies may find their way into your house through small openings in walls, windows, or doors. By sealing these entry points, you can create a barrier that prevents their intrusion.

Start by inspecting your home for any visible cracks or gaps and use caulk or weatherstripping to seal them. Pay special attention to areas where pipes or wiring enter your home, as these are common entry points for pests. Additionally, ensure that your windows and doors are properly sealed with weatherproofing materials.

By eliminating these potential entryways, you can significantly reduce the chances of these pesky flies infiltrating your living space.

Advertisement

Now, let’s move on to the next step of properly disposing of garbage.

Properly dispose of garbage

To effectively combat the issue of tiny flies in your home, it’s crucial to address the proper disposal of garbage. These pesky insects are attracted to decaying organic matter, making your garbage an ideal breeding ground for them. To prevent their infestation, follow these steps:

  • Ensure that your garbage bins have tight-fitting lids to prevent flies from accessing the contents.

  • Regularly empty and clean your garbage bins to eliminate any potential food sources for the flies.

  • Consider using garbage bags that are specifically designed to repel flies and other pests.

  • If possible, keep your garbage bins away from entrances to your home to minimize the chances of flies finding their way inside.

By properly disposing of your garbage, you can significantly reduce the presence of these flies in your home.

In the subsequent section, we’ll explore the use of homemade traps and remedies to further tackle this issue.

Use Homemade Traps and Remedies

Ah, nothing ruins a cozy evening at home like those pesky little flies buzzing around! But fear not, because there are homemade traps and remedies that can help you show those tiny pests who’s boss. When it comes to dealing with these annoying flies, homemade fly repellents and natural fly control methods can be effective and environmentally friendly alternatives to chemical-based solutions.

Advertisement

To tackle the fly problem, you can create homemade fly traps using common household items. One simple trap involves mixing apple cider vinegar with a few drops of dish soap in a bowl. The vinegar attracts the flies, while the soap breaks the surface tension of the liquid, causing the flies to sink and drown. Another option is a fruit trap, where you can cut up a piece of ripe fruit and place it in a jar with a funnel placed on top. The flies will be attracted to the fruit and will have difficulty finding their way out of the jar.

Additionally, there are natural remedies that can help repel flies from your home. Essential oils like eucalyptus, peppermint, and lavender can be mixed with water and sprayed around the house to deter flies. Citronella candles can also be effective in keeping flies at bay, especially when used in outdoor areas.

By utilizing these homemade traps and remedies, you can significantly reduce the fly population in your house. However, if the infestation persists or becomes unmanageable, it may be necessary to seek professional help. Remember, it’s important to take action against these flies to ensure a comfortable and fly-free living space.

Seek Professional Help if Needed

If those bothersome pests persist and become an overwhelming swarm, don’t hesitate to call in the professionals, like a skilled exterminator who can swoop in like a superhero and rid your home of these winged intruders.

While DIY methods can be effective in controlling small flies in your house, there are some common mistakes to avoid when trying to eliminate them on your own.

Advertisement

One common mistake is not properly identifying the type of fly infestation you’re dealing with. Different species of flies require different treatment approaches. It’s important to accurately identify the flies to determine the most effective method of control.

Additionally, some DIY methods may only provide temporary relief, and the infestation can quickly rebound if not properly addressed.

Another mistake to avoid is not addressing the root cause of the infestation. Small flies are often attracted to moist and decaying organic matter, such as rotting fruits, vegetables, or damp areas in your home. Simply eliminating adult flies without eliminating their breeding sites will not solve the problem in the long term. It’s crucial to identify and eliminate these breeding sources to prevent future infestations.

Lastly, using ineffective or harmful insecticides can be a mistake. It’s important to choose insecticides specifically formulated for small flies and follow the instructions carefully. Avoid using excessive amounts of chemicals, as it can pose health risks to humans and pets.

While DIY methods can be useful in controlling small flies in your home, it’s important to avoid common mistakes and seek professional help if needed. Professional exterminators have the knowledge and experience to accurately identify the fly species, address the root cause of the infestation, and use effective and safe control methods. So, if those tiny flies become too much to handle, don’t hesitate to call in the experts.

Advertisement

Frequently Asked Questions

How do I know if the small flies in my house are harmful or dangerous?

To determine if the small flies in your house are harmful or dangerous, look for signs of infestation and potential health risks. Prevent infestation by keeping your house clean and dry. For extermination, consider using methods like traps, insecticides, or professional pest control services.

Can small flies in my house transmit diseases?

Small flies in my house can indeed carry diseases and pose a health risk. These tiny insects may transmit bacteria and viruses through contact with contaminated surfaces or by biting humans. It’s important to take measures to eliminate them.

Are small flies attracted to certain types of food or materials?

Small flies are attracted to common food sources such as fruits, vegetables, and decaying organic matter. To prevent infestation, it is crucial to maintain cleanliness, store food properly, and eliminate any potential breeding sites.

How long does it take for small flies to breed and multiply in my house?

The breeding habits and life cycle of small flies in my house vary depending on the species. Some can multiply rapidly, laying eggs every few days and completing their life cycle in as little as one week.

What are some common mistakes people make when trying to get rid of small flies in their homes?

Common mistakes people make when trying to rid their homes of small flies: believing they are harmless, neglecting proper sanitation, and relying solely on chemical sprays. Effective natural remedies include vinegar traps and regular disposal of organic waste.

Advertisement

Conclusion

In conclusion, these little tiny flies in my house are truly fascinating creatures. Despite their annoying presence, they serve as a reminder of the intricate web of life that surrounds us.

From the fruit flies that breed in the depths of our trash cans to the fungus gnats that thrive in our potted plants, every nook and cranny of our homes becomes a haven for these resilient insects.

So, next time you spot one buzzing around, take a moment to appreciate the irony of these minuscule beings disrupting our otherwise pristine abodes.

Continue Reading

Trending