You have chosen to start the process of building a tiny house even though you have no prior experience. This is a brave decision, and I applaud your courage. Building a tiny house can be very challenging, even for experienced builders, but don’t let that intimidate you. By doing thorough research, planning carefully, and putting in hard work, you are on track to create the home of your dreams.
In this article, I will guide you through the step-by-step process of building a tiny house from scratch, all while keeping in mind that you have no previous building experience. We’ll cover everything from gathering the necessary materials and tools, to tackling the foundation and framing, all the way to the finishing touches and details that will make your tiny house feel like home.
Now, before we dive in, let me be clear – building a tiny house is no walk in the park. It will require dedication, patience, and a whole lot of determination. But fear not, because I’m here to provide you with the knowledge and guidance you need to successfully build your very own tiny house, even if you’re a complete novice.
So, let’s get started on this exciting journey together!
Key Takeaways
- Building a tiny house without experience can be daunting, but with research and planning, it is achievable.
- Knowledge of local zoning laws and regulations is necessary to ensure compliance during the building process.
- Budgeting is essential to understand the costs involved in building a tiny house and to avoid unexpected expenses.
- Consulting with professionals or experienced builders can provide valuable guidance and expertise throughout the building process.
Research and Planning
You’ll need to spend some time researching and planning before you start building your tiny house. Researching the challenges of building a tiny house will help you understand what to expect and how to overcome any obstacles that may arise.
One challenge you may encounter is finding suitable land to build on. You’ll need to research local zoning laws and regulations to ensure that you can legally build a tiny house on the land you choose.
Additionally, budgeting is an important aspect of planning. Research budgeting tips specific to tiny house construction to ensure that you have a realistic understanding of the costs involved. This will help you avoid any financial surprises along the way.
Once you’ve done your research and have a solid plan in place, it’s time to gather the necessary materials and tools to start building. Transitioning into the next section, gathering these materials and tools is the next step in the process of building your tiny house.
Gather Necessary Materials and Tools
First, gather all the essential materials and tools needed to create your cozy little dream home. The building process of a tiny house requires careful consideration and preparation. You’ll need to estimate the cost of materials and tools to ensure a smooth construction process.
Begin by making a list of all the necessary materials such as lumber, insulation, roofing, siding, and windows. Research local suppliers and compare prices to find the best deals. Also, gather the required tools such as a circular saw, drill, hammer, tape measure, and level. These tools will be essential for cutting, drilling, and assembling various components of the house.
It’s important to have everything organized and readily available before starting the construction process.
Once you have gathered all the necessary materials and tools, you can move on to the next step of the building process: foundation and framing. This stage involves laying the foundation and constructing the basic frame of the tiny house. By carefully planning and gathering the right materials and tools, you’ll be well-prepared to tackle the next phase of construction.
Foundation and Framing
When it comes to building a tiny house, the first step is to prepare the site for construction. This involves clearing the area, leveling the ground, and ensuring that it’s stable and can support the weight of your tiny house.
Once the site is ready, the next step is to build the foundation of your tiny house. This may involve pouring a concrete slab or constructing a pier and beam foundation.
Finally, it’s time to frame the structure of your tiny house. This involves building the walls, roof, and floor using lumber and other materials, creating the basic skeleton of your tiny house.
Prepare the site for construction
Before starting, make sure the site is cleared of any debris and leveled, creating a solid foundation for your tiny house construction project. Site preparation is a crucial first step that sets the stage for the entire construction process. It involves clearing the land, removing any obstacles, and grading the site to ensure a smooth and even surface. This not only ensures stability for your tiny house but also makes it easier to work on.
To give you an idea of the construction timeline, here is a table outlining the estimated time required for each site preparation task:
| Site Preparation Task | Estimated Time |
|---|---|
| Clearing the land | 1-2 days |
| Removing obstacles | 1 day |
| Grading the site | 1-2 days |
| Total | 3-5 days |
Once the site is prepared, you can move on to the next step: building the foundation of your tiny house.
Build the foundation of your tiny house
Now that the site is prepared, it’s time to start constructing the foundation of your cozy abode.
When it comes to foundation options for tiny houses, there are a few different types to consider. One common option is a concrete slab, which provides a solid and stable base for your tiny house.
Another option is a pier foundation, where concrete footings are placed at specific points along the perimeter of the house. This type of foundation is great for sloped or uneven terrain.
Additionally, you could choose to build a skid foundation, which involves placing the house on large beams or skids. This allows for easy mobility if you plan on moving your tiny house in the future.
When building your foundation, it’s important to ensure it is strong and sturdy. Here are a few tips to keep in mind.
First, make sure to properly level the ground before pouring the foundation. This will prevent any future structural issues.
Secondly, use high-quality materials that are designed to withstand the weight of the house. Reinforce the foundation with rebar or post-tension cables for added strength.
Lastly, consult with a professional or experienced builder to ensure you are following proper construction techniques.
With the foundation in place, it’s time to move on to framing the structure, which will give your tiny house its shape and support.
Frame the structure
Once you’ve got the foundation set, it’s time to get your hands dirty and start framing the skeleton of your adorable little dwelling. Building techniques play a crucial role in ensuring the structural integrity of your tiny house, and there are several alternative materials you can use for framing. Here are three key considerations:
-
Studs: Opt for 2×4 or 2×6 wooden studs to create the framework of your tiny house. These are the vertical pieces that support the walls and provide stability.
-
Roof Trusses: Trusses are pre-made wooden frameworks that form the shape of your roof. They’re essential for maintaining the structural strength of your tiny house, and they make the construction process faster and easier.
-
Sheathing: Use plywood or oriented strand board (OSB) to cover the exterior walls and roof. This adds rigidity to the structure and protects it from the elements.
Now that the framing is complete, it’s time to move on to the exciting world of plumbing and electrical work.
Plumbing and Electrical Work
With no prior experience, you’ll be amazed at how quickly you can tackle the plumbing and electrical work in building your own tiny house. While it may seem intimidating at first, with the right guidance and a willingness to learn, you’ll be able to handle these essential tasks. Ensuring plumbing and electrical safety is crucial, so it’s important to familiarize yourself with local building codes and regulations. Additionally, understanding common plumbing issues and troubleshooting techniques will save you time and money in the long run.
To help you get started, here is a table summarizing some key points to remember during the plumbing and electrical work:
| Plumbing Safety | Electrical Safety | Troubleshooting Common Plumbing Issues |
|---|---|---|
| Turn off main water supply before beginning any work | Cut power before working on electrical components | Clogged drains: use a plunger or drain snake |
| Use proper tools and materials for each task | Ensure wires are properly insulated to prevent electrical shocks | Leaky faucets: check and replace worn-out washers or seals |
| Properly vent plumbing system to prevent sewer gas buildup | Label and organize electrical wires for easy identification | Low water pressure: check for clogs in aerators or filters |
Now that you have a basic understanding of plumbing and electrical work, it’s time to move on to the next step – insulation and interior finishing.
Insulation and Interior Finishing
Get ready to cozy up your new space with insulation and add the finishing touches to create a warm and inviting interior. Insulation is a crucial step in building a tiny house, as it helps regulate the temperature and keeps the space comfortable all year round.
There are several insulation techniques you can choose from, such as spray foam insulation, rigid foam boards, or even recycled denim insulation. Each technique has its pros and cons, so it’s important to research and choose the one that best suits your needs.
Once the insulation is in place, it’s time to focus on the interior design. One of the great things about building a tiny house is that you can get creative with your interior design ideas. From rustic and cozy to sleek and modern, the possibilities are endless.
Consider using reclaimed wood for accent walls or installing built-in shelves for added storage. Don’t forget to choose paint colors that reflect your personal style and create a cohesive look throughout the space.
As you finish up the insulation and interior design, it’s time to move on to the next step: flooring, cabinets, and fixtures. This section will cover everything you need to know about selecting the right materials for your tiny house and installing them properly.
Flooring, Cabinets, and Fixtures
When it comes to flooring in a tiny house, I recommend using materials that are durable and easy to clean, such as laminate or vinyl. These options aren’t only cost-effective but also provide a polished look to the space.
As for cabinets and storage solutions, building them yourself allows for customization and optimal use of the available space.
Lastly, installing fixtures like sinks, toilets, and showers can be done with the help of online tutorials and basic plumbing knowledge. It’s important to choose fixtures that are compact and efficient, maximizing the functionality of the tiny house.
Install flooring materials
Installing the flooring materials in a tiny house without any experience can be a fun and rewarding challenge. To ensure a successful installation, it’s important to familiarize yourself with the various flooring installation techniques. From floating floors to adhesive applications, understanding the pros and cons of each technique will help you make an informed decision.
Additionally, choosing the right flooring materials is crucial for durability and aesthetics. Options such as vinyl, laminate, or hardwood offer different benefits, and considering factors like moisture resistance, ease of cleaning, and overall style will help you make the best choice.
Once you’ve selected the flooring materials, it’s time to start the installation process. This involves careful measurement, cutting, and fitting. With patience and attention to detail, you’ll achieve a beautiful and functional floor for your tiny house.
Now, let’s move on to the next section about building and installing cabinets and storage solutions.
Build and install cabinets and storage solutions
Now that the flooring materials are installed, it’s time to move on to one of my favorite parts of building a tiny house – designing and building the cabinets and storage solutions.
The key to a successful tiny house is maximizing every inch of space, and the right cabinet design can make all the difference. I’m excited to create custom cabinets that will not only fit perfectly in the limited space but also provide ample storage for all my belongings.
I’ll be incorporating space-saving solutions like built-in shelves, pull-out drawers, and hidden compartments. These clever design elements will help me keep everything organized and make the most of the limited square footage.
With the cabinets and storage solutions in place, it’s time to move on to installing fixtures such as sinks, toilets, and showers, seamlessly transitioning into the next phase of building my dream tiny house.
Install fixtures such as sinks, toilets, and showers
After successfully building and installing custom cabinets and storage solutions, it’s time to move on to the next phase of my tiny house project – installing fixtures such as sinks, toilets, and showers. Did you know that the average American spends a total of 1.5 years in the bathroom over their lifetime?
To ensure a smooth installation process, it’s crucial to choose the right fixtures that fit both the design and functionality of the tiny house. Here are five key considerations when installing plumbing fixtures:
-
Water efficiency: Opt for fixtures that are eco-friendly and conserve water, such as low-flow toilets and aerated faucets.
-
Space optimization: Select compact fixtures that maximize the available space without sacrificing comfort or usability.
-
Quality and durability: Invest in fixtures that are made of high-quality materials to ensure longevity and minimize maintenance needs.
-
Style and aesthetics: Choose fixtures that complement the overall design and theme of the tiny house.
-
Installation compatibility: Ensure the fixtures are compatible with the plumbing system and can be easily installed without complications.
With the right fixtures in place, the tiny house won’t only be functional but also aesthetically pleasing.
Now, let’s move on to the next section about exterior finishing.
Exterior Finishing
The process of completing the exterior finishing on a tiny house without any prior experience may take a considerable amount of time. One of the first steps in this process is to carefully plan the design of the exterior. Tiny house exterior design is an important aspect to consider, as it not only adds to the overall aesthetic appeal but also contributes to the durability and functionality of the house. Choosing the right siding is crucial, as it protects the house from the elements and provides insulation. Common options for tiny house siding include wood, vinyl, and metal. Each has its pros and cons, so it is important to research and select the best option for your specific needs.
To help you better understand the different types of siding, here is a table outlining their key characteristics:
| Siding Type | Pros | Cons |
|---|---|---|
| Wood | Natural look, customizable | Requires regular maintenance |
| Vinyl | Low maintenance, affordable | Limited color options |
| Metal | Durable, fire-resistant | Can be noisy during rain or hail |
Once you have chosen the right siding for your tiny house, the next step is to install it properly. This may involve cutting and fitting the siding pieces, as well as securing them to the exterior walls. Attention to detail is crucial, as any gaps or incorrect installation can lead to water damage or decreased insulation efficiency.
After completing the exterior finishing, it’s time to move on to the final touches and details that will truly make your tiny house feel like a home.
Final Touches and Details
When it comes to the final touches and details of my tiny house, there are a few key points to consider.
First, I need to complete any remaining interior work, such as painting, installing trim, and adding any necessary finishing touches.
Next, I will need to install lighting fixtures and outlets throughout the house to ensure it’s well-lit and functional.
Finally, I can add decorative elements and personal touches to make the space feel cozy and unique.
By following these steps, I can bring my tiny house to life and create a space that reflects my personal style and preferences.
Complete any remaining interior work
Get ready to put your personal touch on the tiny house and witness the transformation of a blank canvas into a cozy and inviting home. Here are some discussion ideas for completing any remaining interior work:
-
Space optimization techniques: Maximize the functionality of your tiny house by utilizing smart storage solutions such as built-in shelves, under-bed storage, and foldable furniture. Think creatively to make the most of every square inch.
-
Choosing sustainable and eco-friendly materials: Consider using reclaimed wood, bamboo flooring, or recycled materials for your tiny house. Not only will this help reduce your carbon footprint, but it’ll also give your home a unique and rustic charm.
-
Incorporate natural light: Install large windows and skylights to let in plenty of natural light. This will make your tiny house feel more spacious and open, creating a welcoming and airy atmosphere.
-
Add personal touches: Make your tiny house feel like home by adding personal touches such as artwork, photographs, and decorative items. These small details will bring warmth and character to your space.
Now that the interior is taking shape, it’s time to move on to the next step: installing lighting fixtures and outlets.
Install lighting fixtures and outlets
Now it’s time to brighten up your space by installing lighting fixtures and outlets, bringing a warm and inviting glow to your tiny home. Installing electrical fixtures requires careful planning and attention to detail. Before starting, it’s important to consider electrical safety considerations such as ensuring that the electrical supply is turned off and using appropriate tools and equipment.
To guide you through the installation process, here’s a helpful table outlining the steps involved:
| Step | Description |
|---|---|
| 1 | Plan the location of lighting fixtures and outlets |
| 2 | Install junction boxes and wiring |
| 3 | Connect wiring to fixtures and outlets |
| 4 | Test the electrical connections for functionality |
By following these steps, you can ensure a well-lit and safe living environment in your tiny home. Once you have finished installing lighting fixtures and outlets, you can move on to the next step of adding decorative elements and personal touches to make your space truly yours.
Add decorative elements and personal touches
To infuse your space with personality and elevate its ambiance, consider adding decorative elements and personal touches. This is the perfect opportunity to personalize the design and make your tiny house truly feel like home.
Here are a few ideas to get you started:
-
Add decorative elements: Hang up artwork, photographs, or tapestries that reflect your personal style and interests. Incorporate unique pieces that spark joy and make you feel happy whenever you look at them.
-
Personalize color schemes: Experiment with different colors to create a cozy and inviting atmosphere. Consider using accent walls or colorful accessories to add pops of vibrancy to your space.
-
Incorporate unique artwork: Support local artists or create your own artwork to display in your tiny house. This not only adds visual interest but also makes your space feel more personal and curated.
With these ideas in mind, you can now move on to the next step of testing and inspection, ensuring that everything’s in proper working order.
Testing and Inspection
Imagine the thrill of having your tiny house undergo professional testing and inspection to ensure its safety and quality. This crucial step in the building process ensures that all aspects of your tiny house meet the necessary standards.
There are various testing techniques and inspection processes involved to guarantee that your tiny house is structurally sound and ready for occupancy. During the testing phase, experts will examine the electrical systems, plumbing, and HVAC to ensure they’re functioning properly and meet all safety regulations. They’ll also check for any potential issues with insulation, ventilation, and fire safety. Additionally, structural integrity will be assessed to ensure that your tiny house can withstand various environmental conditions.
The inspection process involves a thorough examination of every aspect of your tiny house, from the foundation to the roof. This includes checking for any leaks, signs of water damage, and proper installation of windows and doors. Inspectors will also assess the overall craftsmanship and attention to detail in the construction of your tiny house.
Once your tiny house passes all the necessary tests and inspections, you can move in and enjoy! The peace of mind that comes with knowing your tiny house has been professionally inspected and tested is invaluable.
Move-In and Enjoy!
Now that my tiny house is built and all the testing and inspections are complete, it’s time to move in and enjoy!
The first step is to clean and prepare the interior of the tiny house for move-in. This includes wiping down all surfaces, vacuuming or sweeping the floors, and making sure everything is in its place.
Once the house is clean, it’s time to furnish and decorate the space. Since space is limited, it’s important to choose furniture that is functional and multi-purpose.
Finally, it’s time to start enjoying the benefits of minimalistic living. With less stuff and a smaller space to maintain, I can focus on what truly matters and live a more intentional and simplified life.
Clean and prepare your tiny house for move-in
Once you’ve finished cleaning and preparing your tiny house, it’s fascinating to note that the average time it takes for someone with no experience to move in is around 3-4 weeks. Cleaning and organizing a small space can be a daunting task, but with a cleaning checklist and some tips for organizing small spaces, it becomes much more manageable.
Start by creating a checklist of all the areas that need to be cleaned, such as the kitchen, bathroom, and living area. Organize your cleaning supplies and gather everything you need before you start. When cleaning, focus on one area at a time and tackle it thoroughly before moving on to the next.
As for organizing small spaces, utilize storage solutions such as shelves, hooks, and under-bed storage to maximize your space.
Once your tiny house is clean and organized, it’s time to move on to the exciting part – furnishing and decorating your new space.
Furnish and decorate your new space
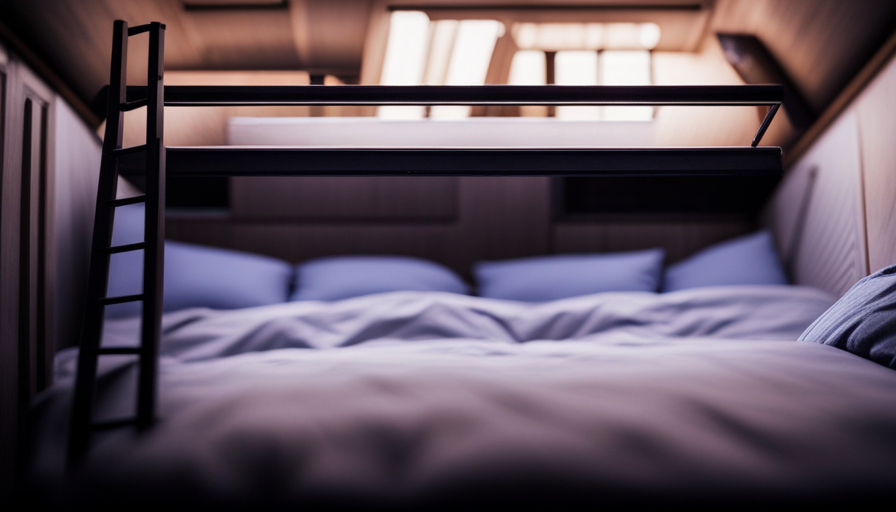
To truly transform your small abode into a cozy and personalized sanctuary, let your creative flair shine through as you furnish and add decorative touches to your new space. When it comes to furnishing a tiny house, space-saving ideas are essential. Utilizing multipurpose furniture and clever storage solutions is key. Consider investing in a loft bed with built-in drawers or a sofa that doubles as a guest bed. Maximize vertical space by installing shelves or wall-mounted organizers. Additionally, opt for furniture with hidden compartments to keep your belongings organized and out of sight. When it comes to decorating, keep in mind that less is more in a tiny house. Choose a color scheme that is light and airy to make the space feel larger. Incorporate mirrors to create the illusion of more space. Remember, the key to furnishing and decorating a tiny house is to prioritize functionality and simplicity. With these furnishing tips and space-saving ideas, you can create a beautiful and functional home in your tiny house. Now, it’s time to start enjoying your tiny house and the benefits of minimalistic living.
Start enjoying your tiny house and the benefits of minimalistic living
Embrace the enchanting essence of your cozy little haven as you relish in the rewards of living a minimalist lifestyle.
Transitioning to a minimalistic living can be a transformative experience that brings many benefits to your life. One of the major advantages is the freedom from clutter and excess possessions. By having fewer things, you can focus on what truly matters and create a space that is both calming and functional.
Another benefit is the financial savings that come with minimalistic living. By not constantly buying unnecessary items, you can save money for experiences and things that truly bring you joy.
To transition to a minimalistic lifestyle, start by decluttering and only keeping items that serve a purpose or bring you joy. Implement a one in, one out rule to prevent clutter from building up again.
Embrace the concept of mindful consumption, where you carefully consider your purchases and only buy what you truly need.
By living minimally, you can simplify your life and create a space that promotes peace and tranquility.
Frequently Asked Questions
How much does it cost to build a tiny house with no experience?
Building a tiny house with no experience can be a cost-effective option. The cost estimation varies depending on factors such as location, size, and building materials. Typically, building materials account for a significant portion of the overall cost. By opting for affordable yet durable materials, one can keep expenses down.
Doing thorough research, comparing prices, and seeking advice from experts can help in obtaining an accurate cost estimation for building a tiny house with no experience.
Can I build a tiny house on wheels instead of a foundation?
Building a tiny house on wheels is a brilliant idea! It offers the freedom to travel and explore without being tied down to a foundation. The advantages include mobility, flexibility, and the ability to park in various locations.
However, there are a few disadvantages to consider, such as limited space and the need for regular maintenance. To design a functional and mobile tiny house, prioritize lightweight materials, efficient storage solutions, and a sturdy trailer.
Is it possible to build a tiny house without hiring professionals for plumbing and electrical work?
Yes, it’s possible to build a tiny house without hiring professionals for plumbing and electrical work. However, it’s important to be aware of building codes and regulations to ensure the safety and legality of your project.
DIY plumbing and electrical work require a good understanding of the systems, proper tools, and knowledge of local regulations. It’s advisable to research and consult experts or experienced builders to ensure that the work is done correctly and meets all requirements.
What are some common challenges faced during the insulation and interior finishing stage of building a tiny house?
Insulation challenges and interior finishing difficulties are common hurdles faced during the construction of a tiny house.
Insulation poses challenges such as selecting the right materials for energy efficiency and preventing moisture buildup.
Interior finishing difficulties can include finding suitable fixtures and fittings, ensuring proper ventilation, and creating a cohesive design within limited space.
Overcoming these challenges requires careful planning, research, and attention to detail to create a comfortable and visually appealing tiny house.
Are there any specific regulations or permits required to build a tiny house in a particular area?
In order to build a tiny house in a specific area, it’s important to be aware of the regulations and permits required. Each area may have its own set of requirements, so it’s essential to research and understand these regulations beforehand.
Some common regulations may include minimum square footage, zoning restrictions, and foundation requirements. Additionally, permits may be needed for construction, electrical, and plumbing work.
It’s crucial to consult with local authorities to ensure compliance with all regulations and obtain the necessary permits for building a tiny house in a specific area.
Conclusion
And there you have it! Building a tiny house with no experience may seem like a daunting task, but with proper research, planning, and determination, it can be a rewarding and fulfilling project.
From gathering materials to final touches, each step has its challenges, but with patience and perseverance, you can create a cozy and functional home.
So, don’t be afraid to take on this adventure and create your own little haven. Happy building!

Hi, I’m Emma. I’m the Editor in Chief of Tiny House 43, a blog all about tiny houses. While tree houses are often associated with childhood, they can be the perfect adult retreat. They offer a cozy space to relax and unwind, surrounded by nature. And since they’re typically built on stilts or raised platforms, they offer stunning views that traditional homes simply can’t match. If you’re looking for a unique and romantic getaway, a tree house tiny house might just be the perfect option.