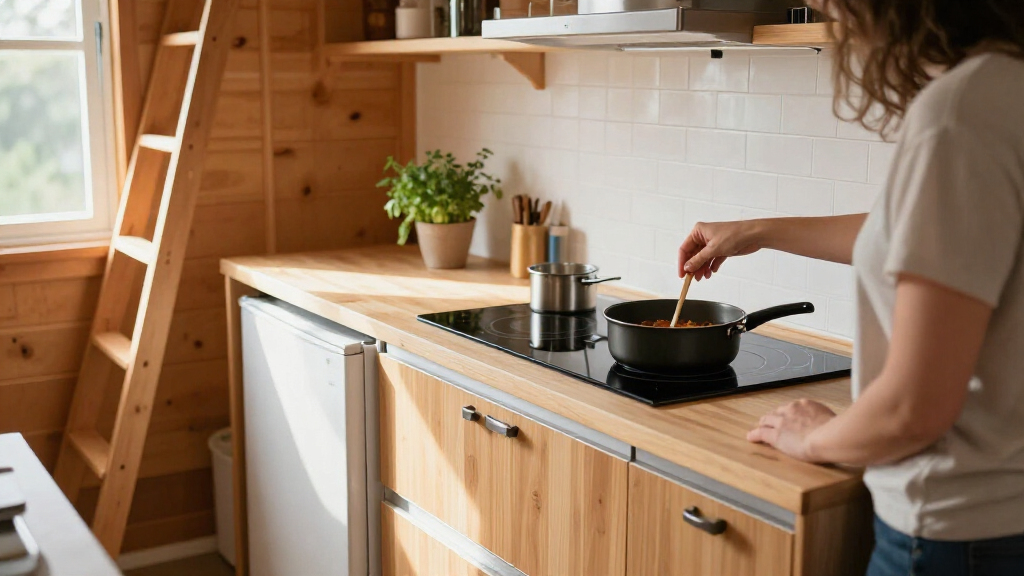

Choose compact energy-efficient appliances by measuring the available space, matching capacity to your household, comparing energy labels and operating costs, then checking installation requirements. This guide is for renters and homeowners replacing appliances in small kitchens, studios, and utility areas. The selection process is beginner-friendly and usually takes 2-4 hours, not including delivery or installation.

Get compact home essentials delivered free with Prime
- Fast, free delivery on millions of items
- Prime Video, Amazon Music and more included
- Member-only deals all year

BLACK+DECKER 4-Slice Air Fry Toaster Oven, 5-in-1 Countertop Oven
- ✔ Functions: Air Fry, Bake, Broil, Toast, Keep Warm
- ✔ Power: 1150 watts
- ✔ Capacity: Up to 4 slices of bread or a 9-inch pizza

Upstreman 1.7 Cu.ft Mini Fridge with Freezer, Black-FR17
- ✔ Capacity: 1.7 cu. ft.
- ✔ Dimensions: 18.9 in W × 17.7 in D × 19.3 in H
- ✔ Daily energy use: 0.5 kWh per day, as stated
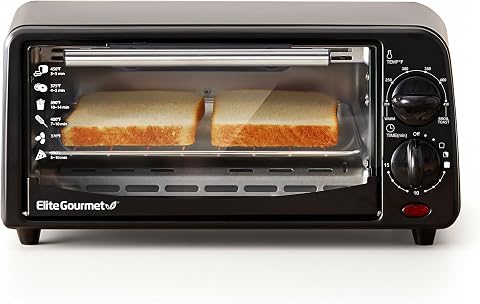
Elite Gourmet ETO236 Compact 2-Slice Toaster Oven, 15-Min Timer, Black
- ✔ Functions: Toast, Bake, Broil, Warm
- ✔ Power: 650 watts
- ✔ Temperature range: 200°F–450°F
Difficulty: Beginner | Time: 2-4 hours for research and setup, plus delivery time
What You’ll Need
Tools & Materials:
- Tape measure
- Phone or notebook for recording measurements and model details
- Current utility rate, if you want to estimate running costs
- Appliance manuals or installation specifications for existing connections
Knowledge:
- Basic familiarity with the appliance type you need
- A rough estimate of how many people will use it and how often
Check whether you rent or own the property. Before buying, confirm who may approve changes to plumbing, electrical circuits, ventilation, or built-in cabinetry. Compact appliances still need suitable clearances and connections.
BLACK+DECKER 4-Slice Air Fry Toaster Oven, 5-in-1 Countertop Oven
The BLACK+DECKER 4-Slice Air Fry Toaster Oven is our strongest pick when one small appliance needs to cover several cooking routines. Air Fry, Bake, Broil, Toast and Keep Warm give it a wider role than the Elite Gourmet, which focuses on basic toaster-oven tasks. Its interior fits four slices of bread or a 9-inch pizza, enough for snacks and small meals without moving up to a full-size oven.That range has a space and energy tradeoff. At 1150 watts, it draws more power while operating than the Elite Gourmet’s 650-watt model; the supplied information does not state daily energy use, so wattage alone cannot tell us which costs less over a typical week. Its 15.5-inch width and 11.5-inch depth also take more counter space than the Elite. The 30-minute timer and compact capacity suit shorter cooking tasks, but are limiting for longer recipes or larger households. Choose it for versatility; skip it if minimal footprint or low operating wattage is your overriding concern.
Pros:
- Five cooking functions in one countertop appliance.
- Fits four bread slices or a 9-inch pizza.
- Includes an air fry mesh tray, bake pan, wire rack and removable crumb/drip tray.
- EvenToast technology is designed to distribute heat for more consistent toast.
Cons:
- At 1150 watts, its operating draw is higher than the Elite Gourmet’s 650 watts.
- The 30-minute timer may not suit longer cooking tasks.
- Its footprint and four-slice capacity remain limited for family-size meals.
Best for: Small households that want one countertop appliance for toast, air frying and modest baking jobs.
Not ideal for: People who need to cook large trays or long recipes, or who prioritize the lowest stated operating wattage and smallest oven footprint.
Bottom line: Pick the BLACK+DECKER when cooking versatility matters more than minimizing counter space or wattage.
“Pick the BLACK+DECKER when cooking versatility matters more than minimizing counter space or wattage.”
Upstreman 1.7 Cu.ft Mini Fridge with Freezer, Black-FR17
For buyers who need chilled storage rather than another way to cook, the Upstreman 1.7 Cu.ft Mini Fridge fills a role the two ovens cannot. It provides a refrigerator compartment plus a compact freezer, with five temperature settings and a reversible door. Its stated 0.5 kWh daily energy use gives us a more direct energy-use reference than the cooking appliances’ wattage figures, though actual use can vary with conditions and habits.At 18.9 × 17.7 × 19.3 inches, it fits under a desk or in a small room, but still needs dedicated space and continuous access to power. Unlike either toaster oven, it is designed to keep food cold around the clock, so it is a better fit for dorms and offices than for cooking. The 38 dB noise specification is relevant in a bedroom or study, while the freezer has a clear limitation: the stated range is not intended for ice cream storage. Manual defrost also means periodic maintenance. Pick it for small-scale refrigeration; choose one of the ovens if counter cooking is the actual gap.
Pros:
- States daily energy use of 0.5 kWh.
- Compact dimensions suit under-desk or small-room placement.
- Five temperature settings and a reversible door provide placement flexibility.
- 38 dB stated noise level may suit shared or quiet spaces.
Cons:
- Freezer compartment is not intended for storing ice cream.
- Manual defrost requires occasional upkeep.
- Needs a permanent powered location and does not perform cooking tasks.
Best for: Dorm residents, office workers or bedroom users who need a compact refrigerator for drinks and everyday food, with a small ice-making freezer compartment.
Not ideal for: People who need full-size freezer performance, ice cream storage, or an appliance that prepares meals rather than storing them.
Bottom line: Choose the Upstreman when compact, always-on food storage is your priority and its modest freezer capacity is sufficient.
“Choose the Upstreman when compact, always-on food storage is your priority and its modest freezer capacity is sufficient.”
Elite Gourmet ETO236 Compact 2-Slice Toaster Oven, 15-Min Timer, Black
When every inch of counter space matters, the Elite Gourmet ETO236 is the most restrained cooking choice in this lineup. Its 13.25 × 7.5 × 6.5-inch dimensions and 650-watt draw are both below the BLACK+DECKER’s listed size and wattage. Adjustable temperature from 200°F to 450°F supports toast, warming, baking and broiling, making it useful for a snack, an open-faced sandwich or a personal pizza.The smaller footprint comes with fewer capabilities. It does not list an air fry function or keep-warm mode, and the 15-minute timer is half the BLACK+DECKER’s 30 minutes. The product information does not specify a food capacity beyond two slices, so we would treat it as a personal-use oven rather than a small-family workhorse. Wattage is a measure of power while operating, not a full energy-cost comparison; shorter sessions may help limit use, but actual consumption depends on how often and how long it runs. This model makes sense for a dorm, RV or compact kitchenette where basic heating is enough. For broader cooking, the BLACK+DECKER earns its extra space.
Pros:
- Smallest stated footprint among the two toaster ovens.
- 650-watt operating draw, lower than the BLACK+DECKER’s 1150 watts.
- Adjustable temperature from 200°F to 450°F.
- Includes a non-stick bake pan and removable wire rack.
Cons:
- 15-minute timer limits longer cooking tasks.
- No air fry or keep-warm function is listed.
- Two-slice format is less suited to shared meals than the BLACK+DECKER.
Best for: A student, solo cook or RV user who wants a small oven for toast, snacks and occasional personal-size baking.
Not ideal for: Households cooking multiple portions, buyers who want air frying, or anyone needing a timer longer than 15 minutes.
Bottom line: Choose the Elite Gourmet for basic cooking in a particularly tight space, provided its short timer and small capacity fit your routine.
“Choose the Elite Gourmet for basic cooking in a particularly tight space, provided its short timer and small capacity fit your routine.”
As an Amazon Associate we earn from qualifying purchases.
Before You Start
List the appliances you plan to replace and rank them by urgency. Decide what “compact” means for your space: a narrow width, shallow depth, reduced height, or a combination. Do not rely on product photos or nominal dimensions; handles, hoses, doors, and ventilation gaps can add to the space required. For gas or hardwired appliances, plan for a qualified installer where local rules require one.
Step-by-Step Instructions
Step 1: Measure the installation space
Measure the opening’s width, height, and depth at several points, since walls and cabinets may not be square. Record the smallest measurement for each dimension. Measure doorways, stairways, and turns along the delivery route too. Note nearby outlets, water valves, drains, gas connections, vents, and cabinet doors that could obstruct the appliance.
Tip:Use the installation manual’s required side, rear, and top clearances when checking fit. Leave room for hoses and plugs without crushing or sharply bending them.
Check: You have a written set of space and delivery-route measurements, plus the location of every relevant connection.
Step 2: Set capacity and feature limits
Write down the minimum useful capacity for each appliance based on your normal routine. For a refrigerator, consider how much fresh food you keep; for a washer, consider typical load size and laundry frequency. Keep only features you will use regularly, such as a freezer compartment or a short wash cycle. Compare internal usable capacity as well as outside dimensions.
Tip:A very small model can lead to extra loads, trips, or replacement purchases. Choose the smallest capacity that handles your usual needs comfortably.
Check: Each appliance has a target capacity range and a short list of needed features.
Step 3: Compare energy use and operating cost
Compare the energy labels for models of the same type and similar capacity. Use the label’s annual or per-cycle energy figure, following the unit shown. Check the water-use figure for washers and dishwashers. If your local label provides a scale or database listing, compare products within that system rather than assuming labels from different regions are directly interchangeable.
Estimate yearly electricity cost by multiplying the listed annual energy use by your electricity price per kilowatt-hour. Treat the result as an estimate: your actual use depends on settings, room temperature, load size, and how often you run the appliance.
Tip:Compare appliances of similar capacity and intended use. A low energy figure may reflect a smaller model that cannot handle your household’s typical load.
Check: You have a shortlist with comparable energy figures, water use where relevant, and estimated annual electricity costs.
Step 4: Check connections, clearance, and service access
Read the installation specifications for each shortlisted model. Confirm the required voltage, outlet type, water supply, drain, venting, and any circuit requirements against your home. Check the door swing, drawer travel, filter access, and space needed to remove the appliance for service. Ask the landlord, building manager, or installer about any uncertain connection or building restriction before purchasing.
Tip:Do not use an extension cord or adapter to make an appliance fit an unsuitable outlet. Follow the manufacturer’s instructions and local electrical rules.
Check: At least one shortlisted model fits the measured space and has compatible connections and service access.
Step 5: Compare total cost and choose a model
Compare the purchase price, delivery charge, installation cost, warranty, and replacement-part availability alongside estimated energy costs. Check return terms for incorrect measurements and confirm that delivery includes the services you need. Choose the model that meets your capacity and fit requirements while offering a practical balance of upfront and running costs.
Tip:Verify the exact model number and dimensions on the seller’s order page; similar versions can have different controls or installation requirements.
Check: Your selected model’s exact specifications, total purchase cost, delivery plan, and installation responsibilities are recorded.
Step 6: Prepare the site and install the appliance
Clear the area and protect nearby floors and cabinets before delivery. Follow the manufacturer’s installation instructions or arrange a qualified installer for work involving gas, hardwiring, plumbing changes, or other regulated connections. Keep the appliance level, preserve the specified ventilation gaps, and route hoses and cords as directed. Remove shipping brackets or packing materials only as instructed.
Tip:Do not power on a refrigerator immediately if its manual requires it to stand upright for a period after transport. Follow the model’s stated guidance.
Check: The appliance stands level, has the required clearance, and is connected according to its manual and local requirements.
Step 7: Test operation and set efficient habits
Run the manufacturer’s recommended initial test or cycle. Check for leaks, unusual noise, error codes, and unobstructed airflow. Set the recommended temperature or default program, then consult the manual for routine care such as cleaning filters, seals, or vents. Use full but not overloaded washer and dishwasher loads, and choose efficient settings when they suit the job.
Tip:Keep the receipt, model number, energy label details, and manual together for service requests and future comparisons.
Check: The appliance completes its initial check without leaks or error codes, and you know how to use and maintain its energy-saving settings.
Common Mistakes to Avoid
- Buying based on the advertised width alone. — Measure height and depth as well, include handles and connection space, and check delivery-route clearances before ordering.
- Choosing the smallest capacity without checking normal use. — Match usable capacity to typical loads and routines so the appliance does not require excessive extra cycles.
- Comparing energy figures across different sizes or label systems. — Compare like appliance types and capacities, and use the label method and units applicable in your region.
- Ignoring installation and ventilation requirements. — Read the installation manual before purchase and confirm that connections, clearances, and service access are available.
Troubleshooting
Problem: The appliance does not fit after delivery.
Solution: Do not force it into the opening or block ventilation gaps. Recheck the full dimensions, including hoses and handles, and contact the retailer about return or exchange options.
Problem: The appliance powers on but displays an error or will not start.
Solution: Check the manual’s startup section, confirm that shipping materials were removed as directed, and verify that the door, water supply, and drain are correctly set. Contact the installer or manufacturer if the code remains.
Problem: A washer or dishwasher leaks during the first cycle.
Solution: Stop the cycle and disconnect power if it is safe to do so. Close the water supply, inspect accessible hose connections for looseness or kinks, and arrange service if the leak continues.
Problem: Energy use seems higher than expected.
Solution: Check the meter or utility data over a representative period, compare usage with the label’s test conditions, and review temperature, load, and cycle settings. Clean filters or vents as directed and seek service if performance remains abnormal.
What Success Looks Like
The chosen appliances fit their measured openings and delivery route, meet the household’s capacity needs, and use compatible connections. Installation follows each manual, required ventilation remains clear, and initial operation completes without leaks or error codes. You can identify the energy-saving settings and routine maintenance tasks for each model.
Next Steps
Save the manuals and receipts, and add filter, seal, or vent cleaning to a regular reminder based on the manufacturer’s schedule. Review utility use after a few billing cycles against your estimate. If an appliance repeatedly fails, leaks, or uses far more energy than expected, contact the manufacturer or a qualified service technician with the model number and any error code.
Frequently Asked Questions
Do compact appliances always use less energy?
No. Size alone does not determine efficiency. Compare energy use on the applicable label for appliances of similar type and capacity, then consider how often you will use the model.
How much clearance should I leave around a compact appliance?
Use the clearance specified in the appliance’s installation manual. Requirements vary by model and can affect ventilation, door movement, and safe operation.
Can I install a compact appliance in a rental?
Often, if it uses existing connections and the lease allows it. Get approval before changing plumbing, electrical circuits, cabinetry, ventilation, or gas connections.
How do I compare electricity costs between models?
Multiply each model’s annual energy figure by your electricity price per kilowatt-hour. Compare models with similar capacity and remember that real use varies with settings and frequency.