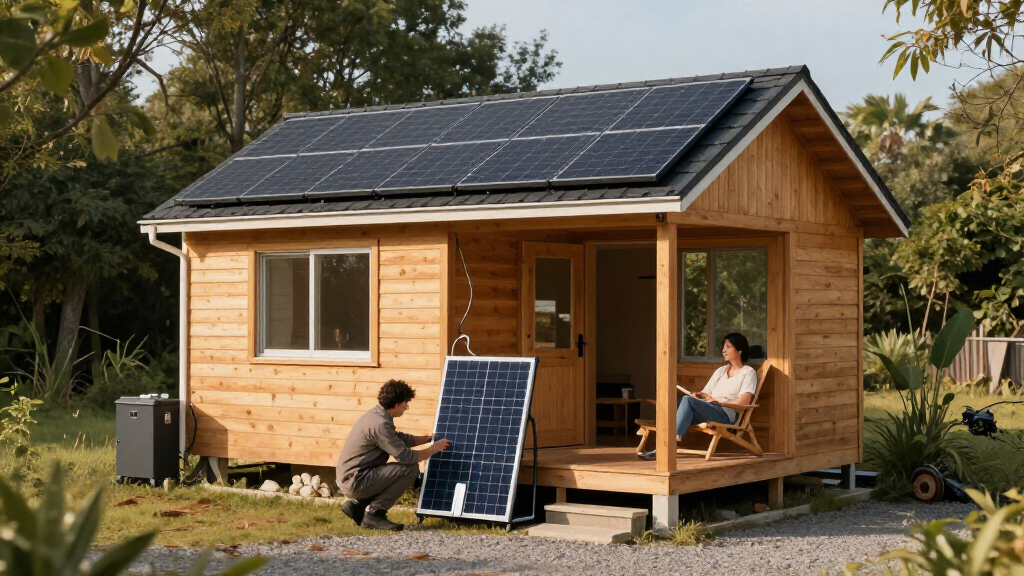
Plan and assemble a compact solar power system for small devices such as phones, lights, a router, or a small 12-volt appliance. This guide is for people with basic experience using hand tools who can follow product manuals; it does not cover household wiring or grid connection. Expect 2–4 hours for planning, assembly, and checks, plus time to charge the battery. You will finish with a system sized to your loads, with securely connected components and a basic operating check.

Get compact home essentials delivered free with Prime
- Fast, free delivery on millions of items
- Prime Video, Amazon Music and more included
- Member-only deals all year
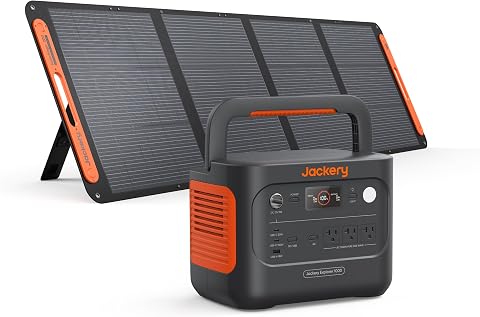
Jackery Solar Generator 1000 v2 with 200W Solar Panel
- ✔ Battery capacity: 1,070Wh
- ✔ Battery type: LFP
- ✔ AC output: 1,500W

ZeroKor 300W Portable Power Station with 60W Solar Panel
- ✔ Maximum output: 300W
- ✔ Solar panel: 60W monocrystalline
- ✔ Panel conversion efficiency: 20.5%

ZeroKor 100W Portable Power Station with 40W Foldable Solar Panel
- ✔ Maximum output: 100W
- ✔ Solar panel: 40W foldable monocrystalline
- ✔ Panel conversion efficiency: 22.8%
Difficulty: Intermediate | Time: 2–4 hours, plus charging time
What You’ll Need
Tools & Materials:
- Solar panel and compatible charge controller
- Deep-cycle battery with a chemistry and voltage supported by the controller
- Inline fuse and holder sized for the system wiring and loads
- Battery cables and connectors sized for the expected current
- DC loads or an appropriately rated inverter
- Wire stripper and crimper suitable for the connectors
- Multimeter
- Mounting hardware and protective enclosure suitable for the location
Knowledge:
- Basic awareness of positive and negative electrical connections
- Ability to read component labels and follow manufacturer wiring diagrams
- Understanding that batteries can deliver dangerous short-circuit current
List each device, its voltage, wattage, and hours of use per day before buying parts. Check the panel, controller, battery, cables, fuse, and loads for compatible voltage and current ratings. Work in a dry, well-ventilated area, keep the panel covered while wiring, and remove rings or metal jewelry. Never connect a battery with damaged casing or exposed terminals.
Jackery Solar Generator 1000 v2 with 200W Solar Panel
Among these three systems, the Jackery 1000 v2 is the only one with a stated 1,070Wh battery capacity, giving us a concrete basis for judging how much energy it can store. Its 1,500W AC output and 3,000W surge peak also put it in another class from the ZeroKor 300W and 100W stations. That extra headroom can accommodate a broader range of devices, although we should still compare each appliance’s running and startup demand with the unit’s limits.The tradeoff is portability: at 23.8 pounds, this is not the easy-carry choice that the 3.3-pound ZeroKor 100W is. Its 200W panel is also the largest included panel in this group, and the listed solar charge time is six hours to 80% under the stated conditions. Buyers should plan around the fact that the station and panel ship separately. The one-hour charging mode also requires emergency charging to be enabled in the app, which makes fast charging less straightforward than the headline feature might suggest.We rank it first for buyers who need meaningful stored energy and more output flexibility in a compact portable format. If the priority is carrying the lightest possible kit for phones and small electronics, the ZeroKor 100W is a better fit. If we cannot use its weight or need only modest loads, the Jackery’s extra capacity may be more system than we need.
Pros:
- Stated 1,070Wh LFP battery capacity
- 1,500W AC output with 3,000W surge peak
- Includes a 200W solar panel and app control
- Multiple AC, USB, and DC outputs
Cons:
- The station weighs 23.8 pounds, far more than the ZeroKor 100W
- The station and solar panel ship separately
- One-hour charging requires enabling emergency charging in the app
Best for: Buyers who want a portable backup or trip power source with documented capacity and support for devices drawing more than the ZeroKor models allow.
Not ideal for: People who need a very light carry kit, or buyers whose needs are limited to small electronics and who do not need its higher capacity.
Bottom line: Choose the Jackery when capacity and appliance support matter more than keeping the whole system exceptionally light.
“Choose the Jackery when capacity and appliance support matter more than keeping the whole system exceptionally light.”
ZeroKor 300W Portable Power Station with 60W Solar Panel
The ZeroKor 300W raises the output ceiling to 300W, three times the rating of its 100W sibling. That makes it the more flexible ZeroKor for small devices and compatible loads, while retaining a much smaller panel than the Jackery’s 200W setup. It includes two AC outlets, several USB options, DC output, and three ways to recharge: wall power, a compatible solar panel, or a 12V car outlet.For a compact solar system, its weak point is how much we can verify about stored energy. Battery capacity and runtime are not specified, so the 300W output rating tells us the maximum supported load, not how long the station can run it. The included 60W panel is larger than the 40W panel bundled with the 100W ZeroKor, but still far below the Jackery panel’s 200W rating. Its junction box is not waterproof, which calls for care around moisture while setting up outdoors.This model makes sense when the 100W ZeroKor’s ceiling feels too restrictive, but the Jackery’s weight and higher output are unnecessary. Buyers should avoid loads above 300W, which the product warns may damage the unit. Those needing a confidently estimated runtime should favor a system with disclosed capacity, such as the Jackery.
Pros:
- 300W maximum output is higher than the 100W ZeroKor
- Includes a 60W monocrystalline panel
- Recharges from AC, compatible solar, or a 12V car outlet
- Offers AC, DC, and multiple USB outputs
Cons:
- Battery capacity and runtime are not specified
- Loads over 300W may damage the station
- Solar panel junction box is not waterproof
Best for: Campers and occasional backup users who want more output than a lightweight 100W station provides and can work within a 300W maximum.
Not ideal for: Buyers who need a known runtime, plan to power loads above 300W, or need a weatherproof panel connection.
Bottom line: Pick this ZeroKor when its 300W ceiling and included 60W panel suit your loads, and you can accept the missing runtime information.
“Pick this ZeroKor when its 300W ceiling and included 60W panel suit your loads, and you can accept the missing runtime information.”
ZeroKor 100W Portable Power Station with 40W Foldable Solar Panel
At about 3.3 pounds and 7.6 by 3.7 by 6.1 inches, the ZeroKor 100W is the clearest choice when carry weight and storage space lead the decision. It bundles a foldable 40W panel and provides AC, DC, USB-A, QC USB, and USB-C outputs. Compared with the 300W ZeroKor, it sacrifices substantial output headroom in exchange for a lighter, smaller station.That 100W ceiling sharply limits what belongs on it. The product advises against appliances with air compressors or heating elements and warns that loads above 100W may damage the unit. This is better thought of as a small-electronics system than an all-purpose backup source. As with its 300W sibling, the supplied information does not give battery capacity or runtime, so we cannot estimate how long it will keep devices running from the listed output alone.For buyers charging phones and other modest electronics on a short outing, the included foldable panel and car charging support make the kit easier to bring along. But the Jackery offers far more documented energy and power, while the 300W ZeroKor gives more room for compatible loads. We would choose this model when its small footprint is the deciding advantage and our devices fit comfortably within its limit.
Pros:
- Lightweight station at about 3.3 pounds
- Compact dimensions and included foldable 40W panel
- AC, DC, USB-A, QC USB, and USB-C outputs
- Can recharge from a wall outlet, car, or solar panel
Cons:
- 100W maximum output excludes many appliances
- Battery capacity and runtime are not specified
- Not recommended for devices with heating elements or air compressors
Best for: Day-trippers, minimalist campers, or emergency-kit planners who want a light station for small electronics and value an included foldable panel.
Not ideal for: Anyone who needs to run heating appliances, air compressors, loads over 100W, or calculate expected runtime from a stated battery capacity.
Bottom line: Choose the ZeroKor 100W for a lightweight solar kit for small electronics, not as a substitute for a higher-output backup system.
“Choose the ZeroKor 100W for a lightweight solar kit for small electronics, not as a substitute for a higher-output backup system.”
As an Amazon Associate we earn from qualifying purchases.
Before You Start
Keep the system off household wiring. Do not connect it to a wall outlet or utility circuit. A compact solar setup can still cause burns or fire if a battery is shorted or a cable is undersized. Follow the controller and battery manuals whenever their connection order differs from the steps below. Place the battery on a stable, nonconductive surface with airflow around it, and protect terminals from accidental contact.
Estimate daily energy use by multiplying each device’s watts by its hours of use, then adding the results in watt-hours. For example, a 10-watt light used for 4 hours consumes 40 watt-hours. Add a margin for conversion losses and cloudy weather; actual solar output varies with season, shade, panel angle, and location. Choose capacity for the autonomy you need, rather than assuming the panel will replenish the battery every day.
Step-by-Step Instructions
Step 1: List and measure the loads
Write down every device you intend to power, its input voltage, wattage, and expected daily hours of use. Use the label or manual; if only amperage is listed, multiply amps by volts to estimate watts. Add each device’s daily watt-hours to get the total. Identify any device with a motor or compressor, because its startup surge may be much higher than its running wattage.
Tip:Separate devices that run directly on DC from devices that require AC. An inverter adds losses and must handle both continuous demand and startup surge.
Check: You have a daily watt-hour estimate and know the highest continuous load and any startup surge the system must support.
Step 2: Choose the panel, battery, and controller
Select a panel whose expected daily production can cover your energy use in the conditions where you will operate it. Use local solar estimates or the panel maker’s guidance, and allow for cloudy days and seasonal changes. Size the battery for the energy you need between charges while respecting its usable capacity; lead-acid batteries typically should not be regularly drained as deeply as many lithium batteries. Choose a charge controller that matches the panel type and voltage, supports the battery chemistry, and accepts the panel’s maximum voltage and current.
Tip:Do not size a system from panel wattage alone. Shade, short winter days, heat, and poor orientation can reduce actual energy production substantially.
Check: The battery has enough usable watt-hours for your planned use, and the controller’s input and battery ratings match the panel and battery specifications.
Step 3: Prepare a stable mounting and wiring layout
Place the battery, controller, fuse, and loads where they will stay dry and protected from knocks. Mount the panel so it can face the sun without regular shade, using hardware rated for the surface and expected wind. Plan short battery cables to reduce voltage drop, and route panel and load cables so they cannot be pinched, tripped over, or pulled loose. Keep the positive and negative conductors clearly identified.
Tip:Follow the panel maker’s mounting instructions. A portable panel still needs a stable support and cable strain relief.
Check: Each component has a secure location, the cable route is clear, and the panel can be positioned without blocking ventilation or creating a trip hazard.
Step 4: Fit the battery fuse and check polarity
With the panel covered and all loads switched off, check the battery, controller, and cable labels. Install an appropriately rated fuse in the battery positive lead as close to the battery as the equipment instructions allow. The fuse must protect the cable and fit the expected current; do not substitute a larger fuse to stop nuisance blowing. Use the multimeter to confirm polarity before connecting any lead.
Tip:A battery can deliver very high current into a short circuit. Use insulated tools, keep loose metal away from terminals, and never let a bare positive lead touch the negative terminal or chassis.
Check: The fuse is on the positive battery lead, its rating is suitable for the cable and system, and your meter confirms the marked positive and negative conductors.
Step 5: Connect the controller to the battery
Follow the controller manual’s sequence; many controllers require the battery to be connected before the solar panel. With the panel still covered, connect the controller’s battery terminals to the battery using the correctly sized cables, observing polarity. Keep the fuse removed or open until the connections are secure if the manual allows this. Tighten terminals to the maker’s specified torque without overtightening.
Tip:Reverse polarity can damage a controller or battery. If the labels are unclear, stop and consult the product manual before proceeding.
Check: The controller powers up or displays the expected battery status, with no sparks, hot cables, warning code, or loose connection.
Step 6: Connect the panel and loads
With the panel covered, connect its positive and negative leads to the controller’s solar input, matching polarity and staying within the controller’s input limits. Then connect DC loads to the controller’s load output only if the manual permits their current and type; connect larger loads directly to the battery through their own correctly rated fuse when specified by the manufacturer. If you need AC, connect a properly rated inverter to the battery with short, suitable cables and the required fuse. Do not exceed the inverter’s continuous or surge rating.
Tip:Some controllers’ load terminals cannot handle inverter current or motor startup surges. Use the wiring diagram and ratings for each component.
Check: All connections match the wiring diagrams, positive and negative leads are correctly placed, and no cable or component rating is exceeded.
Step 7: Start the system and check charging
Uncover the panel and switch on the system in the order specified by the manuals. Check the controller display or indicators for battery voltage, charging status, and any fault messages. Measure battery voltage at its terminals with the multimeter if you need to confirm a reading; compare it with the battery maker’s charging guidance and account for the battery’s state and temperature.
Tip:A charging symbol may take a short time to appear, and a full battery may show little charging current. Check in direct sunlight with the panel facing the sun before treating that as a fault.
Check: The controller reports a plausible battery status and charging activity when the battery needs charge and the panel receives sunlight, with no fault indicator.
Step 8: Test each load and secure the setup
Switch on one device at a time and confirm it operates normally. Check that the controller or inverter does not report overload, and feel near—but do not touch exposed conductors—to detect unusual heating at cables or connectors. Switch off any load that causes a fault or hot connection. Secure the cables, close the enclosure as directed, and record the panel, battery, and controller ratings for future reference.
Tip:Do not leave a new system unattended during its first substantial load test. Stop immediately if you smell burning, hear battery venting, or see smoke.
Check: Each intended load operates within its rating, the system shows no errors or abnormal heat, and cables and components remain secure.
Common Mistakes to Avoid
- Choosing a panel or battery based only on its advertised wattage or capacity. — Calculate daily watt-hours, account for usable battery capacity, and use location-specific sunlight estimates with a margin for losses and cloudy conditions.
- Connecting the panel before the battery when the controller requires the reverse sequence. — Read the controller manual first, keep the panel covered during wiring, and use the specified connection and shutdown order.
- Using cable that is too thin or a fuse that is too large. — Select cable and fuse ratings for the current, cable length, and component instructions; place battery protection close to the positive terminal.
- Assuming every controller load terminal can run an inverter or high-surge appliance. — Check continuous and surge current limits, and connect loads through the wiring method and protection specified by the equipment maker.
Troubleshooting
Problem: The controller shows no charging in sunlight.
Solution: Check that the panel is uncovered and unshaded, confirm polarity and secure connectors, and inspect the controller’s solar input voltage against its permitted range. Check the manual for status indicators and fault codes.
Problem: A fuse blows when a load starts.
Solution: Switch off the load and inspect for a short, reversed polarity, or damaged cable. Compare the load’s startup surge with the fuse, cable, controller, and inverter ratings. Do not install a larger fuse unless the cable and equipment specifications allow it.
Problem: A device shuts off even though the battery appears charged.
Solution: Check the device’s voltage requirement, connector polarity, and current draw. Measure voltage at the battery and at the device while it runs; excessive cable length or small cable can cause voltage drop. Check low-voltage cutoff settings and battery condition.
Problem: The battery does not reach its expected charge level.
Solution: Check for shade, poor panel orientation, dirty panel glass, high daily consumption, or a controller setting that does not match the battery chemistry. Compare the controller’s charging profile with the battery manual and reduce loads while diagnosing.
What Success Looks Like
The finished system has components with compatible ratings, a fuse protecting the battery positive cable, and correctly polarized, secure connections. In suitable sunlight, the controller shows charging when the battery can accept it; each intended device runs without overload warnings, abnormal heat, or unstable voltage. Keep the system within its rated limits and verify operation again after changing a component or load.
Next Steps
Check cable tightness, connector condition, battery status, and panel cleanliness periodically, following the equipment manuals. Track daily loads and charging performance for several days so you can see whether the panel and battery cover real use. If the battery repeatedly reaches low-voltage cutoff, reduce consumption or increase storage and generation capacity. Disconnect and investigate damaged, swollen, leaking, or unusually hot equipment before using the system again.
Frequently Asked Questions
Can I use a car battery for a compact solar system?
A standard starter battery is designed for short bursts of high current, not repeated deep discharge. Use a deep-cycle battery whose chemistry and charging limits are supported by the controller.
Can I charge a laptop or phone directly from the panel?
Use a regulated USB or DC output designed for the device’s input. A bare panel’s output changes with sunlight and may fluctuate, so connect it through a compatible charge controller or regulated charging device.
How long will the battery run my devices?
Estimate runtime by dividing the battery’s usable watt-hours by the combined load in watts, then allow for conversion losses and battery limits. For example, 400 usable watt-hours divided by a 40-watt load gives about 10 hours before losses.
Can I leave the system charging unattended?
Only if every component is installed and rated for the location, the battery has suitable charge protection, and the manufacturer permits unattended operation. Keep the system ventilated as required and inspect it regularly.
Can I expand the system later?
Yes, if the controller, wiring, fuses, battery, and inverter can handle the added panel or load. Check maximum solar input, battery charging current, and load surge limits before adding components.
Halloween Picks
halloween
As an affiliate, we earn on qualifying purchases.