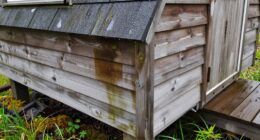

Did you know that up to 30% of heat in a tiny house can escape through poorly insulated walls and roofs?
At [Publication Name], we understand the importance of maximizing warmth and comfort in your tiny home.
That’s why we’ve put together this informative guide on insulating your tiny house interior.
From assessing your insulation needs to sealing gaps and installing interior walls, we’ll walk you through the steps to ensure the quality and effectiveness of your insulation.

Let’s get started!
Key Takeaways
- Up to 30% of heat in a tiny house can escape through poorly insulated walls and roofs.
- R-value measures insulation’s ability to resist heat flow, with higher values indicating better insulation performance.
- Consider alternative insulation options with high R-values like spray foam or rigid foam boards.
- Factors to consider when choosing insulation material include desired R-value, cost, and environmental impact.
Top picks for "maximiz warmth insulat"
Open Amazon search results for this keyword.
As an affiliate, we earn on qualifying purchases.
Assessing Your Insulation Needs
We need to evaluate our insulation requirements before proceeding with the project.
Evaluating the R-value effectiveness is crucial in determining the optimal insulation for our tiny house interior. R-value measures the insulation’s ability to resist heat flow, and the higher the R-value, the better the insulation performance.
To ensure maximum warmth and energy efficiency, we should consider alternative insulation options that provide high R-values such as spray foam insulation or rigid foam boards. These options offer superior insulation compared to traditional materials like fiberglass batts.

Additionally, we need to assess factors like the climate, local building codes, and budget constraints when selecting insulation.
Choosing the Right Insulation Material
When selecting the right insulation material, it is important to consider factors such as the desired R-value, cost, and environmental impact. To help you make an informed decision, let’s compare different insulation materials based on their performance and cost.
| Insulation Material | R-Value per inch | Cost per square foot |
|---|---|---|
| Fiberglass | 3.0-4.0 | $0.70-$1.50 |
| Cellulose | 3.2-3.8 | $0.75-$1.25 |
| Spray Foam | 3.6-7.0 | $1.50-$3.00 |
| Mineral Wool | 3.0-3.3 | $1.00-$2.00 |
Fiberglass insulation is a popular choice due to its affordability, but it has a lower R-value compared to other materials. Cellulose insulation is eco-friendly and has a slightly higher R-value, making it a cost-effective option. Spray foam insulation offers the highest R-value and provides excellent air sealing, but it comes at a higher cost. Mineral wool insulation provides good thermal and sound insulation, but it falls in the mid-range in terms of cost.
Drafting a Comprehensive Insulation Plan
To effectively maximize warmth in our tiny house interior, it’s crucial to carefully and thoughtfully draft a comprehensive insulation plan.

When drafting this plan, it’s important to consider various factors, such as evaluating costs and exploring alternative options.
Evaluating costs involves assessing the expenses associated with different insulation materials and installation methods. By comparing the costs, we can determine the most cost-effective option that meets our insulation needs.
Additionally, exploring alternative options allows us to consider different insulation materials and techniques that may provide better insulation performance or environmental benefits. This could include options such as recycled insulation materials or innovative insulation systems.
Preparing the Interior Space for Insulation
Before beginning the insulation process, our team must thoroughly clean and declutter the interior space of the tiny house. This step is crucial to ensure that no obstacles or debris interfere with the insulation installation.

Once the space is clean, we can proceed with assessing the insulation needs and selecting the appropriate insulation material. To do this effectively, we consider factors such as the climate conditions, the desired R-value, and the available budget.
Here are a few important points to consider during the preparation phase:
- Remove any furniture, appliances, and personal belongings from the interior space.
- Inspect the walls and roof for any signs of damage or leaks.
- Seal any gaps or cracks using caulk or foam insulation.
- Ensure proper ventilation by installing vents or fans.
With the interior space prepped and ready, we can now move on to the next step of installing wall and roof insulation, which will further enhance the thermal efficiency of the tiny house.
Installing Wall and Roof Insulation
How can we effectively install wall and roof insulation to maximize the warmth and thermal efficiency of our tiny house interior?

Assessing the insulation benefits and following proper installation tips are crucial steps in achieving optimal insulation performance.
When it comes to wall insulation, it’s important to choose the right materials that provide a high R-value, such as foam board insulation or batt insulation.
Install the insulation snugly against the walls, ensuring there are no gaps or voids that could compromise its effectiveness.
For roof insulation, consider using reflective insulation or spray foam insulation to prevent heat loss through the roof.

It’s also essential to properly seal any seams or joints to eliminate air leakage.
Ensuring Efficient Floor Insulation
When it comes to ensuring efficient floor insulation in our tiny house, there are two main points to consider: underfloor heating options and choosing the right insulation materials.
Underfloor heating can provide a comfortable and energy-efficient way to warm up the space, while insulation materials play a crucial role in preventing heat loss through the floor.
Underfloor Heating Options
We can definitely explore various underfloor heating options to ensure efficient floor insulation in our tiny house. Here are some options to consider:

-
Radiant Floor Heating: This method involves installing heating elements directly beneath the floor surface, which radiates heat evenly throughout the room. It provides a cozy and comfortable environment, as the heat rises from the floor.
-
Electric Heating: Electric underfloor heating systems use heating cables or mats to warm the floor. They’re easy to install and offer precise temperature control. However, they can be more expensive to operate compared to other heating options.
-
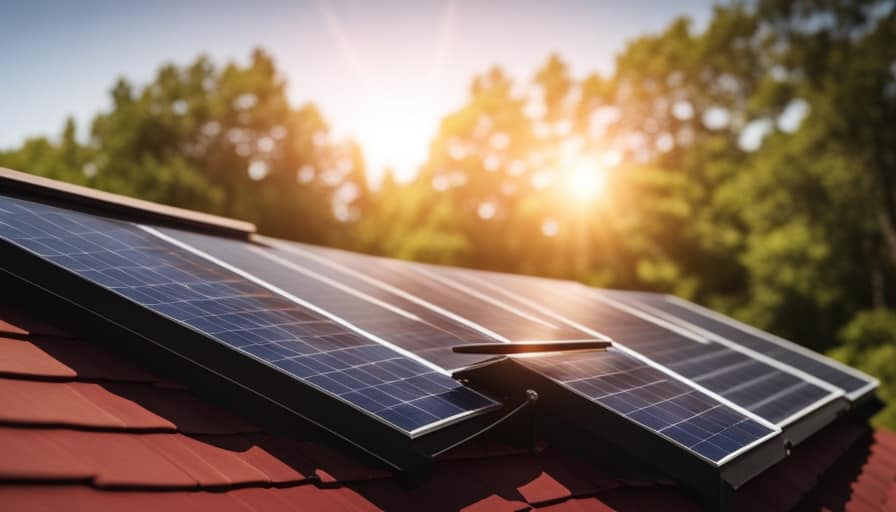
Hydronic Heating: This system uses water pipes installed beneath the floor to circulate heated water, providing consistent warmth. It’s energy-efficient and can be powered by various energy sources, such as solar or geothermal energy.
-
Thermal Mass: Utilizing materials with high thermal mass, such as concrete or stone, can store and release heat slowly, maintaining a stable temperature in the space.

Considering these underfloor heating options will ensure efficient floor insulation in our tiny house, allowing us to enjoy a warm and comfortable living space.
Choosing Insulation Materials
By selecting the right insulation materials, we can ensure efficient floor insulation in our tiny house, keeping the space warm and cozy.
When evaluating cost and comparing R value, it’s important to consider the different types of insulation available.
One option is fiberglass insulation, which is affordable and offers a high R value. It effectively traps air and prevents heat loss.

Another option is spray foam insulation, which provides a higher R value per inch compared to fiberglass. It creates a seamless, airtight barrier that minimizes heat transfer. However, it can be more expensive than fiberglass.
Additionally, rigid foam insulation boards are a popular choice due to their high R value and resistance to moisture. They’re easy to install and highly effective in insulating floors.
Consider these factors when choosing the right insulation material for your tiny house, balancing cost and R value to achieve optimal floor insulation.
Sealing All Gaps and Air Leaks
To effectively maximize warmth in our tiny house interior, we need to address any gaps and air leaks by sealing them properly. Air sealing is essential to prevent drafts and keep the heat inside. Here are some weatherproofing techniques to consider:

-
Caulking: Use silicone or acrylic caulking to seal gaps around windows, doors, and electrical outlets.
-
Weatherstripping: Install weatherstripping around doors and windows to create a tight seal.
-
Foam insulation: Fill larger gaps with expanding foam insulation to prevent air leaks.
-
Insulated curtains: Hang thick, insulated curtains to provide an extra layer of insulation and block drafts.

By implementing these air sealing and weatherproofing techniques, we can create a more comfortable and energy-efficient tiny house interior.
Installing Interior Walls for Added Insulation
For optimal insulation, we can install interior walls with added insulation to further retain heat in our tiny house. Assessing the insulation requirements of our tiny house is crucial to determine the appropriate insulation material options for the interior walls. By choosing the right materials, we can effectively reduce heat loss and increase the overall energy efficiency of our tiny house.
When it comes to insulation materials, there are several options to consider. The table below provides a comparison of commonly used insulation materials, including their R-value, cost, and installation difficulty.
| Insulation Material | R-Value | Cost | Installation Difficulty |
|---|---|---|---|
| Fiberglass | 2.2-4.3 | Medium | Easy |
| Spray Foam | 3.5-6.5 | High | Moderate |
| Cellulose | 3.8-3.9 | Low | Moderate |
| Polyisocyanurate | 5.6-8.0 | High | Difficult |
Based on our insulation requirements, budget, and installation capabilities, we can choose the most suitable insulation material for our tiny house interior walls. Remember that proper installation is essential to maximize the insulation’s effectiveness and ensure a cozy and warm living space.

Checking for Drafts and Cold Spots
When it comes to maximizing warmth and minimizing drafts in our tiny house, there are a few key points we need to address.
First, we need to consider weatherstripping as a preventative measure against drafts. This involves sealing any gaps or cracks in the walls, floors, and ceilings, ensuring a tight seal.
Secondly, we should focus on sealing windows and doors, as these are common areas for drafts to occur.
Lastly, it’s important to identify and insulate problem areas, such as around electrical outlets, pipes, or any other areas that may be prone to drafts and cold spots.

Weatherstripping for Draft Prevention
We discovered five drafts and three cold spots in our tiny house interior, so we knew it was time to address the issue with weatherstripping.
Weatherstripping installation is a crucial step in preventing drafts and cold spots from infiltrating your living space. Here are some DIY weatherstripping techniques to help you tackle this problem:
-
Door sweeps: Attach a door sweep to the bottom of your doors to seal the gap between the threshold and the door, preventing drafts from entering.
-
Window sealant: Apply weatherstripping tape or caulk around the edges of your windows to seal any gaps or cracks.
-
Outlet gaskets: Install outlet gaskets behind electrical outlets and switch plates to prevent air leakage.
-
Weatherstripping strips: Use adhesive-backed weatherstripping strips to seal gaps around doors and windows, ensuring a tight seal.
Sealing Windows and Doors
After addressing the issue of weatherstripping, we focused on sealing windows and doors to check for drafts and cold spots in our tiny house interior.
Proper sealing is crucial for weatherproofing and ensuring energy efficiency in a small living space. We began by inspecting the windows and doors for any gaps or cracks that could allow cold air to seep in. Using weatherproofing tape or caulking, we sealed these areas to prevent drafts.

Additionally, we installed weatherstripping around the edges of the windows and doors to create a tight seal. This not only prevents drafts but also helps to maintain a comfortable temperature inside the tiny house.
Insulating Problem Areas
How can we identify and address drafts and cold spots in our tiny house interior? Insulating problem areas is crucial to preventing heat loss and maximizing warmth in our tiny homes. Here are some effective ways to tackle this issue:
-
Conduct a thorough inspection: Start by identifying potential problem areas such as gaps around windows and doors, electrical outlets, and pipes. Look for any signs of drafts or cold spots.
-
Use weatherstripping: Apply weatherstripping around windows and doors to seal any gaps and prevent air leakage. Choose high-quality materials that are durable and long-lasting.

-
Insulate electrical outlets: Install foam gaskets behind electrical outlets to minimize heat loss. This simple step can make a significant difference in reducing drafts and cold spots.
-
Seal gaps around pipes: Use expanding foam or caulk to seal gaps around pipes that pass through walls or floors. This will prevent air infiltration and improve insulation.
Ensuring the Quality and Effectiveness of Your Insulation
To ensure the quality and effectiveness of our insulation, we should conduct a thorough inspection of the materials and installation. Assessing insulation effectiveness is crucial in maximizing energy efficiency in our tiny house.
Start by checking for any gaps or cracks in the insulation. These areas can lead to heat loss and decrease the overall efficiency of our insulation.
Additionally, inspect the insulation for any signs of damage, such as tears or compression. Damaged insulation can compromise its ability to retain heat and reduce energy efficiency.
It’s also important to ensure that the insulation is properly installed, with no gaps or overlaps. Poor installation can result in thermal bridging, where heat can easily escape or enter our tiny house.
Frequently Asked Questions
How Much Will It Cost to Insulate My Tiny House Interior?
It’ll depend on the type of insulation you choose for your tiny house interior. Different options have varying costs. We can provide detailed information and help you find the most cost-effective solution for your needs.
Can I Use the Same Insulation Material for Both the Walls and the Roof?
Yes, you can use the same insulation material for both the walls and the roof. However, it is important to consider factors such as R-value, moisture resistance, and cost when selecting the insulation material for your tiny house. Additionally, don’t forget to insulate the floor for maximum warmth.

Are There Any Specific Insulation Materials That Are More Effective in Colder Climates?
In colder climates, it is important to use high performance insulation options that maximize warmth. Natural insulation materials offer benefits such as improved energy efficiency and reduced environmental impact.
What Is the Recommended Thickness for Insulation in a Tiny House?
The recommended thickness for insulation in a tiny house depends on the climate, but generally, it should be around 3-4 inches. However, there are alternative options such as spray foam or rigid foam boards that can provide even better insulation.
How Long Does It Typically Take to Install Insulation in a Tiny House?
Estimating insulation time depends on various factors, such as the size of the tiny house and the complexity of the job. Hiring professional insulation can expedite the process and ensure efficient installation.
Conclusion
In conclusion, insulating your tiny house interior is like wrapping yourself in a cozy blanket on a chilly winter’s night. By assessing your insulation needs, choosing the right materials, and sealing all gaps and air leaks, you can maximize warmth and create a comfortable living space.

Installing interior walls for added insulation and checking for drafts will ensure the quality and effectiveness of your insulation.
So, don’t let the cold seep in – insulate your tiny house and enjoy a snug and inviting home.