To frame the walls of your tiny home, start by measuring and cutting your studs to fit your wall height, then assemble a rectangular frame with evenly spaced, securely nailed studs—usually 16 inches on center. Attach sheathing like plywood or OSB to add stability, install headers over openings, and reinforce the structure to withstand loads. Proper insulation and vapor barriers go inside later. Continuing will guide you through each detailed step for a strong, safe, and well-insulated tiny home.
Key Takeaways
- Measure and cut wall studs accurately to fit the tiny home’s dimensions.
- Assemble the studs into a rectangular frame and secure with nails or a nail gun.
- Space the studs evenly, typically 16 inches on center, ensuring proper support.
- Attach sheathing securely to the outside of the frame to provide structural stability.
- Install headers over openings and reinforce the frame to support roofing and lateral forces.
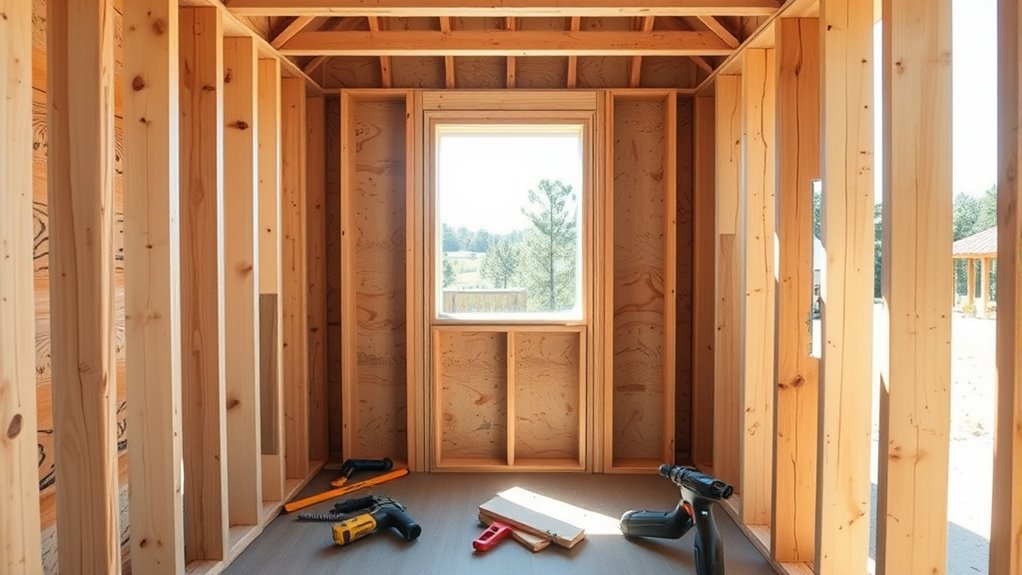
Building the walls of a tiny home is a crucial step that sets the foundation for the entire structure. Once you’ve established your design and gathered your materials, you’ll focus on framing the walls properly. A strong, well-constructed frame ensures stability and durability, but it also influences your insulation techniques and the wall material options available. Getting this part right will make the rest of your tiny home process much smoother.
Start by measuring and cutting your wall studs. Typically, you’ll use 2x4s or 2x3s, depending on your wall thickness preferences. Cut your studs to the desired height, accounting for the floor and ceiling framing. When you assemble the wall frame, make sure to space your studs evenly—usually 16 inches on center—so your wall can support insulation and wall coverings effectively. Use a nail gun or hammer to secure the studs together, creating a sturdy rectangular frame that matches your wall dimensions.
Measure and cut wall studs, then assemble and secure them evenly spaced for a sturdy frame.
Once the basic frame is assembled, you need to contemplate insulation techniques. Your choice of wall material options will influence your insulation method. For instance, if you opt for foam board or spray foam, you can insulate directly into the wall cavity before adding the exterior sheathing or interior wall coverings. If you prefer traditional insulation like fiberglass batts, make sure your wall framing provides enough space for them, and install vapor barriers if necessary. Proper insulation not only keeps your tiny home comfortable but also increases energy efficiency, so take your time to choose the right insulation method suited to your climate and budget.
With your insulation in place, it’s time to add sheathing. Sheathing options vary from plywood and OSB to metal panels, depending on your aesthetic and structural needs. Attach the sheathing securely to the outside of your framed wall using nails or screws, making sure to keep everything square and aligned. This layer provides structural support and a base for the exterior finish.
Finally, reinforce your wall frame with headers over door and window openings. This step ensures your walls can support the weight of the roof and resist lateral forces. After completing the framing, sheathing, and insulation, you’ll be ready to move on to finishing touches, like interior walls and exterior siding. Properly built walls form the backbone of your tiny home, so pay close attention to each step, from wall material options to insulation techniques, to create a safe, efficient, and comfortable space.
Additionally, understanding building codes and regulations can help ensure your tiny home meets safety standards and passes inspections.

Farm Plastic Supply – 2 in. x 4 in. (1 1/2" x 3 1/2") Wood Lumber – Premium Grade KD-HT Stud, Board Stud Wood, 2 by 4, Lumber (4, 42 Inches)
Many Uses – This product is suitable for new home construction, renovation projects, and more and has been…
As an affiliate, we earn on qualifying purchases.
As an affiliate, we earn on qualifying purchases.
Frequently Asked Questions
What Tools Are Essential for Wall Framing?
You’ll need essential tools like a tape measure, framing square, and a circular saw for accurate cuts. A cordless drill is vital for attaching studs and drywall, while a level guarantees your walls are plumb. Don’t forget a hammer, nails, and safety gear. These tools help you frame walls efficiently, install insulation properly, and securely attach drywall, making your tiny home sturdy and well-insulated.
How Do I Ensure Wall Alignment and Levelness?
To guarantee wall alignment and levelness, focus on measurement accuracy and proper framing techniques. Use a level or laser level regularly to check vertical and horizontal lines as you build. Mark precise measurements on your studs and plates, and double-check before fastening. Keep framing straight by aligning studs with your markings, and adjust as needed. Consistent tools and careful measurements help you create strong, accurately aligned walls for your tiny home.
What Materials Are Best for Tiny Home Framing?
You should choose sturdy, lightweight materials like dimensional lumber or engineered wood for framing your tiny home. For insulation options, consider spray foam or rigid foam boards to improve energy efficiency. Use precise framing techniques, such as proper nail spacing and bracing, to guarantee stability and straight walls. These materials and techniques help create durable, well-insulated walls, making your tiny home comfortable and long-lasting.
How Do I Incorporate Electrical Wiring During Framing?
You should plan your electrical wiring early during framing to guarantee compliance with electrical code requirements. First, run wiring conduit installation through wall studs, making sure the conduit is properly supported and accessible. Leave enough slack for connections and future adjustments. Keep wiring away from sharp edges, and double-check that all wiring paths meet electrical code compliance. This approach guarantees safety, easy access, and smooth integration with your tiny home’s electrical system.
What Safety Precautions Should I Take During Framing?
Think of safety precautions as your armor against potential hazards. You should always wear safety gear like gloves, goggles, and a dust mask to protect yourself. Stay alert to hazard awareness, such as unstable framing or power tools. Keep your workspace tidy to prevent trips and falls. By staying cautious and prepared, you diminish risks and ensure a safer, more efficient framing process, making your tiny home project smoother and safer.

Metabo HPT Framing Nailer, Pro-Preferred Power Nailer for Flooring, Roof Decking, and More, Lightweight 7.5 lbs Framing Tool for 21° 2" to 3-1/2" Plastic Collated Nails, NR90AES1
NAILER: 21 degree plastic collated framing nailer
As an affiliate, we earn on qualifying purchases.
As an affiliate, we earn on qualifying purchases.
Conclusion
Now that you’ve learned how to frame the walls of your tiny home, you’re well on your way to bringing your vision to life. Remember, patience and attention to detail are your best friends in this process. Don’t rush through the steps—think of it as building a house on a solid foundation. If you stay diligent and keep your eye on the prize, you’ll have a sturdy, beautiful home before you know it. Rome wasn’t built in a day!

OSB Sheathing Panel 7/16 Application as 4ft. X 8 ft. (69 Sheets on a Hack) – Delivered by Waterpallets
A trustworthy alternative to plywood
As an affiliate, we earn on qualifying purchases.
As an affiliate, we earn on qualifying purchases.

DGSL Double Reflective Bubble Foil Insulation Foam, 23.6 in X 10 FT Aluminum Foil Thermal Insulation Radiant Barrier for Window, Garage Door, RV, Roof
Reflective Window Insulation: Our rv window insulation is well-made, which is weight of 200 g / 10.76 sqft….
As an affiliate, we earn on qualifying purchases.
As an affiliate, we earn on qualifying purchases.