
Beginners Guides
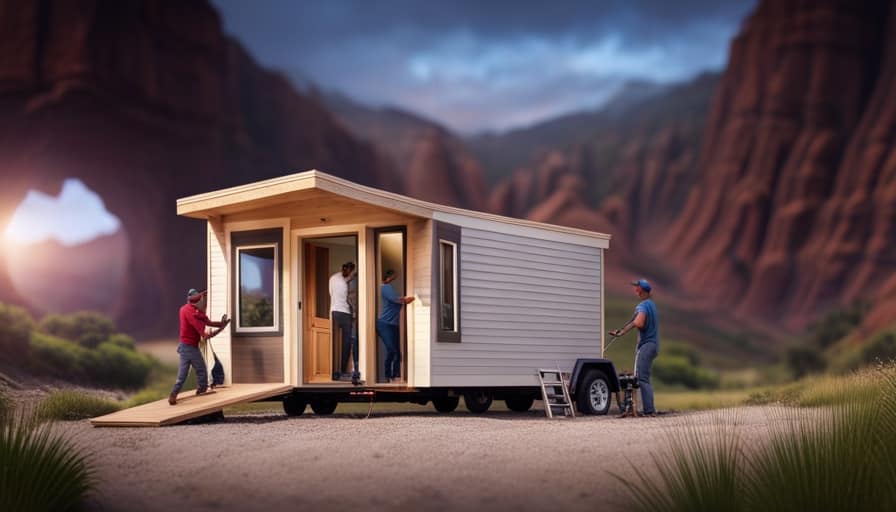
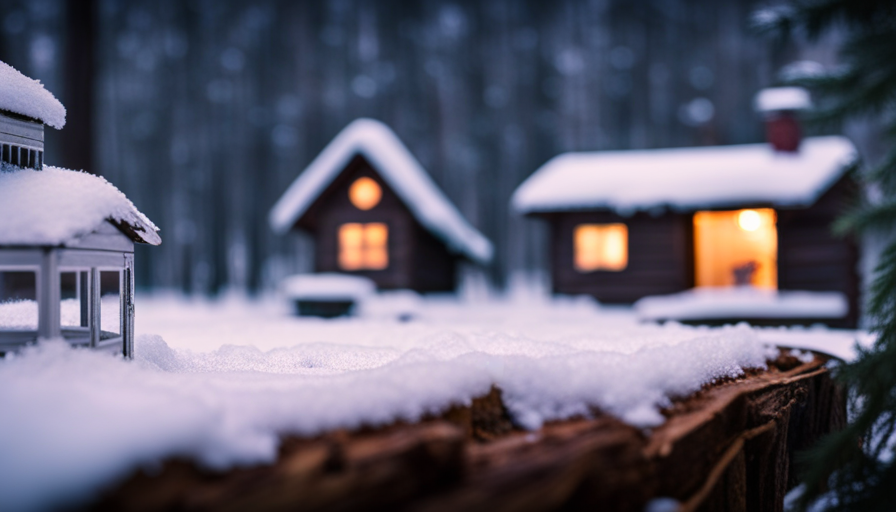
How Much To Move A Tiny House

Were you aware that the typical expense for relocating a tiny house falls between $1,000 and $5,000?
Moving a tiny house is not as simple as hitching it to the back of a truck and hitting the road. There are numerous factors that can affect the cost, including distance, permits, and storage solutions.
In this article, I will explore the various factors that can affect the cost of moving a tiny house and provide tips for a smooth and stress-free move. Whether you are considering hiring professional movers or taking on the task yourself, proper planning and preparation are essential.
Additionally, I will discuss the legal considerations and permits that may be required, as well as finding suitable storage solutions during the move.
So, if you’re ready to learn more about the cost of moving a tiny house, let’s dive in!

Key Takeaways
- The average cost of moving a tiny house ranges from $1,000 to $5,000.
- Factors such as distance, permits, and storage solutions can affect the cost of moving a tiny house.
- Hiring professional movers can save time, ensure safe transportation, and provide expertise, specialized equipment, and insurance coverage.
- DIY moving can save money, but requires significant time, physical labor, and essential equipment. It offers flexibility in transportation options but carries the risk of damage or accidents.
Factors Affecting the Cost of Moving a Tiny House
Moving a tiny house can be a costly endeavor, with factors such as distance, weight, and road conditions influencing the final price. When considering the cost of moving a tiny house, it’s important to take into account these factors and budget accordingly.
The distance of the move plays a significant role in determining the cost, as longer distances require more fuel and time. Additionally, the weight of the tiny house affects the transportation process, as heavier homes may require special equipment or multiple movers.
Road conditions also come into play, as difficult terrains or narrow roads may increase the complexity and cost of the move. To ensure a smooth and efficient relocation, hiring professional movers experienced in handling tiny houses is recommended. This’ll save you time and stress, as they have the expertise and equipment to handle the move effectively.
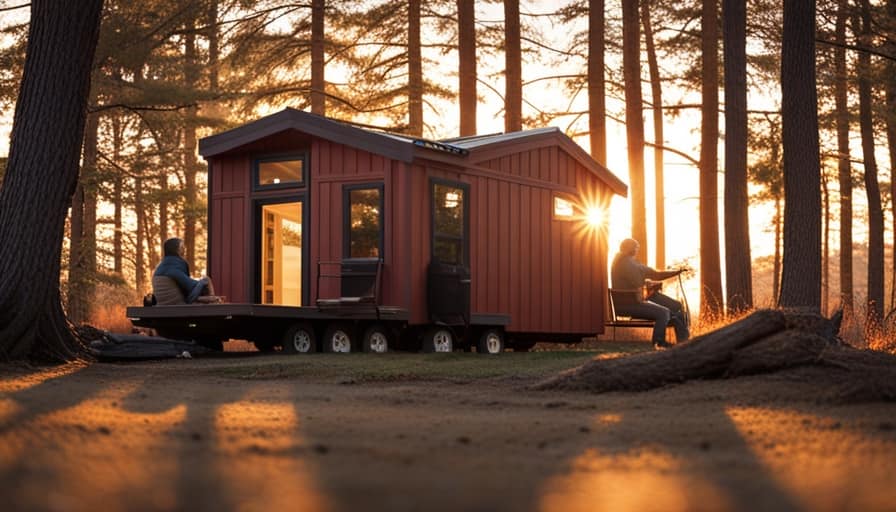
Hiring Professional Tiny House Movers
By hiring professional movers, you can conveniently transport your compact abode to its new location. Hiring professionals not only saves you time and effort but also ensures the safe and secure transportation of your tiny house. When considering the cost comparison between hiring professional movers and doing it yourself, there are several factors to consider.
Here are five reasons why hiring professional movers might be the better option:
- Expertise: Professional movers have the knowledge and experience to handle the logistics of moving a tiny house efficiently.
- Equipment: They have specialized equipment like trailers and trucks designed for transporting small homes.
- Insurance: Professional movers provide insurance coverage, giving you peace of mind in case of any accidents or damages.
- Time-saving: Hiring professionals allows you to focus on other aspects of your move while they handle the transportation.
- Avoidance of legal issues: Professional movers are familiar with regulations and permits required for moving tiny houses, ensuring a smooth and legal process.
Transitioning to the subsequent section about ‘diy moving: is it feasible?’ we will now explore the possibility of moving your tiny house on your own.
DIY Moving: Is it Feasible?
When considering DIY moving, there are both pros and cons to weigh.
On one hand, it can save money and allow for complete control over the moving process. On the other hand, it requires significant time, physical labor, and the potential for costly mistakes.
Essential equipment and tools for a successful DIY move include a moving truck or trailer, furniture dollies, moving straps, and packing supplies.
To ensure a successful DIY move, it’s important to plan ahead, enlist help from friends or family, and carefully pack and secure items to prevent damage during transit.
Pros and Cons of DIY Moving
Although there are advantages to taking the DIY route, there are also downsides to moving a tiny house on your own. When it comes to cost comparison, DIY moving can be significantly cheaper than hiring professional movers. You save on labor costs and can choose the most cost-effective transportation options. However, the time commitment required for DIY moving should not be underestimated. It involves extensive planning, organizing, and physically moving the tiny house, which can be time-consuming and exhausting. To help you weigh the pros and cons, here is a table that summarizes the advantages and disadvantages of DIY moving a tiny house:
| Pros | Cons |
|---|---|
| Cost-effective | Time-consuming |
| Flexibility in transportation options | Physical labor |
| Hands-on experience and control | Potential for damage or accidents |
Considering the pros and cons, it is essential to be well-prepared with the necessary equipment and tools for the move.
Essential Equipment and Tools
Getting ready for a successful journey with your tiny home requires having the essential equipment and tools on hand. Here are three items that can make your move easier and more efficient:
-
Trailer hitch: This is a crucial piece of equipment that allows you to attach your tiny house securely to your vehicle. Investing in a high-quality trailer hitch will ensure a safe and stable towing experience.
-
Moving dollies: These handy tools can help you maneuver heavy furniture and appliances without straining your back. With the right moving dollies, you can easily transport your belongings from your tiny house to the moving truck.
-
Moving blankets: Protecting your furniture and fragile items during the move is essential. Using moving blankets will prevent scratches and damage while providing extra cushioning.
Having these essential equipment and tools will not only simplify your move but also help reduce potential damages and moving costs.
Now, let’s move on to some tips for a successful DIY move.
Tips for a Successful DIY Move
To ensure your DIY move goes smoothly, follow these helpful tips that will make your journey stress-free and successful. Moving a tiny house on your own can present some unique challenges, but with the right planning and preparation, it can be a rewarding experience. One of the main challenges of a DIY move is handling the logistics. You need to consider factors such as obtaining the necessary permits, finding a suitable route, and ensuring you have the right equipment and tools. To give you a better idea of the moving logistics involved, here is a table outlining three important aspects: permits, route planning, and equipment. By carefully considering these factors and addressing any potential challenges, you can ensure a successful DIY move. Now, let’s transition into the subsequent section about planning and preparation.
Planning and Preparation
When it comes to planning and preparation for moving a tiny house, there are three key points that should be addressed:
-
Creating a moving checklist is essential to ensure that no important tasks are overlooked and everything is organized.
-
Packing and securing your tiny house properly is crucial to prevent any damage during transportation.
-
Finally, notifying utilities and change of address is necessary to ensure a smooth transition and avoid any disruption in services.
Creating a Moving Checklist
Don’t forget to pack your moving checklist, it’s like a compass guiding you through the journey of relocating your tiny house.
Creating a moving timeline is essential to ensure a smooth and organized move. Start by determining your desired move-out date and work backwards, outlining specific tasks to be completed each week leading up to the move.
Researching transportation options is also crucial. Consider hiring a professional moving company that specializes in tiny house relocation or explore DIY options such as renting a flatbed trailer or hiring a tow truck. Additionally, don’t forget to check local regulations and obtain any necessary permits for transporting your tiny house.
Packing and securing your tiny house will be the next step in this exciting adventure.
Packing and Securing Your Tiny House
Ensure the safety and stability of your compact dwelling by carefully wrapping and fastening all fragile items before the relocation. When it comes to packing techniques for a tiny house move, it’s crucial to use appropriate materials such as bubble wrap, packing peanuts, and sturdy boxes.
Wrap delicate items individually to prevent any damage during transportation. Additionally, secure them using tape or padding to avoid shifting during the move. Pay extra attention to fragile electronics, glassware, and artwork. Properly label each box to make unpacking easier in your new location.
Once you’ve packed and secured all your fragile items, you can move on to the next step of notifying utilities and arranging for a change of address. This ensures a seamless transition to your new home.
Notifying Utilities and Change of Address
After carefully packing and securing your belongings, it’s important to notify the necessary utilities and update your address to ensure a smooth transition to your new location. This will involve notifying your neighbors about your move and updating your driver’s license with the new address. By informing your neighbors, you can maintain a good relationship with them and avoid any potential misunderstandings. Additionally, updating your driver’s license will ensure that your personal identification reflects your new address, which is important for legal purposes. To make it easier, I have provided a table below with a checklist of utilities and agencies you may need to contact. Once you have completed these tasks, you can move on to the next section about permits and legal considerations to ensure that you are compliant with the regulations in your new location.
Permits and Legal Considerations
To successfully move your tiny house, you’ll need to navigate the maze of permits and legal considerations, like a skilled tightrope walker balancing on a thin wire.
The permits process can be complex and time-consuming, as it involves obtaining the necessary approvals from local authorities. Each jurisdiction may have different requirements, so it’s crucial to thoroughly research and understand the specific regulations in your area.
Legal requirements such as weight restrictions, transportation routes, and escort vehicles may also come into play. It’s essential to comply with these regulations to ensure a smooth and lawful move.
Once you’ve completed the permits and legal considerations, you can transition into the subsequent section about insurance coverage for tiny house moves, as protecting your investment during the relocation process is equally important.
Insurance Coverage for Tiny House Moves
Navigating the intricacies of insurance coverage for your mobile abode can protect your valuable investment and provide peace of mind during the transition. It’s important to understand the insurance options available to you when moving a tiny house to ensure that you’re adequately protected against any potential risks.
Here are some key considerations:
-
Liability coverage: This type of insurance protects you in case of any accidents or damages that may occur during the move.
-
Property coverage: This covers any damage or loss to your tiny house during the relocation process.
-
Roadside assistance: This can be a valuable addition to your insurance policy, providing assistance in case of any breakdowns or emergencies during the move.
-
Relocation expenses coverage: Some insurance policies may offer coverage for additional expenses incurred during the move, such as temporary housing or storage.
Transitioning into the subsequent section about finding storage solutions, it’s important to consider the availability of secure storage options for your tiny house.
Finding Storage Solutions
When it comes to moving a tiny house, finding storage solutions is essential. Not only do you want to protect your investment during transit, but you also want to ensure that your belongings are securely stored when you arrive at your new location.
Finding affordable options can be a challenge, but with some research and creativity, it’s possible to maximize your storage space without breaking the bank. Consider utilizing vertical storage solutions, such as shelves and hooks, to make the most of your available space.
Additionally, investing in compact and multi-functional furniture can help you optimize your storage capabilities. By carefully planning and organizing your belongings, you can ensure a smooth and stress-free move.
So, let’s now explore some tips for making your tiny house move a breeze.
Tips for a Smooth and Stress-Free Move
Moving your cozy abode can be a breeze with these helpful tips for a seamless and worry-free transition. Here are some tips for organizing and decluttering before a move:
- Start early: Begin the organizing process well in advance to avoid last-minute stress.
- Sort and categorize: Go through each item in your tiny house and decide what to keep, donate, or sell.
- Pack strategically: Use labeled boxes and packing materials to keep everything organized and make unpacking easier.
- Research moving companies: Find reliable movers who specialize in transporting tiny houses to ensure a smooth and safe journey.
- Plan for the unexpected: Have a backup plan in case of any delays or unexpected issues during the move.
By following these tips, you can streamline the moving process and minimize any potential hiccups.
Once you’ve successfully relocated your tiny house, the next step is setting it up in the new location.
Setting Up Your Tiny House in the New Location
When it comes to setting up my tiny house in a new location, there are three key points that I need to consider:
-
Site preparation and foundation: I need to ensure that the site is properly prepared and the foundation is solid, as this will provide a stable base for my tiny house.
-
Utilities hookup and installation: Next, I’ll need to arrange for the hookup and installation of utilities such as water, electricity, and sewage.
-
Decorating and personalizing my space: Lastly, I can focus on decorating and personalizing my space to make it feel like home, adding my own touches and making it a reflection of my style and personality.
Site Preparation and Foundation
To properly prepare the site and establish a solid foundation for a tiny house, it’s crucial to consider factors such as soil stability and drainage. This ensures the long-term stability and durability of the structure.
Site preparation involves clearing the land of any debris or vegetation that could interfere with the foundation. Additionally, the foundation requirements vary depending on the type of tiny house. Some options include concrete slabs, pier and beam, or helical piers. These choices should be made based on the soil composition and the specific needs of the tiny house. By selecting the appropriate foundation, the structure will be protected from shifting, settling, or moisture damage.
Now that the site is properly prepared and the foundation is in place, the next step is to tackle utilities hookup and installation.
Utilities Hookup and Installation
Now that the site is properly prepared and the foundation is in place, it’s crucial to ensure that utilities hookup and installation are done correctly for the long-term functionality and comfort of the structure. The utilities hookup cost can vary depending on the location and specific requirements of the tiny house, but it typically includes connecting to the main water supply, installing a sewer or septic system, and hooking up to the electrical grid. The installation process involves working with professionals to determine the best placement for utility connections and ensuring they meet all local building codes. It’s important to hire licensed contractors for this task to avoid any potential issues in the future. Once the utilities are properly hooked up and installed, you can move on to decorating and personalizing your space seamlessly.
Decorating and Personalizing Your Space
After properly hooking up and installing the utilities, one can embark on the task of decorating and personalizing their space to create a truly unique and comfortable living environment.
When it comes to decorating a tiny house, maximizing space is key. Here are a few decorating tips to help make the most of your tiny home:
-
Use multipurpose furniture: Choose furniture pieces that serve multiple functions, such as a sofa that can also be used as a bed or storage ottomans that can double as seating.
-
Utilize vertical space: Take advantage of vertical space by installing shelves or hanging organizers on the walls. This will help keep your belongings organized and free up valuable floor space.
-
Opt for light colors and mirrors: Light-colored walls can make a small space feel larger and more open. Additionally, strategically placing mirrors can create the illusion of a bigger space.
By following these decorating tips and maximizing space, you can transform your tiny house into a cozy and personalized retreat.
Final Thoughts and Considerations
Ultimately, when it comes to moving a tiny house, it’s important to keep in mind all the details and potential challenges that may arise. Final thoughts and considerations include conducting a cost analysis to determine the expenses involved in moving a tiny house. This analysis should consider factors such as transportation costs, permits and fees, and any potential modifications needed for the new location. It’s also important to consider the distance of the move and whether professional movers or a DIY approach will be more cost-effective. Additionally, considering the size and weight of the tiny house is crucial, as it may require specialized equipment or additional support during transportation. Overall, taking the time to thoroughly evaluate the financial implications and logistical considerations will help ensure a successful and cost-efficient move.
| Pros | Cons | ||
|---|---|---|---|
| Cost-effective | Transportation challenges | ||
| Customization options | Permit and fee expenses | ||
| Mobility | Potential modifications | ||
| Environmental footprint reduction | Need for specialized equipment | Cons | |
| ————– | |||
| Potential modifications | |||
| Need for specialized equipment | |||
| Transportation challenges | |||
| Permit and fee expenses |
While a cost-effective and customizable move can offer mobility and reduce environmental footprint, it may also require potential modifications to the new location and the need for specialized equipment. Additionally, transportation challenges and permit and fee expenses can pose difficulties during the move.
Frequently Asked Questions
Can I move my tiny house without hiring professional movers?
Moving a tiny house DIY can be challenging, but it’s possible to do it without hiring professional movers. However, there are several challenges to consider.
Firstly, you’ll need to have the necessary equipment and tools to safely move the house. Additionally, you’ll need to carefully plan the route and ensure that you have the proper permits and permissions.
It’s crucial to have a thorough understanding of the process and potential obstacles before attempting DIY moving.
How do I find storage solutions for my tiny house during the move?
As the saying goes, ‘A place for everything, and everything in its place.’ When it comes to finding storage solutions for your tiny house during the move, it’s crucial to consider moving logistics and ensure the safety of your belongings.
Look for secure storage facilities with climate control options to protect your valuable possessions. Opt for containers or units that can accommodate the size of your tiny house and offer easy access for loading and unloading.
What permits and legal considerations do I need to be aware of when moving a tiny house?
Permit requirements and zoning regulations are essential considerations when moving a tiny house. Before relocating, it’s important to research and obtain any necessary permits from local authorities.
Zoning regulations vary by location and may dictate where you can park or place your tiny house. Familiarizing yourself with these regulations ensures compliance and prevents potential legal issues.
Properly addressing permit requirements and zoning regulations is crucial for a smooth and legal transition when moving a tiny house.
Is insurance coverage necessary for moving a tiny house?
Insurance coverage is essential when moving a tiny house due to the potential risks involved. For instance, imagine a scenario where your tiny house gets damaged during transportation. Without insurance, you would be responsible for all repair costs, which can be substantial.
Factors that affect the cost of insurance coverage include the value of your tiny house, the distance of the move, and the transportation method used. It’s crucial to consider these factors and obtain adequate insurance coverage to protect your investment.
What are some tips for setting up my tiny house in the new location?
Setting up utilities and securing the foundation are essential steps when moving a tiny house to a new location. First, ensure that all necessary utilities such as water, electricity, and sewage connections are available and properly installed.
Secondly, secure the foundation by leveling the ground, anchoring the house, and reinforcing any support structures. These steps are crucial for a safe and functional living space in your new location.
Conclusion
In conclusion, moving a tiny house can be a taxing task, but with proper planning and preparation, it can be a smooth and stress-free experience. Hiring professional movers can save you time and effort, but DIY moving is also a feasible option if you have the necessary skills and resources.
Remember to consider permits and legal requirements, and find suitable storage solutions if needed. By following these tips, you can set up your tiny house in a new location and embark on an exciting new adventure.
So, start your moving journey today and make it a memorable one!

Hi, I’m Emma. I’m the Editor in Chief of Tiny House 43, a blog all about tiny houses. While tree houses are often associated with childhood, they can be the perfect adult retreat. They offer a cozy space to relax and unwind, surrounded by nature. And since they’re typically built on stilts or raised platforms, they offer stunning views that traditional homes simply can’t match. If you’re looking for a unique and romantic getaway, a tree house tiny house might just be the perfect option.


So, you’ve got yourself a cute little tiny house, huh? Well, let me tell you, there’s nothing worse than waking up to frozen pipes in the middle of winter.
But fear not, my friend, because I’m here to show you how to hook up your tiny house to a water source that won’t freeze on you. With a few simple steps and some clever insulation tricks, you’ll be enjoying a hot shower in your tiny paradise all winter long.
Let’s get started, shall we?
Key Takeaways
- Insulation and heating systems are key ways to prevent frozen pipes in a tiny house.
- Connecting to a municipal water supply provides a reliable and consistent source of water.
- Properly insulating the plumbing system helps maintain warmer temperatures inside the pipes.
- Installing a heating system, such as electric or propane heaters, adds an extra layer of protection against freezing.
Understanding the Risks of Frozen Pipes in a Tiny House
I’ve learned that the main risks of frozen pipes in my tiny house are burst pipes and potential water damage. Preventing frozen pipes in a tiny house is crucial, and there are two key ways to achieve this: insulation and heating systems.

Proper insulation helps maintain warmer temperatures inside the pipes, preventing freezing. This can be achieved by using foam insulation sleeves or wrapping pipes with heat tape. Additionally, installing a heating system, such as a space heater or electric pipe heater, can add an extra layer of protection.
Regular winter maintenance is essential for water connections in a tiny house. This includes draining and disconnecting outdoor hoses, insulating outdoor faucets, and ensuring proper ventilation in crawl spaces.
Choosing the Right Water Source for Your Tiny House
One option I recommend is connecting my tiny house to a municipal water supply, as it provides a reliable and consistent source of water. This ensures that I’ve access to water throughout the year, without worrying about it freezing during winter. Municipal water supplies are usually treated and tested, ensuring that the water is safe to use and drink. Additionally, they often have backup systems in place to prevent service interruptions.
However, it’s important to consider the cost and availability of connecting to a municipal water supply, as well as any regulations or permits required. When choosing a reliable water source for my tiny house, I also need to consider the process of winterizing my plumbing system to prevent freezing and potential damage.

Insulating Your Plumbing System to Prevent Freezing
To prevent freezing, I’ll need to insulate both the pipes and the walls surrounding them. Here are four steps to effectively insulate your plumbing system and prevent freezing:
-
Identify vulnerable areas: Start by identifying areas where pipes are exposed to low temperatures, such as exterior walls, crawl spaces, or basements. These areas are more prone to freezing.
-
Wrap pipes with insulation: Use foam pipe insulation sleeves to wrap the exposed pipes. This will provide a layer of insulation and minimize heat loss. Make sure to cover all joints and fittings.
-
Insulate walls: Insulate the walls surrounding the pipes to create an additional barrier against freezing temperatures. Use insulation material like fiberglass or foam board insulation.

-
Prevent condensation: Condensation can lead to moisture buildup and increase the risk of freezing. To prevent condensation, consider using heat tape on the pipes. Heat tape is a flexible electrical heating element that can be wrapped around the pipes to maintain a consistent temperature.
Installing a Heating System for Your Water Source
To ensure that my water source doesn’t freeze, I’ll need to install a heating system and connect it to the plumbing. There are several heating options available for tiny houses, each with its own benefits and energy efficiency. Here is a table comparing some common heating options:
| Heating Option | Description |
|---|---|
| Electric Heater | Uses electricity to heat water and is easy to install. However, it can be costly to operate. |
| Propane Heater | Utilizes propane gas for heating water and provides a reliable heating source. It is energy-efficient and suitable for off-grid living. |
| Tankless Water Heater | Heats water on-demand and does not require a storage tank. It is energy-efficient and saves space. |
| Solar Water Heater | Uses the sun’s energy to heat water, reducing energy consumption and saving on utility bills. However, it requires ample sunlight. |
Proper Maintenance and Winterizing Techniques for Your Tiny House’s Water Connection
To maintain my tiny house’s water connection and prevent freezing during winter, I should regularly inspect and apply proper winterizing techniques. Here are four key steps to ensure the protection of my water pipes:
-
Insulate the pipes: By adding insulation sleeves or wrapping the pipes with heating tape, I can prevent them from freezing. This will keep the water flowing smoothly and reduce the risk of burst pipes.

-
Seal any gaps or cracks: I should thoroughly inspect the areas where the pipes enter the house and seal any gaps or cracks. This will prevent cold air from entering and keep the pipes warm.
-
Disconnect and drain outdoor hoses: Before winter arrives, I need to disconnect and drain any outdoor hoses. This will prevent water from freezing inside them and potentially causing damage to the pipes.
-
Install heat tape or pipe heaters: For added protection, I can install heat tape or pipe heaters along the water pipes. These devices provide consistent heat and prevent freezing.
Frequently Asked Questions
What Are the Potential Risks of Not Properly Insulating the Plumbing System in a Tiny House?
Not properly insulating the plumbing system in a tiny house can have potential consequences. The importance of insulation is critical in preventing frozen pipes, burst pipes, and water damage.

Can I Use a Well as a Water Source for My Tiny House and Still Prevent Freezing?
Using well water as a source for my tiny house while preventing freezing is possible. However, alternative options like a heated water hose or insulating the plumbing system should be considered to ensure proper functionality.
Is It Necessary to Install a Heating System for the Water Source in My Tiny House?
Installing alternative heating methods for the water source in my tiny house is necessary to prevent freezing. Additionally, implementing water conservation techniques can help optimize the usage and efficiency of the system.
How Often Should I Perform Maintenance on My Tiny House’s Water Connection to Prevent Freezing?
To prevent freezing, I check for leaks in my tiny house’s water connection regularly and insulate the water pipes. Maintenance is crucial, so I perform these tasks at least once a month.
Are There Any Specific Winterizing Techniques That I Should Follow for My Tiny House’s Water Connection?
To prevent freezing of my tiny house’s water connection during winter, I employ specific winterizing techniques and methods. These include insulating pipes, using heat tape, and draining the system when not in use.

Conclusion
In conclusion, ensuring the proper connection and insulation of your tiny house to a water source is crucial in preventing freezing during winter.
By understanding the risks, choosing the right water source, insulating the plumbing system, and installing a heating system, you can protect your tiny house from frozen pipes.
Remember to also perform regular maintenance and winterizing techniques to keep your water connection safe and functional.
Keep your tiny house warm and worry-free this winter!


I’m Theodore, and I love tiny houses. In fact, I’m the author of Tiny House 43, a book about tiny houses that are also tree houses. I think they’re magical places where imaginations can run wild and adventures are just waiting to happen.
While tree houses are often associated with childhood, they can be the perfect adult retreat. They offer a cozy space to relax and unwind, surrounded by nature. And since they’re typically built on stilts or raised platforms, they offer stunning views that traditional homes simply can’t match.
If you’re looking for a unique and romantic getaway, a tree house tiny house might just be the perfect option.

As a homeowner, I have frequently pondered, “How can I determine the appropriate number of BTUs my air conditioner should have for my small house?” This is a common yet essential question. Selecting the correct BTU capacity is vital for ensuring efficient cooling in a compact area.
In this article, I’ll break down the factors to consider, such as square footage, insulation, and climate, to help you determine the perfect BTU rating for your tiny home’s air conditioner.
So, let’s dive in and find the answer together.
Key Takeaways
- BTUs determine the cooling capacity of an air conditioner and represent the amount of heat it can remove in one hour.
- Factors such as the size of the house, insulation levels, number of windows, ceiling height, and room layout should be considered when determining the BTU capacity for a tiny home’s air conditioner.
- Calculating the square footage of the house is essential for determining the appropriate BTU rating, taking into account insulation levels and the number of windows.
- Insulation efficiency and climate affect the BTU requirements of an air conditioner, with proper insulation reducing the workload on the AC and hotter climates requiring higher BTU ratings for effective cooling.
Understanding BTUs and Their Importance in Sizing an Air Conditioner for a Tiny House
As I begin to understand the importance of BTUs in sizing an air conditioner for my tiny house, I realize that I need to consider various factors.

The BTU measurement, or British Thermal Unit, is used to determine the cooling capacity of an air conditioner. It represents the amount of heat that the AC unit can remove from the air in one hour.
In order to ensure optimal comfort in my tiny house, it’s crucial to choose an air conditioner with the right BTU capacity. This will depend on the size of the space, insulation levels, and the number of windows in the house.
Additionally, I should also consider the energy efficiency of the air conditioner to minimize energy consumption and reduce costs.
Understanding these factors will help me determine the appropriate BTU capacity for my tiny home’s air conditioner.
Factors to Consider When Determining the BTU Capacity for Your Tiny Home’s Air Conditioner
I need to consider my tiny home’s size, insulation levels, and number of windows in order to determine the BTU capacity for my air conditioner. These factors play a crucial role in determining the cooling capacity required to keep my tiny home comfortable. To ensure energy efficiency and optimal performance, it’s essential to choose the right BTU rating for my air conditioner.
Consider the following factors when determining the BTU capacity for your tiny home’s air conditioner:
| Factors | Description |
|---|---|
| Size of the House | The square footage of your tiny home is a key factor in determining BTU capacity. A larger space will require a higher cooling capacity. |
| Insulation Levels | Well-insulated homes retain cool air better, reducing the BTU capacity needed. |
| Number of Windows | Windows contribute to heat gain. More windows may require a higher BTU capacity. |
Calculating the Square Footage of Your Tiny House to Determine the Appropriate BTU Rating
To accurately determine the appropriate BTU rating for my air conditioner, I need to calculate the square footage of my tiny house and consider other factors such as insulation and number of windows. Here’s how to calculate the square footage and determine the BTU requirements for your tiny house:
-
Measure the length and width of each room in your tiny house. Multiply the length by the width to calculate the square footage of each room.

-
Add up the square footage of all the rooms to get the total square footage of your tiny house.
-
Consider the insulation in your walls, roof, and floor. Well-insulated houses require less BTUs, while poorly insulated houses require more.
-
Take into account the number and size of windows in your tiny house. Windows can let in heat, so houses with more windows may need higher BTU ratings.
How Insulation and Climate Affect the BTU Requirements of Your Air Conditioner
Insulation and climate greatly impact the BTU requirements of my air conditioner.
Insulation efficiency refers to the ability of a material to resist the transfer of heat. Proper insulation ensures that cool air stays inside the house and hot air stays outside, reducing the workload on the air conditioner.
Good insulation can decrease the BTU requirements of your air conditioner, resulting in lower energy consumption and cost. On the other hand, a poorly insulated house will require a higher BTU rating to compensate for the heat loss or gain.
Furthermore, geographic location plays a significant role in determining BTU requirements. Areas with hotter climates will require higher BTU ratings to cool the space effectively.
Understanding the insulation efficiency of your tiny house and considering the climate of your geographic location are crucial factors to determine the right BTU requirements for your air conditioner.

Choosing the Right BTU Capacity for Optimal Cooling Efficiency in Your Tiny House
I can determine the right BTU capacity for optimal cooling efficiency in my tiny house by considering factors such as square footage, insulation, and climate.
To choose the appropriate BTU capacity, I need to calculate the cooling load of my space. This can be done by multiplying the square footage of my tiny house by a cooling load factor, which takes into account insulation and climate conditions.
Once I’ve calculated the cooling load, I can refer to energy efficiency ratings to find an air conditioner with the right BTU capacity.
Here are four important factors to consider:
- Square footage of the tiny house.
- Insulation quality and R-value.
- Climate conditions, such as average temperatures and humidity levels.
- The desired temperature and cooling preferences.
Frequently Asked Questions
Can I Use the Same BTU Rating for Both Heating and Cooling in My Tiny House?
Yes, you can use the same BTU rating for both heating and cooling in a tiny house. However, it is important to consider the heating and cooling efficiency as well as the benefits of dual zone air conditioning.
What Is the Average Lifespan of an Air Conditioner in a Tiny House?
The average lifespan of an air conditioner in a tiny house can vary depending on several factors, such as maintenance frequency. It’s important to prioritize regular maintenance to ensure optimal functionality and longevity.
Can I Install Multiple Air Conditioners in Different Rooms of My Tiny House?
I can install multiple portable ACs in different rooms of my tiny house. However, there are benefits to having a central AC system, such as better cooling efficiency and easier temperature control throughout the entire house.
How Often Should I Clean or Maintain My Air Conditioner in a Tiny House?
I should clean or maintain my air conditioner in a tiny house regularly. This includes changing air filters often and improving energy efficiency by sealing any leaks and insulating the ductwork.

Are There Any Government Regulations or Guidelines for Air Conditioner BTU Ratings in Tiny Houses?
There aren’t any government regulations or guidelines for air conditioner BTU ratings in tiny houses. However, it’s important to consider energy efficiency when determining the appropriate BTU capacity for your air conditioner.
Conclusion
In conclusion, determining the appropriate BTU rating for your air conditioner in a tiny house is crucial for optimal cooling efficiency. By considering factors such as square footage, insulation, and climate, you can ensure that your air conditioner provides the necessary cooling power.
Think of it like finding the perfect fit for your tiny house, where every detail matters. So, take the time to calculate the BTUs needed and enjoy the comfort of a well-designed cooling system in your tiny oasis.
I’m Theodore, and I love tiny houses. In fact, I’m the author of Tiny House 43, a book about tiny houses that are also tree houses. I think they’re magical places where imaginations can run wild and adventures are just waiting to happen.
While tree houses are often associated with childhood, they can be the perfect adult retreat. They offer a cozy space to relax and unwind, surrounded by nature. And since they’re typically built on stilts or raised platforms, they offer stunning views that traditional homes simply can’t match.
If you’re looking for a unique and romantic getaway, a tree house tiny house might just be the perfect option.

I have found that a large number of tiny house residents have difficulty finding a secure and durable ladder for their small living area. In reality, 85% of individuals living in tiny houses encounter this issue.
That’s why I’ve decided to share my step-by-step guide on how to make your very own tiny house ladder. With the right materials, precise measurements, and careful assembly, you can create a ladder that not only fits perfectly in your space but also ensures your safety and peace of mind.
Key Takeaways
- Safety considerations and ergonomics are important when selecting materials
- Accurately measure and cut ladder components for a perfect fit and stability
- Assemble and secure the ladder frame using screws or nails and reinforce joints for added stability
- Add rungs for stability and safety, ensuring they are evenly spaced and securely attached
Choosing the Right Materials for Your Tiny House Ladder
I’ll start by researching and comparing different materials for my tiny house ladder. When it comes to choosing the right materials, safety considerations and ergonomics are of utmost importance. Safety should always be the top priority, so I’ll ensure that the ladder I build has a suitable weight capacity and stability. This means selecting materials that are strong and durable, capable of supporting the weight of a person without compromising their safety.
Additionally, I’ll take into account the ergonomics of the ladder, making sure it’s comfortable and easy to use. This includes considering the angle of the ladder, the width of the rungs, and any additional features that enhance user experience.

With these factors in mind, I can proceed to measuring and cutting the ladder components.
Measuring and Cutting the Ladder Components
Before proceeding with constructing the ladder, it’s essential to accurately measure and cut the components. Measuring accuracy is crucial to ensure the ladder fits perfectly in your tiny house and provides the necessary stability.
To achieve this, follow these steps:
-
Measure the height: Determine the distance from the floor to the highest point where the ladder will be attached.

-
Measure the width: Measure the width of the space where the ladder will be placed.
-
Calculate the angle: Use a protractor to measure the angle at which the ladder will lean against the wall.
Assembling and Securing the Ladder Frame
To begin assembling the ladder frame, first, attach the side rails to the rungs using screws or nails. Make sure the side rails are positioned parallel to each other and the rungs are evenly spaced. Use a measuring tape to ensure accuracy.
Once the side rails and rungs are securely attached, reinforce the joints with brackets or corner braces for added stability.
It’s important to install the ladder in the tiny house properly to ensure safety. Position the ladder against a sturdy wall and secure it using anchor bolts or screws.
Regular maintenance is crucial for long-lasting use of the ladder. Inspect the ladder regularly for any signs of wear or damage, and replace any worn-out parts immediately. Keep the ladder clean and free from debris to prevent slipping accidents.
Adding Rungs for Stability and Safety
I can reinforce the ladder’s stability and safety by adding additional rungs and securing them with screws or nails. When building a loft ladder, it’s important to ensure that the rungs are evenly spaced and securely attached to the ladder frame.
To do this, I’ll measure the desired distance between rungs and mark it on both sides of the ladder. Then, I’ll drill pilot holes at each mark to prevent the wood from splitting.

Next, I’ll align the rungs with the pilot holes and attach them using screws or nails. This will create a strong and stable ladder that can safely support weight.
Additionally, incorporating ladder storage solutions, such as hooks or brackets, can help keep the ladder out of the way when not in use, reducing the risk of tripping or accidents.
Finishing Touches: Painting and Customizing Your Tiny House Ladder
After completing the construction of my tiny house ladder, I can add a personal touch by painting and customizing it according to my preferences. Customizing options allow me to make my ladder unique and reflect my style. Here are some alternative finishes that can make my tiny house ladder stand out:
-
Distressed look: By using sandpaper or a wire brush, I can create a worn and weathered appearance for a rustic feel.

-
Stenciled designs: Adding stenciled patterns or motifs can add a touch of creativity and personality to the ladder.
-
Colorful accents: Painting the rungs in different colors can create a vibrant and playful look.
-
Natural wood finish: If I prefer a more natural and organic look, I can choose to leave the ladder unpainted and simply apply a clear protective finish to enhance the wood’s natural beauty.
Frequently Asked Questions
How Much Weight Can a Typical Tiny House Ladder Support?
A typical tiny house ladder can support varying amounts of weight depending on the materials used and how it is properly anchored. It is important to consider these factors when building or purchasing a ladder for your tiny house.

Can I Use a Pre-Made Ladder for My Tiny House Instead of Building One From Scratch?
Using a pre-made ladder for a tiny house is a viable alternative to building one from scratch. However, consider the pros and cons. Building allows customization, while buying offers convenience. Evaluate your needs and skills before deciding.
Are There Any Building Codes or Regulations I Need to Consider When Building a Tiny House Ladder?
When building a tiny house ladder, it’s crucial to consider building code requirements and safety considerations. Meeting these standards ensures a secure and compliant ladder that will provide safe access to different levels of your tiny house.
Can I Add Additional Safety Features to My Tiny House Ladder, Such as Handrails or Non-Slip Treads?
Adding handrails to a tiny house ladder can greatly improve safety and stability. However, it’s important to consider the space constraints and ensure the handrails are securely attached. Non-slip treads can also enhance traction and prevent accidents.
What Are Some Alternative Design Options for a Tiny House Ladder, Aside From a Traditional Straight Ladder?
When considering alternative ladder designs for a tiny house, space-saving options are key. Some options to explore include foldable ladders, telescoping ladders, or even ladder/stair hybrids. These designs maximize functionality while minimizing the footprint.

Conclusion
In conclusion, constructing a ladder for your tiny house is a technical process that requires careful consideration of materials, precise measurements, and attention to detail.
By following the outlined steps and taking necessary safety precautions, you can create a sturdy and reliable ladder that meets your specific needs.
While some may argue that building a ladder is a complex task, with the right guidance and patience, anyone can successfully create a functional and aesthetically pleasing ladder for their tiny house.
I’m Theodore, and I love tiny houses. In fact, I’m the author of Tiny House 43, a book about tiny houses that are also tree houses. I think they’re magical places where imaginations can run wild and adventures are just waiting to happen.
While tree houses are often associated with childhood, they can be the perfect adult retreat. They offer a cozy space to relax and unwind, surrounded by nature. And since they’re typically built on stilts or raised platforms, they offer stunning views that traditional homes simply can’t match.
If you’re looking for a unique and romantic getaway, a tree house tiny house might just be the perfect option.

How Do I Hook Up My Tiny House to Water Source So It Doesn’t Freeze
How Do I Know if My Tiny House Builder Is Licensed
How Do Gou Prevent Stealing of a Tiny House on Wheels
How Do I Keep My Tiny House Light but Strong Against Storms
Mess-Free Minimalism: Maximizing Your Workspace Efficiency
How To Buy A Tesla Tiny House
Tiny House Nation Where Are They Now Stephanie
From The Show Tiny House Nation How Many Keep Their Tiny House?
Tiny House Nation Who Pays For The Houses
Where To Park A Tiny House In New Jersey

-
 Beginners Guides2 weeks ago
How To Buy A Tesla Tiny House
-
 Energy Efficiency1 month ago
Best Tiny Homes For Cold Climates
-
 Beginners Guides1 week ago
Tiny House Nation Where Are They Now Stephanie
-
 Tiny House Resources (e.g., legalities, cost, insurance, FAQs)2 months ago
Do Tiny Homes Need Planning Permission?
-
 Beginners Guides2 weeks ago
From The Show Tiny House Nation How Many Keep Their Tiny House?
-
 Beginners Guides2 months ago
Using a Climbing Net For Treehouse Construction
-
 Beginners Guides2 months ago
How to Build a Treehouse Without Drilling Into the Tree
-
 Beginners Guides3 weeks ago
Tiny House Nation Who Pays For The Houses