Connect with us

Beginners Guides

How Much Does It Cost To Build A Tiny House In California

Published

on

A visual depicting a sunny Californian landscape, with a tiny house under construction

The concept of residing in a tiny home has always captured my imagination. The allure of a minimalist way of life, the liberty to roam, and its cost-effectiveness, all contribute to its appeal. Nevertheless, a frequent inquiry arises, ‘What is the expense involved in constructing a tiny house in California?’

As a data-driven person, I decided to delve into the topic and find some answers. Building a tiny house in California involves a thorough understanding of local building codes and regulations, as well as careful consideration of the size and design. Material costs, labor expenses, permit fees, financing options, and utility hook-up fees also need to be taken into account. Additionally, one should budget for interior furnishings, appliances, and ongoing maintenance expenses.

In this article, I will analyze all these factors and provide you with a comprehensive breakdown of the costs involved in building a tiny house in California. So, if you’re considering embarking on this exciting journey, keep reading for all the data-driven insights you need to make informed decisions and turn your tiny house dreams into a reality.

Key Takeaways

  • Building a tiny house in California can cost between $50,000 and $100,000, depending on size and design.
  • Labor costs per hour range from $30 to $100, depending on the task and expertise of the construction team.
  • Permit costs for building a tiny house vary based on location, size, design, and local regulations.
  • Land expenses for a tiny house include utilities like water, electricity, and sewage, as well as hook up fees to connect to existing systems.

Research Local Building Codes and Regulations

Now, let’s dive into researching the local building codes and regulations so you can navigate the process of building your tiny house in California hassle-free. It’s crucial to familiarize yourself with the local building permits and zoning restrictions before starting any construction.

These regulations vary from one city to another, so it’s vital to check the specific requirements for the area you plan to build your tiny house in.

To begin, you should contact the local building department or visit their website to obtain the necessary information about building permits. This’ll give you a clear understanding of what’s required and help you avoid any potential legal issues in the future.

Advertisement

Additionally, familiarize yourself with the zoning restrictions in your chosen area. These restrictions outline where and how you can build your tiny house, including setback requirements, minimum lot sizes, and height limitations.

By researching and adhering to the local building codes and regulations, you can ensure a smoother construction process and avoid costly mistakes. Once you have a solid understanding of the requirements, you can move on to the next step of determining the size and design of your tiny house.

Determine the Size and Design of Your Tiny House

First, imagine the sheer delight of creating your own pocket-sized paradise in the Golden State. When it comes to designing your tiny house, you have endless possibilities. You can choose from a variety of styles and layouts to suit your needs and preferences. Whether you prefer a rustic cabin feel or a sleek modern design, the choice is yours.

Keep in mind that the size and design of your tiny house will greatly impact the overall construction cost.

The cost of building a tiny house in California can vary depending on the size and complexity of the design. On average, you can expect to spend around $50,000 to $100,000 for a well-built tiny house. Factors such as the materials used, labor costs, and any additional features or amenities you choose to include will also contribute to the final cost.

Advertisement

Now that you have a general idea of the design and size of your tiny house, it’s time to dive deeper into the specifics. In the next section, we will calculate the material costs needed for construction. This will help you get a more accurate estimate of the overall cost and ensure that you stay within your budget.

Calculate Material Costs

Take a moment to envision the array of beautiful materials needed to bring your dream pocket-sized paradise in the Golden State to life. To calculate material costs for building a tiny house in California, consider the following:

  1. Lumber: The backbone of your tiny house, lumber is essential for framing, flooring, and walls. Estimate the amount needed based on the size and design of your tiny house.

  2. Insulation: California’s varying climate requires proper insulation to maintain a comfortable living environment. Calculate the cost of insulation materials like fiberglass, foam boards, or spray foam.

  3. Roofing: Protect your tiny house from the elements with a durable roof. Consider the cost of roofing materials such as shingles, metal panels, or tiles.

  4. Interior Finishes: From flooring to cabinets, interior finishes add the final touches to your tiny house. Calculate the expenses for materials like hardwood, laminate, or tile flooring, as well as cabinetry and fixtures.

By estimating these building material expenses, you can get a better understanding of the overall cost of constructing a tiny house in California. Consider labor expenses as well to have a comprehensive view of the total investment required.

Consider Labor Expenses

Labor expenses are an important factor to consider when calculating the total investment required for constructing a tiny house in California. Estimating labor costs accurately is crucial for staying within budget and avoiding any financial surprises. The cost of labor can vary depending on factors such as the size and complexity of the project, as well as the experience and expertise of the construction team. To help you get an idea of potential labor expenses, I have created a table below:

Labor Task Average Cost per Hour ($)
Site preparation $30 – $50
Foundation $50 – $100
Framing $40 – $70
Interior finishing $30 – $60

It is important to note that these figures are just estimates and may vary based on location and individual contractor rates. To minimize labor costs, there are potential cost-saving measures to consider, such as doing some of the work yourself or hiring subcontractors for specific tasks. By carefully planning and researching labor options, you can make informed decisions to save money without compromising the quality of your tiny house.

Advertisement

Moving on to the next section, it is also crucial to factor in permit costs when calculating the total investment required for constructing a tiny house in California.

Factor in Permit Costs

One potential concern that may arise is the complexity of navigating the permit process, but obtaining the necessary permits is a crucial step in ensuring the legality and safety of your tiny house project.

When it comes to building a tiny house in California, permit costs can vary depending on several factors. Factors affecting permit costs include the location of your build, the size and design of your tiny house, and the specific regulations of the local jurisdiction. For example, some areas may require additional permits for plumbing or electrical work, which can increase the overall cost.

To reduce permit expenses, it’s important to research and understand the local regulations before starting your project. Hiring a professional who’s experienced with the local building codes can also help streamline the permit process and potentially save you money in the long run. Additionally, consider opting for a simpler design and minimizing the size of your tiny house, as this can help reduce permit costs.

By taking these factors into account, you can better prepare for the permit expenses associated with building a tiny house in California.

Advertisement

Moving on to calculating land expenses…

Calculate Land Expenses

To calculate your land expenses, envision the breathtaking views and lush greenery that could surround your future tiny home site in California.

When considering the cost of utilities, it’s important to research the average monthly expenses for water, electricity, and sewage in the area where you plan to build your tiny house. These costs can vary significantly depending on the location and size of your home.

Additionally, you’ll need to factor in the cost of hook up fees for these utilities. These fees can include charges for connecting your tiny house to the existing water, electricity, and sewage systems. It’s crucial to contact the local utility providers to obtain accurate information about these fees.

Remember to account for any additional expenses such as permits or inspections that may be required by the local government when hooking up these utilities.

Advertisement

By thoroughly analyzing the cost of utilities and hook up fees, you can create a comprehensive budget for your land expenses. Once you have a clear understanding of these costs, you can transition into researching financing options for your tiny house project.

Research Financing Options

Now that we’ve calculated the expenses for purchasing land, it’s time to explore the various financing options available for building a tiny house in California. Researching financing options is crucial in determining the best approach to fund your project.

When it comes to financing a tiny house, there are several avenues to consider. Here are three popular options:

  • Traditional Mortgage: Some individuals opt to finance their tiny house through a traditional mortgage. This may require meeting certain loan qualifications, such as a good credit score and a steady income. While this option provides stability and longer repayment terms, it may not be suitable for everyone.

  • Personal Loans: Another option is obtaining a personal loan specifically for building a tiny house. These loans are typically unsecured, meaning you don’t need collateral. However, interest rates may be higher compared to traditional mortgages.

  • RV Loans: If your tiny house is on wheels and meets the necessary requirements, you may qualify for an RV loan. These loans are specifically designed for recreational vehicles, including tiny houses on wheels.

By exploring these financing options and understanding their loan qualifications, you can make an informed decision about the best way to fund your tiny house project.

In the next section, we’ll discuss how to budget for utilities and hook-up fees, ensuring you have a comprehensive understanding of the costs involved.

Advertisement

Budget for Utilities and Hook-Up Fees

Imagine yourself in your cozy, fully-equipped tiny house in California, enjoying the comfort and convenience of electricity, water, and other essential utilities that you budgeted for and organized hook-up fees for seamlessly.

When it comes to budgeting for utilities and hook-up fees for your tiny house, it’s important to calculate and estimate these costs accurately to ensure a smooth transition into your new home.

Calculating the cost of utilities involves considering factors such as the size of your tiny house, the number of occupants, and the specific utility rates in your area. You’ll need to estimate the monthly costs for electricity, water, sewage, and garbage services.

Additionally, you should research the hook-up fees required to connect your tiny house to these utilities. These fees can vary depending on the location and the utility providers.

By thoroughly analyzing the data and taking into account these factors, you can create a realistic budget for utilities and hook-up fees, ensuring that you’re well-prepared for the ongoing costs of living in your tiny house in California.

Advertisement

Consider additional costs for interior furnishings and appliances to complete your dream tiny home.

Consider Additional Costs for Interior Furnishings and Appliances

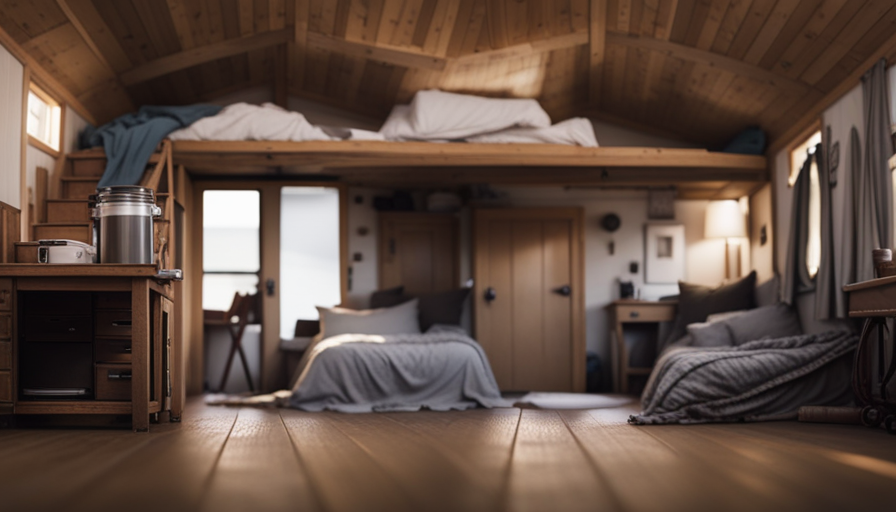
Get ready to transform your tiny house into a cozy oasis by considering the additional costs for interior furnishings and appliances, like a warm hug on a chilly day. When it comes to interior design ideas for tiny houses, the key is to maximize space while creating a comfortable and visually appealing environment. One cost-effective approach is to invest in multifunctional furniture pieces, such as a sofa that can be converted into a bed or a coffee table with storage compartments. These dual-purpose items not only save space but also serve multiple functions, making them ideal for tiny living.

In terms of appliances, it’s important to choose ones that are both cost-effective and energy-efficient. Look for appliances with high energy star ratings, as they consume less electricity and can significantly reduce your utility bills. Additionally, consider the size of the appliances to ensure they fit well within the limited space of a tiny house. Compact appliances, such as mini-fridges and slim dishwashers, are great options for tiny living.

To provide a comprehensive overview of the costs, here is a table outlining some common interior furnishings and appliances for a tiny house, along with their average prices:

Item Average Price
Sofa bed $500 – $1,500
Coffee table $100 – $300
Mini-fridge $150 – $400
Slim dishwasher $300 – $800
Energy-efficient HVAC system $2,000 – $5,000

By carefully considering these additional costs, you can create a comfortable and functional living space within your tiny house. As you plan for maintenance and upkeep expenses, it’s important to keep these costs in mind.

Advertisement

Plan for Maintenance and Upkeep Expenses

To ensure the longevity and functionality of my compact dwelling, it’s crucial for me to carefully plan and budget for the ongoing maintenance and upkeep expenses.

While the initial cost of building a tiny house in California may be lower compared to traditional homes, it’s important to consider the long-term sustainability and maintenance costs.

Budgeting for ongoing maintenance costs is essential to keep my tiny house in good condition. Regular maintenance tasks such as cleaning gutters, inspecting the roof for leaks, and maintaining the plumbing and electrical systems are necessary to prevent costly repairs down the line.

Additionally, I should allocate funds for repainting the exterior, replacing worn-out flooring, and updating appliances as needed.

I’ll also need to consider the cost of insurance for my tiny house. While the premiums may vary depending on the location and size of the house, it’s important to have coverage to protect against unforeseen events such as fire, theft, or natural disasters.

Advertisement

Furthermore, I should factor in the cost of any necessary upgrades to improve energy efficiency and sustainability. This may include installing solar panels, upgrading insulation, or investing in energy-efficient appliances. While these upgrades may require an upfront investment, they can lead to long-term savings on utility bills.

Budgeting for ongoing maintenance costs and considering the long-term sustainability of my tiny house is crucial. By carefully planning and allocating funds for maintenance and upgrades, I can ensure that my compact dwelling remains in excellent condition for years to come.

Frequently Asked Questions

Are there any specific regulations or building codes in California that apply specifically to tiny houses?

California has specific regulations for permanent tiny houses, which differ from state to state. For example, in Florida, tiny houses must meet the Florida Building Code. It’s important to research the specific building codes and regulations in each state before starting a tiny house project.

How long does it typically take to build a tiny house in California?

On average, it takes around 6-9 months to build a tiny house in California. However, common challenges like obtaining permits and finding suitable land can cause delays in the construction process.

Are there any specific labor expenses that should be considered when building a tiny house in California?

Labor expenses should be carefully considered when building a tiny house in California. These costs can vary depending on the complexity of the project and the skill level of the workers. Additionally, the construction timeline should also be taken into account to accurately estimate labor expenses.

Advertisement

What are the average permit costs for building a tiny house in California?

The average permit costs for building a tiny house in California can vary depending on the location and specific requirements. Along with construction costs, it is important to consider potential hidden expenses related to permits and inspections.

Are there any specific financing options available for individuals looking to build a tiny house in California?

There are several financing options available for building a tiny house in California. One interesting statistic shows that the majority of lenders require a credit score of at least 640 for loan approval.

Conclusion

In conclusion, building a tiny house in California requires careful planning and budgeting. By researching local building codes and determining the size and design, calculating material and labor costs, factoring in permit expenses, and exploring financing options, you can estimate the total cost.

Additionally, budgeting for utilities, hook-up fees, interior furnishings, appliances, and ongoing maintenance is crucial. As the saying goes, "The devil is in the details," so make sure to consider all aspects and expenses before embarking on your tiny house journey in California.

Advertisement
Continue Reading
Advertisement

Beginners Guides

How Long Does Tiny House Last

Published

on

By

An image showcasing the passage of time for a blog post on "How Long Does a Tiny House Last?" Depict an aging, weathered tiny house surrounded by lush greenery, with fading paint, worn-out windows, and a slightly sagging roof

You may question the longevity of tiny homes due to their size, but rest assured, these small dwellings are built to last. By utilizing high-quality materials, construction techniques, and regular maintenance, a tiny home can maintain its durability over time.

The key to the durability of a tiny house lies in its foundation and anchoring. By ensuring a solid base, the structure can withstand the forces of nature, from strong winds to earthquakes. Additionally, high-quality building materials and skilled workmanship play a crucial role in the longevity of these homes.

Climate and environmental factors also come into play. Proper insulation, ventilation, and weatherproofing are essential to protect the tiny house from extreme temperatures, moisture, and pests. Regular inspections and pest control measures further contribute to its longevity.

Furthermore, the mobility of tiny houses does not compromise their durability. With careful transportation and anchoring at each new location, these homes can continue to thrive.

In this article, we will delve into the factors that determine the lifespan of a tiny house, including maintenance, upgrades, and long-term planning. So, let’s explore the world of tiny houses and discover just how long they can truly last.

Advertisement

Key Takeaways

  • Tiny houses can last for many years with the right materials, construction techniques, and maintenance.
  • Key factors for durability include the foundation, anchoring, and high-quality building materials.
  • Proper insulation, ventilation, and weatherproofing protect against extreme temperatures, moisture, and pests.
  • Regular inspections and pest control measures are important for maintenance.

Building Materials and Construction Techniques

Tiny houses typically last for a long time due to their use of durable building materials and modern construction techniques. When it comes to building a tiny house, it’s important to follow local building codes to ensure the structural integrity and safety of the dwelling. This includes using materials that are approved for residential construction and meeting the required standards for insulation options.

One common building material used in tiny house construction is steel framing. Steel is known for its strength and durability, making it an excellent choice for supporting the weight of the house. Additionally, steel is resistant to pests and rot, reducing the risk of damage over time.

Another popular option is using structural insulated panels (SIPs) for the walls and roof. SIPs offer excellent insulation properties, reducing energy consumption and providing a comfortable living environment.

In terms of construction techniques, modern methods such as advanced framing and modular construction are often employed in tiny house projects. Advanced framing techniques maximize the use of materials, reducing waste and increasing energy efficiency. Modular construction allows for the assembly of prefabricated components, ensuring a higher level of precision and quality control.

To maintain the longevity of a tiny house, regular inspections and maintenance are essential. This includes checking for any signs of wear and tear, addressing any issues promptly, and ensuring that the insulation remains effective. By following these practices, tiny houses can last for many years to come, providing a comfortable and sustainable living space.

Maintenance and Regular Inspections

Take good care of your compact abode, and it will gracefully endure the test of time, akin to a steadfast sentinel guarding your dreams. Regular maintenance is crucial for the longevity of your tiny house. Establishing an inspection schedule is essential to identify and address any issues promptly.

Advertisement

Begin by examining the exterior of your dwelling, paying close attention to the roof, siding, and foundation. Look for signs of wear and tear, such as cracks, leaks, or rot. Inspect the windows and doors for proper sealing and functionality.

Inside your tiny house, inspect the plumbing and electrical systems regularly to ensure they’re in good working condition. Check for any signs of water damage or potential fire hazards. Additionally, inspect the insulation to maintain energy efficiency and comfort.

Following a comprehensive maintenance and inspection schedule will help you catch small problems before they become major issues. This will transition us to the subsequent section on climate and environmental factors, which also play a significant role in the lifespan of your tiny house.

Climate and Environmental Factors

When it comes to climate and environmental factors, it’s important to consider the effects of extreme weather on your tiny house. High winds, heavy rain, and extreme temperatures can all take a toll on the structure and integrity of your home.

Additionally, protecting your tiny house from moisture is crucial to avoid issues such as mold and rot. This can be achieved through proper insulation, ventilation, and the use of moisture barriers.

Advertisement

Lastly, it’s essential to prepare for seasonal changes, as different climates and temperatures can impact the performance and durability of your tiny house. This might involve adjusting your insulation, heating, and cooling systems accordingly.

Consider the Effects of Extreme Weather

Given the impact of extreme weather, it’s essential to consider the longevity of a tiny house.

The effects of extreme temperatures can greatly affect the structural integrity of a tiny house. Prolonged exposure to extreme heat or cold can cause materials to expand and contract, leading to cracks, warping, and overall deterioration.

Additionally, strong winds can pose a significant threat to tiny houses, especially those not built to withstand such forces. The powerful gusts can not only cause damage to the exterior but also put stress on the foundation and structural elements.

Therefore, when constructing or purchasing a tiny house, it’s crucial to consider the potential impacts of extreme temperatures and strong winds to ensure its longevity.

Advertisement

Protecting your tiny house from moisture is another vital aspect to address, as it’ll be discussed in the subsequent section.

Protect Your Tiny House from Moisture

Moisture is like a relentless enemy that can turn your tiny house into a soggy, moldy disaster if it’s not properly protected against. Preventing condensation is crucial to keep your tiny house dry and free from damage.

One effective way to do this is by using proper insulation. Insulating the walls, floors, and ceiling will help maintain a consistent temperature inside, preventing the formation of condensation.

Additionally, investing in waterproofing techniques such as sealing gaps and cracks, installing vapor barriers, and using moisture-resistant materials can further safeguard your tiny house from moisture intrusion. By implementing these measures, you can ensure that your tiny house remains a cozy and comfortable haven.

Now, let’s explore how to prepare for seasonal changes and maintain the longevity of your tiny house.

Advertisement

Prepare for Seasonal Changes

To ensure your tiny home remains in optimal condition, it’s essential to adequately prepare for the changing seasons. Seasonal insulation and energy-efficient heating are key elements in maintaining a comfortable and durable tiny house.

As the temperature drops during winter, it’s crucial to insulate your tiny home properly to minimize heat loss and prevent moisture buildup. Adding insulation to the walls, roof, and floor can significantly improve the energy efficiency of your tiny house.

Additionally, investing in energy-efficient heating systems, such as a programmable thermostat or a high-efficiency wood stove, can help keep your tiny home warm while reducing energy consumption. By properly insulating and heating your tiny house, you can enjoy a cozy living space all year round.

Now, let’s explore the importance of a solid foundation and secure anchoring for your tiny home.

Foundation and Anchoring

The foundation and anchoring of a tiny house are essential for its long-lasting durability. Proper maintenance of the foundation is crucial to prevent any structural issues that may arise over time. Here are four important aspects to consider when it comes to foundation maintenance:

Advertisement
  1. Regular inspections: Conducting routine checks to identify any signs of damage or shifting in the foundation is vital. Look for cracks, uneven settling, or water leakage, as these can indicate potential problems.

  2. Moisture control: Moisture is a common enemy for any foundation. Ensure proper drainage and take measures to prevent water from accumulating around the foundation. This includes installing gutters, downspouts, and grading the area away from the house.

  3. Repairing cracks promptly: If you notice any cracks in the foundation, it’s crucial to address them as soon as possible. Small cracks can quickly escalate into major issues if left unattended.

  4. Professional assistance: When it comes to foundation maintenance, it’s often best to seek professional help. They have the expertise and tools necessary to identify and resolve any foundation-related problems effectively.

Proper anchoring techniques also play a significant role in the longevity of a tiny house. Anchoring methods depend on factors such as soil conditions, local building codes, and the size of the house. It’s essential to consult with experts who can guide you in selecting the most suitable anchoring system for your specific location.

Now let’s transition to the next section, which focuses on the quality of workmanship in building a tiny house.

Quality of Workmanship

When it comes to the durability and lifespan of a tiny house, one crucial factor to consider is the quality of workmanship. The craftsmanship and attention to detail put into constructing a tiny house can greatly impact its longevity. A well-built tiny house, with sturdy materials and precise construction techniques, can last for many years to come.

The quality of workmanship encompasses various aspects, such as the precision of the joints, the strength of the connections, and the overall structural integrity of the house. Every aspect of the construction process, from the framing to the finishing touches, should be executed with meticulous care and expertise.

By ensuring high-quality workmanship, tiny house owners can have confidence in the durability of their homes. A well-constructed tiny house can withstand the test of time and provide a comfortable living space for its occupants.

Advertisement

As we move on to the next section about lifestyle and usage, it’s important to consider how the durability and craftsmanship of a tiny house can be influenced by the way it’s utilized and the lifestyle of its occupants.

Lifestyle and Usage

Living in a tiny house is like embarking on a wild adventure where your creativity is unleashed and your resourcefulness is put to the test. It offers a unique lifestyle that promotes simplicity and minimalism. But how long can you expect your tiny house to last? The longevity of a tiny house greatly depends on various factors, including the quality of materials used and the workmanship involved in its construction. However, with proper maintenance and care, a well-built tiny house can last for several decades.

When considering the cost effectiveness of a tiny house, it is important to take into account its lifespan. Compared to traditional houses, tiny houses are generally more affordable to build and maintain. They require fewer materials, less energy for heating and cooling, and have lower utility costs. Additionally, their small size makes them easier to clean and repair. All these factors contribute to the overall cost effectiveness of living in a tiny house.

To illustrate the benefits of tiny house living, let’s take a look at the following table:

Aspect Traditional House Tiny House
Cost Expensive Affordable
Maintenance High Low
Environmental Impact High Low
Flexibility Limited High
Energy Efficiency Low High

Living in a tiny house not only offers financial advantages but also promotes a more sustainable and flexible lifestyle. As we delve into the next section about ‘pest control’, it is crucial to consider how these factors interact and affect the overall experience of living in a tiny house.

Advertisement

Pest Control

Get ready to tackle pests head-on and keep your tiny house critter-free with effective pest control strategies. When it comes to maintaining a pest-free environment in your tiny house, integrated pest management is key. This approach combines multiple techniques to prevent and control pests, reducing the need for harsh chemicals.

Start by sealing off any entry points that pests could use to infiltrate your tiny house. Inspect for cracks, gaps, and holes in the walls, floors, and windows, and seal them with weatherstripping, caulk, or mesh screens. Additionally, keep your tiny house clean and tidy, as clutter and food debris can attract pests. Regularly sweep, vacuum, and wipe down surfaces, and store food in airtight containers.

If you do encounter pests, consider natural remedies such as diatomaceous earth, essential oils, or vinegar sprays, which can be effective against ants, spiders, and other common pests. Remember to regularly inspect your tiny house for signs of infestation and take immediate action if needed.

By implementing these pest control strategies, you can create a comfortable and pest-free living space in your tiny house.

Transition: Now that we’ve discussed effective pest control strategies, let’s move on to the next topic, transportation and mobility, which plays a crucial role in the lifespan of a tiny house.

Advertisement

Transportation and Mobility

When considering the impact of moving your tiny house, it’s important to understand the potential risks and challenges. You need to prepare for road conditions and regulations that may affect your journey.

It’s crucial to secure and protect your tiny house during transport to ensure its structural integrity and prevent any damage.

Consider the Impact of Moving Your Tiny House

Moving your tiny house is like uprooting a delicate flower, risking its fragile petals to the harsh winds of uncertainty. The challenges of moving a tiny house go beyond simply hitching it to a truck and hitting the road.

Relocation logistics can be complex, as you need to consider the size and weight of your tiny house, as well as any permits or restrictions in your destination. Planning is key to ensure a smooth and safe move.

Before embarking on your journey, it’s important to research road conditions and regulations that may affect your route. This includes understanding weight limits, height restrictions, and any specific regulations for towing a tiny house. By preparing for these road conditions and regulations, you can ensure a successful move without compromising the integrity of your tiny house.

Advertisement

Prepare for Road Conditions and Regulations

Make sure to research and understand road conditions and regulations before you hit the road with your tiny house. Road safety is of utmost importance when transporting a tiny house. It’s crucial to know the weight limits, height restrictions, and any other regulations that may apply to your route. This knowledge will help you plan your journey and avoid any potential issues or accidents along the way.

Additionally, familiarize yourself with parking regulations in different areas, as some places may have specific rules for parking a tiny house. By being well-informed about road conditions and regulations, you can ensure a smooth and safe journey for your tiny house.

Now, let’s move on to the next section and learn how to secure and protect your tiny house during transport.

Secure and Protect Your Tiny House during Transport

Ensuring the safety of your mobile home is essential, so it’s crucial to know how to securely protect it while on the move. When it comes to securing your tiny house during transport, there are several key steps you can take. First, make sure to properly secure all items inside your tiny house to prevent damage or shifting while on the road. Additionally, consider investing in sturdy tie-downs and straps to keep your tiny house firmly in place. Insuring your tiny house is also important, as it provides financial protection in case of any accidents or damages during transport.

To provide a visual representation of these ideas, here is a table showcasing some key measures to secure and protect your tiny house during transport:

Advertisement
Measures to Secure and Protect Your Tiny House
Secure all items inside the house
Use sturdy tie-downs and straps
Insure your tiny house

By taking these precautions, you can ensure the safety and protection of your tiny house during transport. Now, let’s delve into the next section about upgrades and renovations.

Upgrades and Renovations

To truly appreciate the longevity of your tiny house, you should consider the transformative power of upgrades and renovations. Upgrading your tiny house not only enhances its functionality and aesthetics but also ensures its long-term durability. When planning upgrades and renovations, cost considerations and design options play a crucial role in achieving the desired outcome while staying within budget.

Cost considerations: Prioritizing upgrades based on their cost-effectiveness can help you make informed decisions. Assessing the lifespan of materials and appliances, as well as their maintenance requirements, is essential. Investing in high-quality, durable materials may initially incur higher costs but can save you money in the long run by reducing repairs and replacements.

Design options: Tiny houses offer endless design possibilities. From optimizing storage space to incorporating energy-efficient features, you can tailor your upgrades to suit your needs and preferences. Consider installing solar panels, upgrading insulation, or implementing smart home technology to enhance energy efficiency and reduce utility costs.

Long-term planning and sustainability: As you embark on your journey to upgrade and renovate, it’s crucial to think about the long-term sustainability of your tiny house. By choosing eco-friendly materials, minimizing waste, and considering the future adaptability of your upgrades, you can ensure that your tiny house remains resilient and sustainable for years to come.

Advertisement

By understanding the cost considerations and design options of upgrades and renovations, you can make informed decisions that contribute to the long-lasting success of your tiny house. Moving forward, let’s explore the importance of long-term planning and sustainability in ensuring the durability of your tiny house.

Long-Term Planning and Sustainability

When it comes to planning for the future and ensuring sustainability, it’s crucial to consider the adaptability and eco-friendliness of your tiny house upgrades. Longevity planning is an essential aspect of sustainable construction, as it involves designing and constructing a tiny house that can withstand the test of time and adapt to changing needs.

By incorporating sustainable materials and construction techniques, you can increase the lifespan of your tiny house while reducing its environmental impact. One key aspect of longevity planning is selecting durable materials that can withstand wear and tear. Opting for high-quality, long-lasting materials such as metal roofing, durable siding, and sustainable flooring options can significantly increase the lifespan of your tiny house.

Additionally, considering the energy efficiency of your upgrades can help reduce your carbon footprint in the long run. Incorporating energy-efficient appliances, insulation, and renewable energy sources can make your tiny house more sustainable and cost-effective over time.

Another important factor to consider in long-term planning is the adaptability of your tiny house. As your needs change, having a flexible floor plan and modular design can allow for easy modifications and expansions. This can save you from having to rebuild or relocate your tiny house in the future, reducing waste and costs.

Advertisement

Longevity planning and sustainable construction are vital for the long-term viability of your tiny house. By selecting durable materials, incorporating energy-efficient upgrades, and designing for adaptability, you can ensure that your tiny house lasts for many years to come while minimizing its environmental impact.

Frequently Asked Questions

Can I build a tiny house using unconventional materials like recycled materials or reclaimed wood?

Certainly! Constructing a tiny house using unconventional materials like recycled materials or reclaimed wood can be a creative and eco-friendly choice. Recycled materials offer affordability and sustainability, while reclaimed wood adds character and charm. However, it’s important to consider the pros and cons.

Recycled materials may vary in quality and durability, requiring careful selection. Reclaimed wood may have structural issues or contain pests. Nonetheless, with proper planning and maintenance, these materials can contribute to a unique and environmentally conscious tiny house construction.

How often should I have my tiny house inspected for potential maintenance issues?

Professional inspections for a tiny house should be scheduled every 1-2 years to ensure potential maintenance issues are identified and addressed promptly. While some maintenance tasks can be done by the owner, it’s necessary to hire a professional for a comprehensive inspection. Their expertise can uncover hidden problems that may not be apparent to an untrained eye. Regular inspections help maintain the structural integrity and longevity of the tiny house, ensuring it lasts for many years to come.

Is it possible to live comfortably in a tiny house located in extreme climates like the desert or the mountains?

Living off grid in a tiny house in extreme climates like the desert or mountains poses both challenges and solutions. The challenges include temperature regulation, water scarcity, and isolation. However, with proper insulation, solar panels, and water conservation systems, these challenges can be overcome.

Advertisement

The pros of living in a tiny house in extreme climates include lower utility bills, reduced carbon footprint, and a simpler lifestyle. However, the cons include limited space and the need for constant maintenance to ensure the house remains comfortable and functional.

What are the best foundation options for anchoring a tiny house on uneven terrain?

The best foundation options for anchoring a tiny house on uneven terrain include concrete piers, helical piles, and skids. Concrete piers provide stability and durability, while helical piles offer excellent load-bearing capacity. Skids are versatile and can be adjusted to fit the terrain.

When considering insulation options, spray foam insulation provides superior thermal performance but can be expensive. Fiberglass insulation is cost-effective but may not offer the same level of insulation.

Each foundation material has its own pros and cons, so it’s important to consider your specific needs and budget.

Can I expect the same level of durability and quality in a DIY-built tiny house as one that is professionally constructed?

When it comes to the durability of DIY tiny houses, one interesting statistic to consider is that professionally constructed tiny houses typically last around 20 to 30 years.

Advertisement

While DIY-built tiny houses can be just as durable and high-quality, it largely depends on the skill level and attention to detail of the builder.

While there are pros and cons to both approaches, a professionally constructed tiny house often offers the advantage of expertise and experience, ensuring a higher level of durability and quality.

Conclusion

In conclusion, after extensively researching and analyzing the various factors that contribute to the lifespan of a tiny house, it’s evident that its longevity primarily depends on the quality of materials used, construction techniques employed, and regular maintenance.

Additionally, climate and environmental factors, proper foundation and anchoring, as well as pest control measures play crucial roles in ensuring its durability.

By considering these aspects and incorporating long-term planning and sustainable practices, a tiny house can withstand the test of time and continue to provide a comfortable and functional living space for years to come.

Advertisement
Continue Reading

Beginners Guides

How Long Do Tiny House Spiders Live

Published

on

By

An image capturing the intricate web spun by a tiny house spider, adorned with delicate dewdrops glistening under the golden morning sunlight, inviting readers to discover the secret world where these arachnids thrive and live out their short yet fascinating lives

How long do small house spiders typically live?

The answer to this question can be fascinating, as these eight-legged creatures have a remarkable ability to adapt and thrive in a variety of environments. Understanding the lifespan of house spiders is essential for homeowners who want to coexist peacefully with these tiny arachnids.

In my research on the subject, I have discovered that the lifespan of house spiders can vary depending on several factors. Factors such as species, environmental conditions, and reproductive activity all play a role in determining how long these spiders live.

So, what are some common species of house spiders and how long do they typically live? How does reproduction affect their lifespan? And what can we do to prevent these spiders from entering our homes?

In this article, we will delve into these questions and more, providing you with the knowledge you need to better understand and live harmoniously with these fascinating creatures.

Advertisement

Key Takeaways

  • House spiders have varying lifespans depending on the species, with the black widow and American house spider living for about 1 year, the jumping spider for 2 years, the cobweb spider for up to 3 years, and the orb-weaving spider for 1-2 years.
  • Female house spiders generally live longer than males due to their investment in reproduction, with some females reaching up to five years or more.
  • Factors such as temperature, humidity, availability of food, and exposure to predators can greatly impact the lifespan of house spiders.
  • Human activities like pollution and climate change can negatively affect house spider lifespan, with pollution causing respiratory problems and reduced reproductive success, and climate change posing threats with extreme temperatures and changes in precipitation.

A Look into the Life Cycle of House Spiders

Take a closer look into the fascinating life cycle of those eight-legged creatures that creep and crawl through our homes. House spiders, also known as tiny house spiders, have a unique life cycle that consists of several stages.

From egg to adult, these spiders go through a series of transformations that are influenced by various factors affecting their longevity.

House spiders typically lay their eggs in protected areas, such as corners, crevices, or underneath furniture. The eggs hatch into spiderlings, which undergo molting several times before reaching adulthood. The entire process can take several months, depending on the species and environmental conditions.

Behavior patterns in house spiders also play a role in their lifespan. Some species are more active and adventurous, while others prefer to stay in their webs and wait for prey. These behavior patterns can impact their ability to find food, avoid predators, and mate, ultimately affecting their overall lifespan.

Factors that affect the lifespan of house spiders include temperature, humidity, availability of food, and exposure to predators. Higher temperatures and humidity levels can promote faster growth and development, while a lack of food or constant threat from predators can shorten their lifespan.

In the subsequent section, we will explore the various factors that affect the lifespan of house spiders, including environmental conditions and natural predators.

Advertisement

Factors That Affect the Lifespan of House Spiders

One fascinating statistic to consider is the impact of environmental conditions on the lifespan of these arachnids. Factors influencing spider longevity include a variety of environmental factors such as temperature, humidity, and access to food and water. Environmental conditions play a crucial role in determining the lifespan of house spiders, as they can either extend or shorten their life expectancy.

To further understand the relationship between environmental conditions and spider lifespan, let’s examine the following table:

Environmental Condition Effect on Spider Lifespan
High temperature Shortens lifespan
Low temperature Lengthens lifespan
High humidity Lengthens lifespan
Low humidity Shortens lifespan
Abundant food/water Lengthens lifespan
Limited food/water Shortens lifespan

As seen in the table, high temperatures and low humidity tend to shorten the lifespan of house spiders. On the other hand, low temperatures and high humidity contribute to a longer lifespan. Additionally, an abundant supply of food and water can also extend the life expectancy of house spiders.

Understanding these factors can help us better comprehend the complexities of spider lifespan and their ability to adapt to various environments. Transitioning to the subsequent section about common species of house spiders and their lifespan, it is important to consider how these factors interact with the life cycle of different spider species.

Common Species of House Spiders and Their Lifespan

Explore the fascinating world of house spider species and discover how their lifespans vary based on environmental factors. House spiders, like the common cellar spider (Pholcus phalangioides), can live for up to two years. However, there are other species that have shorter lifespans, such as the black widow (Latrodectus spp.), which typically lives for about one year.

Advertisement

To paint a picture of the diversity of house spider species and their lifespans, here are five examples:

  • The American house spider (Parasteatoda tepidariorum) has a lifespan of about one year.

  • The jumping spider (Salticidae spp.) has a lifespan of about two years.

  • The cobweb spider (Theridiidae spp.) can live for up to three years.

  • The orb-weaving spider (Araneidae spp.) has a lifespan of about one to two years.

  • The cellar spider (Pholcidae spp.) can live for up to two years.

House spiders go through various life cycle stages, including egg, spiderling, juvenile, and adult. During these stages, they exhibit different behavior patterns, such as building webs, hunting prey, and mating. These behaviors, along with environmental factors like temperature and food availability, can influence the lifespan of house spiders.

Understanding the life cycle stages and behavior patterns of house spiders is crucial in comprehending the role of reproduction in their lifespan. Transitioning into the next section, we will explore how reproduction impacts the overall lifespan of these fascinating creatures.

The Role of Reproduction in the Lifespan of House Spiders

Immerse yourself in the intricate web of the house spider’s life as reproduction weaves a thread that determines their fleeting existence. The role of reproduction plays a crucial part in the lifespan of house spiders, as it greatly influences their longevity.

Female house spiders typically have a longer lifespan compared to their male counterparts. This is due to the fact that females invest more energy into reproduction, from producing eggs to caring for their young. In contrast, males focus their energy on finding mates and are often consumed by the female after mating.

Advertisement

Reproduction’s influence on spider longevity can be seen in the lifespan variations among male and female house spiders. Female house spiders can live for several years, with some reaching up to five years or more. In contrast, male house spiders have a much shorter lifespan, typically living for only a few months. This difference in lifespan is a result of the reproductive strategies employed by each sex.

As we delve deeper into the intricacies of house spider lifespan, we will explore the fascinating variations between male and female spiders in terms of their lifespan and reproductive behaviors.

Lifespan Variations among Male and Female House Spiders

Reproduction greatly impacts the lifespan of male and female house spiders, leading to significant variations in their longevity. Lifespan differences between male and female house spiders can be attributed to their distinct mating behaviors. Here are three key factors that contribute to the variations in lifespan among male and female house spiders:

  1. Mating Behavior: The act of mating can be a perilous endeavor for male house spiders. They engage in elaborate courtship rituals and often risk their lives to find a suitable mate. Once copulation is achieved, males are more likely to die shortly after, as the female may cannibalize them for nutrients. On the other hand, female house spiders have the advantage of being able to mate multiple times without suffering the same fate.

  2. Reproductive Investment: Female house spiders invest a significant amount of energy into producing eggs and caring for their offspring. This investment can take a toll on their overall health and lifespan. In contrast, male house spiders do not contribute to parental care, allowing them to allocate more energy towards survival.

  3. Hormonal Changes: The reproductive process triggers hormonal changes in both male and female house spiders. These changes can have profound effects on their physiology and behavior, potentially influencing their lifespan.

Understanding these lifespan differences and the underlying mating behaviors of house spiders provides valuable insights into their biology.

Transitioning into the subsequent section about the impact of human activities on house spider lifespan, it is crucial to consider how our actions may further affect these intricate dynamics.

Advertisement

The Impact of Human Activities on House Spider Lifespan

In the previous subtopic, we explored the lifespan variations between male and female house spiders. Now, let’s delve into the impact of human activities on the lifespan of these fascinating arachnids.

Human activities, such as pollution and climate change, have a profound effect on the lifespan of house spiders. Pollution, especially air pollution, can lead to respiratory problems and reduced reproductive success in spiders. Additionally, exposure to pollutants in their environment can weaken their immune system, making them more susceptible to diseases and reducing their overall lifespan.

Climate change also poses a threat to house spider longevity. As temperatures rise and weather patterns become more unpredictable, spiders may struggle to adapt. Extreme heat or cold can be fatal to spiders, and changes in precipitation can disrupt their food sources, leading to starvation.

To illustrate the impact of human activities on house spider lifespan, consider the following table:

Human Activity Impact on Lifespan
Pollution Reduced
Climate Change Decreased

These factors highlight the importance of understanding and mitigating the negative effects of human actions on our environment and its inhabitants. Now, let’s explore ways to prevent house spiders from entering your home.

Advertisement

Ways to Prevent House Spiders from Entering Your Home

To keep these fascinating arachnids out of your home, try implementing these simple tips to prevent house spiders from entering.

  1. Seal cracks and crevices: House spiders can squeeze through tiny openings, so it’s important to seal any gaps in windows, doors, and walls. Use caulk or weatherstripping to ensure a tight seal.

  2. Keep a tidy home: Spiders are attracted to clutter and dark hiding spots. Regularly declutter and clean your home to eliminate hiding places for spiders. Vacuum regularly, especially in corners and under furniture.

  3. Use natural spider repellents: Certain scents are known to repel spiders. Try using essential oils like peppermint, lavender, or tea tree oil to deter them. Simply mix a few drops with water in a spray bottle and apply to areas where spiders are likely to enter.

By following these preventive measures, you can greatly reduce the chances of house spiders invading your home. However, if you already have a spider problem, you may need to employ natural methods to control house spider populations. These methods focus on minimizing their preferred habitats and disrupting their reproductive cycle, which I will discuss in the next section.

Natural Methods to Control House Spider Populations

After learning about the various ways to prevent house spiders from entering your home, it’s important to consider natural methods for controlling their populations. These remedies are not only effective but also safe for both humans and the environment.

One natural spider deterrent is the use of essential oils, such as peppermint, tea tree, and lavender. Spiders are known to dislike these scents, so spraying a diluted mixture of these oils around windows, doors, and other entry points can discourage them from entering your home.

Additionally, keeping your home clean and clutter-free is essential, as spiders are attracted to dark and dusty areas. Regularly vacuuming and dusting can help eliminate potential hiding spots for these arachnids.

Advertisement

Another effective method is the use of spider traps, which can be easily made at home using common household items. Placing these traps along walls, corners, and other areas where spiders are commonly found can help capture and remove them from your living space.

By incorporating these natural remedies and spider deterrents into your home maintenance routine, you can significantly reduce the population of house spiders. However, it’s important to remember that these methods aren’t foolproof and may not completely eliminate the presence of spiders in your home.

Transitioning into the subsequent section about misconceptions and myths about house spider lifespan, it’s crucial to address the common belief that house spiders live for an extended period of time.

Misconceptions and Myths about House Spider Lifespan

Contrary to popular belief, there’s a misconception surrounding the lifespan of those eight-legged creatures commonly found in our homes. Many people believe that house spiders have a short lifespan, lasting only a few months or a year at most. However, this is a myth that needs to be debunked.

House spiders can actually live for several years if the conditions are right. Understanding the life span of house spiders is crucial for living harmoniously with them. These arachnids typically reach maturity within a year and can live for an additional two to three years. Factors such as temperature, food availability, and habitat conditions can significantly affect their lifespan. In optimal conditions, some house spiders have been known to live up to five years.

Advertisement

It is important to note that the lifespan of house spiders can vary depending on the species. While some species may have shorter lifespans, others can live longer. Additionally, male house spiders generally have shorter lifespans compared to females. This is because males often die shortly after mating, while females can live longer to lay multiple egg sacs.

By understanding the true lifespan of house spiders, we can appreciate their presence in our homes and learn to coexist with them.

In the next section, I will share tips for living harmoniously with these fascinating creatures, allowing us to maintain a balanced ecosystem within our living spaces.

Tips for Living Harmoniously with House Spiders

Here’s how you can peacefully coexist with these fascinating arachnids in your home. Creating a spider-friendly home is essential if you want to live harmoniously with house spiders.

First and foremost, it’s important to understand that house spiders play a crucial role in controlling other pests, such as flies and mosquitoes. So, instead of trying to eliminate them completely, consider allowing them to thrive in your space.

Advertisement

To make your home spider-friendly, start by reducing clutter and keeping your living areas clean. Spiders are attracted to dark, undisturbed spaces, so decluttering will limit their hiding spots. Regularly dust and vacuum to remove any spider webs or egg sacs.

Additionally, seal any cracks or gaps in windows and doors to prevent spiders from entering your home.

Another helpful tip is to minimize the use of pesticides, as these can harm not only spiders but also the ecosystem as a whole. Instead, opt for natural alternatives like vinegar or essential oils to repel spiders without causing harm.

Lastly, providing alternative habitats for spiders can divert their attention away from high-traffic areas. Consider placing small, inconspicuous spider homes, like empty containers or cardboard tubes, in corners or behind furniture.

By following these tips, you can create a spider-friendly environment and peacefully coexist with these beneficial creatures in your home.

Advertisement

Frequently Asked Questions

Are house spiders dangerous to humans?

House spiders, oh how terrifying they are! With their eight legs and beady little eyes, one might think they’re venomous creatures waiting to pounce. But fear not, dear reader, for I’m here to assure you that house spiders aren’t dangerous to humans.

While they may bite if threatened, their venom is usually harmless and causes only minor irritation. So rest easy, knowing that these tiny arachnids pose no real danger to our well-being.

What is the average lifespan of a house spider?

The average lifespan of a house spider can vary depending on several factors. These factors include environmental conditions, availability of food, and predation. On average, house spiders can live for about one to two years. However, some species can live for several years under favorable conditions.

It’s important to note that the lifespan of individual house spiders can be greatly influenced by their surroundings, making it difficult to determine an exact lifespan for all species.

Can house spiders survive in extreme temperatures?

Alright folks, let me tell you about house spiders and their ability to handle extreme temperatures. Now, you might think these little critters would struggle in harsh conditions, but let me assure you, they have some nifty adaptations up their eight-legged sleeves.

Advertisement

House spiders are known to possess thermoregulatory mechanisms that help them survive both hot and cold environments. These adaptations allow them to withstand a wide range of temperatures, making them quite the resilient arachnids.

How many eggs do house spiders typically lay in their lifetime?

House spider reproduction is a fascinating process. Female house spiders typically lay multiple egg sacs in their lifetime, each containing around 100-400 eggs. These sacs are carefully constructed and protected by the spider until the eggs hatch. The number of egg sacs produced by a female house spider can vary depending on factors such as species, age, and environmental conditions.

House spider egg sacs play an important role in ensuring the survival and continuation of their species.

Do house spiders have any natural predators?

House spiders have several natural predators, including birds, lizards, and other spiders. However, one interesting statistic is that roughly 95% of their predators are actually other spiders.

House spiders feed on a variety of insects, including flies, mosquitoes, and other small arthropods. They are known for their ability to spin intricate webs, which they use to catch their prey. These webs serve as both their hunting ground and their home, providing them with shelter and a steady source of food.

Advertisement

Conclusion

In conclusion, understanding the lifespan of house spiders is crucial for effective pest management. One interesting statistic to note is that the average lifespan of a house spider can range from one to two years, depending on various factors such as species, environmental conditions, and reproductive cycles.

This visual representation highlights the importance of implementing preventive measures to control house spider populations and mitigate their impact on our homes. By adopting natural methods and debunking misconceptions, we can coexist harmoniously with these fascinating creatures while maintaining a spider-free environment.

Continue Reading

Beginners Guides

How Long Does It Take To Build A Tiny House Contractor

Published

on

By

An image featuring a skilled contractor amidst a picturesque landscape, meticulously crafting a tiny house

Building a small house is an exciting project. It allows you to create a cozy, personalized space that meets all your needs and reflects your unique style. But how long does it take to finish a tiny house with the help of a contractor? Let me break it down for you in a detailed and organized manner.

First, you need to research contractors and obtain quotes. This step is crucial in finding the right professional who can bring your vision to life.

Once you’ve found the perfect contractor, it’s time to create a detailed construction plan. This plan will serve as a roadmap for the entire building process.

Next, you’ll need to obtain necessary permits and approvals. This ensures that your tiny house meets all building codes and regulations. Once you have the green light, it’s time to clear and prepare the building site. This includes leveling the ground and making sure it’s ready for construction.

The next stages involve foundation and framing, insulation and interior finishing, and exterior finishing and roofing. These steps require precision and attention to detail to ensure a sturdy and well-insulated structure.

Advertisement

Finally, you’ll install fixtures and appliances, undergo final inspections, and be ready to move into your tiny house. The entire process can take anywhere from a few months to a year, depending on various factors such as the complexity of your design and the availability of materials.

Building a tiny house is a labor of love, but with the right contractor by your side, you can make your dream home a reality in no time.

So, let’s get started on this exciting journey!

Key Takeaways

  • Building a tiny house can take anywhere from a few months to a year, depending on factors such as design complexity and material availability.
  • The construction process involves steps such as researching contractors, creating a detailed construction plan, obtaining necessary permits and approvals, and clearing and preparing the building site.
  • Choosing the right foundation option and using lightweight, strong materials and precise cutting and assembly methods can help save time and maximize space in the tiny house.
  • Hiring licensed professionals for electrical and plumbing installation, considering water conservation, and ensuring proper insulation and ventilation are important aspects of building a tiny house.

Research Contractors and Obtain Quotes

You’ll need to reach out to different contractors and get quotes for your tiny house. This is an essential part of the research process, as it allows you to gather information and compare options.

Start by making a list of potential contractors in your area. Look for recommendations from friends or family who’ve built tiny houses or do some online research to find reputable contractors.

Once you have a list, begin reaching out to them to request quotes. Be prepared to provide details about your project, such as the size of the house, the desired materials, and any specific design elements you have in mind.

Advertisement

During this research process, it’s important to keep budget considerations in mind. Ask each contractor for a detailed breakdown of costs, including labor, materials, and any additional fees. Compare these quotes carefully to ensure they align with your budget. Don’t forget to inquire about the estimated timeline for completion as well.

By carefully researching and comparing quotes, you can find a contractor who not only fits within your budget but also understands your vision for your tiny house. Once you have gathered all the necessary information, you can move on to the next step: creating a detailed construction plan.

Create a Detailed Construction Plan

First, envision every detail of your dream tiny home, from the layout of each room to the placement of windows that’ll fill the space with natural light. Creating a detailed construction plan is essential to ensure that your vision becomes a reality.

Start by determining your budget for the project. This’ll help you make informed decisions when choosing materials and designing the layout. Consider the cost of materials, labor, and any additional features you want to include.

When choosing materials, take into account both their aesthetic appeal and durability. Research different options and consider factors such as cost, sustainability, and maintenance requirements. For example, you may opt for eco-friendly materials like reclaimed wood or energy-efficient windows. It’s also important to consider the climate in which your tiny house will be located, as certain materials may be better suited for specific weather conditions.

Advertisement

Once you have determined your budget and chosen the materials, it’s time to create a detailed construction plan. This plan should include the layout of each room, the placement of windows and doors, and any other design elements you want to incorporate. It should also outline the timeline for the construction process, including any milestones or deadlines you want to meet.

With a comprehensive construction plan in place, you can move on to the next step: obtaining necessary permits and approvals. This ensures that your tiny house meets all building codes and regulations.

Obtain Necessary Permits and Approvals

Now that you’ve got your detailed construction plan in hand, it’s time to dive into the exciting world of obtaining the necessary permits and approvals for your dream tiny home. The permit application process can be a bit daunting, but with the right knowledge and organization, it can be a smooth and efficient experience.

First, you’ll need to research and understand the specific requirements for permits in your area. Each jurisdiction may have different regulations and building codes that must be followed. It’s important to ensure that your tiny home complies with these codes to avoid any issues down the road.

Once you have a clear understanding of the requirements, you can begin the permit application process. This typically involves filling out forms, providing detailed plans and specifications, and paying any necessary fees. It’s important to be thorough and accurate in your application to avoid any delays or rejections.

Advertisement

During this process, it’s also helpful to establish good communication with the local building department. They can provide guidance and answer any questions you may have along the way.

With your permits and approvals in hand, you’ll be ready to move on to the next exciting step of clearing and preparing the building site for your tiny home. Transitioning into this next section, it’s important to ensure that the site is properly cleared and prepared for construction.

Clear and Prepare the Building Site

Properly prepping the construction site is an essential step in the process of setting up your sensational small space. Site preparation is crucial to ensure a sturdy foundation and smooth construction process for your tiny house.

Before starting any construction work, it’s important to clear the site of any debris, vegetation, or obstacles that may hinder the building process. This includes removing rocks, trees, and any other obstructions that may be in the way. Additionally, the ground needs to be leveled and graded to ensure proper drainage and stability.

Once the site is cleared, it’s important to prepare the ground for the foundation. This may involve removing topsoil, compacting the soil, and installing any necessary drainage systems. Site preparation also includes marking the boundaries of the house and ensuring that the site is in compliance with local building codes and regulations. This may require obtaining permits and approvals from the relevant authorities.

Advertisement

After completing the site preparation, you can smoothly transition into the subsequent section about foundation and framing. By properly clearing and preparing the building site, you set a strong foundation for the construction process of your tiny house.

Foundation and Framing

Prepare to be amazed by the incredible foundation and framing techniques used to create a solid structure for your dream small space. When it comes to building a tiny house, the foundation and framing are crucial steps that lay the groundwork for the entire project.

Here are three reasons why you’ll be blown away by these techniques:

  1. Cost-effective foundations: Building a foundation for a tiny house can be surprisingly affordable. From traditional concrete slabs to innovative pier and beam systems, there are various options to suit your budget. By choosing the right foundation, you can save money without compromising on stability.

  2. Advanced framing techniques: Tiny houses require smart framing techniques to maximize space and ensure structural integrity. From using lightweight yet strong materials to employing precision cutting and assembly methods, these techniques allow for efficient use of every square inch while maintaining a durable structure.

  3. Time-saving benefits: Foundation and framing techniques in tiny house construction are designed to save time without sacrificing quality. With the right expertise, these processes can be completed quickly, allowing you to move on to the next steps of your project sooner.

With the foundation and framing in place, it’s time to move on to the exciting world of electrical and plumbing installation.

Electrical and Plumbing Installation

Once the foundation and framing are in place, the electrical and plumbing installation brings the tiny house to life, electrifying the space and plumbing it with functionality.

Advertisement

When it comes to electrical safety, it’s crucial to adhere to all the necessary regulations. Hiring a licensed electrician ensures that the electrical system is installed correctly and up to code. They’ll handle tasks such as installing the main electrical panel, wiring outlets, switches, and lighting fixtures. Additionally, they’ll ensure that the system is properly grounded to prevent electrical hazards.

In terms of plumbing, it’s essential to follow plumbing regulations to ensure the efficient operation of the tiny house. A licensed plumber will handle tasks such as installing the water supply lines, drainage pipes, and fixtures. They’ll ensure that all connections are secure and leak-free, preventing any potential water damage. It’s also important to consider water conservation in a tiny house, so plumbers can provide options like low-flow fixtures and water-saving devices.

Once the electrical and plumbing installation is complete, the tiny house is ready for insulation and interior finishing. This stage involves adding insulation to maintain comfortable temperatures and reduce energy consumption. Following that, the interior finishing touches can be added, such as drywall, flooring, and cabinetry. These steps bring us closer to creating a cozy and functional living space within the tiny house.

Insulation and Interior Finishing

After the electrical and plumbing installation, it’s time to bring comfort and style to the tiny house through insulation and interior finishing. This crucial step ensures that the interior stays cozy and energy-efficient while showcasing your personal style. Here are three key aspects to consider during this phase:

  1. Insulation Techniques: Proper insulation is essential for maintaining a comfortable temperature inside the tiny house. From spray foam insulation to rigid foam boards, there are various options to choose from. Each technique has its advantages, such as superior air sealing or moisture resistance. Careful consideration of the climate and local building codes will help determine the most suitable insulation method for your tiny house.

  2. Interior Design Ideas: The interior finishing allows you to express your creativity and personalize your tiny house. Consider incorporating space-saving strategies like built-in storage solutions and multipurpose furniture. Choose a color palette that reflects your aesthetic preferences and makes the space feel inviting. Explore different flooring options, such as hardwood or eco-friendly materials like cork or bamboo. Don’t forget to install proper ventilation systems to maintain indoor air quality.

  3. Transition to Exterior Finishing and Roofing: Once the insulation and interior finishing are complete, it’s time to shift focus to the exterior of the tiny house. This includes finalizing the exterior finishing, such as siding or cladding, and installing the roofing system.

By carefully considering insulation techniques and interior design ideas, you can create a comfortable and visually appealing space inside your tiny house. Now, let’s move on to the next section and explore the final steps in the construction process – exterior finishing and roofing.

Advertisement

Exterior Finishing and Roofing

Now, as we dive into the process of exterior finishing and roofing, imagine your tiny house transforming into a beautiful butterfly, spreading its wings and taking flight in the neighborhood.

The exterior finishing of a tiny house not only adds aesthetic appeal but also provides protection against the elements. When it comes to roofing materials, there are various options to consider. From traditional asphalt shingles to metal roofs, each has its advantages.

Asphalt shingles are cost-effective and easy to install, while metal roofs offer durability and longevity.

In addition to the roofing material, the exterior cladding options play a crucial role in defining the look of your tiny house. Popular choices include vinyl siding, wood shingles, fiber cement, and even metal panels. Each cladding material has its unique characteristics, such as low maintenance, natural beauty, or modern appeal. It’s important to select a cladding option that suits your preferences and stands up to the local climate.

As we wrap up the exterior finishing and roofing, it’s time to transition into the next phase of the construction process, which involves installing fixtures and appliances. This step will bring your tiny house to life, turning it into a cozy and functional space.

Advertisement

Install Fixtures and Appliances

To complete the transformation of your elegant tiny abode, you can now embark on the installation of fixtures and appliances. Choosing the right appliances and fixtures is crucial to maximize functionality and space efficiency in your tiny house. It’s important to carefully consider the size, energy efficiency, and compatibility with your overall design. Additionally, selecting fixtures that match your aesthetic preferences will enhance the overall look and feel of your tiny home.

Proper installation of fixtures and appliances is essential to ensure their functionality and longevity. Hiring a professional contractor with experience in tiny house construction is highly recommended to handle the installation process. They have the knowledge and expertise to navigate the challenges that come with installing fixtures and appliances in a limited space.

Below is a table that provides a visual representation of ideas for choosing the right fixtures and appliances, as well as the importance of proper installation:

Choosing the right appliances and fixtures Importance of proper installation Maximizing functionality and space efficiency
Consider size and energy efficiency Hiring a professional contractor Enhance the overall look and feel

By carefully selecting and properly installing fixtures and appliances, you can create a functional and aesthetically pleasing tiny home. Once the installation is complete, it’s time to proceed to the final inspections and move-in process.

Final Inspections and Move-In

Once you’ve completed the installation of fixtures and appliances, it’s time for you to prepare for the final inspections and the exciting process of moving into your new, thoughtfully designed tiny home.

Advertisement

Final inspections are a crucial step to ensure that your tiny house meets all the necessary building codes and regulations. This process typically involves a thorough examination of the electrical, plumbing, and structural systems to ensure they’re safe and functioning properly. It’s important to schedule these inspections well in advance to avoid any delays in your move-in timeline.

During the final inspections, you may be required to provide documentation such as building permits, floor plans, and proof of compliance with zoning regulations. It’s essential to have these documents organized and readily available for the inspector’s review. Additionally, make sure to address any outstanding issues or concerns before the inspection to increase your chances of a smooth approval.

Once your tiny house passes all the final inspections, it’s time to celebrate and begin the exciting process of moving in. Take some time to thoroughly clean your new home and make any final adjustments or touch-ups. Plan your move-in day carefully, ensuring you have the necessary help and equipment to transport your belongings safely. Consider creating a checklist to ensure you don’t overlook any essential items during the move.

Moving into your tiny house is a significant milestone and marks the beginning of a new chapter. Enjoy the process and take the time to appreciate all the hard work and dedication that went into creating your dream home.

Frequently Asked Questions

How much does it cost to build a tiny house contractor?

The cost to build a tiny house contractor depends on various cost factors such as location, size, design, and building materials. Building materials can significantly impact the overall cost. For example, using high-end materials like hardwood flooring and granite countertops will increase the cost compared to using more affordable alternatives.

Advertisement

It’s important to consider your budget and prioritize which building materials are essential for your tiny house contractor project.

What is the average size of a tiny house contractor?

The average size of a tiny house contractor varies depending on the specific project and client preferences. However, the challenges faced by tiny house contractors in the construction process are consistent.

One major challenge is managing the average cost of materials for a tiny house contractor, as they often need to source high-quality materials while staying within budget. Additionally, ensuring efficient space utilization and meeting building codes can be complex tasks that require meticulous planning and expertise.

Can I customize the interior design of my tiny house contractor?

Yes, you can absolutely customize the interior design of your tiny house contractor.nnWith custom interior finishes, you have the opportunity to personalize every aspect of your space, from the flooring to the cabinetry.nnBy working closely with a professional contractor, you can create a design that maximizes space and meets your specific needs.nnCustomizing the interior allows you to create a unique and functional living environment that reflects your style and preferences.

Are there any specific building codes or regulations for tiny house contractors?

Yes, there are specific building codes and regulations that apply to tiny house contractors. These codes and regulations vary depending on the location and jurisdiction, but they typically cover aspects such as minimum square footage requirements, safety standards, electrical and plumbing systems, and zoning restrictions. It’s important for tiny house contractors to be knowledgeable about these codes and regulations to ensure compliance and the safety of the structure.

Advertisement

How long does it typically take to obtain necessary permits and approvals for a tiny house contractor?

Obtaining necessary permits and approvals for a tiny house contractor can be a complex process. It requires careful research and adherence to building codes and regulations. Finding the right location is crucial, considering factors like zoning laws and proximity to utilities.

Common challenges in obtaining permits include navigating through local government bureaucracy and ensuring compliance with specific requirements. It’s important to be organized and detail-oriented throughout this process to ensure a smooth and timely approval.

Conclusion

In conclusion, building a tiny house is a meticulous process that requires careful planning and coordination with contractors. From researching and obtaining quotes to obtaining permits and approvals, every step must be executed with precision.

Just like a symphony conductor leading an orchestra, the contractor orchestrates the construction, ensuring all the pieces come together harmoniously. With patience and expertise, the contractors bring your vision to life, transforming a simple structure into a cozy and functional home.

So, if you’re ready to embark on this exciting journey, be prepared for a remarkable adventure in creating your own tiny oasis.

Advertisement
Continue Reading

Trending