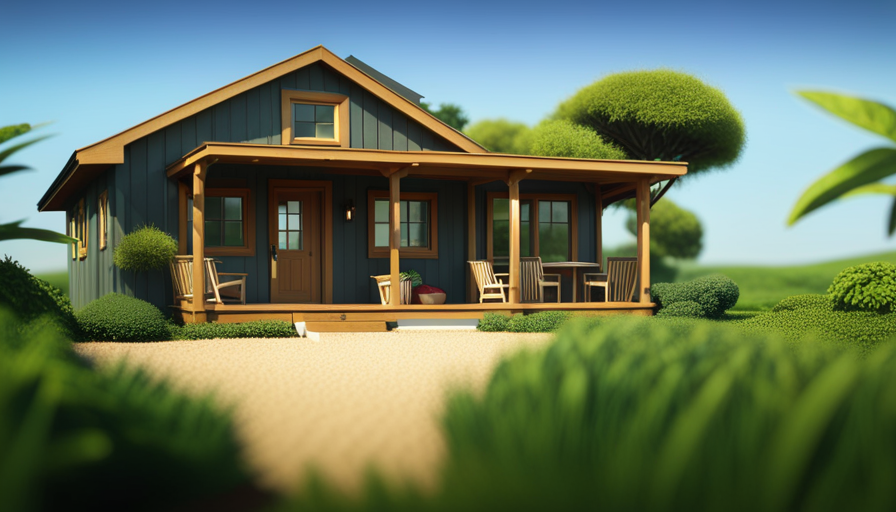
Connect with us

Beginners Guides

Free Plans On How To Build A Tiny House On A Trailer

Published

on

An image showcasing a bustling workshop, filled with tools and materials

Dreaming of a simpler, minimalist way of life? Do you yearn for the liberty to roam and discover new places, unburdened by the chains of mortgage or rent payments? Search no more! In this article, I’ll uncover the secrets to constructing your own tiny house on wheels – and what’s even better? It’s absolutely free!

That’s right, I have free plans that will guide you through every step of the construction process. From choosing the perfect trailer to installing utilities and systems, I’ll show you exactly how to create a comfortable and functional living space that you can take anywhere.

So, if you’re ready to downsize and start living life on your own terms, keep reading. Your tiny house adventure begins now!

Key Takeaways

  • Importance of choosing the right trailer based on weight distribution and axle placement
  • Design and layout considerations for optimizing space and functionality in the tiny house
  • Energy efficiency tips for reducing energy consumption and utilizing renewable energy sources
  • Gathering materials and tools, including reclaimed materials and essential tools

Choose the Right Trailer for Your Tiny House

You should consider the weight distribution and axle placement when choosing the right trailer for your tiny house, as these factors will greatly impact the stability and towing capabilities of your home-on-wheels.

Start by determining the trailer weight capacity needed for your tiny house. This will depend on the size and weight of your build. Make sure the trailer can handle the load and has a sturdy frame.

Next, consider the trailer size and dimensions. Measure the length, width, and height requirements for your tiny house to ensure a proper fit. Additionally, check if the trailer has enough ground clearance and proper suspension for a smooth ride.

Advertisement

Once you have selected the appropriate trailer, you can move on to design and layout considerations for your tiny house-on-wheels.

Design and Layout Considerations

When designing and laying out a tiny house, it’s crucial to optimize space and functionality in order to make the most of the limited square footage. This can be achieved by carefully planning the placement of furniture and appliances, as well as utilizing multi-purpose and collapsible fixtures.

Additionally, incorporating clever storage solutions, such as built-in cabinets and hidden compartments, can help maximize storage space and keep the tiny house organized and clutter-free.

Lastly, considering energy efficiency is essential in order to reduce energy consumption and make the tiny house more sustainable. This can be done by choosing energy-efficient appliances, incorporating insulation and proper ventilation, and utilizing renewable energy sources whenever possible.

Optimize Space and Functionality

To maximize space and functionality in your tiny house, consider installing a loft above the kitchen area where you can create a cozy sleeping nook, freeing up the rest of the space for a functional living area. This design choice allows you to maximize comfort by utilizing vertical space effectively.

Advertisement

The loft can be accessed through a ladder or staircase, providing a private retreat for relaxation and sleep. By elevating the sleeping area, you create more room for the living space below, which can be used for entertaining guests, working, or simply enjoying your hobbies.

Incorporating a loft not only optimizes the available space but also adds a unique and cozy touch to your tiny house.

In the next section, we’ll explore how to incorporate storage solutions seamlessly into your tiny house design.

Incorporate Storage Solutions

Consider incorporating clever storage solutions into your tiny house design to maximize space and keep your belongings organized. When it comes to storage organization in a tiny house, maximizing vertical space is key.

Here are two sub-lists of storage solutions to help you make the most of your tiny house:

Advertisement
  • Utilize wall-mounted shelves and hooks: Install shelves on the walls to store books, plants, and decorative items. Additionally, use hooks to hang coats, hats, and bags. This will free up valuable floor space and keep your belongings easily accessible.

  • Opt for multifunctional furniture: Invest in furniture pieces that serve multiple purposes, such as a sofa that can be transformed into a bed or a coffee table with built-in storage compartments. This will help you save space and keep your essentials neatly tucked away.

By incorporating these storage solutions, you can maximize the functionality of your tiny house. Consider energy efficiency as the next important aspect of your design.

Consider Energy Efficiency

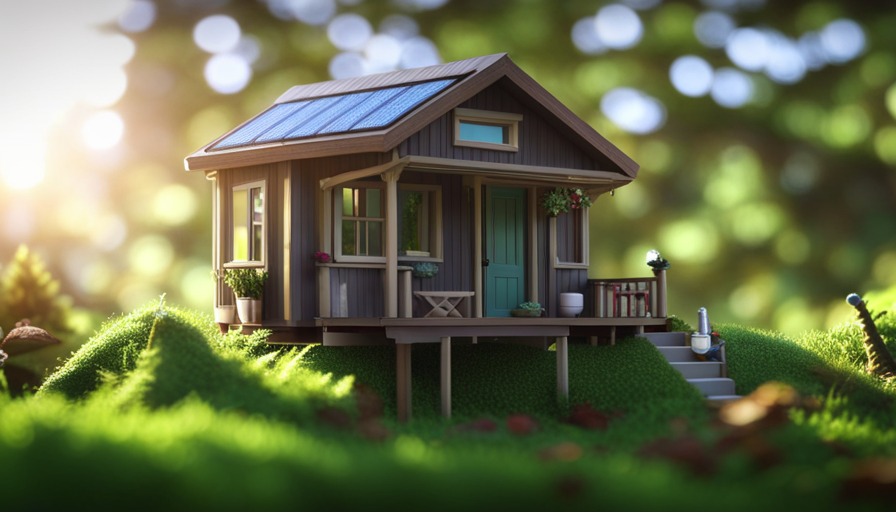
Maximize the comfort and sustainability of your small home by prioritizing energy efficiency, ensuring a cozy and eco-friendly living space. Incorporating energy-saving techniques and eco-friendly materials into the design and construction of your tiny house can significantly reduce your environmental impact and save on utility costs. Some effective energy-saving techniques include installing energy-efficient appliances, using proper insulation, and incorporating renewable energy sources such as solar panels. Additionally, choosing eco-friendly materials like reclaimed wood and low VOC paints can further enhance the sustainability of your tiny house.

Energy-Saving Techniques Eco-Friendly Materials Benefits
Insulate walls and roof Reclaimed wood Reduces energy loss
Install energy-efficient appliances Low VOC paints Reduces energy consumption
Use solar panels for electricity Recycled insulation Utilizes renewable energy

Considering energy efficiency in your tiny house design will not only provide a comfortable living environment but also contribute to a greener future. Once you have incorporated these energy-saving techniques and selected eco-friendly materials, you can move on to gathering the necessary materials and tools for your tiny house construction.

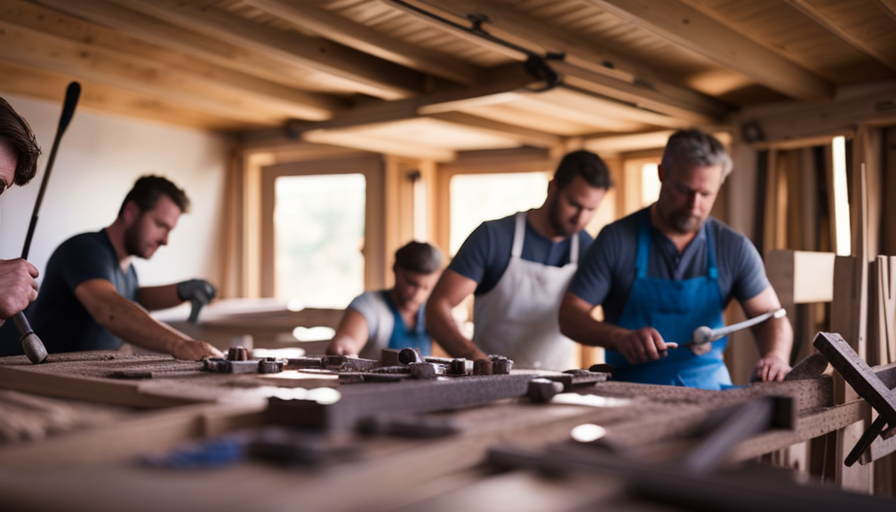
Gather Materials and Tools

Get ready to gather all the materials and tools you’ll need to build your own tiny house on a trailer! When it comes to building a tiny house on a budget, there are plenty of budget-friendly alternatives you can consider.

For example, instead of buying brand new materials, you can source reclaimed materials, which not only helps reduce costs but also gives your tiny house a unique and eco-friendly touch. Look for local salvage yards, online marketplaces, or even ask around your community for any available reclaimed materials.

Advertisement

As you gather materials, make sure you have the necessary tools on hand. Some essential tools include a circular saw, drill, jigsaw, hammer, and measuring tape.

With all your materials and tools ready, you can now move on to building the foundation and frame of your tiny house.

Build the Foundation and Frame

To begin building the foundation and frame for my tiny house, I’ll first secure the trailer to a solid foundation to ensure stability.

Next, I’ll construct the floor and wall frames using sturdy materials such as lumber and screws. This will provide a strong and durable structure for my tiny house.

Lastly, I’ll install windows and doors to allow for natural light and easy access.

Advertisement

Secure the Trailer to the Foundation

Fastening the trailer securely to the foundation ensures a sturdy and reliable base for your tiny house. When it comes to anchoring methods, there are a few options to consider.

One common method is using anchor bolts to attach the trailer to the foundation. These bolts are inserted through pre-drilled holes in the trailer frame and then secured with nuts and washers.

Another option is using steel straps or brackets that are bolted to the trailer and then anchored to the foundation using concrete screws or bolts.

In addition to choosing the right anchoring method, it’s important to consider trailer weight distribution. Proper weight distribution helps to evenly distribute the load and prevent any structural issues. When securing the trailer to the foundation, make sure to distribute the weight evenly across all anchor points.

With the trailer securely fastened to the foundation, the next step is to construct the floor and wall frames.

Advertisement

Construct the Floor and Wall Frames

Now that you’ve securely anchored your trailer, it’s time to dive into the exciting process of constructing the floor and wall frames. This step is crucial as it forms the foundation of your tiny house. When building the floor frame, you have a variety of flooring options to choose from, such as hardwood, laminate, or tile. Consider factors like durability, weight, and cost when making your decision. Next, it’s important to focus on insulation techniques to ensure your tiny house stays comfortable year-round. You can use materials like fiberglass batts or rigid foam board to insulate the floor and walls. This will help regulate the temperature and reduce energy consumption. With the floor and wall frames complete, you’re now ready to move on to the next step: installing windows and doors, which will bring light and functionality to your tiny house.

Install Windows and Doors

Once you’ve constructed the floor and wall frames, it’s time to bring functionality and natural light into your tiny house by installing windows and doors.

Windows and doors are crucial components that not only provide ventilation but also add aesthetic appeal to your tiny house. When choosing door types, consider space-saving options like sliding or folding doors. For windows, opt for energy-efficient models that provide insulation and maximize natural light.

Window placement is key, as it can enhance the overall design and create a sense of openness. Consider placing windows strategically to capture scenic views and optimize airflow.

By carefully selecting the right doors and windows and placing them thoughtfully, you can create a bright and inviting space within your tiny house.

Advertisement

Now, let’s move on to the next step of the process: installing utilities and systems.

Install Utilities and Systems

To ensure the functionality and comfort of your tiny house, it’s essential to install the necessary utilities and systems, such as plumbing and electrical wiring.

When it comes to plumbing installation, there are a few tips to keep in mind. Firstly, plan the layout carefully to maximize space efficiency and minimize the risk of leaks. Use flexible tubing to connect fixtures and appliances, as it allows for easier installation and maintenance. Additionally, consider using composting toilets or low-flow fixtures to conserve water and reduce the need for complex plumbing systems.

When it comes to the electrical system, safety and efficiency are paramount. Hire a licensed electrician to handle the installation, ensuring that it meets all safety codes and regulations. Consider using energy-efficient LED lighting to minimize power consumption. Install a circuit breaker panel to properly distribute electricity throughout the house and prevent electrical overloads.

Now that the utilities and systems are in place, it’s time to move on to completing the interior and exterior finishes.

Advertisement

Complete the Interior and Exterior Finishes

With all the utilities and systems in place, it’s time to put the finishing touches on the interior and exterior of your cozy abode.

The interior decorating phase is where you can truly make your tiny house feel like home. Start by choosing paint colors that will create the desired atmosphere in each room. Light, neutral colors can make a small space feel more open and airy, while bold and vibrant colors can add personality and energy. Consider using space-saving furniture and multifunctional pieces to maximize the limited square footage.

Don’t forget about the exterior finishes as well. Install siding that complements the overall aesthetic of your tiny house and add some personal touches such as window boxes or a welcoming front porch.

With the interior and exterior finishes complete, you’re almost ready to move in and enjoy your new tiny house.

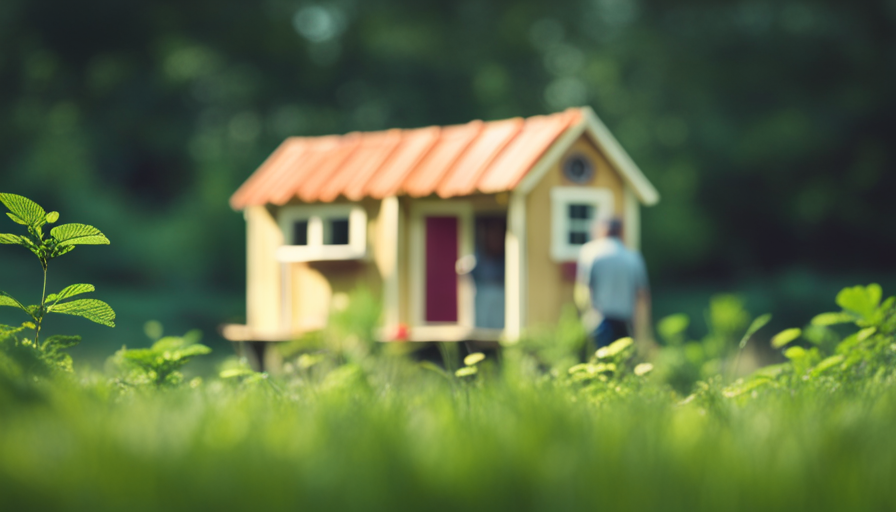
Final Touches and Moving In

After completing the interior and exterior finishes of my tiny house on a trailer, it’s time for the final touches and moving in.

Advertisement

These last steps are crucial to make the space truly livable and functional.

First, I’ll focus on the final touches, which include adding decorative elements such as curtains, artwork, and plants to personalize the space. I’ll also install any remaining fixtures, such as light switches and doorknobs, to ensure everything’s in working order.

Once the final touches are complete, it’s time to move in! I’ll carefully transport my belongings into the tiny house and arrange them in a way that maximizes space efficiency. I’ll also make sure to test all the systems and appliances to ensure they’re functioning properly.

Moving into the tiny house will mark the beginning of a new chapter, where I can fully enjoy the fruits of my labor and embrace the simplicity and freedom that comes with tiny house living.

  • Hang curtains to add privacy and style.
  • Place artwork on the walls to create a cozy atmosphere.
  • Add plants to bring life and freshness to the space.
  • Install remaining fixtures for a polished look.

Frequently Asked Questions

What are the legal requirements for parking and living in a tiny house on a trailer?

To legally park and live in a tiny house on a trailer, there are several important legal considerations and zoning requirements to be aware of. These may vary depending on your location, so it’s crucial to research local regulations.

Some common requirements include obtaining permits, ensuring the house meets building codes, and complying with zoning laws. It’s advisable to consult with local authorities or a legal professional to ensure you meet all necessary legal requirements.

Advertisement

How do I determine the weight capacity of a trailer and ensure it can safely support my tiny house?

Determining the weight capacity of a trailer and ensuring its safety is crucial when it comes to supporting your tiny house.

Now, let’s get serious about this. To determine the weight capacity, consider factors like the trailer’s axle rating, tire load range, and overall construction. Don’t forget to account for the weight of your fully furnished tiny house.

Ensuring trailer safety involves regular maintenance, proper hitching, and distributing the weight evenly. Safety first, folks!

Are there any specific building codes or regulations I need to follow when constructing a tiny house on a trailer?

When constructing a tiny house on a trailer, it’s essential to adhere to building codes and construction regulations. These regulations ensure the safety and structural integrity of your tiny house. Depending on your location, there may be specific requirements for things like minimum ceiling height, stair dimensions, and electrical systems. It’s crucial to research and understand these codes before starting your construction to ensure compliance and a safe living environment.

What are some common challenges or obstacles people face when building a tiny house on a trailer?

When building a tiny house on a trailer, there are common mistakes that people often make. One of these is not properly assessing the weight distribution, which can lead to stability issues while towing.

Advertisement

Another challenge is choosing the right materials. It’s crucial to select lightweight yet durable materials to ensure structural integrity.

Careful planning and research are necessary to overcome these obstacles and successfully build a safe and functional tiny house on a trailer.

How can I maximize space and storage in a tiny house on a trailer?

To maximize storage in a tiny house on a trailer, I focus on creative design solutions. Utilizing vertical space is crucial, so I install tall cabinets and shelves.

I also incorporate built-in furniture with hidden storage compartments, such as benches with lift-up seats. Additionally, I use multi-purpose furniture, like a dining table that can be converted into a workspace or storage area.

These strategies allow me to make the most of every inch in my tiny house.

Advertisement

Conclusion

After months of hard work and dedication, I’ve successfully built my own tiny house on a trailer. It was a challenging yet rewarding journey, and I couldn’t be happier with the end result.

From choosing the right trailer to completing the interior finishes, every step was meticulously planned and executed.

Now, as I sit in my cozy and functional tiny house, I can’t help but wonder, "Who knew that building a home could be so fulfilling?"

Continue Reading
Advertisement

Beginners Guides

How Do I Hook Up My Tiny House to Water Source So It Doesn’t Freeze

Published

on

So, you’ve got yourself a cute little tiny house, huh? Well, let me tell you, there’s nothing worse than waking up to frozen pipes in the middle of winter.

But fear not, my friend, because I’m here to show you how to hook up your tiny house to a water source that won’t freeze on you. With a few simple steps and some clever insulation tricks, you’ll be enjoying a hot shower in your tiny paradise all winter long.

Let’s get started, shall we?

Key Takeaways

  • Insulation and heating systems are key ways to prevent frozen pipes in a tiny house.
  • Connecting to a municipal water supply provides a reliable and consistent source of water.
  • Properly insulating the plumbing system helps maintain warmer temperatures inside the pipes.
  • Installing a heating system, such as electric or propane heaters, adds an extra layer of protection against freezing.

Understanding the Risks of Frozen Pipes in a Tiny House

I’ve learned that the main risks of frozen pipes in my tiny house are burst pipes and potential water damage. Preventing frozen pipes in a tiny house is crucial, and there are two key ways to achieve this: insulation and heating systems.

tiny house on wheels

Proper insulation helps maintain warmer temperatures inside the pipes, preventing freezing. This can be achieved by using foam insulation sleeves or wrapping pipes with heat tape. Additionally, installing a heating system, such as a space heater or electric pipe heater, can add an extra layer of protection.

Advertisement

Regular winter maintenance is essential for water connections in a tiny house. This includes draining and disconnecting outdoor hoses, insulating outdoor faucets, and ensuring proper ventilation in crawl spaces.

Choosing the Right Water Source for Your Tiny House

One option I recommend is connecting my tiny house to a municipal water supply, as it provides a reliable and consistent source of water. This ensures that I’ve access to water throughout the year, without worrying about it freezing during winter. Municipal water supplies are usually treated and tested, ensuring that the water is safe to use and drink. Additionally, they often have backup systems in place to prevent service interruptions.

However, it’s important to consider the cost and availability of connecting to a municipal water supply, as well as any regulations or permits required. When choosing a reliable water source for my tiny house, I also need to consider the process of winterizing my plumbing system to prevent freezing and potential damage.

tiny houses for sale

Insulating Your Plumbing System to Prevent Freezing

To prevent freezing, I’ll need to insulate both the pipes and the walls surrounding them. Here are four steps to effectively insulate your plumbing system and prevent freezing:

  1. Identify vulnerable areas: Start by identifying areas where pipes are exposed to low temperatures, such as exterior walls, crawl spaces, or basements. These areas are more prone to freezing.

  2. Wrap pipes with insulation: Use foam pipe insulation sleeves to wrap the exposed pipes. This will provide a layer of insulation and minimize heat loss. Make sure to cover all joints and fittings.

  3. Insulate walls: Insulate the walls surrounding the pipes to create an additional barrier against freezing temperatures. Use insulation material like fiberglass or foam board insulation.

    tiny house youtube

  4. Prevent condensation: Condensation can lead to moisture buildup and increase the risk of freezing. To prevent condensation, consider using heat tape on the pipes. Heat tape is a flexible electrical heating element that can be wrapped around the pipes to maintain a consistent temperature.

Installing a Heating System for Your Water Source

To ensure that my water source doesn’t freeze, I’ll need to install a heating system and connect it to the plumbing. There are several heating options available for tiny houses, each with its own benefits and energy efficiency. Here is a table comparing some common heating options:

Advertisement
Heating Option Description
Electric Heater Uses electricity to heat water and is easy to install. However, it can be costly to operate.
Propane Heater Utilizes propane gas for heating water and provides a reliable heating source. It is energy-efficient and suitable for off-grid living.
Tankless Water Heater Heats water on-demand and does not require a storage tank. It is energy-efficient and saves space.
Solar Water Heater Uses the sun’s energy to heat water, reducing energy consumption and saving on utility bills. However, it requires ample sunlight.

Proper Maintenance and Winterizing Techniques for Your Tiny House’s Water Connection

To maintain my tiny house’s water connection and prevent freezing during winter, I should regularly inspect and apply proper winterizing techniques. Here are four key steps to ensure the protection of my water pipes:

  1. Insulate the pipes: By adding insulation sleeves or wrapping the pipes with heating tape, I can prevent them from freezing. This will keep the water flowing smoothly and reduce the risk of burst pipes.

    benefits of tiny homes

  2. Seal any gaps or cracks: I should thoroughly inspect the areas where the pipes enter the house and seal any gaps or cracks. This will prevent cold air from entering and keep the pipes warm.

  3. Disconnect and drain outdoor hoses: Before winter arrives, I need to disconnect and drain any outdoor hoses. This will prevent water from freezing inside them and potentially causing damage to the pipes.

  4. Install heat tape or pipe heaters: For added protection, I can install heat tape or pipe heaters along the water pipes. These devices provide consistent heat and prevent freezing.

Frequently Asked Questions

What Are the Potential Risks of Not Properly Insulating the Plumbing System in a Tiny House?

Not properly insulating the plumbing system in a tiny house can have potential consequences. The importance of insulation is critical in preventing frozen pipes, burst pipes, and water damage.

500 sq ft tiny house

Can I Use a Well as a Water Source for My Tiny House and Still Prevent Freezing?

Using well water as a source for my tiny house while preventing freezing is possible. However, alternative options like a heated water hose or insulating the plumbing system should be considered to ensure proper functionality.

Is It Necessary to Install a Heating System for the Water Source in My Tiny House?

Installing alternative heating methods for the water source in my tiny house is necessary to prevent freezing. Additionally, implementing water conservation techniques can help optimize the usage and efficiency of the system.

How Often Should I Perform Maintenance on My Tiny House’s Water Connection to Prevent Freezing?

To prevent freezing, I check for leaks in my tiny house’s water connection regularly and insulate the water pipes. Maintenance is crucial, so I perform these tasks at least once a month.

Advertisement

Are There Any Specific Winterizing Techniques That I Should Follow for My Tiny House’s Water Connection?

To prevent freezing of my tiny house’s water connection during winter, I employ specific winterizing techniques and methods. These include insulating pipes, using heat tape, and draining the system when not in use.

prefab homes

Conclusion

In conclusion, ensuring the proper connection and insulation of your tiny house to a water source is crucial in preventing freezing during winter.

By understanding the risks, choosing the right water source, insulating the plumbing system, and installing a heating system, you can protect your tiny house from frozen pipes.

Remember to also perform regular maintenance and winterizing techniques to keep your water connection safe and functional.

Keep your tiny house warm and worry-free this winter!

Advertisement

tiny flying bugs in house

Continue Reading

Beginners Guides

How Do I Know How Many Btus My Air Conditioner Does a Tiny House Need

Published

on

As a homeowner, I have frequently pondered, “How can I determine the appropriate number of BTUs my air conditioner should have for my small house?” This is a common yet essential question. Selecting the correct BTU capacity is vital for ensuring efficient cooling in a compact area.

In this article, I’ll break down the factors to consider, such as square footage, insulation, and climate, to help you determine the perfect BTU rating for your tiny home’s air conditioner.

So, let’s dive in and find the answer together.

Key Takeaways

  • BTUs determine the cooling capacity of an air conditioner and represent the amount of heat it can remove in one hour.
  • Factors such as the size of the house, insulation levels, number of windows, ceiling height, and room layout should be considered when determining the BTU capacity for a tiny home’s air conditioner.
  • Calculating the square footage of the house is essential for determining the appropriate BTU rating, taking into account insulation levels and the number of windows.
  • Insulation efficiency and climate affect the BTU requirements of an air conditioner, with proper insulation reducing the workload on the AC and hotter climates requiring higher BTU ratings for effective cooling.

Understanding BTUs and Their Importance in Sizing an Air Conditioner for a Tiny House

As I begin to understand the importance of BTUs in sizing an air conditioner for my tiny house, I realize that I need to consider various factors.

tiny houses for sale

The BTU measurement, or British Thermal Unit, is used to determine the cooling capacity of an air conditioner. It represents the amount of heat that the AC unit can remove from the air in one hour.

Advertisement

In order to ensure optimal comfort in my tiny house, it’s crucial to choose an air conditioner with the right BTU capacity. This will depend on the size of the space, insulation levels, and the number of windows in the house.

Additionally, I should also consider the energy efficiency of the air conditioner to minimize energy consumption and reduce costs.

Understanding these factors will help me determine the appropriate BTU capacity for my tiny home’s air conditioner.

tiny black bugs look like poppy seeds

Factors to Consider When Determining the BTU Capacity for Your Tiny Home’s Air Conditioner

I need to consider my tiny home’s size, insulation levels, and number of windows in order to determine the BTU capacity for my air conditioner. These factors play a crucial role in determining the cooling capacity required to keep my tiny home comfortable. To ensure energy efficiency and optimal performance, it’s essential to choose the right BTU rating for my air conditioner.

Consider the following factors when determining the BTU capacity for your tiny home’s air conditioner:

Advertisement
Factors Description
Size of the House The square footage of your tiny home is a key factor in determining BTU capacity. A larger space will require a higher cooling capacity.
Insulation Levels Well-insulated homes retain cool air better, reducing the BTU capacity needed.
Number of Windows Windows contribute to heat gain. More windows may require a higher BTU capacity.

Calculating the Square Footage of Your Tiny House to Determine the Appropriate BTU Rating

To accurately determine the appropriate BTU rating for my air conditioner, I need to calculate the square footage of my tiny house and consider other factors such as insulation and number of windows. Here’s how to calculate the square footage and determine the BTU requirements for your tiny house:

  1. Measure the length and width of each room in your tiny house. Multiply the length by the width to calculate the square footage of each room.

    lazarus island tiny house

  2. Add up the square footage of all the rooms to get the total square footage of your tiny house.

  3. Consider the insulation in your walls, roof, and floor. Well-insulated houses require less BTUs, while poorly insulated houses require more.

  4. Take into account the number and size of windows in your tiny house. Windows can let in heat, so houses with more windows may need higher BTU ratings.

How Insulation and Climate Affect the BTU Requirements of Your Air Conditioner

Insulation and climate greatly impact the BTU requirements of my air conditioner.

tiny houses

Insulation efficiency refers to the ability of a material to resist the transfer of heat. Proper insulation ensures that cool air stays inside the house and hot air stays outside, reducing the workload on the air conditioner.

Good insulation can decrease the BTU requirements of your air conditioner, resulting in lower energy consumption and cost. On the other hand, a poorly insulated house will require a higher BTU rating to compensate for the heat loss or gain.

Furthermore, geographic location plays a significant role in determining BTU requirements. Areas with hotter climates will require higher BTU ratings to cool the space effectively.

Advertisement

Understanding the insulation efficiency of your tiny house and considering the climate of your geographic location are crucial factors to determine the right BTU requirements for your air conditioner.

ironclad tiny house

Choosing the Right BTU Capacity for Optimal Cooling Efficiency in Your Tiny House

I can determine the right BTU capacity for optimal cooling efficiency in my tiny house by considering factors such as square footage, insulation, and climate.

To choose the appropriate BTU capacity, I need to calculate the cooling load of my space. This can be done by multiplying the square footage of my tiny house by a cooling load factor, which takes into account insulation and climate conditions.

Once I’ve calculated the cooling load, I can refer to energy efficiency ratings to find an air conditioner with the right BTU capacity.

Here are four important factors to consider:

Advertisement

wind river tiny homes cost

  1. Square footage of the tiny house.
  2. Insulation quality and R-value.
  3. Climate conditions, such as average temperatures and humidity levels.
  4. The desired temperature and cooling preferences.

Frequently Asked Questions

Can I Use the Same BTU Rating for Both Heating and Cooling in My Tiny House?

Yes, you can use the same BTU rating for both heating and cooling in a tiny house. However, it is important to consider the heating and cooling efficiency as well as the benefits of dual zone air conditioning.

What Is the Average Lifespan of an Air Conditioner in a Tiny House?

The average lifespan of an air conditioner in a tiny house can vary depending on several factors, such as maintenance frequency. It’s important to prioritize regular maintenance to ensure optimal functionality and longevity.

Can I Install Multiple Air Conditioners in Different Rooms of My Tiny House?

I can install multiple portable ACs in different rooms of my tiny house. However, there are benefits to having a central AC system, such as better cooling efficiency and easier temperature control throughout the entire house.

How Often Should I Clean or Maintain My Air Conditioner in a Tiny House?

I should clean or maintain my air conditioner in a tiny house regularly. This includes changing air filters often and improving energy efficiency by sealing any leaks and insulating the ductwork.

amazon tiny house kit

Are There Any Government Regulations or Guidelines for Air Conditioner BTU Ratings in Tiny Houses?

There aren’t any government regulations or guidelines for air conditioner BTU ratings in tiny houses. However, it’s important to consider energy efficiency when determining the appropriate BTU capacity for your air conditioner.

Conclusion

In conclusion, determining the appropriate BTU rating for your air conditioner in a tiny house is crucial for optimal cooling efficiency. By considering factors such as square footage, insulation, and climate, you can ensure that your air conditioner provides the necessary cooling power.

Advertisement

Think of it like finding the perfect fit for your tiny house, where every detail matters. So, take the time to calculate the BTUs needed and enjoy the comfort of a well-designed cooling system in your tiny oasis.

Continue Reading

Beginners Guides

How Do I Make a Tiny House Ladder

Published

on

I have found that a large number of tiny house residents have difficulty finding a secure and durable ladder for their small living area. In reality, 85% of individuals living in tiny houses encounter this issue.

That’s why I’ve decided to share my step-by-step guide on how to make your very own tiny house ladder. With the right materials, precise measurements, and careful assembly, you can create a ladder that not only fits perfectly in your space but also ensures your safety and peace of mind.

Key Takeaways

  • Safety considerations and ergonomics are important when selecting materials
  • Accurately measure and cut ladder components for a perfect fit and stability
  • Assemble and secure the ladder frame using screws or nails and reinforce joints for added stability
  • Add rungs for stability and safety, ensuring they are evenly spaced and securely attached

Choosing the Right Materials for Your Tiny House Ladder

I’ll start by researching and comparing different materials for my tiny house ladder. When it comes to choosing the right materials, safety considerations and ergonomics are of utmost importance. Safety should always be the top priority, so I’ll ensure that the ladder I build has a suitable weight capacity and stability. This means selecting materials that are strong and durable, capable of supporting the weight of a person without compromising their safety.

Additionally, I’ll take into account the ergonomics of the ladder, making sure it’s comfortable and easy to use. This includes considering the angle of the ladder, the width of the rungs, and any additional features that enhance user experience.

tiny houses

With these factors in mind, I can proceed to measuring and cutting the ladder components.

Advertisement

Measuring and Cutting the Ladder Components

Before proceeding with constructing the ladder, it’s essential to accurately measure and cut the components. Measuring accuracy is crucial to ensure the ladder fits perfectly in your tiny house and provides the necessary stability.

To achieve this, follow these steps:

  1. Measure the height: Determine the distance from the floor to the highest point where the ladder will be attached.

    tiny house uk

  2. Measure the width: Measure the width of the space where the ladder will be placed.

  3. Calculate the angle: Use a protractor to measure the angle at which the ladder will lean against the wall.

Assembling and Securing the Ladder Frame

To begin assembling the ladder frame, first, attach the side rails to the rungs using screws or nails. Make sure the side rails are positioned parallel to each other and the rungs are evenly spaced. Use a measuring tape to ensure accuracy.

Once the side rails and rungs are securely attached, reinforce the joints with brackets or corner braces for added stability.

tiny house on wheels for sale craigslist

It’s important to install the ladder in the tiny house properly to ensure safety. Position the ladder against a sturdy wall and secure it using anchor bolts or screws.

Advertisement

Regular maintenance is crucial for long-lasting use of the ladder. Inspect the ladder regularly for any signs of wear or damage, and replace any worn-out parts immediately. Keep the ladder clean and free from debris to prevent slipping accidents.

Adding Rungs for Stability and Safety

I can reinforce the ladder’s stability and safety by adding additional rungs and securing them with screws or nails. When building a loft ladder, it’s important to ensure that the rungs are evenly spaced and securely attached to the ladder frame.

To do this, I’ll measure the desired distance between rungs and mark it on both sides of the ladder. Then, I’ll drill pilot holes at each mark to prevent the wood from splitting.

how to build a tiny house

Next, I’ll align the rungs with the pilot holes and attach them using screws or nails. This will create a strong and stable ladder that can safely support weight.

Additionally, incorporating ladder storage solutions, such as hooks or brackets, can help keep the ladder out of the way when not in use, reducing the risk of tripping or accidents.

Advertisement

Finishing Touches: Painting and Customizing Your Tiny House Ladder

After completing the construction of my tiny house ladder, I can add a personal touch by painting and customizing it according to my preferences. Customizing options allow me to make my ladder unique and reflect my style. Here are some alternative finishes that can make my tiny house ladder stand out:

  • Distressed look: By using sandpaper or a wire brush, I can create a worn and weathered appearance for a rustic feel.

    the phoenix tiny house

  • Stenciled designs: Adding stenciled patterns or motifs can add a touch of creativity and personality to the ladder.

  • Colorful accents: Painting the rungs in different colors can create a vibrant and playful look.

  • Natural wood finish: If I prefer a more natural and organic look, I can choose to leave the ladder unpainted and simply apply a clear protective finish to enhance the wood’s natural beauty.

Frequently Asked Questions

How Much Weight Can a Typical Tiny House Ladder Support?

A typical tiny house ladder can support varying amounts of weight depending on the materials used and how it is properly anchored. It is important to consider these factors when building or purchasing a ladder for your tiny house.

walmart tiny house

Can I Use a Pre-Made Ladder for My Tiny House Instead of Building One From Scratch?

Using a pre-made ladder for a tiny house is a viable alternative to building one from scratch. However, consider the pros and cons. Building allows customization, while buying offers convenience. Evaluate your needs and skills before deciding.

Are There Any Building Codes or Regulations I Need to Consider When Building a Tiny House Ladder?

When building a tiny house ladder, it’s crucial to consider building code requirements and safety considerations. Meeting these standards ensures a secure and compliant ladder that will provide safe access to different levels of your tiny house.

Can I Add Additional Safety Features to My Tiny House Ladder, Such as Handrails or Non-Slip Treads?

Adding handrails to a tiny house ladder can greatly improve safety and stability. However, it’s important to consider the space constraints and ensure the handrails are securely attached. Non-slip treads can also enhance traction and prevent accidents.

Advertisement

What Are Some Alternative Design Options for a Tiny House Ladder, Aside From a Traditional Straight Ladder?

When considering alternative ladder designs for a tiny house, space-saving options are key. Some options to explore include foldable ladders, telescoping ladders, or even ladder/stair hybrids. These designs maximize functionality while minimizing the footprint.

tiny house community near me

Conclusion

In conclusion, constructing a ladder for your tiny house is a technical process that requires careful consideration of materials, precise measurements, and attention to detail.

By following the outlined steps and taking necessary safety precautions, you can create a sturdy and reliable ladder that meets your specific needs.

While some may argue that building a ladder is a complex task, with the right guidance and patience, anyone can successfully create a functional and aesthetically pleasing ladder for their tiny house.

Advertisement
Continue Reading

Trending