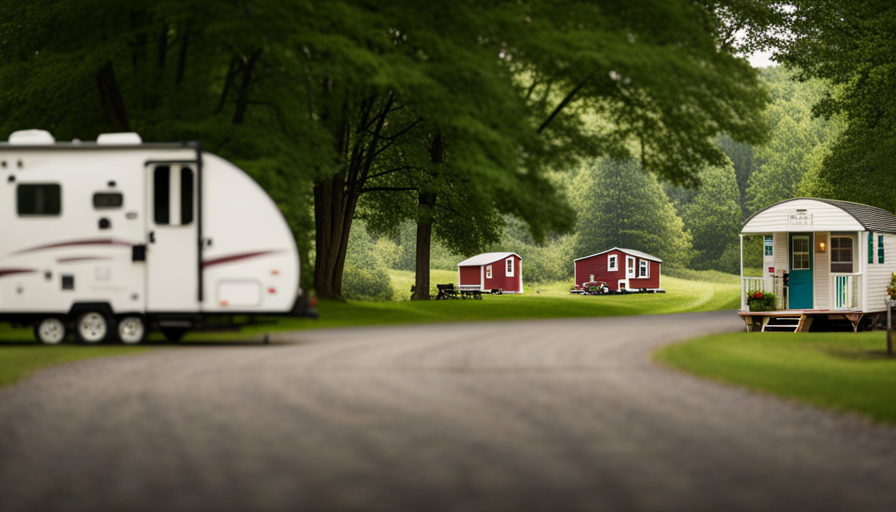
Connect with us

Beginners Guides

How Build The Inside Of A Tiny House Barn

Published

on

An image showcasing the cozy interior of a tiny house barn, with warm wooden walls adorned with rustic decor, a loft bedroom nestled beneath a slanted roof, a compact kitchenette, and a snug living area with a crackling fireplace

Have you ever fantasized about simplifying your life by residing in a quaint, adorable little barn house? I’m here to assure you that such a lifestyle is not just achievable, but also immensely fulfilling. Throughout this article, I’ll walk you through every stage of crafting the interior of a tiny barn house, detailing each step.

Designing the layout of your tiny house barn is the first and most crucial step. It’s important to carefully plan the placement of each element to maximize space and functionality. From there, choosing the right materials and finishes will not only enhance the aesthetic appeal but also ensure durability and longevity.

Next, we will dive into planning the electrical and plumbing systems, as well as insulating your tiny house barn to create a comfortable living environment. Storage solutions are also a key consideration, as they will help you make the most of the limited space available.

Additionally, we will discuss creating a comfortable sleeping area, designing a functional bathroom, and incorporating natural light and ventilation. Finally, we’ll explore adding personal touches and décor to make your tiny house barn truly feel like home.

So, let’s get started on this exciting journey of building the inside of your dream tiny house barn!

Advertisement

Key Takeaways

  • Designing the layout is crucial for maximizing space and functionality
  • Choosing the right materials and finishes enhances aesthetic appeal and durability
  • Clever storage solutions can maximize space and create a clutter-free environment
  • Incorporating natural light and ventilation is important for a comfortable living environment

Designing the Layout of Your Tiny House Barn

Now it’s time for me to envision how I want the inside of my tiny house barn to look and feel. The key to designing the layout of a tiny house barn is space optimization. Since the square footage is limited, every inch counts.

I need to think strategically about the placement of furniture and how it can serve multiple purposes. For example, a sofa bed can provide seating during the day and a comfortable sleeping area at night.

To make the most of the space, I will also consider using built-in storage solutions, such as shelves and cabinets, to minimize clutter and maximize storage capacity. Additionally, I will explore the option of utilizing vertical space by incorporating loft areas or overhead storage compartments.

When choosing furniture, I will prioritize pieces that are multifunctional and compact in size. This will help to create an open and airy feel within the tiny house barn. I will also pay attention to the flow of the space, ensuring that there is enough room to move around comfortably.

In the subsequent section about choosing the right materials and finishes, I will explore options that further enhance the functionality and aesthetic appeal of the tiny house barn. Transitioning from designing the layout to selecting the materials and finishes will ensure a seamless and cohesive design process.

Choosing the Right Materials and Finishes

First, you’ll want to consider selecting the appropriate materials and finishes for creating the cozy and charming interior of your petite rustic dwelling. When choosing sustainable materials, it’s important to prioritize eco-friendly options that minimize the impact on the environment. Look for materials such as reclaimed wood, bamboo flooring, or recycled glass tiles. These choices not only contribute to a greener lifestyle but also add character to your tiny house barn.

Advertisement

In terms of finishes, you have plenty of budget-friendly options to choose from. For the walls, consider using low-VOC (volatile organic compounds) paint, which is not only environmentally friendly but also helps improve indoor air quality. Additionally, using natural finishes like lime plaster or clay paint can give your tiny house barn a unique and earthy aesthetic.

To help you better visualize the different materials and finishes available, take a look at the table below:

Materials Finishes
Reclaimed wood Low-VOC paint
Bamboo flooring Lime plaster
Recycled glass tiles Clay paint

By carefully selecting sustainable materials and budget-friendly finishes, you can create a beautiful and environmentally conscious interior for your tiny house barn. With the materials chosen, it’s now time to move on to planning the electrical and plumbing systems, ensuring the functionality and comfort of your cozy abode.

Planning the Electrical and Plumbing Systems

When planning the electrical and plumbing systems for my tiny house barn, I had to decide between hiring a professional or taking a DIY approach. I weighed the pros and cons of each option, considering factors such as cost, time, and my own skill level.

Ultimately, I decided to hire professionals to ensure safety and efficiency in the installation process. Additionally, I made sure to incorporate energy-efficient solutions into the design, such as using LED lighting and low-flow fixtures, to minimize my environmental impact and reduce utility costs.

Advertisement

Hiring a Professional or DIY Approach

If you’re not confident in your construction skills, hiring a professional to build the inside of your tiny house barn can ensure a beautifully crafted and functional space. When considering whether to hire a professional or take the DIY approach, there are a few key factors to consider.

First, think about your skill level and the complexity of the project. Building the inside of a tiny house barn involves intricate electrical and plumbing work, as well as carpentry and finishing touches. Hiring a professional can guarantee that these tasks are done correctly and efficiently.

Additionally, cost is a significant consideration. While hiring a professional may be more expensive upfront, it can save you money in the long run by preventing costly mistakes. Ensuring the safety and efficiency of your tiny house barn is crucial, and the next section will explore how to achieve this.

Ensuring Safety and Efficiency

To ensure your tiny house barn is a well-oiled machine, it’s essential to prioritize safety and efficiency.

Efficient space utilization is key when designing the interior of a tiny house barn. Consider multi-functional furniture that can serve multiple purposes, such as a fold-out bed or a dining table that can be collapsed when not in use. Additionally, utilize vertical space by installing shelves or hooks on the walls to maximize storage options.

Advertisement

Safety measures should also be a top priority. Install smoke detectors, carbon monoxide detectors, and fire extinguishers in strategic locations throughout the space. Ensure that all electrical wiring is up to code and properly installed by a professional. It’s crucial to have a clear emergency exit plan and easy access to emergency exits.

By prioritizing safety and efficient space utilization, you can create a functional and secure tiny house barn that meets your needs. Incorporating energy-efficient solutions is the next step in optimizing your tiny house barn’s performance and sustainability.

Incorporating Energy-Efficient Solutions

Maximize the energy efficiency of your compact living space by incorporating innovative solutions that minimize your environmental impact and reduce utility costs.

Here are three key ways to achieve this:

  1. Energy Efficient Lighting: Opt for LED or CFL bulbs throughout your tiny house barn. These bulbs consume less energy and have a longer lifespan than traditional incandescent bulbs, making them a cost-effective and eco-friendly lighting solution.

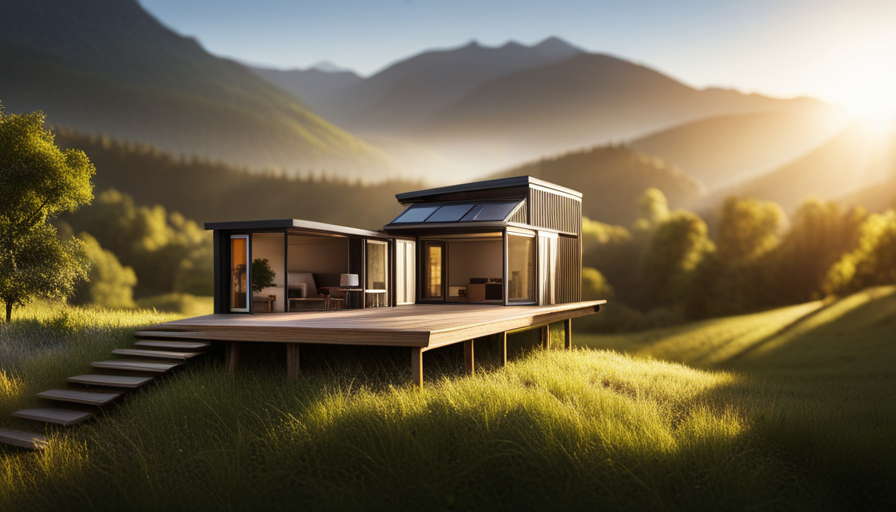
  2. Solar Power Integration: Harness the power of the sun by installing solar panels on the roof of your tiny house barn. This renewable energy source can provide electricity for your lighting, appliances, and heating/cooling systems, significantly reducing your reliance on the grid and lowering your carbon footprint.

  3. Smart Energy Management: Implement smart home technology to control and monitor your energy usage. Use programmable thermostats, energy-efficient appliances, and power-saving devices to optimize energy consumption and reduce wastage.

By incorporating these energy-efficient solutions, you can create a sustainable and cost-effective living space.

Advertisement

Transitioning into the next section about insulating your tiny house barn, it’s important to consider the insulation materials and techniques that will further enhance the energy efficiency of your home.

Insulating Your Tiny House Barn

When it comes to insulating my tiny house barn, I understand the importance of insulation in maintaining a comfortable and energy-efficient living space.

I am careful in selecting appropriate insulation materials that will effectively keep the interior warm in winter and cool in summer.

Additionally, I ensure proper installation to maximize climate control and minimize any potential drafts or air leaks.

Understanding the Importance of Insulation

Insulation is crucial for maintaining comfortable temperatures inside a tiny house barn, as it can reduce heat loss by up to 75%. The benefits of insulation go beyond just keeping the space warm in winter and cool in summer. It also helps to minimize energy consumption, saving you money in the long run.

Advertisement

Proper insulation installation ensures that there are no gaps or leaks where air can escape, maximizing its effectiveness. Additionally, insulation helps to reduce noise transmission, creating a quieter and more peaceful living environment.

When it comes to selecting the appropriate insulation materials, it’s important to consider factors such as R-value, fire resistance, and moisture resistance. By carefully choosing the right insulation, you can ensure optimal comfort and energy efficiency in your tiny house barn.

Selecting the Appropriate Insulation Materials

To ensure optimal comfort and energy efficiency in your tiny house barn, you’ll want to carefully select the appropriate materials for insulation. When choosing insulation materials, consider eco-friendly options that minimize environmental impact. Look for materials that are made from recycled or renewable resources, such as recycled denim, cellulose, or sheep’s wool.

These options not only provide excellent insulation but also contribute to a greener and more sustainable living space. Additionally, cost-effective insulation materials, such as fiberglass or spray foam, can offer good thermal performance without breaking the bank.

By selecting the right insulation materials, you can create a well-insulated and efficient tiny house barn. This will help you maintain comfortable temperatures year-round and reduce your energy consumption.

Advertisement

In the next section, we will discuss ensuring proper installation for climate control.

Ensuring Proper Installation for Climate Control

For optimal climate control, it’s crucial to ensure the proper installation of insulation materials in your cozy abode. To achieve energy efficient solutions and maintain a comfortable living environment, consider the following:

  • Seal all gaps and cracks: Prevent air leaks by sealing any gaps or cracks in the walls, windows, and doors. This will help to keep the desired temperature inside and prevent drafts.

  • Use vapor barriers: Install vapor barriers between the insulation and the interior walls to prevent moisture buildup. This will help to maintain the longevity of the insulation and prevent mold growth.

  • Consider insulation types: Choose insulation materials that are suitable for your climate. For example, in colder climates, consider adding additional insulation layers or using thicker insulation materials.

By implementing these climate control installation techniques, you can create an energy efficient and comfortable living space.

Now, let’s explore how to create storage solutions for your tiny house barn.

Creating Storage Solutions

Maximize your space and enhance the functionality of your tiny house barn by incorporating clever storage solutions. When it comes to designing a small living space, utilizing vertical space and hidden storage can make a world of difference. By thinking creatively and making the most of every nook and cranny, you can create a clutter-free environment that feels spacious and organized.

Advertisement

One effective way to utilize vertical space is by installing floor-to-ceiling shelves along the walls. These shelves can hold books, decorative items, or even baskets for additional storage. Additionally, consider using hanging storage solutions such as hooks or pegboards to keep everyday items within reach without taking up valuable counter or floor space.

Another great option for maximizing storage in a tiny house barn is to incorporate hidden storage compartments. For example, you can build storage drawers underneath your bed or install built-in cabinets that blend seamlessly with the walls. These hidden compartments provide ample space to store clothes, linens, or any items you want to keep out of sight.

Incorporating these storage solutions will help you keep your tiny house barn neat and organized. In the next section, we will discuss how to design a functional kitchen that maximizes efficiency and minimizes clutter.

Designing a Functional Kitchen

When it comes to designing a functional kitchen for a tiny house barn, there are several key points to consider.

First, choosing compact appliances is crucial in order to maximize space while still having all the necessary amenities.

Advertisement

Additionally, maximizing counter and storage space is essential to ensure that everything has a designated place.

Lastly, considering ergonomics and workflow is important to create a kitchen that’s efficient and easy to navigate.

Choosing Compact Appliances

Compact appliances are the perfect solution for creating a cozy and efficient living space inside a tiny house barn. When designing a kitchen in a small space, it’s important to choose appliances that are not only functional but also space-saving. There are several compact appliance options available that can help maximize counter and storage space.

To give you an idea of the possibilities, here is a table showcasing three popular compact appliances for a tiny house barn kitchen:

Appliance Dimensions Features
Compact Fridge 24"W x 24"D x 60"H Energy efficient, adjustable shelves
Two-Burner Stove 12"W x 20"D Induction cooktop, compact size
Countertop Oven 18"W x 14"D x 12"H Convection cooking, multiple functions

These appliances are designed to fit perfectly in small spaces without compromising functionality. By choosing compact appliances, you can create a functional kitchen while still having enough room for maximizing counter and storage space.

Advertisement

In the next section, we will explore strategies for maximizing counter and storage space in a tiny house barn kitchen.

Maximizing Counter and Storage Space

To make the most of your limited kitchen space, get creative with clever storage solutions and make use of every inch of your countertops. Here are five tips to maximize your counter and storage space in your tiny house barn:

  • Install floating shelves or hanging baskets to utilize vertical space.
  • Use magnetic strips or hooks to hang knives, utensils, and other metal items.
  • Utilize the inside of cabinet doors by installing hooks or small shelves.
  • Invest in multi-functional kitchen tools and appliances, such as a cutting board that doubles as a colander.
  • Consider using stackable storage containers and collapsible kitchenware to save space when not in use.

By implementing these creative storage solutions, you can maximize your counter space and keep your kitchen organized in your tiny house barn.

Now, let’s explore how considering ergonomics and workflow can further enhance your kitchen design.

Considering Ergonomics and Workflow

After maximizing counter and storage space in my tiny house barn, the next step is to consider ergonomics and workflow. It’s important to create a space that is not only functional but also comfortable and efficient to work in.

One way to achieve this is by incorporating ergonomic furniture, such as adjustable height desks and chairs with good back support. This will help prevent fatigue and strain on the body during long hours of work.

Advertisement

Another aspect to consider is workflow optimization, which involves arranging the furniture and equipment in a way that promotes a smooth and efficient flow of tasks. This can be achieved by placing frequently used items within easy reach and organizing workstations based on the tasks at hand.

By focusing on ergonomics and workflow, I can ensure that my tiny house barn is a productive and comfortable space to work in. Now, let’s move on to creating a comfortable sleeping area.

Creating a Comfortable Sleeping Area

When designing a comfortable sleeping area in a tiny house barn, it’s important to consider several key points.

Firstly, choosing the right bed size and style is crucial to ensure a good night’s sleep.

Secondly, incorporating storage solutions for bedding is essential in order to maximize space and keep the sleeping area tidy.

Advertisement

Lastly, enhancing privacy and comfort can be achieved through the use of curtains, dividers, or even soundproofing materials to create a peaceful and restful environment.

Choosing the Right Bed Size and Style

As you explore your options for bed sizes and styles, imagine the cozy haven you can create inside your tiny house barn. When it comes to bed frame options, there are a few key factors to consider. First, think about the overall size of your tiny house and the available space for a bed. A bed frame with built-in storage can be a great space-saving solution. Next, consider the mattress size that will fit best in your tiny house. While a standard queen or king mattress may be too large, a full or even a twin-size mattress can provide ample comfort in a smaller space. Once you have chosen the right bed size, consider the style that best fits your aesthetic. From sleek and modern to rustic and farmhouse-inspired, there are plenty of options to choose from. With the perfect bed in place, it’s time to think about incorporating storage solutions for bedding and other essentials.

Incorporating Storage Solutions for Bedding

To maximize your space and keep your bedding organized, consider incorporating storage solutions into your cozy haven. Here are three space-saving options for bedding storage:

  1. Under-bed storage: Utilize the space beneath your bed by investing in storage containers or drawers that can easily slide in and out. This is perfect for storing extra sheets, blankets, or pillows.

  2. Wall-mounted shelving: Install wall-mounted shelves above your bed to create additional storage space for folded bedding or decorative items. This not only adds functionality but also adds visual interest to your tiny house barn.

  3. Built-in storage: If you have the option, consider incorporating built-in storage units into the design of your tiny house barn. This can include cabinets, drawers, or even hidden compartments that blend seamlessly into the walls.

By incorporating these bedding storage solutions, you can optimize your space and keep your cozy haven clutter-free.

Now, let’s explore how to enhance privacy and comfort in your tiny house barn.

Advertisement

Enhancing Privacy and Comfort

After incorporating storage solutions for bedding in my tiny house barn, I realized that enhancing privacy and comfort were equally important.

To achieve both, I explored various privacy solutions and comfort enhancements. One effective privacy solution was installing curtains or blinds on the windows, allowing me to control the amount of natural light and visibility from outside. Additionally, I added frosted glass or decorative window films to the bathroom window and any other areas where privacy was crucial.

To enhance comfort, I invested in a quality mattress and soft bedding, ensuring a good night’s sleep in my cozy space. I also incorporated comfortable seating options, such as a plush armchair or a small sofa, to create a comfortable and inviting atmosphere.

Now, with privacy and comfort taken care of, it’s time to move on to designing a functional bathroom.

Designing a Functional Bathroom

When designing a functional bathroom for a tiny house barn, it’s important to consider that the average person spends about 1.5 years of their life in the bathroom. With limited space, it becomes crucial to prioritize bathroom fixtures and opt for space-saving designs.

Advertisement

Here are three key considerations to keep in mind:

  • Compact fixtures: Investing in compact bathroom fixtures is essential for maximizing space in a tiny house barn bathroom. Opt for a small toilet, a corner sink, and a narrow shower stall. These fixtures not only save space but also provide functionality without compromising on comfort.

  • Storage solutions: Utilizing every inch of available space is crucial in a tiny house barn. Incorporate clever storage solutions such as wall-mounted cabinets, over-the-toilet shelves, and recessed niches. These additions will help keep the bathroom organized and clutter-free.

  • Multi-functional design: When space is limited, it’s important to make every element in the bathroom serve multiple purposes. Consider installing a vanity mirror with built-in storage or a showerhead with a handheld option. These multi-functional designs will maximize the functionality of the bathroom without sacrificing comfort.

Incorporating natural light and ventilation is the next step in creating a well-designed tiny house barn bathroom.

Incorporating Natural Light and Ventilation

After designing a functional bathroom for your tiny house barn, the next step is to focus on incorporating natural light and ventilation into the space. This is crucial for creating a bright and airy atmosphere that can make your tiny house feel more spacious and comfortable.

When it comes to natural light design, there are a few techniques you can use. Firstly, consider installing large windows or skylights to maximize the amount of sunlight that enters the barn. This will not only illuminate the space but also provide beautiful views of the surrounding landscape. Additionally, using light-colored paint on the walls and ceilings can help reflect and distribute natural light throughout the interior.

Ventilation is equally important in a tiny house barn, as it helps to circulate fresh air and prevent stuffiness. One effective technique is to install ceiling fans or small ventilation systems that can be easily controlled. These will help keep the air flowing and maintain a comfortable temperature inside the barn.

Advertisement

Incorporating natural light and ventilation techniques into your tiny house barn will create a pleasant and inviting atmosphere. With the right design choices, you can make the most of the available space and create a cozy living environment.

Now, let’s move on to the next section where we’ll explore adding personal touches and décor to make your tiny house barn truly unique.

Adding Personal Touches and Décor

To truly make your tiny house barn feel like a home, you can add personal touches and décor that reflect your unique style and personality. Personalized accents are a great way to add charm and character to your space. Consider using items that have sentimental value or that showcase your hobbies and interests.

For example, if you love traveling, you could display a collection of postcards or maps from your favorite destinations. Unique artwork is another fantastic way to infuse your tiny house barn with your personal style. Consider hanging paintings or photographs that you love and that resonate with you. You could even create your own artwork to add an extra personal touch.

Don’t be afraid to think outside the box – you could hang a tapestry, a handmade quilt, or even a collection of vintage posters. When it comes to décor, focus on simplicity and functionality. Choose furniture and accessories that serve a purpose while also adding aesthetic appeal. Opt for multipurpose pieces that can save space, such as a coffee table that doubles as storage or a bench with built-in shelves.

Advertisement

By incorporating personalized accents and unique artwork, you can create a tiny house barn that truly feels like home. Let your imagination run wild and have fun with the process of making your space reflect your individuality.

Frequently Asked Questions

How much does it cost to build a tiny house barn?

Building a tiny house barn: Is it worth the investment? Let’s investigate.

The hidden costs of constructing a tiny house barn can significantly impact your budget. While the initial construction costs may seem reasonable, there are additional expenses to consider. These include permits, site preparation, utilities, and interior finishing. These hidden costs can quickly add up and affect the overall affordability of your project.

So, before diving in, it’s essential to carefully evaluate whether building a tiny house barn is worth the investment.

What are the legal requirements for building a tiny house barn?

Legal considerations and zoning restrictions are important factors to consider when building a tiny house barn. Before starting construction, it’s crucial to research and comply with local building codes, permits, and regulations. These requirements may vary depending on the location, so it’s essential to consult with local authorities or a professional to ensure compliance.

Advertisement

Zoning restrictions may dictate the size, location, and use of the structure, so it’s important to understand and adhere to these regulations to avoid any legal issues.

Can a tiny house barn be transported to different locations?

Yes, a tiny house barn can be transported to different locations, which is one of its key advantages. Its transportability allows for flexibility and the ability to relocate as needed.

However, there are some disadvantages to consider. Moving a tiny house barn requires specialized equipment and can be costly. Additionally, the structure must be properly secured during transportation to prevent damage.

Despite these challenges, the ability to transport a tiny house barn offers the opportunity for change and adaptability.

How long does it typically take to build a tiny house barn?

When planning the construction of a tiny house barn, factors such as size, design, and complexity play a crucial role in determining the time it takes to complete. For example, a 200 square foot barn with a simple layout can be built in about 2-3 months, assuming all necessary permits and materials are readily available.

Advertisement

However, more intricate designs or larger sizes may take longer. It’s important to carefully consider these factors to ensure a smooth and timely construction process.

Are there any specific building codes or regulations that need to be followed when constructing a tiny house barn?

When constructing a tiny house barn, it’s crucial to adhere to specific building codes and regulations. These codes ensure the safety and structural integrity of the building. However, meeting these regulations can pose challenges due to the unique nature of tiny house barns.

For instance, issues may arise regarding minimum square footage requirements, plumbing and electrical systems, and zoning restrictions. It’s essential to consult with local authorities and professionals to navigate these challenges and ensure compliance with building codes for tiny house barns.

Conclusion

After completing the construction of my tiny house barn, I couldn’t be happier with the end result.

Every step of the process was worth it, from designing the layout to choosing the materials and finishes.

Advertisement

One interesting statistic that caught my attention during this project was that tiny houses use approximately 80% less energy for heating and cooling compared to traditional homes. This not only saves money but also has a positive impact on the environment.

I’m proud to have built a sustainable and cozy living space that meets all my needs.

Continue Reading
Advertisement

Beginners Guides

How Much Does It Cost To Build A Tiny House In Florida

Published

on

By

An image displaying an aerial view of a charming tiny house set against the backdrop of Florida's lush landscape

In the realm where the sun beams and beaches are lined with pristine sand, under the gentle sway of palm trees and the soft murmur of the ocean breeze, you’ll find the captivating state of Florida. However, amid its charm and magnetic appeal, a novel trend has surfaced – the tiny house movement.

These whimsical abodes, with their compact size and minimalist charm, have captured the hearts and imaginations of many Floridians looking to downsize and simplify their lives. However, before embarking on this unique adventure, one must consider the all-important question: How much does it cost to build a tiny house in Florida?

In this article, I will delve into the intricacies of building a tiny house in the Sunshine State, exploring everything from local building codes to material costs and labor expenses. By the end, you will have a comprehensive understanding of the financial aspects involved, allowing you to embark on your tiny house journey with confidence and clarity.

So, let us embark on this exciting exploration together, as we uncover the true cost of building a tiny house in Florida.

Key Takeaways

  • Research local building codes, zoning restrictions, and permit requirements in Florida
  • Calculate material costs and consider quality, durability, and sustainability of materials
  • Factor in expenses for land, foundation, interior and exterior finishes, and off-grid or sustainable features
  • Evaluate maintenance and insurance costs, and compare quotes from contractors and suppliers

Research Local Building Codes and Regulations

You’ll need to research the local building codes and regulations in Florida to make sure your tiny house dream doesn’t get crushed by red tape and restrictions. Before you start building your tiny house, it’s essential to understand the zoning restrictions and building permits required in your specific area.

Each county and city in Florida may have different regulations, so it’s important to do your due diligence.

Advertisement

Zoning restrictions in Florida can vary greatly, and they dictate where you can legally place your tiny house. Some areas may have specific zoning requirements for tiny houses, while others may classify them as accessory dwelling units or require them to be on wheels. It’s crucial to check with your local zoning department to ensure compliance with the regulations.

Obtaining building permits is another critical step in the process. These permits ensure that your tiny house meets all safety and structural requirements. Building codes in Florida are designed to protect homeowners and ensure their safety. It’s crucial to familiarize yourself with these codes and obtain the necessary permits before starting construction.

Once you have thoroughly researched the local building codes and regulations, you can move on to determining your design and layout for your tiny house. By understanding the restrictions and requirements, you can tailor your plans to comply with the rules while still creating the tiny house of your dreams.

Determine Your Design and Layout

Imagine yourself sitting in the cozy nook of your very own sunshine-filled sanctuary, where every corner of your dream abode has been carefully designed and laid out to reflect your unique personality and needs. When determining the design and layout of your tiny house in Florida, it’s essential to consider space optimization techniques and incorporate unique storage solutions that’ll make the most of your limited square footage.

To paint a picture of what this could look like, consider the following:

Advertisement
  • Utilize multipurpose furniture: Opt for a sofa that can be converted into a bed, or a dining table that can be folded away when not in use. This’ll maximize your living space and allow for flexibility in how you use each area.

  • Built-in storage: Incorporate built-in shelves, cabinets, and closets to maximize vertical space and keep your belongings organized. Consider utilizing under-stair storage or creating storage compartments within your furniture.

  • Creative use of walls: Install hooks, shelves, or magnetic strips on the walls to hang and store items such as utensils, pots, and pans, or even shoes.

By implementing these space optimization techniques and incorporating unique storage solutions into your tiny house design, you can create a functional and personalized living space. This’ll not only reflect your needs and personality but also make the most of the limited square footage available.

In the next section, we’ll explore how to calculate the material costs for your project.

Transitioning into the subsequent section about calculating material costs, it’s important to consider the financial aspect of building your tiny house in Florida.

Calculate Material Costs

To accurately estimate the expenses involved in constructing your compact dwelling in the Sunshine State, it’s crucial to diligently calculate the costs of the materials required for your project.

Calculating costs and sourcing materials are essential steps in the process of building a tiny house in Florida. The first step is to determine the quantity of each material needed, such as lumber, insulation, roofing materials, and siding.

Advertisement

Once you have a comprehensive list, you can start researching prices from various suppliers to find the best deals. When calculating material costs, it’s important to consider factors such as quality, durability, and sustainability. While it may be tempting to go for the cheapest option, investing in high-quality materials will ensure the longevity and efficiency of your tiny house. Additionally, considering eco-friendly alternatives can contribute to a more sustainable and energy-efficient dwelling.

Sourcing materials can be done through local suppliers or online platforms that specialize in tiny house construction. It’s recommended to compare prices and read reviews to ensure you’re getting the best value for your money. Don’t forget to account for delivery fees if you choose to purchase materials from different locations.

By thoroughly calculating material costs and sourcing the necessary materials, you can have a clearer picture of the financial aspect of building a tiny house in Florida. With this information, you can now transition to estimating labor expenses to have a comprehensive understanding of the overall project costs.

Estimate Labor Expenses

Now, buckle up because estimating the labor expenses for your pint-sized masterpiece is going to be a wild ride! Finding skilled contractors is the first step in ensuring the success of your tiny house project. Look for contractors who specialize in building small homes or have experience in carpentry and construction. Ask for recommendations from friends, family, or local builders’ associations.

Obtaining necessary permits is another crucial aspect of the labor expenses. Contact your local building department to understand the specific permits required for your tiny house, such as building permits, electrical permits, and plumbing permits. Keep in mind that permit costs vary depending on the location and size of your tiny house.

Advertisement

To estimate labor expenses accurately, consider the following factors:

  1. Complexity of the design: Intricate designs may require more skilled labor, leading to higher costs.nn2. Materials used: Labor costs can vary based on the type of materials used, such as wood, metal, or eco-friendly alternatives.nn3. Timeframe: If you need the project completed quickly, it may require additional labor or overtime expenses.nn4. Location: Labor costs can differ based on the local market rates and availability of skilled workers.

Once you have estimated the labor expenses, it’s important to consider additional costs for utilities and permits. These costs can significantly impact your overall budget and should not be overlooked.

Transitioning into the subsequent section about ‘consider additional costs for utilities and permits,’ it is essential to thoroughly research and plan for these expenses to avoid any unexpected surprises during the construction process.

Consider Additional Costs for Utilities and Permits

Picture yourself in the midst of your tiny house project, envisioning the additional expenses for utilities and permits that are crucial to consider for a smooth construction process. When calculating the cost of building a tiny house in Florida, it’s important to take into account the cost of living in the area, as it can have a significant impact on property value and thus affect the overall cost of your project. In Florida, the cost of living can vary depending on the specific location, so it’s essential to research and understand the local market trends.

Additionally, you should factor in the cost of utilities such as water, electricity, and sewage. These costs can vary depending on the size of your tiny house and the specific utility rates in your area. It’s important to contact the local utility providers to get accurate estimates for these expenses.

Moreover, permits are another expense to consider. Building permits are required for any construction project, including tiny houses. The cost of permits can vary depending on the location and the size of your tiny house. It’s crucial to research the specific permit requirements for your area and budget accordingly.

Advertisement

Considering these additional costs for utilities and permits is essential for an accurate budget for your tiny house project. As we move into the next section about budgeting for land and foundation, it’s important to keep in mind the impact of these expenses on your overall budget.

Budget for Land and Foundation

When considering the cost of building a tiny house in Florida, it’s important to budget for land and foundation expenses. The availability of land plays a significant role in determining the overall cost of your project. In highly sought-after areas, the price of land can be quite high, while more rural locations may offer more affordable options. Additionally, the size and location of the land will also impact the cost.

Another important aspect to consider is the foundation of your tiny house. There are various foundation options to choose from, each with its own cost implications. For example, a traditional concrete foundation may be more expensive than a pier and beam foundation.

By budgeting for land and foundation costs, you can have a more accurate understanding of the overall expenses involved in building a tiny house in Florida. This will allow you to plan your budget accordingly and avoid any unforeseen financial burdens along the way.

Once you have determined the cost of land and foundation, you can then factor in the expenses for interior and exterior finishes.

Advertisement

Transitioning into the next section about ‘factor in interior and exterior finishes,’ it’s crucial to consider these aspects in order to complete your tiny house project successfully.

Factor in Interior and Exterior Finishes

To complete your tiny house project successfully, you’ll need to factor in the expenses for interior and exterior finishes, which can greatly enhance the overall look and functionality of your space. When it comes to choosing finishes, it’s important to consider your personal style, as well as the durability and cost of materials.

Let’s start with the interior finishes. The cost breakdown for interior finishes typically includes flooring, walls, and ceilings. For flooring, you have options like hardwood, laminate, or tile, each with different price points. Similarly, the type of wall finish you choose, such as paint, wallpaper, or paneling, will affect the overall cost. As for the ceilings, options like drywall, wood, or tin can all add character to your tiny house but at varying costs.

Moving on to the exterior finishes, you’ll need to consider the materials for siding, roofing, and windows. Siding choices like vinyl, wood, or metal can have different price ranges, while the type of roofing material you select, such as asphalt shingles or metal panels, will also impact your budget. Additionally, energy-efficient windows might cost more upfront but can save you money in the long run.

To plan for off-grid or sustainable features, you’ll need to consider the cost implications of incorporating solar panels, rainwater harvesting systems, or composting toilets. These features can help reduce your reliance on traditional utilities and minimize your environmental footprint.

Advertisement

When determining the cost of building a tiny house in Florida, it’s important to factor in the expenses for both interior and exterior finishes. By carefully choosing finishes that align with your style and budget, you can create a beautiful and functional space.

Moving forward, let’s explore how to plan for off-grid or sustainable features.

Plan for Off-Grid or Sustainable Features

Let’s dive into how you can incorporate off-grid or sustainable features into your tiny house project. When planning for off-grid features, one key aspect to consider is the power source. Opting for off-grid power solutions such as solar panels or wind turbines can reduce your reliance on traditional electricity sources and lower your energy costs in the long run. Additionally, using sustainable materials throughout your tiny house construction can have a positive impact on the environment and your budget. Look for materials that are renewable, recyclable, and have a low carbon footprint.

To provide a visual representation of the different options available, here is a table showcasing various off-grid power and sustainable material choices:

Off-Grid Power Sustainable Materials
Solar Panels Bamboo
Wind Turbines Cork Flooring
Hydroelectric Power Recycled Glass Countertops
Biofuel Generators Reclaimed Wood

By incorporating off-grid or sustainable features into your tiny house, you can not only reduce your environmental impact but also potentially save money on energy bills and contribute to a more sustainable future. Now, let’s move on to evaluating maintenance and insurance costs for your tiny house project.

Advertisement

Evaluate Maintenance and Insurance Costs

Evaluate the maintenance and insurance costs for your tiny house project and brace yourself for the potential financial burden that comes with it. When building a tiny house in Florida, it’s essential to consider the ongoing maintenance expenses that may arise.

These costs can include regular cleaning, repairs, and replacements for various components such as the roof, siding, plumbing, and electrical systems. Additionally, you may need to allocate funds for landscaping and pest control services to ensure the longevity of your tiny house.

Insurance coverage is another crucial aspect to consider. It’s essential to protect your investment by obtaining adequate insurance coverage for your tiny house. This coverage should include protection against natural disasters, theft, and liability.

Depending on the location and specific features of your tiny house, insurance premiums may vary significantly. It’s advisable to consult with insurance providers specializing in tiny house coverage to determine the most suitable and cost-effective policy for your needs.

Evaluate the maintenance and insurance costs thoroughly to have a clear understanding of the financial responsibilities associated with your tiny house. Once you’ve assessed these expenses, you can confidently move on to the next section and compare quotes from contractors and suppliers, ensuring that you make informed decisions throughout the construction process.

Advertisement

Compare Quotes from Contractors and Suppliers

Once you’ve thoroughly evaluated maintenance and insurance costs, it’s time to gather and compare quotes from contractors and suppliers for your tiny house project in Florida. This step is crucial in determining the overall cost of building your tiny house.

When it comes to choosing between hiring a contractor or doing it yourself (DIY), it’s important to weigh the pros and cons. Hiring a contractor can save you time and ensure a professional finish, but it can also be more expensive. On the other hand, opting for a DIY approach can be cost-effective, but it requires a significant amount of time, effort, and skill.

To get started, reach out to multiple contractors and suppliers in your area and request quotes. Make sure to provide them with detailed plans and specifications for your tiny house. This will allow them to give you accurate estimates.

While comparing quotes, pay attention to the breakdown of costs. Look for any hidden fees or additional charges that may arise during construction. Additionally, consider the reputation and experience of each contractor and supplier. Remember, it’s not just about finding the cheapest option, but also about finding a reliable and trustworthy professional.

To save on costs, consider these cost-saving tips: source materials locally, reuse and repurpose materials whenever possible, and consider alternative construction methods that may be more affordable.

Advertisement

By being thorough and detailed in comparing quotes, you can make an informed decision that suits your budget and needs.

Frequently Asked Questions

What are the average property prices in Florida for building a tiny house?

Average property prices in Florida for building a tiny house vary depending on location and cost factors like materials and labor. Analyzing the market thoroughly is key to determining the overall cost and finding the best deals.

Are there any specific regulations for tiny houses in Florida that I need to be aware of?

There are specific regulations for tiny houses in Florida that I need to be aware of. These include zoning regulations that dictate where and how tiny houses can be built in the state.

How can I find affordable land options for building a tiny house in Florida?

Finding affordable land options for building a tiny house in Florida can be challenging, but there are options. Consider joining tiny house communities, which provide shared land and amenities, making it more cost-effective and fostering a sense of community.

What are the typical insurance costs for a tiny house in Florida?

Tiny house insurance coverage in Florida can vary depending on factors such as the size, location, and value of the house. Other factors like the type of construction, security measures, and the homeowner’s claims history can also affect insurance costs.

Advertisement

How long does it usually take to build a tiny house in Florida, from start to finish?

On average, it takes around 4-6 months to build a tiny house in Florida. However, various factors can affect the construction time, such as weather conditions, availability of materials, and common challenges like zoning regulations and obtaining permits.

Conclusion

After researching local building codes, calculating material and labor costs, considering additional expenses for utilities and permits, and factoring in finishes, planning for off-grid features, evaluating maintenance and insurance costs, and comparing quotes, I’ve come to the conclusion that building a tiny house in Florida can be a truly transformative and fulfilling experience.

The process may be challenging, but the end result is an enchanting and cozy sanctuary that embraces the beauty of nature and offers a simpler, more sustainable way of living.

So, if you’re ready to embark on this journey, get ready to create a unique and captivating haven that’ll leave you in awe every day.

Advertisement
Continue Reading

Beginners Guides

How To Buy A Tesla Tiny House

Published

on

By

An image of a picturesque suburban street with a cozy Tesla Tiny House parked in front of a sleek Model S

As per the popular adage, ‘the best things arrive in petite packages,’ this holds especially true in the realm of eco-friendly living with the example of the Tesla Tiny House. For those inclined towards adopting a minimalist way of life and aiming to decrease their environmental impact, acquiring a Tesla Tiny House might just be the ideal answer.

In this article, I’ll guide you through the process of purchasing your very own Tesla Tiny House. From understanding the benefits and determining your budget to exploring different models and floor plans, we’ll cover it all.

We’ll also delve into the features and technology included, as well as the warranty and maintenance services you can expect.

Whether you’re a solo adventurer or a small family, there’s a Tesla Tiny House that can meet your space and living needs. So, let’s get started on this exciting journey towards a sustainable lifestyle. Get ready to make a difference and enjoy the comforts of a cozy, eco-friendly home on wheels.

Key Takeaways

  • Consider financing options such as saving up, personal loans, RV loans, or lease-to-own programs when buying a Tesla Tiny House.
  • Look for a reputable Tesla Tiny House dealer that offers competitive and transparent pricing, and schedule a visit or virtual tour to see the tiny house and discuss financing options.
  • Review the warranty coverage and maintenance services provided by Tesla Tiny House to ensure peace of mind.
  • Embrace a sustainable lifestyle by choosing a Tesla Tiny House equipped with eco-friendly appliances, energy-efficient lighting, and solar panels to reduce your carbon footprint.

Understand the Benefits of a Tesla Tiny House

You’ll be amazed at the endless possibilities and sustainable lifestyle that awaits you with a Tesla Tiny House. The sustainability factor of these compact homes is truly remarkable. Powered by solar energy, they’re designed to reduce your carbon footprint and help protect the environment.

Not only do they provide a comfortable living space, but they also minimize energy consumption and waste. Additionally, Tesla Tiny Houses are more affordable compared to traditional houses. With lower construction costs and maintenance expenses, you can save a significant amount of money.

Advertisement

Imagine living in a home that not only meets your needs but also allows you to contribute to a greener future.

Now that you understand the benefits of a Tesla Tiny House, let’s move on to determining your budget and financing options seamlessly.

Determine Your Budget and Financing Options

Figure out your budget and explore different financing options to make owning a Tesla tiny house a reality. When determining your budget, consider how much you can comfortably afford to spend on a tiny house. Take into account not just the purchase price, but also ongoing costs such as maintenance, insurance, and utilities.

To help you budget effectively, here are four financing options and budgeting strategies to consider:

  1. Save up: Set aside a portion of your income each month until you have enough to purchase a Tesla tiny house outright.

  2. Personal loan: Explore the option of obtaining a personal loan from a bank or credit union to finance your tiny house purchase.

  3. RV loan: Some lenders offer specialized loans for tiny houses on wheels, similar to RV loans.

  4. Lease-to-own: Look for lease-to-own programs that allow you to rent a Tesla tiny house with the option to purchase it in the future.

Once you have a clear budget and financing plan in place, you can move on to the next step of researching different models and floor plans.

Advertisement

Research Different Models and Floor Plans

Exploring various models and floor plans can provide a multitude of options for those interested in owning a compact, modern living space on wheels. Tesla offers a range of different designs to suit various preferences and needs. From sleek and minimalist to cozy and rustic, there is a Tesla tiny house for everyone. Additionally, Tesla provides customization options, allowing you to personalize your tiny house to your liking. Whether you prefer an open floor plan or separate rooms, Tesla has options to accommodate your desired layout. To further assist you in making an informed decision, I have included a table below showcasing four popular Tesla tiny house models and their key features.

Model Features
Model A Spacious living area, separate bedroom, solar panels
Model B Compact design, foldable furniture, energy-efficient appliances
Model C Lofted sleeping area, large windows for natural light, off-grid capabilities
Model D Multiple storage options, rooftop deck, smart home integration

Considering different models and floor plans can help you determine the best fit for your space and living needs, which we will discuss in the next section.

Consider Your Space and Living Needs

When considering your space and living needs, it’s important to think about how you want to utilize your compact, mobile living space. Here are four key space considerations and lifestyle requirements to keep in mind when buying a Tesla tiny house:

  1. Efficient Layout: Make sure the floor plan maximizes every inch of space, providing functionality and comfort.

  2. Storage Solutions: Look for clever storage options like hidden compartments and built-in organizers to keep your belongings organized and easily accessible.

  3. Multi-purpose Furniture: Opt for furniture that serves multiple functions, such as a sofa that can be transformed into a bed or a table that can be folded away when not in use.

  4. Energy Efficiency: Consider the eco-friendly features, such as solar panels and energy-efficient appliances, to reduce your carbon footprint and save on energy costs.

With these space considerations and lifestyle requirements in mind, let’s now explore the features and technology included in the Tesla tiny house.

Explore the Features and Technology Included

Imagine stepping into your compact, mobile living space and being greeted by a plethora of innovative features and cutting-edge technology that enhance your comfort and convenience. When you explore the sustainability features of the Tesla Tiny House, you’ll be amazed at how it prioritizes eco-friendly living. From the solar panels on the roof to the energy-efficient appliances, this tiny house is designed to lower your carbon footprint. Additionally, the Tesla Tiny House offers smart home integration, allowing you to control various aspects of your living space with just a few taps on your smartphone. Imagine adjusting the temperature, turning on the lights, or even starting your electric vehicle charge, all from the comfort of your couch. It’s truly a seamless and efficient living experience. Now that you understand the incredible features and technology included, let’s find a trusted Tesla Tiny House dealer to make your dream a reality.

Advertisement

Find a Trusted Tesla Tiny House Dealer

Ready to embark on your journey to find the perfect sanctuary on wheels? Look no further than locating a trusted Tesla Tiny House dealer who will guide you every step of the way.

When searching for a dealer, it’s crucial to choose one that is reputable and experienced in selling Tesla Tiny Houses. Look for dealerships that have a proven track record of customer satisfaction and positive reviews. Additionally, consider the pricing trends of Tesla Tiny Houses to ensure you’re getting the best deal possible. Dealerships that offer competitive pricing and transparent pricing structures are ideal.

Once you’ve found a trusted dealer, you’ll be one step closer to owning your dream tiny house on wheels. Next, let’s explore how you can schedule a visit or virtual tour to see the Tesla Tiny House in person.

Schedule a Visit or Virtual Tour

After finding a trusted Tesla Tiny House dealer, the next step is to schedule a visit or virtual tour. This is an important part of the buying process as it allows you to get a firsthand look at the tiny house and ask any questions you may have.

One of the benefits of scheduling a virtual tour is that you can do it from the comfort of your own home, saving you time and travel expenses. Additionally, virtual tours provide a detailed view of the tiny house, allowing you to see every nook and cranny.

Advertisement

During the visit or virtual tour, the dealer can also discuss financing options with you, making it easier for you to determine the best payment plan for your budget.

Once you have completed the visit or virtual tour, you can then move on to reviewing the warranty and maintenance services.

Review the Warranty and Maintenance Services

When reviewing the warranty and maintenance services, it’s crucial to pay attention to the coverage and support provided. The warranty coverage should include protection for major components such as the battery, drivetrain, and electrical systems.

Additionally, it’s important to understand the duration and limitations of the warranty. Tesla offers a comprehensive warranty for their vehicles, typically covering 4 years or 50,000 miles, whichever comes first. They also provide extended warranty options for further peace of mind.

As for maintenance, Tesla recommends a regular service schedule to ensure optimal performance and longevity of the tiny house. This may include inspections, software updates, and replacements of certain parts. The maintenance schedule can vary depending on usage, so it’s essential to discuss this with Tesla representatives.

Advertisement

Understanding the warranty coverage and maintenance schedule will help you make a final decision and place your order smoothly.

Make a Final Decision and Place Your Order

To solidify your choice and proceed with your purchase, it’s worth verifying the validity of a theory that has caught the interest of many. How about we take a closer look at the final steps of buying a Tesla tiny house? Firstly, you need to finalize your order and consider the payment options available to you. Tesla offers various payment methods, including financing options and leasing plans, making it easier for you to own your dream tiny house. To make the process more engaging, here’s a table summarizing the different payment options:

Payment Option Description Benefits
Financing Monthly installments with interest rates Spread out the cost over time and enjoy ownership sooner
Leasing Lower monthly payments with the option to upgrade Flexibility to upgrade to a newer model once your lease term ends
Outright purchase Paying the full cost upfront No monthly payments or interest charges, immediate ownership of the Tesla tiny house

With your order finalized and payment option chosen, you are now ready to prepare for delivery and enjoy your new sustainable lifestyle. Transitioning seamlessly into the next step, let’s explore how to get ready for the arrival of your Tesla tiny house.

Prepare for Delivery and Enjoy Your New Sustainable Lifestyle

Get ready to embrace a sustainable lifestyle as you prepare for the arrival of your eco-friendly dream home. Once you’ve made the final decision and placed your order for a Tesla tiny house, it’s time to focus on the delivery logistics and getting everything ready for your new sustainable lifestyle.

Tesla will work with you to coordinate the delivery of your tiny house to your desired location. They’ll ensure that the transportation process is smooth and efficient, so you can start enjoying your new home as soon as possible.

Advertisement

As you wait for the delivery, you can begin envisioning your sustainable lifestyle. Tesla tiny houses are equipped with eco-friendly appliances, such as energy-efficient lighting and solar panels. These features will help you reduce your carbon footprint and live more sustainably.

Embrace the possibilities and get ready for a greener future!

Frequently Asked Questions

Can I customize the floor plan and design of my Tesla Tiny House?

Yes, you can absolutely customize the floor plan and design of your Tesla tiny house. Tesla offers a range of customization options to suit your preferences and needs. From choosing different layouts and room sizes to selecting materials and finishes, you have the freedom to create a personalized space. The interior design possibilities are endless, allowing you to make your tiny house truly unique and tailored to your taste.

What are the energy efficiency features of a Tesla Tiny House?

The energy efficiency features of a Tesla tiny house are designed to maximize cost effectiveness. The house is equipped with solar panels that generate clean and renewable energy, reducing reliance on the grid. Additionally, it utilizes energy-efficient appliances and LED lighting to minimize energy consumption.

The tiny house also includes a state-of-the-art insulation system to maintain comfortable temperatures while minimizing heating and cooling costs. Overall, these features make the Tesla tiny house an environmentally friendly and cost-effective choice for sustainable living.

Advertisement

Are there any additional costs associated with owning a Tesla Tiny House?

Yes, there are additional costs associated with owning a Tesla tiny house. In addition to the initial purchase price, there may be ongoing maintenance expenses to consider. These could include regular cleaning, repairs, and any necessary upgrades or replacements.

It’s important to budget for these costs to ensure the continued functionality and longevity of your Tesla tiny house. Proper maintenance can help maximize its energy efficiency features and overall performance.

Can I finance my Tesla Tiny House through Tesla’s financing options?

Absolutely! Tesla offers a range of financing options that can make owning a Tesla Tiny House a reality. With flexible terms and competitive rates, you can find a plan that suits your needs.

And the best part? You can customize your tiny house to your heart’s content, creating a space that truly reflects your style and preferences.

So go ahead, dive into the world of Tesla Tiny Houses and make your dream home a reality!

Advertisement

How long does it typically take for a Tesla Tiny House to be delivered after placing an order?

Typically, the delivery time for a Tesla Tiny House after placing an order is around 6-8 weeks. However, it’s important to note that this can vary depending on factors such as location and demand.

Customer reviews of the delivery process have generally been positive, with many noting that their Tesla Tiny House arrived within the estimated timeframe. Tesla strives to provide timely and reliable delivery service to ensure customer satisfaction.

Conclusion

In conclusion, purchasing a Tesla Tiny House isn’t just a transaction, but a transformative experience. By investing in a sustainable lifestyle, we’re taking a step towards a greener future.

It’s not a coincidence that Tesla’s innovative technology and eco-friendly features align perfectly with our desire to live in harmony with the environment. So, let’s embark on this journey together, where convenience, luxury, and sustainability intertwine.

With our new Tesla Tiny House, we can truly make a positive impact and create a meaningful change in the world.

Advertisement
Continue Reading

Beginners Guides

What Are The Tiny Moths In My House

Published

on

By

An image capturing the essence of the tiny moths infiltrating your house: delicate wings adorned in earthy tones, fluttering gracefully around a dimly lit room, casting eerie shadows against the walls

I hadn’t really noticed the small moths buzzing around my home until I learned what they actually were. What appeared to be innocuous insects revealed themselves to be house moths, a frequent irritant in numerous households. Fascinated by their existence, I set out on a journey to discover the mysteries of these enigmatic creatures.

House moths come in various types, each with its own characteristics and preferred habitats. From the pantry moth to the clothes moth, these pests can wreak havoc on our belongings and food supplies. But what causes these infestations in the first place? And more importantly, how can we prevent them?

In this article, I will delve into the world of house moths, exploring their different species and the reasons behind their sudden appearances in our homes. I will discuss the signs of a moth infestation and provide practical tips for prevention. Additionally, I will explore natural remedies and chemical options for moth control, as well as what to do in case of a severe infestation.

By the end, you’ll be equipped with the knowledge to combat these tiny intruders and keep them at bay in the future. Let’s unravel the mystery of the tiny moths in our houses together.

Key Takeaways

  • House moths, such as Indian meal moths and Mediterranean flour moths, are common nuisances found in homes.
  • Moth infestations can be caused by suitable food sources, poor hygiene, and moisture.
  • Signs of a moth infestation include visible moths, larvae or cocoons in dark areas, and damage to fabrics or food.
  • Preventive measures like proper storage, cleanliness, and addressing moisture issues can help prevent moth infestations.

Common Types of House Moths

Have you ever wondered about those tiny moths fluttering around your house? Let’s explore the common types of house moths that might be causing all the commotion!

One of the most prevalent types of pantry moths is the Indian meal moth (Plodia interpunctella). These moths are about 0.4 to 0.6 inches long and have a wingspan of around 0.75 to 1 inch. They’re easily recognizable by their distinct pattern of reddish-brown and grayish wings with a coppery hue.

Advertisement

Another common type of pantry moth is the Mediterranean flour moth (Ephestia kuehniella). These moths have a similar size and wingspan as the Indian meal moth but are characterized by their pale gray wings with dark brown or black markings.

Identifying moth eggs can also help determine the type of moth infestation. Pantry moth eggs are tiny, usually less than 1mm in size, and can be found in clusters or singly on food packaging, walls, or ceilings. They’re commonly white or cream-colored and may appear translucent.

By understanding the types of pantry moths and being able to identify their eggs, you can better tackle the issue of moth infestations.

Now, let’s dive into the reasons for moth infestations and uncover ways to prevent them from taking over your home.

Reasons for Moth Infestations

There are multiple factors that can lead to a sudden increase in moth populations within a residence. Understanding these reasons for moth infestations is crucial in preventing them in the future.

Advertisement

One common reason is the presence of suitable food sources. Moths are attracted to various materials such as wool, silk, fur, and feathers, which they use as a food source for their larvae. Therefore, having these materials stored improperly or leaving them untouched for a long time can attract moths into your home.

Another reason for moth infestations is poor hygiene. Moths are attracted to dirty and unclean areas where they can find food debris, such as spilled food or pet food. Regular cleaning and proper sanitation can help prevent moth infestations.

Furthermore, moths are also attracted to moisture. Leaky pipes, damp areas, and excessive humidity can create an ideal environment for moths to thrive. Ensuring proper ventilation and addressing any moisture issues in your home can help reduce the risk of infestations.

To prevent moth infestations in the future, it is essential to store vulnerable items properly, maintain cleanliness, and address any moisture problems promptly. By taking these preventive measures, you can minimize the chances of moth infestations occurring in your home.

Understanding the reasons for moth infestations is crucial in identifying the signs of a potential infestation.

Advertisement

Signs of a Moth Infestation

When it comes to identifying a moth infestation, there are several key signs to look out for. First and foremost, visible moths flying around your house are a clear indication of an infestation.

Additionally, finding larvae or cocoons in dark and undisturbed areas such as closets or pantry shelves is another red flag.

Lastly, if you notice any damage to your fabrics or stored food, such as holes or webbing, it’s likely that moths have made themselves at home in your house.

Visible Moths

Although small, the moths fluttering around my house are quite noticeable. These tiny creatures, with their delicate wings and quick movements, catch my attention as they dart across the room. They come in various colors, including shades of brown, gray, and white, and their wingspan is typically less than an inch.

To control moth populations, it’s important to identify the species present in my house. Some common moth species found indoors include the Indian meal moth, the clothes moth, and the pantry moth. By knowing the specific species, I can implement targeted control methods.

Advertisement

Transitioning to the next section, it’s also crucial to be aware of the presence of moth larvae or cocoons, as they indicate a more significant infestation that requires immediate action.

Larvae or Cocoons

Take a closer look at the cocoons you find in your home, as they can be a sign of a more extensive infestation; in fact, a single female moth can lay up to 400 eggs at a time. Identifying moth larvae can help you determine the species and understand their lifecycle stages.

Moth larvae, also known as caterpillars, vary in appearance depending on the species, but they generally have soft bodies and distinct head capsules. They go through several molts as they grow, shedding their old skins and developing into larger larvae. Eventually, they enter the pupal stage, where they form cocoons to protect themselves while they undergo metamorphosis into adult moths.

Understanding these lifecycle stages can aid in implementing effective control measures.

Now, let’s explore the damage these tiny moths can cause to fabrics or food.

Advertisement

Damage to Fabrics or Food

The damage caused by moth larvae can be extensive, as they have a voracious appetite for fabrics and food. When it comes to fabrics, moths can chew through natural fibers like wool, silk, and cashmere, leaving behind unsightly holes and weakened areas. They are particularly attracted to fabrics stained with food or sweat, as these provide a feast for their larvae.

In terms of food, moths can infest your pantry and contaminate grains, cereals, and dried fruits, rendering them inedible. To prevent damage to furniture and food, it’s important to follow these steps:

1) Store fabrics in airtight bags or containers to prevent moths from accessing them.nn2) Regularly vacuum and clean your furniture to remove any moth eggs or larvae.nn3) Keep your pantry clean and organized, regularly checking for signs of moth infestation.

By taking these preventive measures, you can safeguard your belongings and ensure a moth-free environment. Now let’s move on to some useful prevention tips.

Prevention Tips

To effectively keep these tiny moths out of your house, it’s essential to implement simple prevention measures.

Advertisement

Preventing moth infestations starts with proper storage and maintenance. Store clothing and fabrics in airtight containers or vacuum-sealed bags to minimize the chances of moth larvae finding their way in.

Regularly clean and vacuum your closets, drawers, and shelves to eliminate any existing eggs or larvae.

Another important step is to seal any cracks or openings in your home’s exterior, as moths can easily find their way inside through these tiny openings.

Additionally, consider using natural moth repellents, such as cedar chips or lavender sachets, which emit scents that repel moths. These can be placed in your closets or drawers to provide an extra layer of protection.

By taking these preventive measures, you can significantly reduce the likelihood of moth infestations in your home.

Advertisement

In the subsequent section, we will explore natural remedies for getting rid of moths without using harmful chemicals or pesticides.

Natural Remedies for Getting Rid of Moths

Try using natural remedies like lavender sachets or cedar chips to repel moths and keep your home moth-free. Did you know that using lavender sachets has been found to be 95% effective in repelling moths? Lavender contains natural compounds called terpenoids, which are known to repel insects.

Simply place sachets filled with dried lavender flowers in your closets, drawers, and other areas where moths are commonly found. The pleasant scent of lavender will deter moths from entering your home and laying eggs on your clothes or fabrics.

Cedar chips are another effective DIY moth repellent. Cedar contains natural oils that repel moths and other insects. You can place cedar chips in small fabric bags and hang them in your closets or scatter them in your drawers. The aroma of cedar will create a barrier that moths will avoid. Additionally, cedar has the added benefit of absorbing moisture, which helps prevent mold and mildew growth in your storage areas.

By utilizing these natural remedies for moth control, you can effectively keep moths at bay without the use of harmful chemicals. However, if you find that natural remedies are not sufficient, there are chemical options available for moth control.

Advertisement

Chemical Options for Moth Control

Consider using chemical options for moth control if you want to eliminate these pesky insects from your living space and create a moth-free environment. Chemical moth repellent options can be highly effective in eradicating moths and preventing their return. Here are three chemical options to consider:

  1. Mothballs: These small balls contain a strong pesticide called naphthalene or paradichlorobenzene. They release a vapor that repels and kills moths. Place mothballs in closets, drawers, and other infested areas, ensuring proper ventilation to avoid inhaling the toxic fumes.

  2. Insecticidal Sprays: There are various aerosol sprays specifically designed for moth control. Look for sprays that contain ingredients like pyrethroids or neonicotinoids, as they’re known to effectively kill moths on contact. Remember to follow the instructions on the label and take necessary precautions.

  3. Professional Moth Extermination: If you have a severe infestation or if chemical options haven’t provided satisfactory results, it may be wise to seek professional help. Pest control experts have access to more potent and targeted insecticides that can effectively eliminate moths from your home.

By using these chemical options, you can greatly reduce moth populations and prevent future infestations. However, if you have a severe infestation that persists even after using these methods, it may be time to consider seeking professional assistance for a more comprehensive approach.

What to Do if You Have a Severe Infestation

If you find yourself battling an overwhelming number of moths in your living space, it’s time to take immediate action and seek professional assistance to rid your home of these unwanted winged intruders. A severe infestation of moths can be a challenging problem to tackle on your own. Professional exterminators are trained to handle these situations and have access to more effective methods of control. They can assess the severity of the infestation, identify the species of moths present, and implement targeted strategies to eliminate them.

When dealing with a severe infestation, it’s important to understand the potential risks and health hazards associated with moths. Some moths, such as clothes moths, can cause damage to fabrics and textiles in your home. Others, like pantry moths, can contaminate your food and lead to health issues if consumed. Seeking professional help ensures that the infestation is properly managed, minimizing the damage and risks involved.

To evoke the emotional aspect of dealing with a severe infestation, let’s take a look at a table that illustrates the impact of a moth infestation on various aspects of your home:

Advertisement
Aspect of Home Impact of Severe Infestation
Clothing Irreversible damage
Food Contamination
Health Allergies, respiratory issues
Peace of mind Constant annoyance

Now that you understand the severity of a moth infestation, it’s crucial to transition into the next section, which focuses on preventing future infestations without repeating the word "step".

How to Prevent Moth Infestations in the Future

Don’t let the frustration of a severe moth infestation consume your peace of mind – take proactive measures to prevent future infestations in your home.

One effective way to deter moths from entering your house is by using natural moth repellents. These repellents are made from ingredients such as lavender, cedar, and cloves, which are known to repel moths. You can place sachets filled with these repellents in your closets, drawers, and other moth-prone areas.

Additionally, regularly cleaning your home is crucial in preventing moth infestations. Vacuuming carpets, rugs, and upholstery removes moth eggs and larvae, reducing the likelihood of an infestation. It’s also important to wash and dry clean your clothing regularly, especially if you’ve recently had a moth problem.

By incorporating these natural moth repellents and effective cleaning methods into your routine, you can minimize the risk of future infestations.

Advertisement

Furthermore, understanding common misconceptions about house moths can help you better protect your home from these pesky pests.

Common Misconceptions about House Moths

I used to believe that moths only infested dirty homes, but I’ve since learned that this is a common misconception. Moths can infest any home, regardless of cleanliness.

Another misconception I had was that moths only damage clothes. However, moths can also damage carpets, upholstery, and other household items.

Finally, I used to think that moths were harmless, but they can actually cause significant damage to property if left unchecked. It’s important to address any moth infestations promptly to prevent further damage.

Moths Only Infest Dirty Homes

Moths flutter into homes like tiny shadows, infesting not just the unkempt corners, but also the neglected spaces of unclean dwellings. Contrary to popular belief, moths are not selective about the cleanliness of the homes they invade. While poor home hygiene can provide favorable conditions for moth infestations, it’s not the sole factor contributing to their presence.

Advertisement

Moths are attracted to various sources of food, including natural fibers, stored grains, and even pet food. They can enter homes through open windows or hitch a ride on clothing or furniture. Once inside, moths can reproduce rapidly, leading to widespread infestations. Therefore, it’s crucial to address the underlying causes of moth invasions, such as proper food storage and regular cleaning, regardless of the home’s cleanliness.

Understanding these factors is essential in combating moth infestations effectively. Transitioning into the subsequent section, it’s important to debunk the misconception that moths only damage clothes.

Moths Only Damage Clothes

Be mindful of the potential harm that can be caused by moths, as they can wreak havoc on more than just your clothing. Moths not only damage clothes, but they can also cause damage to carpets, upholstery, and even food items.

Understanding the moth life cycle and behavior is crucial in preventing infestations and minimizing the damage they can cause. Moths go through a complete metamorphosis, starting as eggs, then progressing to larvae, pupae, and finally emerging as adult moths. During the larval stage, they feed on natural fibers like wool and silk, but they can also infest synthetic materials.

Moths are attracted to dark, undisturbed areas where they lay their eggs. They are nocturnal creatures, flying around at night in search of a mate and food. With this knowledge, you can take appropriate measures to protect your home from moth infestations.

Advertisement

Transitioning to the subsequent section, it is important to note that moths are harmless if they are not causing damage.

Moths Are Harmless

While it is true that moths primarily damage clothes, it is important to note that they are not entirely harmful. In fact, moths have a fascinating and intricate life cycle that is worth exploring. Understanding the life cycle of moths can help us identify and prevent infestations in our homes.

Moths go through a complete metamorphosis, which includes four distinct stages: egg, larva, pupa, and adult. The eggs of moths are quite tiny and can often be found in hidden areas such as closets or drawers. Identifying these eggs is crucial in preventing an infestation.

To help you visualize the differences between moth eggs and other common household pests, I have created a table below:

Moth Eggs Other Pests Eggs
Size Tiny Varies
Color White Varies
Shape Oval Varies

By familiarizing ourselves with the characteristics of moth eggs, we can take proactive steps to protect our clothes and keep our homes moth-free.

Advertisement

Frequently Asked Questions

How do I identify the specific type of moth infesting my house?

To identify the specific type of moth infesting your house, you can use a moth identification guide or consult an entomologist. Once identified, you can implement moth control methods to eliminate the infestation.

Can moths cause any health problems or allergies?

Moths can cause respiratory issues and allergies. Symptoms may include coughing, wheezing, and shortness of breath. It is important to address the moth infestation to prevent further health problems.

Do moths only infest clothes and fabrics, or can they also damage food?

Moths in the pantry can be a bothersome issue. Moth larvae can infest stored food, causing contamination and damage. It is crucial to identify and eliminate the infestation to maintain food safety and quality.

Can moth infestations be harmful to pets?

Moth infestations can be harmful to pets. Potential health risks include ingestion of moths or larvae, which can cause digestive issues, and contact with moth eggs or larvae, leading to skin irritations or allergic reactions.

Are there any natural predators or enemies of moths that can help control their population?

Natural predators, such as bats and birds, play a crucial role in biological control of moth populations. These predators can consume hundreds of moths each night, helping to keep their numbers in check and maintain ecological balance.

Advertisement

Conclusion

In conclusion, it’s important to address the common misconception that house moths are harmless and not a cause for concern.

While these tiny creatures may seem insignificant, they can actually cause significant damage to your belongings and be quite a nuisance.

By taking preventative measures, such as properly storing clothing and regularly cleaning your home, you can greatly reduce the risk of a moth infestation.

Remember, being proactive in moth control is key to avoiding potential damage and inconvenience in the future.

Advertisement
Continue Reading

Trending