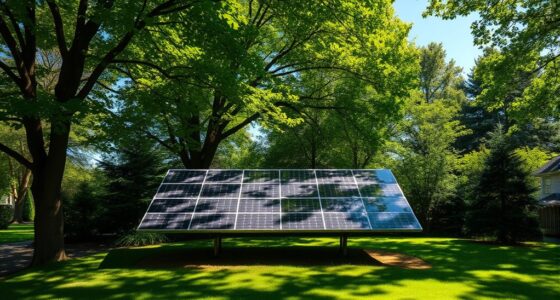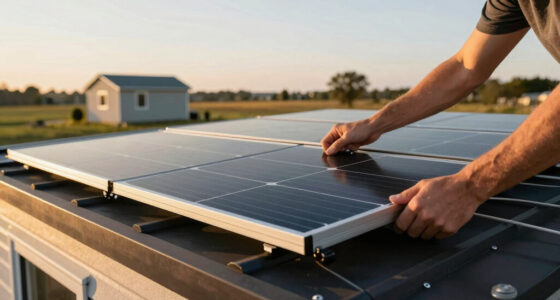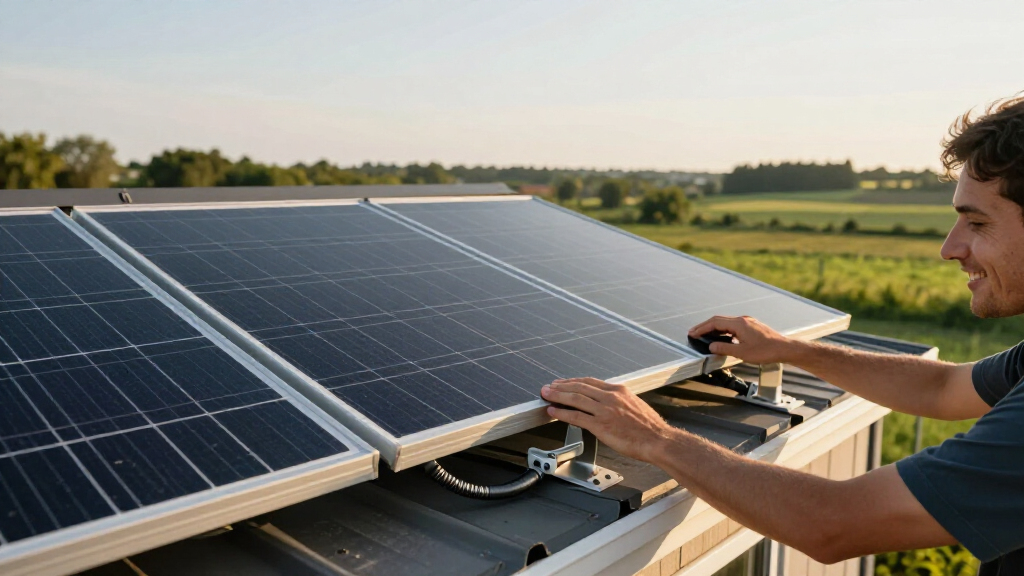

This guide walks you through installing a compact solar panel kit — typically a 100W to 400W panel or panel pair, a charge controller, a 12V battery, and optionally a small inverter — for an RV, van, shed, boat, or backup power setup. By the end, you will have a working system that charges your battery during daylight and safely powers your devices. The guide assumes no prior solar experience: every wiring connection, mounting step, and safety check is spelled out. Plan on two to four hours for the physical installation, plus time beforehand to choose a mounting location and confirm your kit’s components are compatible with each other. All electrical work here is low-voltage DC (12V), which is safe to handle if you follow the connection order described in the steps.

Get compact home essentials delivered free with Prime
- Fast, free delivery on millions of items
- Prime Video, Amazon Music and more included
- Member-only deals all year

FlexSolar 100W Foldable Portable Solar Panel Charger, IP67 Waterproof
- ✔ Maximum Power: 100 W
- ✔ Weight: 4.1 lbs (1.85 kg)
- ✔ Folded Dimensions: 12.99 x 10.43 x 2.17 in

FlexSolar 36W Ultra-Portable Lightweight Solar Panel Charger
- ✔ Power Output: 36W
- ✔ Weight: 1.7 lbs
- ✔ Folded Size: 7.7 x 5.1

SOKIOVOLA 100W Portable Foldable Solar Panel Charger Kit, 18V, MC-4, IP68 Waterproof
- ✔ Power Output: 100W
- ✔ Voltage: 18V
- ✔ Folded Size: 14.69 x 8.67 x 1.78 in
Difficulty: Beginner | Time: 2-4 hours (plus site planning)
What You’ll Need
Tools & Materials:
- Compact solar panel kit (panels, charge controller, MC4 cables)
- 12V deep-cycle battery (AGM, flooded lead-acid, or LiFePO4)
- MC4 connector crimping tool or pre-made extension cables
- Wire strippers and crimper
- Multimeter or voltmeter
- Appropriate gauge wire (typically 10 AWG for panel runs, 12 AWG for controller-to-battery)
- MC4 inline fuse or blade fuse holder with 15-30A fuse
- Mounting hardware: Z-brackets, screws, or roof sealant
- Drill with driver bits, socket or adjustable wrench
- Battery terminal connectors (ring lugs)
- Cable ties or adhesive cable clips
Knowledge:
- Basic ability to use a drill and multimeter
- Understanding that panel positive connects to controller positive (polarity matters)
- Awareness that batteries should never be short-circuited across terminals
Before buying or starting, verify three compatibility points: (1) the charge controller’s voltage rating matches your battery type — many controllers have a switch or menu setting for AGM vs. lithium; (2) the controller’s amperage rating exceeds your panel’s short-circuit current (Isc) with 25% headroom; (3) if you add an inverter, its wattage stays within what your battery can deliver. If you plan to expand the system later, buy an MPPT controller rated for the future panel wattage, not just the current panels.
FlexSolar 100W Foldable Portable Solar Panel Charger, IP67 Waterproof
<p>The <strong>FlexSolar 100W foldable panel</strong> stands out for its combination of high efficiency, weatherproof design, and versatile outputs. Its monocrystalline cells achieve over 23% efficiency, translating to reliable power even in less-than-ideal sunlight. The panel’s <strong>IP67 waterproof and dustproof rating</strong> ensures durability in outdoor conditions, and its foldable form makes it portable—though it does require a fair amount of space when fully unfolded. Compared with the other options, it offers the highest power output and flexibility for charging phones, power banks, or small power stations, but its size and weight make it less ideal for ultra-light backpacking or minimal setups.</p>
Pros:
- High-efficiency monocrystalline cells for better power output
- Weatherproof IP67 rating protects against dust and water
- Multiple outputs including USB-C, USB-A, and DC for versatile device charging
Cons:
- Relatively heavy and larger when unfolded, affecting portability
- No built-in battery storage, relies on external batteries or devices
- Performance varies with sunlight conditions
Best for: Outdoor enthusiasts needing reliable, high-efficiency portable power on the go
Not ideal for: Hikers or minimalists seeking the lightest possible gear or those with limited storage space
Bottom line: Ideal for those needing a reliable, durable, and portable high-power solar panel, with some tradeoff in size and weight.
“Ideal for those needing a reliable, durable, and portable high-power solar panel, with some tradeoff in size and weight.”
FlexSolar 36W Ultra-Portable Lightweight Solar Panel Charger
<p>The <strong>FlexSolar 36W panel</strong> is designed for hikers, campers, and emergency prep, emphasizing <strong>portability and ease of transport</strong>. Its ultra-lightweight design at just 1.7 lbs makes it perfect for backpacking and quick setups. While it supports multiple outputs and features MPPT technology for improved efficiency, it offers only 36W, limiting its ability to meet higher power demands. Its <strong>IP67-rated, triple-layer construction</strong> provides excellent durability in dusty or wet conditions, but it lacks a built-in battery—so you’ll need to pair it with a power bank for storage. This makes it less suitable for those seeking standalone power solutions or larger setups.</p>
Pros:
- Extremely lightweight and compact for portability
- Supports multiple output types including USB-C and USB-A
- Durable construction with triple-layer IP67 waterproofing
Cons:
- Limited power output for larger devices or multiple devices simultaneously
- No built-in battery or energy storage
- Dependent on sunlight conditions for optimal performance
Best for: Hikers, backpackers, or outdoor adventurers needing a compact, lightweight solar panel for small devices
Not ideal for: Users with high power needs or those wanting integrated battery storage for extended use
Bottom line: Best suited for lightweight, emergency, or occasional outdoor use where portability is paramount, but limited in power capacity.
“Best suited for lightweight, emergency, or occasional outdoor use where portability is paramount, but limited in power capacity.”
SOKIOVOLA 100W Portable Foldable Solar Panel Charger Kit, 18V, MC-4, IP68 Waterproof
<p>The <strong>SOKIOVOLA 100W foldable panel</strong> is tailored for campers, RV travelers, and outdoor adventurers who need a <strong>durable, high-capacity solar solution</strong>. Its <strong>IP68 waterproof rating and ETFE surface</strong> withstand harsh weather, and its broad compatibility via the 4-in-1 MC-4 cable makes it versatile for use with most portable power stations. Weighing 4.6 lbs, it offers a good balance between portability and power, but its size and weight can be a consideration for ultra-light backpackers. Keep in mind that the actual charging capacity depends on connected power stations’ input limits, so it’s best paired with larger or compatible systems for maximum benefit.</p>
Pros:
- High 100W power output for demanding setups
- IP68 waterproof and UV-resistant ETFE surface for durability
- Includes comprehensive accessories for compatibility and mounting
Cons:
- Relatively heavy and bulky for ultralight needs
- Dependent on compatible power stations for full power
- Requires optimal sunlight for best performance
Best for: RV owners, campers, or travelers seeking a rugged, high-power, versatile solar panel for mobile power stations
Not ideal for: Minimalist hikers or those with small, low-capacity devices needing only occasional charging
Bottom line: A top-tier choice for outdoor travelers needing robust power and durability, with some compromise on portability for weight-sensitive users.
“A top-tier choice for outdoor travelers needing robust power and durability, with some compromise on portability for weight-sensitive users.”
As an Amazon Associate we earn from qualifying purchases.
Before You Start
Do all planning and unpacking before touching wiring. Choose a mounting location for the panels that gets unobstructed sun from roughly 9 AM to 3 PM, faces south (in the northern hemisphere), and tilts toward the sun if possible. Check that no vents, air conditioners, or roof edges will shade the panels — even partial shading on one panel can cut output by half or more. Unpack the kit and lay out every component, matching it against the manual’s parts list, and read the charge controller manual for its specific wiring diagram and battery-type setting. Connection order matters and is the single most common cause of damaged controllers: always connect battery to controller first, panels last, and reverse the order when disconnecting.
Step-by-Step Instructions
Step 1: Mount the solar panels in your chosen location
Position the panels and mark the mounting hole locations with a pencil. If mounting to a roof (RV, van, shed), drill pilot holes, apply butyl sealant under each bracket foot, then fasten the Z-brackets with screws. Tighten until the sealant squeezes out slightly around the bracket base — that squeeze-out is what makes the seal waterproof. If the panels will be ground-mounted or portable, attach them to a frame or angled stand and confirm they cannot tip over or blow away. Leave at least 10 cm of clearance under roof-mounted panels so airflow can cool them; hot panels produce less power.
Tip: Test the spot before drilling: check the location at 10 AM, 1 PM, and 3 PM on a sunny day and confirm the area is fully in sun at all three times.
Check: Panels are rigid with no flex or rattle when pushed, bracket seals show squeezed-out sealant, and the panel face points toward the midday sun with no shading.
Step 2: Run the panel cables to the charge controller location
Route the MC4 cable pair from the panels to where the charge controller will sit, keeping the run as short and direct as possible. Where cables pass through a roof or wall, use a cable gland or grommet so the metal edge cannot cut the insulation. Secure the cables every 30 cm with cable ties or clips so they cannot flap, chafe, or snag. Label or note which cable is positive (typically the male MC4 connector) and which is negative. Do not connect the panels to the controller yet.
Tip: Cover the panel faces with a towel or cardboard while handling the cables. A panel in full sun is live and will spark if the bare connector ends touch.
Check: Cables reach the controller location with 30 cm of slack, are secured along their entire run, and pass through sealed, protected openings.
Step 3: Configure the charge controller for your battery type
Before any wiring, set the controller’s battery type. This is done with a physical switch, a jumper, or a menu button depending on the model. Select the setting matching your battery exactly: AGM, Gel, flooded lead-acid, or lithium (LiFePO4). Each battery chemistry needs different charging voltages, and the wrong setting will either undercharge the battery (shortening run time) or overcharge it (destroying it or, for lithium, creating a safety hazard).
Tip: If the controller has no selectable battery type and you own a lithium battery, do not use that controller — buy one that supports LiFePO4.
Check: The display or switch shows the correct battery type before any wire is connected.
Step 4: Connect the battery to the charge controller first
Install a blade fuse holder on the positive battery cable within 20 cm of the battery positive terminal — this fuse protects every wire downstream. Crimp ring lugs onto the battery-end of the wires and connect the controller’s battery terminals to the battery: negative to negative, positive to positive, and install the fuse only after both connections are made. Press the fuse in and check the controller display. The controller should power on and show a battery voltage, typically 12.5–13.5V for a healthy 12V battery.
Tip: Connect the fuse last so there is never a live unterminated wire near the battery terminals. Accidentally shorting a battery with a metal wrench can cause burns or an explosion.
Check: Controller display lights up and reads a battery voltage between roughly 12.0V and 13.8V with no error code.
Step 5: Connect the panels to the charge controller
With the panel faces covered or turned away from the sun, connect the panel cables to the controller’s PV (solar) input terminals, again matching polarity exactly. Positive PV wire goes to the controller’s PV+ terminal, negative to PV−. Then uncover the panels. Within a few seconds the controller should detect solar input — the display typically shows a solar/battery charging icon, a PV voltage, and a charging current.
Tip: Most controllers will display an error if PV polarity is reversed. Disconnect the battery fuse immediately, correct the wiring, and reconnect.
Check: In direct sunlight the controller shows PV voltage near or above 18V (for a 12V nominal panel) and a charging current greater than zero.
Step 6: Connect your loads and test the full system
Connect your DC loads (lights, fans, 12V outlets) to the controller’s load terminals if it has them, or to the battery through a fused distribution block. If using an inverter, connect it directly to the battery terminals with the gauge wire the inverter manual specifies — not to the controller’s load terminals — and give the inverter its own fuse. Turn on a load and confirm it runs, then check the controller display shows power flowing in from the panels and out to the load.
Tip: Test the whole system on a sunny day, not at dusk. Low-light testing gives misleadingly low readings and makes diagnosis harder.
Check: A test device runs continuously, the controller shows charging current during daylight, and no wires, connectors, or the controller become warm or hot to the touch.
Step 7: Verify performance over a full day
Let the system run a full sunny day and check the controller at midday and at sunset. At midday on a clear day with a 100W panel and a partially discharged battery, expect roughly 4–6A of charging current. At sunset, the battery voltage should have risen; a fully charged 12V lead-acid battery rests around 12.7–12.9V, and a LiFePO4 around 13.3–13.6V after charging stops. Record these numbers as your baseline for future comparison.
Tip: Note your daily amp-hour consumption. If the battery drains before the next morning, you either need more panel wattage or less load — measure before guessing.
Check: Midday charging current is within expected range, battery reaches full voltage by end of day, and the system repeats this pattern for several days.
Common Mistakes to Avoid
- Connecting the panels to the charge controller before the battery. — Always wire in this order: battery first, panels second, loads last. Many controllers are damaged or destroyed if PV power arrives with no battery reference. Disconnect in reverse order: loads, panels, then battery.
- Reversing polarity on the battery connection. — Wrap a strip of red tape on the positive wire and black on negative before starting, and double-check with a multimeter before each connection. Even a momentary reverse connection can destroy a controller instantly.
- Leaving the battery type at the controller’s default setting. — Set battery type as a deliberate step before wiring, and write the setting in your system notes. Defaults usually suit flooded lead-acid and will overcharge or undercharge other chemistries.
- Omitting fuses or installing them far from the battery. — Every positive wire leaving a battery terminal needs a fuse within 20 cm of the terminal. A shorted unfused battery wire can melt insulation and start a fire in seconds.
Troubleshooting
Problem: Controller shows zero PV voltage during daylight.
Solution: Check that the panel MC4 connectors are fully clicked together, verify PV polarity at the controller terminals with a multimeter, and confirm the panels are not covered or shaded. Measure directly across the panel cables: you should read 18–22V on a 12V panel in sun. If voltage is present at the panel but not at the controller, the cable run has a break.
Problem: Charging current is far lower than expected in full sun.
Solution: Check for partial shading — a single leaf, antenna, or vent shadow can halve output. Clean the panel face. Verify the battery is not already full (controllers taper current as the battery fills). Confirm wire gauge is adequate; undersized wire on a long run causes voltage drop and lost power.
Problem: Battery voltage drops to empty overnight despite daytime charging.
Solution: Add up your load wattage and hours of use to estimate daily amp-hours, and compare against panel output and battery capacity. If consumption exceeds production, reduce loads or add a panel. Also test the battery: a battery that will not hold above 12.4V at rest after a full day of charging is likely at end of life.
Problem: Inverter shuts off under load or wires get warm.
Solution: The battery bank cannot supply the inverter’s demand. Check that the inverter’s input wire gauge and length match the manual’s requirements, and that the battery is charged and healthy. Warm wires mean the gauge is too small or a connection is loose — disconnect and fix before continued use.
What Success Looks Like
Your installation is complete and correct when: the controller powers on and displays battery voltage with no error codes; PV voltage and charging current appear within seconds of uncovering the panels in daylight; midday charging current is roughly 4–6A per 100W of panel; the battery reaches its full resting voltage by sunset; test loads run continuously; all connections are sealed, fused, and cool to the touch; and this pattern repeats for three or more consecutive days. If any of these checks fails, work through the troubleshooting section before adding loads or expanding the system.
Next Steps
After a week of stable operation, keep a simple log of daily battery voltage and charging current — a sudden change is the earliest warning of a failing panel, battery, or connection. Re-check mounting hardware and seals every six months, and clean the panel faces monthly or after dusty weather. If your loads outgrow the system, expand by adding panels in series or parallel within the controller’s voltage and current limits, upgrade the controller and battery first if needed, and re-run your amp-hour calculations before buying. For systems above roughly 500W or any involving household AC wiring, bring in a licensed electrician for that portion of the work.
Frequently Asked Questions
What size compact solar kit do I need?
Estimate your daily consumption in watt-hours (device watts × hours used), divide by roughly 4–5 peak sun hours to get panel wattage, then pick a battery with at least that many usable watt-hours. A typical minimal setup — lights, phone charging, a small fan — runs on a 100W panel and a 100Ah battery.
Do I need an MPPT or PWM charge controller?
PWM controllers are cheaper and fine for small single-panel systems with matched voltage. MPPT controllers cost more but harvest 15–30% more power and are the right choice if you plan to add panels, use higher-voltage panel strings, or run in variable weather.
Can I leave the system connected permanently?
Yes. Once correctly configured, the controller manages charging automatically, including float maintenance. Just verify the battery type setting is right for your chemistry, since the controller will apply that charging profile indefinitely.
Can I connect two batteries or panels together?
Yes, if they are identical models, ages, and capacities. Match voltages: batteries in parallel keep 12V and add capacity; panels in series add voltage, panels in parallel add current. Confirm the total stays within the controller’s rated input voltage and current, and never mix old and new batteries in one bank.
Fall Picks
fall essentials
As an affiliate, we earn on qualifying purchases.