
Identifying non-load-bearing walls is key to making DIY remodels easier and safer. Look for interior walls that aren’t aligned with foundation posts or supported by beams—they’re often lightweight, framed with 2x4s, and less than 6 inches thick. Check blueprints or consult professionals if unsure. Removing or modifying these walls can open up space quickly, but always guarantee safety and compliance by understanding their location and purpose. Keep exploring to learn more about remodeling strategies and safety tips.
Key Takeaways
- Identify non-load bearing walls through blueprint review, visual inspection, and location relative to structural elements.
- Use lightweight materials like drywall and wood studs for easier removal and modifications.
- Confirm wall function with professional assessment before altering to ensure safety.
- Reinforce or remove walls with simple methods such as steel beams, carbon fiber strips, or temporary supports.
- Plan modifications around utilities and doorways to maximize flexibility in room layout.
Understanding Zero-Load Bearing Walls and Their Role
Have you ever wondered what makes some interior walls non-essential to a building’s structure? Zero-load bearing walls, also called non-load-bearing or partition walls, don’t support any of the building’s weight. Their main role is to divide spaces, offer privacy, and define functional areas inside your home. Since they don’t carry weight from roofs, floors, or upper stories, they aren’t critical to the building’s stability. Typically, you’ll find these walls made from lightweight materials like drywall, wood studs, or light steel framing. They’re common in both homes and commercial spaces, providing flexibility in layout. Removing or modifying them won’t affect your building’s structural integrity, making them ideal for renovations. Just keep in mind that some may contain utilities like wiring or pipes that need careful handling during changes. Proper identification of these walls is essential to ensure safe remodeling, especially when considering building codes and safety standards.
Identifying Non-Structural Walls in Your Home

To identify non-structural walls, start by examining their materials and framing; lighter 2×4 studs and single top plates usually indicate they aren’t load-bearing. Pay attention to their location and layout—interior walls that don’t align with basement beams or span multiple floors are likely non-structural. Additionally, look for structural clues like their orientation relative to floor joists and support elements to help distinguish them from bearing walls. Remember, load-bearing walls are crucial for supporting your home’s structure, so when in doubt, consulting a professional is always recommended.
Wall Material Types
Identifying non-structural walls in your home starts with understanding the materials used. Lightweight options like hollow concrete blocks and hollow bricks are common for non-load-bearing interior or exterior walls because they offer insulation and durability without supporting structural loads. Facade brick walls, made from strong clay bricks, are typically decorative exteriors that don’t bear weight. Hollow bricks are often used as partition walls, reducing weight while maintaining strength. Concrete masonry units (CMUs) are versatile and resist pests, frequently used for interior or exterior non-structural applications. Veneered brick walls are purely decorative facades, attached externally without supporting weight. Recognizing these materials helps determine which walls can be modified safely during your DIY remodel, especially since non-load bearing walls do not contribute to the structural integrity of the building and can typically be altered with less risk. Understanding the material composition of your walls can also help identify whether they are load-bearing or not, reducing the risk of structural issues during remodeling.
Location and Layout
Determining whether a wall is load-bearing often starts with its location and alignment within your home. You should consider these key clues:
- Central positioning: Walls near the home’s middle are more likely to support weight.
- Alignment with structural elements: Walls that line up with beams, joists, or foundation walls usually carry loads.
- Vertical consistency: Walls that align directly above foundation or footing walls indicate support roles.
- Position relative to house edges: Walls away from exterior walls and closer to the core tend to be load-bearing.
- Supporting structural integrity: Recognizing these patterns can help you identify load-bearing walls before considering any modifications.
- Consulting building plans: When in doubt, reviewing blueprints or architectural drawings can provide definitive information on wall functions.
Structural Indicators
How can you tell if a wall is non-structural just by examining it? Start by checking its thickness—non-load bearing walls are usually thinner than 6 inches and made from lightweight materials like 2×4 lumber. Look for visible supports; load-bearing walls often have columns or piers beneath them, while non-structural walls lack these supports. Observe the orientation; walls parallel to floor joists tend to be non-load bearing, especially if they’re interior partitions, whereas load-bearing walls typically run perpendicular or align under beams. Notice the presence of beams; if a wall supports a large beam, it’s likely load-bearing. Finally, examine the wall’s construction—single top plates and lighter framing materials suggest non-structural status. Additionally, checking the building plans or consulting a professional can provide definitive confirmation of whether a wall is load-bearing or not. You can also look for structural indicators, such as the types of fasteners or framing techniques used, to gain further insight.
Materials Commonly Used in Non-Load-Bearing Walls
When choosing materials for non-load-bearing walls, lightweight options like drywall and foam concrete make installation easier and faster. These materials are also budget-friendly, helping you save on costs while maintaining functionality. Plus, their simplicity allows for quick modifications if you decide to reconfigure your space later. Since they do not support any structural load, these materials can be easily removed or replaced without affecting the overall stability of the building. Additionally, selecting materials with durable finishes can enhance longevity and reduce maintenance needs over time.
Lightweight Construction Materials
Lightweight construction materials are essential for creating non-load-bearing walls that are easy to install, modify, and handle. They allow you to remodel with less effort and more flexibility. Here are four reasons why these materials empower you:
- Save Time—Materials like drywall and plywood go up quickly, so your project moves faster.
- Ease of Handling—Lightweight panels and framing reduce physical strain and simplify installation.
- Environmental Benefits—Many options, like fast-growing wood species and recyclable composites, lower ecological impact. Renewable raw materials contribute to sustainable building practices and reduce reliance on non-renewable resources.
- Design Flexibility—Materials such as fiberboard and composite panels support creative layouts and easy modifications. Using lightweight construction materials also minimizes the structural support needed, making your remodel safer and more adaptable.
Choosing the right lightweight materials makes your DIY remodel smoother, more sustainable, and adaptable to your evolving needs.
Cost-Effective Options Available
Choosing the right materials for non-load-bearing walls can substantially impact your project’s budget and timeline. Gypsum board, or drywall, is popular because it’s inexpensive, easy to install, and versatile—plus, moisture- and fire-resistant options are available. Metal studs offer durability, fire resistance, and recyclability, making them a cost-effective choice for commercial spaces. Wood studs provide a natural look, are budget-friendly, and easy to work with, ideal for residential projects. Hollow concrete blocks and bricks deliver insulation, lightweight handling, and simple installation, reducing energy costs over time. These materials are generally lighter and cheaper than load-bearing options, helping you save on both materials and labor. Prefabricated components further cut costs by minimizing onsite work and waste, making your remodel more efficient and affordable. Additionally, understanding the structural role of walls helps you select appropriate materials that meet safety standards while remaining budget-conscious.
Ease of Modification
Materials used in non-load-bearing walls are designed to facilitate easy modifications, making renovation and reconfiguration simpler and faster. You’ll find that these materials support your DIY projects by allowing quick changes without extensive effort.
- Drywall: Easily cut, removed, or replaced with minimal tools, perfect for quick updates.
- Wood and metal studs: Enable you to reposition walls or create new openings effortlessly.
- Lightweight materials like hollow bricks or blocks: Cut down labor time and simplify adjustments.
- Embedded utilities: Wiring and plumbing can be added or moved within cavities, reducing surface damage.
Because these walls only support their own weight, modifications won’t threaten your building’s stability. This flexibility makes DIY remodels safer and more approachable.
Placement Strategies for Flexible Room Design

Effective placement of non-load-bearing walls is key to creating flexible room designs that can adapt to your evolving needs. By strategically positioning these walls near doorways or corridors, you can define zones without obstructing flow or natural light. Using partial walls or openings like archways visually connects spaces while maintaining necessary divisions, making layouts more adaptable. Placing walls to accommodate electrical and plumbing access allows for easy future upgrades without major disruptions. Choose lightweight materials like drywall or gypsum board for easy modifications and added sound insulation. Incorporate movable partitions or partial walls to support dynamic usage, whether for privacy or open-concept areas. Planning for future changes guarantees your space remains versatile, functional, and aesthetically pleasing over time. Additionally, understanding cookie categories can help you optimize your space planning with smart technology integrations that enhance convenience and privacy.
Safety Tips When Modifying or Removing Walls

Modifying or removing walls can substantially impact your building’s safety, so it’s crucial to follow proper safety protocols at every stage.
- Secure the area—prevent unauthorized access to avoid accidents.
- Use PPE—wear hard hats, gloves, eye protection, and dust masks.
- Disconnect utilities—shut off electricity and water to prevent shocks or leaks.
- Install temporary supports—structural engineers should determine the placement to prevent collapse. Proper planning and professional guidance are essential to ensure the integrity of the structure during the project. Additionally, understanding load-bearing walls and their role can help you make informed decisions during the remodel.
Always monitor for signs of instability, such as cracks or sagging, and get professional inspections after removal. Staying vigilant and following these safety tips reduces risks, protects your safety, and ensures your remodel remains sound. Prioritize safety to enjoy your renovation without preventable accidents.
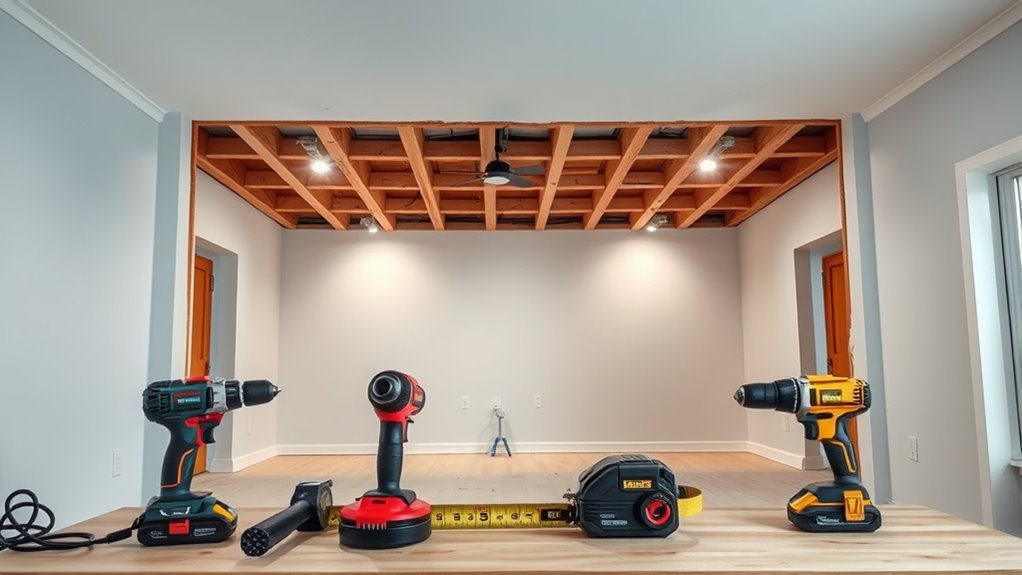
Tools and Techniques for DIY Wall Adjustments
To successfully modify or remove walls, you need the right tools like a reciprocating saw, drill, and level to guarantee accuracy and safety. Using proper techniques for removing drywall and supporting structures helps prevent accidents and damage. Reinforcing your work with the appropriate materials guarantees stability and long-lasting results. Understanding the importance of identifying load-bearing walls ensures that you approach each project with the proper precautions and supports in place.
Essential Tools Needed
When working on DIY wall adjustments, having the right tools is essential for safety and precision. You’ll want reliable equipment to make cuts, remove drywall, and handle framing smoothly. Here are four must-have tools to get started:
- Reciprocating Saw – Powers through studs and drywall quickly, saving time and effort.
- Utility Knife – Perfect for scoring drywall and making accurate cuts.
- Sledge Hammer – Provides the force needed to break down wall sections safely.
- Drill – Essential for drilling pilot holes and making precise cuts or attachments. Proper tools help prevent structural damage and ensure support during demolition or framing.
Equipping yourself with these tools guarantees your project runs smoothly, minimizes risks, and helps you achieve professional results. Always remember to follow safety precautions and use protective gear.
Safe Removal Techniques
Are you aware of the key tools and techniques that guarantee safe and effective wall removal? First, verify the wall isn’t load-bearing, ideally with professional help or structural checks. Shut off electrical power and water supplies, and work with licensed plumbers and electricians to de-energize wiring and cap pipes. Use a reciprocating saw with a demolition blade to cut drywall or plaster between studs, starting from existing openings to control debris. Remove drywall in sections, pushing from behind studs to loosen nails and reduce dust. Always handle utilities with care—disengage plumbing and wiring in advance with experts, using voltage testers and pipe locators. Wear PPE like goggles, masks, gloves, and ear protection. Keep the worksite organized and dispose of debris properly for a safe, efficient removal process. Proper planning and assessment are crucial to prevent structural damage and ensure safety during the project.
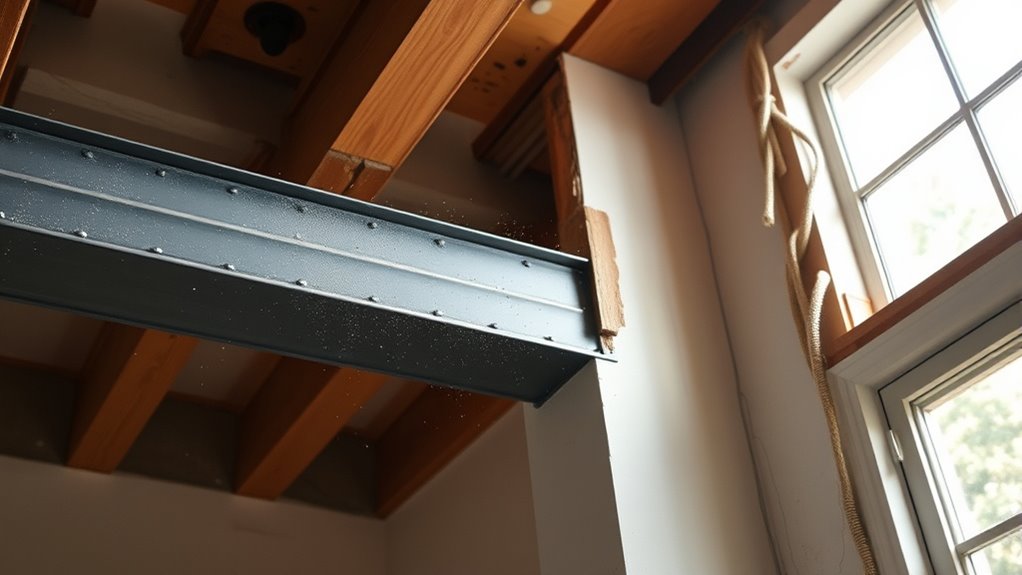
Support and Reinforcement
Support and reinforcement methods are essential when modifying walls, especially if you’re aiming to maintain structural integrity after adjustments. Proper reinforcement prevents cracks, collapse, and safety hazards. Here’s what you need to contemplate:
- Use wire winding for concrete walls with weak compression capacity, ideal for door openings.
- Bond steel plates externally to handle bending and tension, ensuring rapid installation without extensive disruption.
- Apply carbon fiber strips, which are lightweight, corrosion-resistant, and over ten times stronger than steel.
- Install steel beams with professional guidance, ensuring correct sizing and secure placement for load support. Reinforcement techniques should be selected based on the specific condition and function of the wall to maximize safety and effectiveness.
Choosing the right method depends on your wall type and project scope. Always prioritize safety and consult professionals if unsure, ensuring your DIY remodel is both successful and secure.
Planning Your Remodel: What to Consider Before Starting
Before starting your remodel, it is essential to thoroughly assess your space and understand the structural role of the walls you plan to modify. Confirm whether these walls are truly zero-load bearing by reviewing architectural drawings or consulting a professional. Perform a visual and physical inspection to identify utilities like electrical, plumbing, or HVAC lines inside the walls, preventing costly relocations. Consider how removing or altering walls will affect adjacent structures or floors. Use the flexibility of non-load bearing walls to create open layouts or multi-functional spaces, planning for future adaptability. Choose lightweight materials like gypsum board on metal or wood studs, and explore prefabricated panels to simplify installation. Budget for utilities, finishes, permits, and unexpected issues, ensuring your project flows smoothly and meets safety standards.
Navigating Building Codes and Regulations
Understanding how building codes classify and regulate zero-load bearing walls helps guarantee your remodel stays compliant. Knowing the rules keeps you confident and avoids costly mistakes. Here’s what you should focus on:
Knowing building codes for zero-load bearing walls ensures your remodel is safe, compliant, and hassle-free.
- Verify your wall’s classification—non-load-bearing walls must meet framing standards like studs spaced 24 inches on center. Proper classification influences fire-resistance requirements and construction costs.
- Ensure fire safety requirements are met, especially near equipment or in fire-rated assemblies.
- Obtain necessary permits—inspectors will review framing, fireblocking, and finishes.
- Document your wall’s status clearly to prevent rework or fines during inspections.
Failing to follow these regulations can lead to delays, added costs, or legal issues. Staying informed empowers you to remodel safely, confidently, and within code.
Cost Savings and Efficiency With Non-Structural Changes

Choosing non-structural walls for remodeling projects can considerably cut costs and save time. The market for these walls is growing rapidly, driven by affordability and innovation like modular and prefabricated systems that speed up installation and reduce labor expenses. Traditional non-load bearing walls are cheaper, easier to customize, and don’t require complex permits or structural reinforcements, lowering overall costs. AI and robotics further optimize wall placement, minimizing waste and installation time. Using durable, energy-efficient materials extends wall lifespan and reduces future maintenance costs. Plus, modifying or removing non-load bearing walls is simpler and faster, often requiring fewer skilled workers or DIY efforts. Overall, these savings boost your remodeling efficiency while making renovations more accessible and budget-friendly.
When to Seek Professional Advice During Your Remodel
Knowing when to seek professional advice is crucial during your remodel, especially if you’re unsure about a wall’s load-bearing status. Don’t risk structural failure or safety hazards. Consider consulting a professional if:
- You plan to remove or alter walls with uncertain load-bearing roles.
- Walls run perpendicular to floor joists, which often support loads.
- Removing walls might compromise floors or ceilings’ stability.
- Signs of damage like sagging ceilings or cracks appear during work.
Engaging a structural engineer or contractor ensures safety and compliance. They evaluate risks, help with permits, and recommend reinforcements or alternatives. Recognizing these signs and seeking expert advice now can save you from costly mistakes and potential danger later.
Frequently Asked Questions
How Can I Confirm if a Wall Is Load-Bearing Without Professional Help?
You’re wondering how to confirm if a wall is load-bearing without professional help. Start by checking blueprints for symbols indicating load-bearing walls, like thicker lines or structural symbols. Look under the ceiling for beams or joists crossing the wall, and examine the basement or attic to see if joists run perpendicular to it. Also, see if the wall connects directly to the foundation or supports columns—these clues help identify load-bearing walls.
Are There Any Risks in Removing Non-Load-Bearing Walls Myself?
You might think removing non-load-bearing walls is simple, but risks still exist. If you misidentify a wall, you could cause structural instability or damage hidden beams. Electrical, plumbing, or HVAC systems inside walls can pose hazards if not handled properly. Plus, skipping permits or inspections can lead to fines and future legal issues. Always double-check carefully and consider consulting a professional to avoid costly mistakes.
Can I Modify Load-Bearing Walls to Create Open Floor Plans Safely?
Did you know that improper removal of load-bearing walls causes over 50% of structural failures in renovations? You can modify load-bearing walls to create open floor plans, but only if you follow strict safety protocols. You need a structural engineer’s assessment, permits, and temporary supports. Skipping these steps risks serious damage, costly repairs, or even collapse. Always prioritize professional guidance to guarantee your remodel is safe and compliant.
What Are the Best Tools for DIY Removal of Non-Structural Walls?
When you’re removing non-structural walls yourself, the best tools include a reciprocating saw for quick cuts, a drywall saw or utility knife for scoring drywall, and a sledgehammer or pry bar for dismantling framing. A drill with screwdriver bits helps remove screws, while a stud finder guarantees you avoid electrical or plumbing hazards. Safety gear like goggles and masks protect you during demolition, making the process smoother and safer.
How Do Building Codes Influence Non-Load-Bearing Wall Modifications?
Think of building codes as your home’s silent guardian, guiding your DIY project safely. They dictate that non-load-bearing walls can be modified with minimal fuss, but you must identify them correctly first. These codes specify materials, spacing, and safety measures, ensuring your remodel stays legal and secure. By following these rules, you simplify your project, reduce costs, and avoid future issues, making your renovation both smart and compliant.
Conclusion
Knowing how to identify and safely modify zero-load bearing walls can save you thousands on your remodel. In fact, homes with non-structural walls often see a 20% reduction in renovation costs. By understanding their role and following safety tips, you can confidently create flexible, functional spaces. Just remember to check local building codes and consider professional advice when needed. With the right approach, your DIY project can be both rewarding and budget-friendly.

I’m Theodore, and I love tiny houses. In fact, I’m the author of Tiny House 43, a book about tiny houses that are also tree houses. I think they’re magical places where imaginations can run wild and adventures are just waiting to happen.
While tree houses are often associated with childhood, they can be the perfect adult retreat. They offer a cozy space to relax and unwind, surrounded by nature. And since they’re typically built on stilts or raised platforms, they offer stunning views that traditional homes simply can’t match.
If you’re looking for a unique and romantic getaway, a tree house tiny house might just be the perfect option.