Connect with us

Beginners Guides

How To Build Your Own Tiny House

Published

on

An image that showcases a picturesque landscape with a cozy, self-built tiny house nestled amidst towering pine trees, surrounded by a flourishing vegetable garden, and featuring a charming porch and solar panels

Were you aware that over the last 50 years, the standard size of a newly built single-family house in the United States has expanded by almost 1,000 square feet?

With the rising costs of housing and a desire for simplicity, it’s no wonder that many people are turning to tiny houses as a solution.

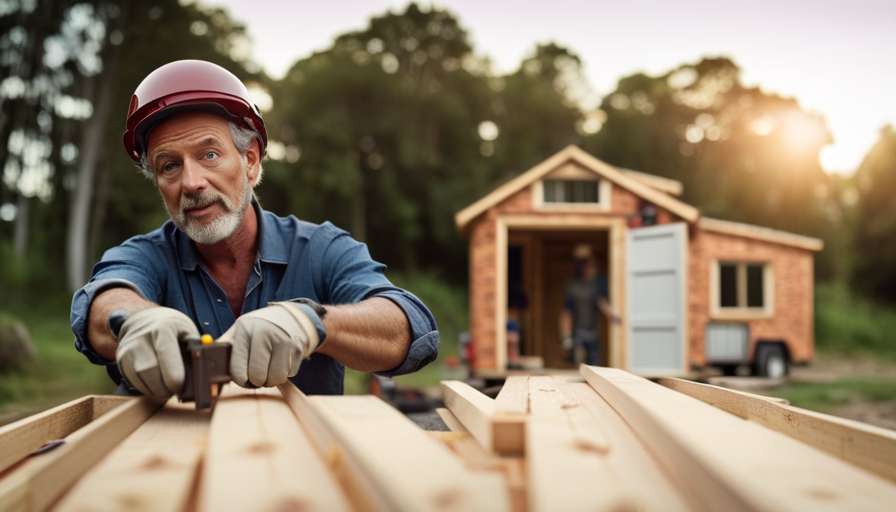
Building your own tiny house can be a rewarding and cost-effective way to create a space that fits your needs and lifestyle.

In this article, I will guide you through the process of building your own tiny house, from determining your needs and goals to connecting utilities and moving in.

By following these steps and using the right tools and materials, you can create a comfortable and efficient home that is uniquely yours.

Advertisement

So let’s get started and build your dream tiny house!

Key Takeaways

  • Building a tiny house can be a rewarding and cost-effective solution for those seeking simplicity and affordability in housing.
  • Maximizing space through multifunctional furniture and built-in storage solutions is crucial in tiny house design.
  • Incorporating sustainability options into the design, such as using eco-friendly materials and energy-efficient appliances, is important for environmental consciousness.
  • Thorough research and compliance with regulations are necessary for obtaining permits, connecting utilities, and ensuring a successful move-in process.

Determine Your Needs and Goals

Before you start building your tiny house, it’s important to determine what you need and what goals you want to achieve with your new home. Identifying your needs will help you design a space that is functional and suits your lifestyle.

Consider the number of people that’ll be living in the house and their specific requirements. This’ll help you determine the size and layout of your tiny house.

To maximize space in your tiny house, it’s essential to identify space-saving solutions. This could include incorporating multi-purpose furniture, such as a sofa that converts into a bed or a dining table that folds down when not in use. Additionally, utilizing vertical space by installing shelves or storage units can help you make the most of your limited square footage.

Incorporating sustainability options into your tiny house design is also a great idea. This could involve using eco-friendly materials, such as reclaimed wood or recycled insulation, to reduce your environmental impact. Installing energy-efficient appliances and utilizing renewable energy sources, such as solar panels, can help you minimize your carbon footprint.

By determining your needs and goals, identifying space-saving solutions, and considering sustainability options, you can create a tiny house that meets your requirements and aligns with your values.

Advertisement

In the next section, we’ll discuss how to design your tiny house and bring your vision to life.

Design Your Tiny House

Once you’ve got the blueprint for your cozy little dream home, it’s time to unleash your creativity and start crafting the perfect space.

Designing your own tiny house allows you to personalize every aspect and incorporate the latest tiny house design trends.

One of the key challenges in tiny house design is maximizing space. With limited square footage, it’s crucial to make every inch count.

To maximize space in a tiny house, consider utilizing multifunctional furniture, such as a bed that can fold up into a sofa or a dining table that can be tucked away when not in use. Opting for built-in storage solutions, like under-bed drawers or overhead cabinets, can help keep your tiny house organized and clutter-free.

Advertisement

In terms of design trends, many tiny house enthusiasts are embracing minimalist aesthetics, incorporating clean lines, neutral colors, and natural materials for a sleek and modern look. Additionally, incorporating large windows and skylights can make your tiny house feel more spacious and connected to the outdoors.

Now that you have a solid design plan, it’s important to obtain necessary permits and regulations to ensure your tiny house meets all legal requirements.

Obtain Necessary Permits and Regulations

To make your cozy dream home a reality, make sure you obtain the necessary permits and regulations, ensuring that your tiny house meets all legal requirements. This step is crucial to avoid any legal issues or setbacks during the construction process. Here are some important considerations to keep in mind:

  • Cost considerations: Before starting the permit application process, it’s essential to factor in the cost of obtaining permits and complying with regulations. This may include fees for building permits, inspections, impact fees, and utility connections. It’s important to research and budget for these expenses to avoid any financial surprises along the way.

  • Finding a suitable location: Different areas have different regulations regarding tiny houses. Research local zoning laws and building codes to find a location where tiny houses are permitted. Additionally, consider factors such as access to utilities, proximity to amenities, and the overall suitability of the area for your tiny house lifestyle.

  • Timeframe: Permit approvals can take time, so it’s important to plan accordingly. Be prepared for potential delays in the process and factor them into your overall timeline for building your tiny house.

Once you have obtained the necessary permits and regulations, you can move on to the next step of gathering tools and materials. This will involve compiling a comprehensive list of all the items you’ll need to construct your tiny house.

Gather Tools and Materials

In order to build my own tiny house, I need to research and purchase the necessary tools. This involves finding tools that are specifically designed for building construction and are suitable for the size and scale of my project.

Advertisement

Additionally, I need to source high-quality building materials that will ensure the durability and longevity of my tiny house. This includes researching different suppliers and comparing prices to find the best options available.

Research and Purchase Tools

First, gather your research and make a list of the tools you’ll need to purchase. Research tools to ensure you are getting the best ones for your project. Consider the specific tasks you’ll be performing and the materials you’ll be working with. Once you have gathered your research, it’s time to make a list of the tools you’ll need to purchase. Here is a table that provides a visual representation of the tools you may need:

Tools Quantity Price Supplier
Circular Saw 1 $50 Home Depot
Power Drill 1 $80 Lowe’s
Hammer 1 $20 Ace Hardware
Tape Measure 1 $10 Amazon

By conducting research and purchasing the necessary tools, you will be well-equipped to build your own tiny house. Now, let’s move on to the next step and source high-quality building materials.

Source High-Quality Building Materials

Now, it’s time for you to seek out top-notch materials for your dream abode. When sourcing high-quality building materials for your tiny house, it’s important to find sustainable options that align with your values. Consider budget constraints and prioritize materials that are durable and eco-friendly.

Here are some bullet points to guide you in your search:

Advertisement
  • Explore local salvage yards and reclaimed material suppliers for unique and environmentally friendly options.
  • Research online retailers specializing in tiny house construction, as they often offer a wide range of high-quality materials tailored to your needs.
  • Connect with other tiny house builders in your community to learn about their recommended suppliers and materials.
  • Don’t forget to check out your local home improvement stores, as they may carry eco-friendly options like low VOC paints and sustainable flooring.

By carefully selecting your building materials, you can ensure a strong foundation for your tiny house.

Build a Solid Foundation

To create a strong and sturdy base for your tiny house, it’s crucial to build a solid foundation. The foundation serves as the anchor for your entire structure, providing stability and support. Before you begin construction, it’s important to familiarize yourself with local building codes to ensure compliance and avoid any future issues. Additionally, proper site preparation is essential to ensure a level and stable surface for your foundation.

To help you understand the importance of a solid foundation, let’s take a look at a comparison table:

Traditional Foundation Alternative Foundation Benefits
Concrete Slab Pier and Beam Cost-effective, easy to install
Crawlspace Screw Piles Suitable for uneven terrain, adjustable
Basement Insulated Concrete Forms (ICFs) Increased energy efficiency, additional living space

By carefully selecting the right foundation type based on your needs and budget, you can ensure a strong base for your tiny house. Once the foundation is in place, you can proceed to construct the frame and walls, which will form the structural skeleton of your tiny house.

Now, let’s move on to the next step and learn how to construct the frame and walls without compromising the integrity of your foundation.

Construct the Frame and Walls

Once you’ve chosen the right foundation, it’s time to start constructing the frame and walls, creating the structure that will bring your dream home to life.

Advertisement

Did you know that a well-built frame can provide up to 80% of the structural integrity of your tiny house? When it comes to framing techniques, there are a few options to consider.

The most common method is stick framing, which involves using standard lumber to create the frame. This technique is relatively easy and cost-effective, making it a popular choice among DIY builders.

Another option is steel framing, which offers increased strength and durability but can be more expensive and require specialized tools.

Once the frame is in place, it’s time to construct the walls. There are various wall construction materials to choose from, including traditional wood framing, structural insulated panels (SIPs), and insulated concrete forms (ICFs).

Each option has its own benefits and considerations, such as cost, insulation, and ease of installation.

Advertisement

With the frame and walls complete, the next step is to install plumbing and electrical systems, ensuring that your tiny house is fully functional and ready to be called home.

Install Plumbing and Electrical Systems

If you want a fully functional and comfortable living space, it’s essential to install the plumbing and electrical systems in your dream tiny house.

These systems are vital for providing the necessary amenities and ensuring a smooth and convenient daily life.

When it comes to the plumbing system, you’ll need to connect your tiny house to a water source and install a sewage system. This involves installing pipes, faucets, drains, and toilets. Additionally, you might want to consider adding a water heater for hot showers and a water filtration system for clean drinking water.

Next, let’s talk about the electrical system. It’s crucial to have a proper electrical setup to power your appliances, lights, and other electrical devices. This will involve installing electrical wiring, outlets, and a circuit breaker panel. You’ll also need to plan the placement of these electrical components to ensure efficient and safe operation.

Advertisement

Installing plumbing and electrical systems in your tiny house is a fundamental step in creating a functional and comfortable living space. These systems provide essential amenities and ensure that your daily needs are met.

Once you have completed this stage, you can move on to the next section about adding insulation and ventilation, which will further enhance the comfort and energy efficiency of your tiny house.

Add Insulation and Ventilation

Creating a cozy and energy-efficient living space in your dream tiny house is easily achieved by adding insulation and ventilation, ensuring comfort and reducing utility costs. Insulation techniques play a vital role in maintaining a comfortable temperature inside the house while minimizing heat loss in winter and heat gain in summer. Common insulation materials for tiny houses include fiberglass batts, spray foam, and rigid foam boards. It is important to properly insulate walls, floors, and ceilings to create a well-insulated envelope.

Ventilation systems are equally important in a tiny house to ensure proper air circulation and prevent moisture buildup, which can lead to mold and mildew. Installing a mechanical ventilation system, such as an energy recovery ventilator (ERV) or heat recovery ventilator (HRV), can help remove stale air and bring in fresh air while minimizing energy loss.

To evoke emotion in the audience, here is a table showcasing the benefits of insulation and ventilation in a tiny house:

Advertisement
Benefits of Insulation Benefits of Ventilation Benefits of Both
Energy efficiency Improved air quality Comfort
Reduced utility costs Moisture control Health
Noise reduction Odor elimination Sustainability

Incorporating these insulation techniques and ventilation systems will provide a comfortable and healthy living environment inside your tiny house. Transitioning into the subsequent section about finishing interior and exterior details, it is important to consider these aspects to complete your dream tiny house.

Finish Interior and Exterior Details

To achieve a visually appealing and personalized tiny house, it’s important to focus on finishing the interior and exterior details. Here are three key elements to consider:

  • Choosing paint colors: Selecting the right paint colors can greatly enhance the overall look and feel of your tiny house. Opt for light and neutral tones to create the illusion of more space. Consider using accent colors to add personality and create focal points in different areas of your home.

  • Selecting flooring materials: When it comes to flooring, durability and functionality are crucial in a tiny house. Consider options such as hardwood, laminate, or vinyl flooring that are easy to clean and maintain. Additionally, opt for materials that are resistant to moisture and temperature changes to ensure longevity.

  • Attention to detail: Paying attention to small details can make a big difference in the overall appearance of your tiny house. Install trim and moldings to give your walls a polished look. Incorporate decorative elements such as window treatments, light fixtures, and accessories that reflect your personal style and add character to your space.

By carefully choosing paint colors, selecting flooring materials, and paying attention to detail, you can create a visually stunning tiny house that reflects your unique taste and style.

Moving forward, let’s explore how to connect utilities and move in seamlessly.

Connect Utilities and Move In

Once you’ve put the finishing touches on your dream tiny home, it’s time to connect utilities and make the move-in process a breeze. Connecting utilities is a crucial step in ensuring your tiny house is functional and comfortable. Before you begin, it’s important to choose a location that allows for easy access to water, electricity, and sewage systems.

Advertisement

When it comes to connecting utilities, it’s essential to research local regulations and requirements. You may need to obtain permits or work with professionals to ensure everything is done correctly. It’s also important to consider the cost of connecting utilities and factor that into your budget.

To help you understand the process better, here’s a table outlining the steps involved in connecting utilities:

Utility Steps Tips
Water 1. Locate water source Choose a location with access to clean and reliable water.
2. Install plumbing system Hire a professional plumber for a seamless installation.
Electricity 1. Determine power source Decide between connecting to the grid or using renewable energy.
2. Install electrical wiring and outlets Follow safety guidelines and hire a licensed electrician.
Sewage 1. Determine sewage disposal method Choose between a septic system or connecting to a municipal sewer.
2. Install sewage system or connect to sewer Seek professional help to ensure proper installation.

By following these steps and doing thorough research, you can successfully connect utilities to your tiny house and make it ready for move-in. Remember to choose a location that suits your needs and comply with local regulations for a hassle-free experience.

Frequently Asked Questions

How much does it cost to build a tiny house?

Building a tiny house can cost anywhere from $10,000 to $100,000, depending on various factors. The cost breakdown typically includes expenses such as materials, permits, labor, and utilities.

Financing options for building a tiny house include personal savings, loans from financial institutions, and crowdfunding. It’s important to carefully consider your budget and explore different financing options to ensure you can cover all the necessary costs of building your own tiny house.

Advertisement

Are there any specific building codes or regulations for tiny houses?

Yes, there are specific building codes and regulations for tiny houses. These codes vary depending on the location and jurisdiction. It is crucial to research and understand the requirements before starting construction.

Specific building codes outline safety standards for structural integrity, electrical systems, plumbing, and overall habitability. Tiny house regulations may also address zoning restrictions, minimum size requirements, and necessary permits.

Adhering to these codes ensures a safe and legal tiny house construction.

Can I build a tiny house on a trailer or does it need to be on a foundation?

You can build a tiny house on a trailer, which offers mobility and flexibility compared to a foundation. Building on a trailer allows you to easily move your tiny house to different locations as needed. It also provides the option to travel with your tiny house if desired.

This mobility and flexibility is a key advantage of building on a trailer, making it a popular choice for many people constructing their own tiny houses.

Advertisement

What are some common challenges or obstacles to building a tiny house?

One common challenge in tiny house construction is ensuring proper insulation. For instance, I faced difficulties in insulating the walls of my tiny house to maintain a comfortable temperature year-round.

Another obstacle is limited space, which requires careful planning and organization.

DIY challenges include acquiring the necessary construction skills and knowledge, as well as navigating building codes and regulations.

Overall, building a tiny house requires attention to detail and problem-solving skills to overcome these obstacles.

Is it possible to live in a tiny house off-grid?

Yes, it’s possible to live in a tiny house off-grid. Living sustainably and exploring alternative housing options have become popular choices for many individuals. Off-grid living involves disconnecting from public utilities and becoming self-sufficient. This typically requires using renewable energy sources like solar panels, wind turbines, or hydroelectric power.

Advertisement

Additionally, water collection and filtration systems, composting toilets, and sustainable food sources are often incorporated into off-grid tiny house living to reduce environmental impact and promote self-sustainability.

Conclusion

Well, there you have it, folks! You now have all the necessary steps to embark on the journey of building your very own tiny house. From designing to obtaining permits, gathering materials to installing plumbing and electrical systems, this article has covered it all.

Remember to add insulation and ventilation for a cozy living space, and don’t forget those finishing touches on the interior and exterior. Once you’ve connected your utilities, it’ll be time to move in and enjoy your new petite palace.

Happy building!

Advertisement
Continue Reading
Advertisement

Beginners Guides

Couple Who Builds Tiny House Cottage

Published

on

By

An image capturing the cozy charm of a couple's labor of love: a rustic, timber-clad tiny house cottage nestled amidst a picturesque woodland backdrop, with a smoke gently wafting from its quaint chimney

Prepare to be astounded by the extraordinary voyage of a pair who bravely challenged societal expectations to create their own quaint tiny house cottage! This extraordinary couple took the courageous step to simplify their lifestyle and set off on an absolutely distinctive journey.

In this article, I will take you through their awe-inspiring story, from the inspiration behind their decision to the challenges they faced during construction, and the benefits and challenges of living in a tiny house. You’ll also discover how this couple found a new sense of freedom and fulfillment through the embrace of minimalism.

If you’ve ever dreamed of simplifying your life and building your own tiny house cottage, stay tuned for some valuable tips and advice from these trailblazers. Plus, get a glimpse into their future plans as they continue their journey in the world of tiny house living.

So, get ready to be inspired and captivated by the extraordinary tale of this couple who turned their dream of a tiny house cottage into a reality!

Key Takeaways

  • Building a tiny house cottage allows for a more environmentally-friendly and sustainable lifestyle.
  • Constructing a tiny house comes with challenges such as financial constraints, finding sustainable building materials, limited space, and managing the construction timeline.
  • Living in a tiny house offers benefits such as reduced expenses, minimal maintenance, and a sense of freedom.
  • Embracing minimalism can improve relationships and financial stability.

The Inspiration Behind Their Decision to Downsize

Imagine how liberating it must feel to finally let go of the excess and embrace a simpler life, as you listen to the couple share the heartfelt inspiration behind their decision to downsize into a tiny house cottage.

After years of feeling overwhelmed by the constant accumulation of stuff and the financial strain of maintaining a large home, they realized that they were missing out on what truly mattered – quality time together and the freedom to pursue their passions.

Advertisement

The couple craved a more sustainable and environmentally-friendly lifestyle, and a tiny house offered the perfect solution. They were drawn to the benefits of living in a tiny house, such as reduced expenses, a smaller ecological footprint, and the ability to simplify their lives.

With these motivations in mind, they began planning and designing their dream tiny house cottage, eager to create a space that reflected their values and allowed for a more intentional way of living.

Planning and Designing Their Dream Tiny House Cottage

Visualizing our ideal cozy retreat, we meticulously crafted the blueprint for our dream abode. Every detail was carefully considered as we planned and designed our tiny house cottage.

The interior of our tiny house was designed to maximize space and create a comfortable living environment. We incorporated clever storage solutions and multi-functional furniture to make the most of every square inch.

In terms of construction, we were committed to eco-friendly practices. We used sustainable materials and implemented energy-efficient features such as solar panels and a composting toilet.

Advertisement

Throughout the planning and designing process, we faced challenges and had to make adjustments, but our determination and passion for our project kept us going.

Transitioning into the subsequent section about overcoming challenges, we learned valuable lessons that shaped the construction process.

Overcoming Challenges During the Construction Process

As you navigate the construction process, you’ll encounter hurdles that test your resilience and determination, but remember that every obstacle is just another step towards turning your dream into a reality.

  • Overcoming financial constraints: Building a tiny house cottage can be costly, but by carefully budgeting and seeking cost-effective alternatives, we were able to overcome financial constraints and stay within our means.

  • Finding sustainable building materials: We wanted our tiny house to be environmentally friendly, so we spent a considerable amount of time researching and sourcing sustainable building materials. From reclaimed wood to energy-efficient appliances, every choice we made aligned with our goal of minimizing our ecological footprint.

  • Dealing with limited space: Constructing a tiny house cottage comes with the challenge of maximizing every inch of space. We had to think creatively and utilize smart storage solutions to ensure functionality and comfort in our compact living quarters.

  • Managing construction timeline: Building a tiny house cottage requires careful planning and coordination. We had to stay organized and adapt to unexpected delays, ensuring that each step of the construction process was completed efficiently.

As we overcame these challenges, we eagerly looked forward to the next phase: living in a tiny house, where we would experience the benefits and face the unique challenges that come with it.

Living in a Tiny House: The Benefits and Challenges

Living in a compact and eco-friendly dwelling presents both advantages and obstacles that can enhance our daily lives. The benefits of small living spaces include reduced expenses, minimal maintenance, and a sense of freedom from material possessions. With fewer rooms to clean and maintain, we have more time and energy to focus on experiences and relationships.

Advertisement

Additionally, living in a tiny house promotes environmental sustainability by reducing our carbon footprint and consumption of resources. However, there are also challenges that come with this minimalistic lifestyle. Limited space can make it difficult to entertain guests or store belongings, and adapting to a simpler way of life requires adjusting our mindset and letting go of unnecessary possessions.

Despite these challenges, embracing minimalism has changed our lives for the better, allowing us to prioritize what truly matters and live with intention.

Embracing Minimalism: How Downsizing Changed Their Lives

Imagine how your life could be transformed by embracing minimalism and downsizing your belongings. The impact on relationships is profound as we learned to communicate, compromise, and work together in our tiny house cottage.

With limited space, we had to prioritize what truly mattered, resulting in a stronger bond and deeper connection.

Financial freedom was another benefit we experienced. By reducing our expenses and living a simpler lifestyle, we were able to save money and live within our means. This newfound financial stability allowed us to pursue our passions and live a more fulfilling life.

Advertisement

As we transition into the next section about tips and advice for building your own tiny house cottage, it’s important to remember that downsizing is not just about the physical space, but also about the positive impact it can have on your relationships and financial well-being.

Tips and Advice for Building Your Own Tiny House Cottage

Ready to embark on your journey of creating a cozy and efficient space of your own? Here are some helpful tips and advice for crafting your dream tiny home.

When it comes to tiny house design, it’s important to optimize every inch of space. Consider using multifunctional furniture and built-in storage solutions to maximize storage and functionality. Additionally, choose cost-effective materials such as reclaimed wood, recycled materials, or repurposed furniture to keep your budget in check.

Remember to prioritize natural light by incorporating large windows or skylights, as it’ll make your tiny house feel more spacious and inviting. Lastly, don’t forget about outdoor living space. Design a small patio or deck area that seamlessly connects your tiny home with the outdoors.

With these tips in mind, you’ll be well on your way to creating your perfect tiny house cottage. As you move forward, let’s explore the couple’s journey and future plans in the next section.

Advertisement

The Future of Tiny House Living: Their Journey and Future Plans

After successfully building our own tiny house cottage, my partner and I have been reflecting on our journey and discussing our future prospects in the world of sustainable living.

The experience of constructing our tiny home has been incredibly rewarding, and it has sparked a passion within us to continue exploring this lifestyle. We have realized that tiny house living offers not only financial freedom but also a sense of environmental responsibility.

As we look ahead, we are excited to further embrace sustainable living by incorporating renewable energy sources and enhancing our self-sufficiency.

Our future plans also include sharing our knowledge and experiences with others who are interested in pursuing a similar lifestyle. We believe that the future of tiny house living is bright, and we are determined to be a part of it.

Frequently Asked Questions

How much did the couple’s tiny house cottage cost to build?

The cost analysis of the tiny house cottage reveals a budget breakdown that is both surprising and inspiring. With meticulous planning and resourcefulness, the couple managed to construct their dream home at a fraction of the cost of traditional houses.

Advertisement

By using salvaged materials and repurposing items, they were able to keep expenses low. The result? A charming and affordable abode that proves you don’t need to break the bank to build your own sanctuary.

Did the couple hire professional help or build the tiny house cottage themselves?

I hired professionals for the construction of my tiny house cottage. Although some people prefer to do it themselves, I felt more comfortable entrusting the job to experts. Hiring professionals ensured that the construction was done efficiently and to a high standard. It also saved me a lot of time and stress.

While DIY construction can be rewarding, I believe that professional help is essential for a project of this scale and complexity.

What materials did the couple use to construct their tiny house cottage?

In constructing my tiny house cottage, I opted for cost-effective materials that prioritize sustainability and eco-friendliness. I used reclaimed wood for the structure, which not only reduced costs but also minimized waste.

For insulation, I chose eco-friendly options like recycled denim and cellulose insulation made from recycled newspapers.

Advertisement

Additionally, I installed energy-efficient windows and utilized low VOC (volatile organic compound) paints to minimize environmental impact.

Overall, these choices allowed me to create a comfortable and environmentally conscious living space.

How long did it take the couple to complete the construction of their tiny house cottage?

It took me a total of 6 months to complete the construction of the tiny house cottage.

The cost of materials was a significant challenge that I faced during this process. I had to carefully budget and source affordable yet high-quality materials.

Additionally, I encountered various challenges during construction, such as limited space and the need for creative problem-solving.

Advertisement

Despite these obstacles, I’m proud of the final result and the effort I put into building my dream home.

What are the couple’s plans for the future regarding their tiny house cottage?

In the future, my plans for the tiny house cottage include adding solar panels to make it more sustainable and energy-efficient.

Additionally, I want to create a small garden and outdoor seating area to enhance the living space.

Despite the challenges faced during the construction process, such as limited space and budget constraints, we were able to overcome them by utilizing creative storage solutions and seeking assistance from experienced builders.

Overall, we’re excited about the potential for our tiny house cottage.

Advertisement

Conclusion

In conclusion, building our tiny house cottage has been a transformative experience.

While we anticipated challenges and obstacles along the way, we persevered and created a space that truly reflects our values and lifestyle.

Some may argue that living in a tiny house is impractical or limiting, but we’ve found the opposite to be true.

By embracing minimalism and downsizing, we’ve gained a sense of freedom and fulfillment that we never thought possible.

So, if you’re considering building your own tiny house cottage, don’t let potential objections hold you back.

Advertisement

It’s a journey worth taking.

Continue Reading

Beginners Guides

How To Wire A Tiny House For Solar Power

Published

on

By

An image showcasing a tiny house with solar panels mounted on the roof

By chance, as I began my quest to establish a self-reliant and eco-friendly way of life, I discovered the fascinating realm of tiny houses. These small homes present a distinctive chance to reduce our environmental impact and sustain a life disconnected from the conventional power grid.

However, powering a tiny house can be quite a challenge. That’s where solar power comes in. In this article, I will guide you through the intricate process of wiring a tiny house for solar power, enabling you to harness the unlimited energy of the sun.

We will start by assessing your power needs and calculating the size of your solar power system. Then, I will help you choose the ideal solar panels and determine the battery storage capacity required.

Next, we will delve into the installation of a solar charge controller and an inverter for AC power. I will also provide detailed instructions on wiring your tiny house for DC power.

Finally, we will discuss testing, monitoring, and maintaining your solar power system, as well as upgrading it to meet your evolving needs.

Advertisement

So, let’s embark on this electrifying journey towards a greener future!

Key Takeaways

  • Assess power needs and calculate the size of the solar power system.
  • Choose the right solar panels and battery storage capacity.
  • Install a solar charge controller and inverter for AC power.
  • Provide detailed instructions on wiring a tiny house for DC power.

Assess Your Power Needs

Now it’s time to figure out how much power you’ll need to keep your tiny house running smoothly on solar energy. Calculating energy consumption is crucial to ensure that your solar power system meets your needs.

Start by making a list of all the electrical appliances and devices you plan to use in your tiny house. Consider their power ratings and the average number of hours you’ll use them each day. This will help you determine the total energy consumption of your house.

Once you have this information, you can start optimizing power usage by choosing energy-efficient appliances and implementing energy-saving practices. By understanding your power needs and optimizing power usage, you can effectively design and install a solar power system that’ll meet your requirements.

Now let’s move on to calculating your solar power system size and ensuring it can meet your energy demands.

Calculate Your Solar Power System Size

To accurately determine the size of your solar system, you’ll need to calculate the amount of electricity needed to sustain your energy needs in your cozy abode. This step is crucial in ensuring that your solar power system is capable of meeting your requirements.

Advertisement

Here are three key factors to consider when calculating your solar power system size:

  1. Solar power benefits: Understand the advantages of solar power, such as reduced electricity bills, lower carbon footprint, and potential financial incentives.

  2. Solar power installation process: Familiarize yourself with the steps involved in installing a solar power system, including site assessment, panel placement, and connection to the electrical grid.

  3. Evaluate your energy consumption: Determine your daily energy usage by analyzing your appliances, lights, and other electrical devices. Consider seasonal variations and the number of sunlight hours in your area.

By accurately calculating your energy needs and understanding the solar power benefits and installation process, you can now move on to choosing the right solar panels for your tiny house.

Choose the Right Solar Panels

When it comes to outfitting your cozy abode with the perfect solar solution, finding the right panels for your energy needs is key. The efficiency of solar panels is crucial in determining how much energy they can generate. Look for panels with high efficiency ratings to maximize power output.

Additionally, consider the placement of your solar panels. Ideally, they should be installed in a location that receives ample sunlight throughout the day, such as a south-facing roof. Avoid shading from trees, buildings, or other obstructions that can reduce the panels’ effectiveness. Proper placement ensures optimal sunlight exposure and increases overall energy production.

Moving forward to determining your battery storage capacity, it’s important to consider how much energy you want to store for later use.

Advertisement

Determine Your Battery Storage Capacity

Prepare to calculate the capacity of your battery to ensure you can store sufficient energy for later use. To optimize energy storage in your tiny house, follow these steps:

  1. Determine your daily energy consumption by adding up the wattage of all your appliances and devices.

  2. Calculate the number of days you want to rely on battery power during periods of low sunlight.

  3. Multiply your daily energy consumption by the number of days to get your total energy requirement.

  4. Divide the total energy requirement by the depth of discharge (DOD) of your battery to calculate the necessary battery capacity.

By accurately calculating your battery capacity, you can ensure that your tiny house has enough energy storage to meet your needs.

Now, let’s move on to the next step and learn how to install a solar charge controller.

Install a Solar Charge Controller

Once you’ve determined your battery storage capacity, it’s time to install the solar charge controller to ensure efficient energy management in your cozy abode. The solar charge controller plays a crucial role in regulating the flow of electricity from your solar panels to the batteries, preventing overcharging and ensuring optimal performance.

To begin, mount the controller in a well-ventilated area near your batteries, ensuring proper wiring connections. It’s essential to follow the manufacturer’s instructions for installation and to adhere to safety precautions.

Advertisement

Regular solar charge controller maintenance is necessary to keep it functioning optimally. This includes checking for loose connections, cleaning the controller regularly, and inspecting for any signs of damage.

Troubleshooting the solar charge controller involves identifying any error codes or abnormal behavior and addressing the issue accordingly.

With the solar charge controller installed and maintained, you’re now ready to connect your solar panels to the charge controller, maximizing the efficiency of your solar power system.

Connect Your Solar Panels to the Charge Controller

To ensure optimal performance, it’s crucial to connect your solar panels to the charge controller, effectively maximizing the efficiency of your renewable energy system. When connecting solar panels to the charge controller, it’s important to follow the manufacturer’s instructions and safety guidelines. To help you understand the process, here’s a table that outlines the basic steps:

Solar Panel Connection Charge Controller Connection Troubleshooting
Connect positive wire from panel to positive terminal on controller Connect negative wire from panel to negative terminal on controller Check for loose connections
Connect positive wire from controller to battery’s positive terminal Connect negative wire from controller to battery’s negative terminal Test voltage output
Install appropriate fuses or breakers in between panels and controller Ensure proper grounding of the system Monitor system performance regularly

By following these steps and troubleshooting any issues, you can ensure a successful connection of your solar panels to the charge controller. In the next section, we will discuss how to install an inverter for AC power.

Advertisement

Install an Inverter for AC Power

Now that you’ve successfully connected your solar panels to the charge controller, it’s time to bring your renewable energy system to life by installing the inverter. The inverter acts as the heart of your system, converting DC power from the batteries into AC power to energize your home like a beating heart powers the body.

When choosing the best inverter for your tiny house, consider the power requirements of your appliances and electronics. Look for an inverter that can handle the maximum power load you anticipate. It’s also important to consider the inverter’s efficiency, reliability, and warranty.

Once you have chosen the right inverter, carefully follow the manufacturer’s instructions to install it correctly. In case of any issues, such as the inverter not functioning properly or generating excessive heat, refer to the troubleshooting guide provided by the manufacturer.

With the inverter installed and functioning correctly, you are now ready to wire your tiny house for DC power, ensuring a seamless transition in your solar power system.

Wire Your Tiny House for DC Power

With the inverter humming and electricity flowing through your tiny sanctuary, your home glows with the gentle hum of renewable energy. One of the key benefits of using solar power in your tiny house is the ability to wire it for DC power. DC electrical wiring allows for a more efficient transfer of energy from the solar panels to your appliances and batteries. To properly wire your tiny house for DC power, you need to understand the basics of electrical circuits and safety precautions.

Advertisement

To help you visualize the process, refer to the table below:

Component Function
Solar Panels Capture sunlight
Charge Controller Regulates power flow
Batteries Store excess energy
DC Load Power appliances
Fuses Protect against overloads

By understanding the components and their functions, you can ensure a smooth and efficient wiring process for your tiny house. Now, let’s move on to the next section about testing and monitoring your solar power system.

Test and Monitor Your Solar Power System

Make sure you regularly test and monitor your solar power system to ensure it’s running smoothly and efficiently. Testing and monitoring the solar panel efficiency is crucial in order to identify any issues or problems that may arise.

One common issue to troubleshoot is a decrease in solar panel efficiency, which could be caused by shading, dirt, or damage to the panels. To test the efficiency, you can use a multimeter to measure the voltage and current output of the panels.

Additionally, monitoring the system’s performance over time can help identify any changes or potential problems. Keep an eye out for any noticeable drops in energy production or irregularities in the power flow.

Advertisement

By regularly testing and monitoring your solar power system, you can ensure it’s operating at its best and address any issues promptly.

Moving on to maintaining and upgrading your solar power system…

Maintain and Upgrade Your Solar Power System

Ensuring the optimal performance of your solar energy setup is like tending to a flourishing garden – regular maintenance and occasional upgrades will help your system thrive and continue to generate clean, renewable energy.

Here are three key steps to maintain and upgrade your solar power system:

  1. Clean and inspect your solar panels regularly to maximize their efficiency. Remove dirt, debris, and snow, and check for any damage or loose connections that may affect performance.

  2. Monitor your system’s performance using a solar power monitoring tool. This will help you identify any issues, such as low output or faulty components, and take prompt action to resolve them.

  3. Stay informed about common solar power system issues and troubleshooting techniques. Familiarize yourself with common problems like inverter failures or shading issues, and learn how to address them effectively to ensure optimal performance.

By following these maintenance and troubleshooting practices, you can keep your solar power system operating at its best and enjoy the benefits of clean, renewable energy for years to come.

Advertisement

Frequently Asked Questions

What are the potential risks or dangers associated with wiring a tiny house for solar power?

Potential risks and dangers associated with wiring a tiny house for solar power include safety precautions, fire hazards, and electrical hazards. It’s important to take proper safety measures when working with solar power systems to prevent accidents and damage.

Safety precautions such as using the correct wiring methods, installing circuit breakers, and grounding the system can help minimize the risks. Fire hazards may arise from faulty wiring or improper installation, while electrical hazards can occur if the system isn’t properly grounded or if there’s a malfunction.

Can I connect multiple tiny houses to one solar power system?

Sure, you can connect multiple tiny houses to one solar power system. It offers numerous benefits like cost savings, environmental friendliness, and energy independence.

By interconnecting the houses, you can share the generated solar energy, reducing the need for individual systems. This allows for more efficient energy usage and lowers the overall installation and maintenance costs.

It’s a smart and sustainable solution for powering multiple tiny houses with clean, renewable energy.

Advertisement

How long does the installation process typically take for wiring a tiny house for solar power?

The installation time for wiring a tiny house for solar power can vary depending on several factors. However, on average, the process typically takes around 2-3 days to complete.

It’s important to note that this timeframe can be affected by common pitfalls such as improper planning, lack of experience, or unexpected complications. To ensure a smooth installation, it’s recommended to thoroughly research and consult with professionals before beginning the project.

Are there any specific building codes or regulations that need to be followed when wiring a tiny house for solar power?

When wiring a tiny house for solar power, it’s crucial to adhere to specific building codes, regulations, and electrical standards. These measures ensure compliance and safety during the installation process. Building codes may dictate the type of wiring, grounding requirements, and placement of electrical components.

Electrical standards provide guidelines for properly sizing and installing solar panels, inverters, and batteries. By following these regulations, you can ensure a safe and efficient solar power system for your tiny house.

How much maintenance is required for a solar power system in a tiny house, and what are the associated costs?

When it comes to the maintenance of a solar power system in a tiny house, regular upkeep is necessary to ensure optimal performance. This includes cleaning the solar panels to remove any dirt or debris that may hinder their efficiency.

Advertisement

Additionally, the battery bank should be regularly checked for proper functioning and replaced if needed.

As for costs, regular maintenance expenses may include cleaning supplies, battery replacements, and occasional professional inspections, which can vary depending on the specific system and its components.

Conclusion

In conclusion, wiring a tiny house for solar power is a meticulous process that requires careful planning and consideration of various factors. By assessing your power needs and calculating the system size, you can determine the right solar panels and battery storage capacity.

Installing a solar charge controller and inverter for AC power is essential, followed by wiring your tiny house for DC power. Testing and monitoring the system is crucial, and regular maintenance and upgrades will ensure optimal performance.

Embracing this sustainable power solution opens the door to a greener and more self-sufficient lifestyle.

Advertisement
Continue Reading

Beginners Guides

How Does Plumbing Work In A Tiny House

Published

on

By

An image showcasing the intricate plumbing system of a tiny house: a network of pipes connecting a compact water heater, a water tank, a sink, a shower, and a composting toilet, highlighting each component's functionality

Have you ever been curious about the plumbing system in a tiny house? It might appear to be a mystery, but worry no more because I’m here to illuminate this topic for you.

Plumbing in a tiny house is a fascinating blend of simplicity and efficiency, ensuring that every drop of water is used wisely. From the essential components to the water sources and fixtures, every aspect is meticulously designed to maximize functionality in a limited space.

The layout and design of the plumbing system play a crucial role in ensuring smooth operation, while water heating options and greywater management are carefully considered for sustainable living.

Maintenance and troubleshooting are also key factors in keeping the plumbing system in top-notch condition. And for those seeking an off-grid lifestyle, there are alternative plumbing options available.

So, join me as we explore the intricacies of plumbing in a tiny house and discover the wonders it holds.

Advertisement

Key Takeaways

  • Plumbing in a tiny house requires simplicity and efficiency.
  • Proper layout and design of the plumbing system are crucial for smooth operation.
  • Water heating options and greywater management should be considered for sustainable living.
  • Regular maintenance and troubleshooting are important for keeping the plumbing system in good condition.

Essential Components of Tiny House Plumbing

When it comes to tiny house plumbing, the essential components are like the intricate veins and arteries that keep the home’s water flowing smoothly. One crucial aspect is water pressure control, which ensures that the water flows at the right rate throughout the system. This is achieved with the help of pressure regulators and valves that maintain a consistent pressure level.

Additionally, obtaining plumbing permits and adhering to regulations is of utmost importance. These permits ensure that the plumbing system meets safety standards and that the installation is done correctly. It is essential to research and understand the specific plumbing regulations for tiny houses in your area before starting any plumbing work.

Now, let’s transition to the subsequent section about water sources for tiny houses, which is another crucial aspect of plumbing in these compact homes.

Water Sources for Tiny Houses

When it comes to water sources for tiny houses, there are three main options to consider. The first option is connecting to a city water supply, which requires hooking up to an existing water line.

Another option is collecting rainwater, which involves installing a rainwater harvesting system to capture and store rainwater for use.

Lastly, installing a well or water tank is a popular choice for those living in remote areas, providing a self-sufficient water source.

Advertisement

Connecting to City Water Supply

To connect a tiny house to a city water supply, the first step is to hire a professional plumber to ensure proper installation, which can increase the overall cost by an average of 15%. This is crucial to avoid any potential issues with water pressure, leaks, or contamination. When connecting to a city water supply, a main water line is usually installed underground, leading from the city’s water source to the tiny house. This line is then connected to the plumbing system inside the house, allowing for easy access to fresh water.

To evoke an emotional response, here is a comparison table showcasing the benefits of connecting to a city water supply versus alternative water sources:

Connecting to City Water Supply Alternative Water Sources
Consistent and reliable supply Dependence on availability
No need for storage tanks Limited water capacity
Easy access to clean water Water quality concerns
Minimal maintenance required Regular maintenance

When it comes to collecting rainwater, there are additional steps to consider.

Collecting Rainwater

If you want to save money and become more self-sufficient, collecting rainwater is an excellent option for your water needs. Rainwater harvesting is the process of collecting and storing rainwater for later use. There are various filtration methods available to ensure the collected rainwater is safe for consumption.

These methods include sedimentation, filtration, and disinfection. Sedimentation involves allowing the water to sit in a tank or barrel, allowing any debris to settle at the bottom. Filtration removes any remaining impurities by passing the water through a series of filters, including activated carbon and sand filters. Lastly, disinfection kills any remaining bacteria or pathogens present in the water.

Advertisement

With these filtration methods in place, you can have a sustainable source of water for your tiny house. Transitioning to the subsequent section about installing a well or water tank, it is important to consider the size and location of your property for optimal water collection.

Installing a Well or Water Tank

Installing a well or water tank can be a game-changer for ensuring a constant and reliable water supply for your small dwelling. When it comes to collecting rainwater, there are two main options to consider: installing a rain barrel or connecting to a community water system.

For those who prefer self-sufficiency, installing a rain barrel is a cost-effective and environmentally-friendly solution. It involves setting up a collection system that captures rainwater from the roof and directs it into a storage tank. This water can then be used for various purposes, such as flushing toilets or watering plants.

On the other hand, connecting to a community water system provides a more reliable and consistent water source. This involves tapping into the existing water infrastructure and ensuring proper connections and plumbing are in place to deliver water to your tiny house.

Choosing the right plumbing fixtures is crucial for an efficient water system. From faucets to showerheads, each fixture should be chosen with water conservation and space-saving in mind, ensuring a seamless transition into the subsequent section about choosing the right plumbing fixtures.

Advertisement

Choosing the Right Plumbing Fixtures

When it comes to picking out fixtures for your tiny house plumbing, finding the perfect ones can be both exciting and challenging. Here are four key factors to consider when selecting plumbing fixtures for your tiny house:

  1. Plumbing Fixture Types: Choose fixtures that are specifically designed for small spaces, such as compact toilets, space-saving sinks, and narrow showerheads. These fixtures are specifically designed to maximize space efficiency.

  2. Sustainable Plumbing Options: Opt for fixtures that promote water conservation, such as low-flow faucets and dual-flush toilets. These eco-friendly fixtures can help reduce water usage and minimize environmental impact.

  3. Durability: Since space is limited in a tiny house, it’s crucial to choose fixtures that are durable and long-lasting. Look for fixtures made from high-quality materials that can withstand regular use and minimize the need for repairs or replacements.

  4. Style and Aesthetics: Consider your personal preferences and the overall design of your tiny house when selecting fixtures. Choose fixtures that complement the style and aesthetics of your space, creating a cohesive and visually appealing look.

With the right plumbing fixtures in place, you can now move on to designing the plumbing layout and ensuring everything fits seamlessly into your tiny house.

Plumbing Layout and Design

Now that you’ve mastered the art of choosing the perfect plumbing fixtures, it’s time to dive into the intricate world of plumbing layout and design. When it comes to plumbing in a tiny house, proper layout and design are crucial to ensure efficient water flow and minimize maintenance issues. A well-designed plumbing system will not only save you time and money but also prevent potential headaches down the line.

To help you understand the importance of plumbing layout, here’s a table outlining key considerations:

Consideration Description
Pipe Sizing Determining the correct pipe size based on flow rate and distance traveled.
Ventilation Installing proper vents to prevent air locks and ensure adequate drainage.
Drainage Designing a slope for efficient water drainage and preventing clogs.
Access Points Including access panels for easy plumbing maintenance and troubleshooting.

By carefully planning your plumbing layout and following these guidelines, you can avoid common plumbing issues and keep your tiny house running smoothly. Now, let’s move on to discuss water heating options.

Advertisement

Water Heating Options

Choosing the right water heating options for your compact living space is essential to ensure a cozy and comfortable environment. In a tiny house, where space is limited, it’s crucial to consider water heater options that are both efficient and compact.

There are several energy-efficient solutions available for tiny homes, such as tankless water heaters and heat pump water heaters. Tankless water heaters provide hot water on demand, eliminating the need for a large storage tank. They’re compact and can be installed in small spaces.

Heat pump water heaters use electricity to transfer heat from the air or ground to heat the water, making them highly efficient. These options not only save space but also reduce energy consumption and lower utility bills.

Transitioning into the subsequent section about insulation and freeze protection, it’s important to consider these factors to ensure the proper functioning of your water heating system.

Insulation and Freeze Protection

In order to prevent frozen pipes in cold climates, it’s crucial to properly insulate water lines in a tiny house. This can be accomplished by using heat tape or insulated sleeves.

Advertisement

These measures help to maintain the temperature of the water lines and prevent them from freezing, which can lead to costly repairs and potential water damage.

Preventing Frozen Pipes in Cold Climates

To avoid the nightmare of burst pipes in freezing temperatures, it’s crucial to take measures to prevent them in your tiny house. Here are three key steps to preventing pipe bursts in cold climates:

  1. Insulate water pipes: Properly insulating water pipes is essential to protect them from freezing. Insulation sleeves or foam tubes can be used to wrap around the pipes, providing a layer of insulation that helps retain heat and prevent freezing.

  2. Seal gaps and cracks: Inspect your tiny house for any gaps or cracks where cold air can enter and reach the pipes. Use caulk or foam insulation to seal these gaps and prevent cold air from reaching the pipes.

  3. Use heat tape: Heat tape is an effective tool for preventing frozen pipes. It’s a special electrical tape that can be wrapped around the pipes and provides a constant source of heat to keep them warm.

By following these steps, you can ensure that your water pipes are properly insulated and protected from freezing temperatures. Properly insulating water lines is the next important aspect to consider in maintaining a functional plumbing system in your tiny house.

Properly Insulating Water Lines

Insulating water lines is essential for ensuring that your pipes stay protected from freezing temperatures in cold climates. By properly insulating your water lines, you can prevent heat loss and keep the water flowing smoothly throughout your tiny house. There are various insulating techniques available to achieve this, such as using foam pipe insulation or wrapping the pipes with heating tape. These methods create a barrier between the pipes and the cold air, preventing them from freezing. Additionally, insulating the pipes helps to conserve energy by reducing heat loss, resulting in lower energy bills. In order to make the insulating process easier to understand, refer to the table below for a comparison of different insulation materials and their effectiveness. Now, let’s move on to the next section and explore the use of heat tape or insulated sleeves to further protect your water lines.

Using Heat Tape or Insulated Sleeves

If you want to ensure the longevity of your water lines and protect them from freezing temperatures, consider using heat tape or insulated sleeves. Heat tape installation involves wrapping a specialized tape around the water lines, which produces heat and prevents freezing. This method is particularly useful in areas with extremely cold climates.

Advertisement

Insulated sleeves, on the other hand, are foam tubes that provide insulation and protection to the water lines. They’re easy to install and don’t require any additional power source. The benefits of using insulated sleeves include energy efficiency and cost-effectiveness. These sleeves reduce heat loss and keep the water lines at a consistent temperature. This prevents the water from freezing and avoids potential damage to the plumbing system.

By properly insulating your water lines with heat tape or insulated sleeves, you can ensure the smooth functioning of your plumbing system in a tiny house.

Moving on to greywater management, it’s important to properly dispose of wastewater to minimize environmental impact.

Greywater Management

Imagine stepping into your tiny house and watching as the greywater gracefully dances its way through a series of interconnected pipes, like a lively river flowing through a beautifully landscaped garden.

Greywater management is a crucial aspect of sustainable plumbing in a tiny house. To ensure proper filtration, consider installing a greywater filtration system that separates solids from the water, allowing it to be reused for non-potable purposes such as watering plants or flushing toilets. Additionally, explore sustainable plumbing options like using biofilters or constructed wetlands to naturally treat the greywater before it is discharged into the environment. These eco-friendly solutions not only minimize water waste but also reduce the strain on traditional sewage systems.

Advertisement

Transitioning into the next section about maintenance and troubleshooting, it’s important to regularly inspect and clean the greywater system to prevent clogs and ensure its efficient functioning.

Maintenance and Troubleshooting

Regularly maintaining and troubleshooting the greywater system is essential for ensuring its efficient and smooth operation in a sustainable and eco-friendly manner.

One common issue to address is troubleshooting water leaks, which can occur due to loose connections or damaged pipes. To fix this, I would first turn off the water supply and inspect the system for any visible leaks. If found, I would tighten the connections or replace the damaged pipes accordingly.

Another aspect of maintenance involves maintaining water pressure, which can be done by regularly cleaning the filters and checking for any blockages in the system. By addressing these issues promptly, we can ensure that the greywater system functions optimally.

Transitioning into the subsequent section about off-grid plumbing options, it’s important to explore alternative solutions for water management in tiny houses.

Advertisement

Off-Grid Plumbing Options

When it comes to off-grid plumbing options for a tiny house, there are several key points to consider.

First, installing a solar-powered water system can provide a sustainable and renewable source of energy to power the water pump and heater.

Second, utilizing water filtration and purification systems ensures that the water is clean and safe for consumption.

Lastly, incorporating composting toilets and greywater recycling allows for efficient waste management and reduces environmental impact.

Installing Solar Powered Water Systems

Installing solar powered water systems in a tiny house can be an exciting and eco-friendly solution for providing hot water and reducing energy consumption. By incorporating solar panel installation into the plumbing system, you can harness the power of the sun to heat water for everyday use.

Advertisement

This involves placing solar panels on the roof to capture sunlight, which is then converted into heat energy and used to warm the water. To maximize efficiency and conserve water, it’s important to implement water conservation tips such as using low-flow fixtures and greywater for non-potable purposes.

These measures not only reduce water waste but also contribute to a more sustainable lifestyle. Transitioning into the subsequent section about using water filtration and purification systems, it’s essential to ensure that the water used in the tiny house is clean and safe for consumption.

Using Water Filtration and Purification Systems

After installing solar-powered water systems in a tiny house, the next step is to ensure that the water being used is clean and safe. This is where water filtration and purification systems come into play. These systems are designed to remove impurities and harmful contaminants from the water supply, providing fresh and clean water for daily use.

Water filtration systems work by passing water through a series of filters that trap particles and sediments. On the other hand, water purification methods use various techniques such as ultraviolet light or chemical disinfection to kill bacteria and other microorganisms. By incorporating these systems into a tiny house plumbing setup, occupants can have peace of mind knowing that their water is pure and safe to drink.

Moving forward, let’s explore the importance of utilizing composting toilets and greywater recycling for a sustainable and eco-friendly plumbing system.

Advertisement

Utilizing Composting Toilets and Greywater Recycling

To create an eco-friendly oasis in your humble abode, why not embrace the wonders of composting toilets and greywater recycling? These innovative systems not only help to reduce water waste but also provide a sustainable solution for managing human waste in a tiny house.

Here are three key benefits of incorporating composting toilets and greywater recycling into your plumbing system:

  • Composting toilets: These toilets use a natural process to break down waste into compost, which can then be safely used as fertilizer for plants. They eliminate the need for water and sewage systems, making them perfect for off-grid living.

  • Greywater recycling: By diverting and treating greywater (water from sinks, showers, and laundry), you can reuse it for purposes like flushing toilets or watering plants. This reduces the strain on freshwater resources and minimizes wastewater discharge.

By implementing composting toilets and greywater recycling, you can significantly reduce your environmental impact while enjoying a self-sufficient lifestyle. For more information on these wastewater treatment systems and other sustainable plumbing options, refer to the resources and further reading section.

Resources and Further Reading

Additionally, there are a variety of books, websites, and online forums available that offer extensive resources and further reading on the intricacies of plumbing systems in tiny houses. These resources provide valuable information on water conservation and off-grid plumbing solutions. They delve into various techniques and technologies that can be employed to maximize water efficiency in a tiny house.

From rainwater harvesting systems to greywater recycling methods, these resources offer step-by-step guides and detailed explanations on how to implement these solutions. They also discuss the importance of proper insulation and ventilation in preventing frozen pipes during winter months.

Advertisement

Furthermore, these resources provide insights into alternative toilet options, such as composting toilets, and explain how they can be integrated into a tiny house plumbing system.

Overall, these resources serve as invaluable references for anyone looking to create a sustainable and efficient plumbing system in their tiny house.

Frequently Asked Questions

Can I use regular plumbing fixtures in a tiny house or do I need to use specialized fixtures?

Regular plumbing fixtures can be used in a tiny house, but there are some specialized fixtures that may be more suitable. These specialized fixtures are specifically designed to address the installation challenges that come with limited space and unique plumbing configurations in tiny houses. By using these fixtures, you can ensure optimal functionality and efficiency in your tiny house plumbing system.

It’s important to consult with a professional plumber who has experience working with tiny house plumbing to ensure proper installation.

How do I determine the size and layout of my plumbing system in a tiny house?

Determining the plumbing size and layout in a tiny house is like solving a complex puzzle. It requires careful consideration of available space and the functionality of each fixture.

Advertisement

To start, calculate the water demand for your household activities and select appropriately sized pipes. Next, plan the layout, considering the proximity of fixtures and minimizing the length of pipe runs.

A well-designed plumbing system ensures efficient water flow and maximizes the limited space in a tiny house.

Are there any specific requirements or considerations for insulating and protecting the plumbing in a tiny house?

When it comes to insulating requirements and protecting considerations for plumbing in a tiny house, there are a few key factors to keep in mind. Proper insulation is crucial to prevent freezing pipes in colder climates. It’s essential to use insulation materials specifically designed for plumbing systems.

Additionally, protecting the plumbing from potential damage caused by shifting or movement of the tiny house during transportation is also important. Adequate support and secure fastening of the pipes are necessary to ensure their longevity and functionality.

What are some common maintenance issues and troubleshooting tips for tiny house plumbing systems?

Common maintenance issues in tiny house plumbing systems can include clogged drains, leaking pipes, and low water pressure. To troubleshoot these issues, start by checking for any blockages in the drains or pipes. Clear them using a plunger or drain snake if necessary.

Advertisement

Inspect the pipes for any visible leaks and repair or replace them as needed. If experiencing low water pressure, check the water supply line for any obstructions or consult a professional to assess the system.

What are the options for off-grid plumbing in a tiny house and how do they differ from traditional plumbing systems?

When considering off-grid plumbing options for tiny houses, there are a few choices available. One option is a composting toilet, which eliminates the need for traditional plumbing altogether.

Another option is a waterless system, which uses innovative technologies to minimize water usage.

Additionally, rainwater harvesting systems can be implemented for water supply.

These off-grid plumbing systems differ from traditional plumbing by reducing reliance on municipal water and sewage systems, making them more sustainable and self-sufficient.

Advertisement

Conclusion

In conclusion, plumbing in a tiny house is like the intricate network of veins that keep our bodies functioning. It may seem small and insignificant, but it is essential for the overall well-being of the house.

Just as our veins carry life-giving blood, plumbing carries water to every nook and cranny, ensuring the tiny house thrives. So, let’s appreciate the beauty of this hidden system, for it symbolizes the life force that flows through our homes, keeping us nourished and comfortable.

Continue Reading

Trending