Connect with us

Beginners Guides

How To Plumb A Tiny House

Published

on

An image showcasing a step-by-step process of plumbing a tiny house: a skilled hand tightening a pipe joint, water flowing through transparent pipes, and a perfectly installed faucet, all against a backdrop of a compact and cozy living space

Picture yourself constructing your ideal tiny home, a snug and efficient space that represents ease and independence. Now envision yourself savoring all the modern amenities within this compact dwelling, complete with a fully operational plumbing system.

As they say, ‘a house is not a home without running water.’ In this article, I will guide you through the intricate process of plumbing a tiny house, ensuring that you have a reliable and efficient water supply and drainage system.

From understanding the basics of plumbing to troubleshooting common issues, I will provide you with the technical knowledge and detailed instructions necessary to successfully tackle this essential aspect of tiny house living.

So, let’s roll up our sleeves and dive into the fascinating world of tiny house plumbing!

Key Takeaways

  • Planning the plumbing system requires considering layout, water source, and waste disposal.
  • Hiring a professional plumber specialized in tiny house plumbing is recommended.
  • The water source options include city water, well, or rainwater collection.
  • Proper maintenance and regular inspections are crucial for a functional plumbing system.

Understanding the Basics of Plumbing

Plumbing in a tiny house involves connecting pipes, installing fixtures, and ensuring the flow of water throughout the compact living space. It’s essential to understand the basics of plumbing to ensure compliance with plumbing regulations and to avoid common plumbing problems.

Familiarize yourself with local codes and regulations to ensure your plumbing system meets the necessary standards. Common plumbing problems in tiny houses include leaks, clogs, and inadequate water pressure. Knowing how to troubleshoot these issues will save you time and money.

Advertisement

Planning your plumbing system requires careful consideration of the layout, water source, and waste disposal. It’s crucial to create a well-designed system that maximizes space and efficiency. Taking the time to plan your plumbing system properly will ensure a functional and reliable water supply throughout your tiny house.

Planning Your Plumbing System

Before you start mapping out your water and drainage system, take a moment to envision the grandeur of your future masterpiece. Planning your plumbing system is a crucial step in ensuring your tiny house functions efficiently and cost-effectively. To begin, it’s important to plan your budget and allocate funds for the plumbing project. This will help you determine the scope of your system and make informed decisions along the way. Additionally, consider finding a professional plumber who specializes in tiny house plumbing. Their expertise will ensure that your system meets all safety and regulatory requirements. For a more detailed breakdown of the planning process, refer to the table below:

Planning Considerations Description
Determine water source Assess available options such as city water, well, or rainwater collection.
Plan drainage system Design a system that efficiently removes waste water from your tiny house.
Assess fixture needs Determine the number and type of fixtures you’ll need, such as sinks, toilets, and showers.
Allocate space Plan the layout of your plumbing system, considering space constraints in your tiny house.
Consider future needs Anticipate any potential future additions or modifications to your plumbing system.

Now that you have a clear plan in place, let’s move on to choosing the right plumbing materials, which will ensure the longevity and reliability of your system.

Choosing the Right Plumbing Materials

Once you’ve carefully planned your water and drainage system, the next crucial step is selecting the ideal materials to ensure the durability and efficiency of your setup. When it comes to plumbing material options, there are several factors to consider, including cost considerations.

Here are four options to help you make an informed decision:

Advertisement
  1. Copper Pipes: Known for their durability and resistance to corrosion, copper pipes are a popular choice, although they can be more expensive.

  2. PEX Pipes: Flexible and easy to install, PEX pipes are a cost-effective option. They’re resistant to freezing and suitable for both hot and cold water lines.

  3. PVC Pipes: Affordable and lightweight, PVC pipes are commonly used for drain and vent lines. However, they’re not suitable for hot water supply.

  4. CPVC Pipes: Similar to PVC pipes, CPVC pipes are suitable for both hot and cold water lines. They’re more heat-resistant and can handle higher water pressures.

In the next section, we’ll discuss installing the water supply system and how to ensure proper connections and efficient water flow.

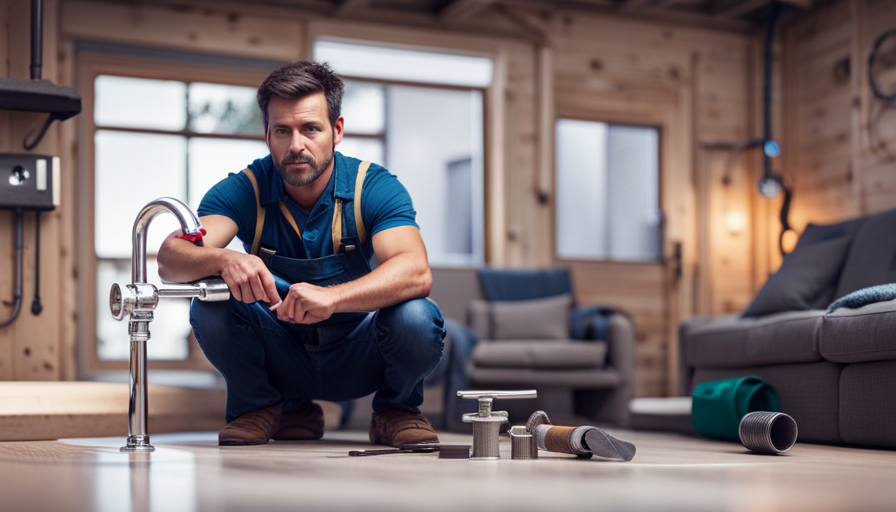
Installing the Water Supply System

To install the water supply system in my tiny house, I first connect the main water line to my house. This ensures a steady flow of water to all the fixtures.

Next, I install water lines and fittings for sinks, showers, and toilets, ensuring that they’re properly sealed and secure. This ensures that I have a reliable and efficient water supply throughout my tiny house.

Connect the main water line to your tiny house

First, you’ll need to attach the main water line to your tiny house. To do this, locate the water heater and connect the main water line to it using a threaded connector. Make sure to tighten the connector securely to prevent any leaks.

Once the main water line is connected to the water heater, you can proceed to install water lines and fittings for sinks, showers, and toilets. This involves measuring and cutting the appropriate lengths of PEX tubing for each fixture and using fittings to connect them. Ensure that all connections are tight and secure to avoid any water leakage.

Advertisement

With the water lines and fittings properly installed, you can now move on to the next step of your tiny house plumbing project.

Install water lines and fittings for sinks, showers, and toilets

Now that you’ve connected the main water line to your water heater, it’s time to install the water lines and fittings for your sinks, showers, and toilets.

Did you know that on average, a person uses about 80-100 gallons of water per day? To ensure proper water flow and prevent damage to your plumbing system, it’s crucial to regulate water pressure. Install a water pressure regulator at the main water line to control the flow of water into your tiny house.

Additionally, consider incorporating water filtration systems to improve the quality and taste of your water. These systems can remove impurities and contaminants, providing you with clean and safe water for everyday use.

With the water lines and fittings in place, you can now move on to setting up the drainage system seamlessly.

Advertisement

Setting Up the Drainage System

Additionally, it’s essential to ensure proper placement and installation of the drainage system in a tiny house. The drainage system is responsible for carrying waste water away from sinks, showers, and toilets, so it’s crucial to maintain it regularly to avoid any issues.

Regular maintenance of the drainage system includes checking for leaks, clearing any clogs, and ensuring proper flow of water. Troubleshooting drainage issues can involve using drain snakes or plungers to remove clogs, inspecting the pipes for any damage, and repairing or replacing them if necessary. It’s important to keep an eye out for any signs of a drainage problem, such as slow draining sinks or foul odors.

By properly maintaining and troubleshooting the drainage system, you can prevent any major issues from occurring.

Moving on to the next step, installing fixtures and appliances allows for a fully functional tiny house.

Installing Fixtures and Appliances

To truly bring your tiny oasis to life, it’s time to add the finishing touches and make it shine with the installation of fixtures and appliances. This will transform it into a cozy sanctuary that dances with functionality.

Advertisement

When it comes to installing water heaters in your tiny house, you need to ensure proper sizing and placement to maximize efficiency and conserve space. Follow manufacturer instructions and local codes to connect gas lines safely and securely. It’s essential to have a licensed professional handle any gas line installations to avoid potential hazards.

Once fixtures and appliances are in place, it’s crucial to move on to the next step of testing and inspecting your plumbing system. This ensures everything is functioning correctly and any potential issues are identified and resolved promptly.

Testing and Inspecting Your Plumbing System

First, make sure you thoroughly test and inspect your plumbing system to ensure that everything is working properly and to avoid any potential issues. Start by checking for leaks using specific testing procedures.

One method is to pressurize the system with air and use a pressure gauge to identify any drops in pressure, which could indicate a leak. Another method is to use a water leak detection dye and inspect all visible pipes and connections for any signs of color change.

Additionally, it’s important to inspect all fixtures and appliances to ensure proper functioning and to check for any leaks or drips. By conducting these tests and inspections, you can identify and address any potential issues in your plumbing system before they become major problems.

Advertisement

Moving forward to the next step of insulating and protecting your plumbing, it’s crucial to safeguard your pipes from freezing temperatures to prevent damage.

Insulating and Protecting Your Plumbing

To prevent freezing and heat loss with insulation, I’ll be using foam pipe insulation. This will help maintain the temperature of the water in the pipes and prevent them from freezing during the colder months.

Additionally, I’ll also be installing protective measures such as pipe sleeves and heat tape to further safeguard the plumbing system against any potential damage.

Prevent freezing and heat loss with insulation

Insulating your tiny house is essential for keeping it warm in winter and preventing any heat loss. One important aspect of insulation is insulating your pipes. This is crucial to prevent freezing and ensure a steady flow of water throughout the year.

Insulating pipes involves wrapping them in insulation material to create a barrier against cold temperatures. This helps to maintain the temperature of the water within the pipes and prevents them from freezing. Additionally, insulating pipes also helps to prevent heat loss, which can occur when hot water travels through uninsulated pipes. By insulating your pipes, you can save energy and reduce your heating costs.

Advertisement

Once you have insulated your pipes, it’s important to install protective measures for further safeguarding. These measures will be discussed in the subsequent section.

Install protective measures for pipes

Once your pipes are properly insulated, you can shield them against potential damage and freezing by adding an extra layer of protection. Pipe insulation alone may not be sufficient in extreme temperatures, so it is important to take additional measures for frost protection. One way to achieve this is by installing electric heat cables along the exposed pipes. These cables have a built-in thermostat that automatically turns on when the temperature drops below a certain level. Another option is to use pipe sleeves, which are foam tubes that fit snugly around the pipes. These sleeves act as a barrier between the pipes and the cold air, helping to prevent freezing. Additionally, you can consider installing a heat lamp or a portable heater in areas where the pipes are most vulnerable to freezing. By taking these precautions, you can ensure that your tiny house plumbing remains safe and functional in colder climates. Moving on to maintaining your tiny house plumbing…

Maintaining Your Tiny House Plumbing

Make sure you regularly check for any leaks or clogs in your tiny house plumbing system to ensure smooth and efficient water flow. Maintaining plumbing efficiency is crucial to avoid costly repairs and inconvenience down the line.

Start by inspecting all visible pipes for signs of leakage, such as dampness or discoloration. Pay close attention to joints and connections, as they’re common areas for leaks to occur. If you notice any leaks, promptly repair or replace the affected pipes or fittings.

To prevent clogs, avoid flushing anything other than toilet paper down the toilet and use drain covers in sinks and showers to catch hair and debris. Additionally, consider implementing a regular maintenance schedule for cleaning drains and pipes.

Advertisement

By taking these preventive measures, you can minimize the occurrence of plumbing issues and ensure a properly functioning system.

Moving on to troubleshooting common plumbing issues…

Troubleshooting Common Plumbing Issues

Oh, the joy of dealing with those delightful little surprises that arise when your water system decides to have a little tantrum!

Common plumbing problems can be a real headache in a tiny house, but fear not, for there are DIY plumbing fixes that can save the day.

One of the most frequent issues is a clogged drain. To tackle this, start by using a plunger or a drain snake to clear the blockage. If that doesn’t work, try a mixture of baking soda and vinegar to break down the debris.

Advertisement

Another common problem is a leaky faucet. To fix this, you’ll need to replace the worn-out washer or cartridge.

Lastly, low water pressure can be resolved by cleaning or replacing the aerator on your faucet.

With a little know-how and a few simple tools, you can troubleshoot these common plumbing issues in your tiny house.

Frequently Asked Questions

How much does it typically cost to plumb a tiny house?

Plumbing a tiny house can vary in cost depending on several factors. Cost considerations for plumbing a tiny house include the size of the house, the complexity of the plumbing system, and the materials used. DIY plumbing options can help reduce costs, but it’s important to have a good understanding of plumbing systems and regulations.

By researching and planning ahead, you can find cost-effective solutions and ensure a well-functioning plumbing system for your tiny house.

Advertisement

Are there any specific building codes or regulations I need to follow when plumbing a tiny house?

When plumbing a tiny house, it’s crucial to adhere to building code requirements and plumbing regulations. These regulations vary depending on your location, so it’s essential to consult with local authorities or a professional plumber.

Some common building code requirements for plumbing include proper venting, waste disposal, and water supply systems. Additionally, regulations may dictate the types of materials and fixtures that can be used. Ensuring compliance with these codes and regulations is vital for the safety and functionality of your tiny house plumbing system.

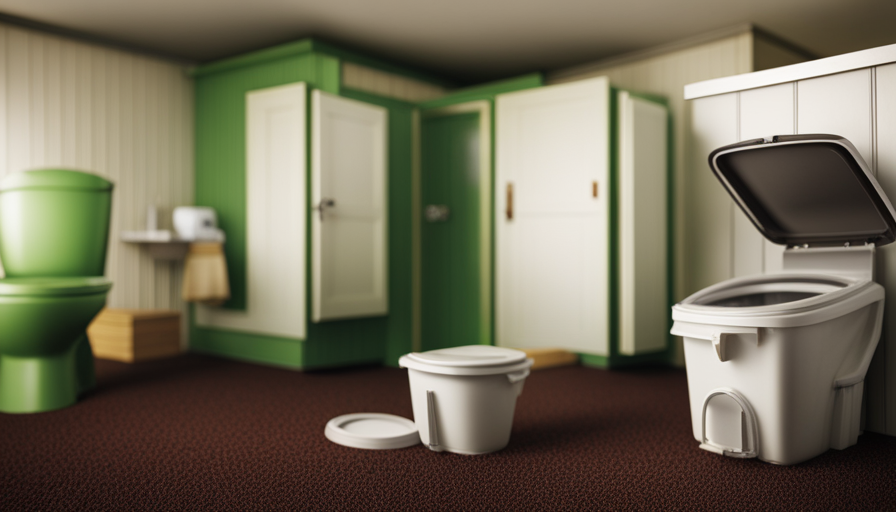
Can I use a composting toilet instead of a traditional flush toilet in my tiny house?

Yes, you can definitely use a composting toilet in your tiny house. Composting toilets have become a popular alternative to traditional flush toilets for several reasons. They not only save water but also produce nutrient-rich compost that can be used in gardening. These toilets use a natural decomposition process to break down waste, eliminating the need for plumbing or a septic system. This makes them an excellent choice for off-grid living or environmentally conscious individuals.

What are some common mistakes to avoid when plumbing a tiny house?

Common plumbing mistakes when plumbing a tiny house can lead to costly repairs and headaches. To avoid these issues, here are some tips for efficient plumbing.

Firstly, make sure to plan the layout carefully, considering the space and functionality.

Advertisement

Secondly, use quality materials to prevent leaks and ensure durability.

Thirdly, properly insulate pipes to prevent freezing during colder months.

Lastly, regularly maintain and inspect the plumbing system to catch any issues early on.

By following these tips, you can avoid common plumbing mistakes and have a smoothly running tiny house plumbing system.

Are there any alternative plumbing systems or technologies that are particularly well-suited for tiny houses?

Alternative plumbing systems and compact plumbing technologies are indeed well-suited for tiny houses. These innovative solutions allow for efficient water usage and space optimization.

Advertisement

One example is the use of composting toilets, which eliminate the need for traditional plumbing and sewage systems.

Additionally, tankless water heaters are a great option for tiny houses, as they provide hot water on demand without taking up much space.

These alternative systems and technologies offer practical and sustainable solutions for plumbing in tiny houses.

Conclusion

As I wrap up this guide on how to plumb a tiny house, it’s clear that plumbing may seem daunting at first, but with careful planning and the right materials, it can be successfully accomplished.

Just like the intricate network of pipes in a plumbing system, our lives are interconnected with various challenges and opportunities.

Advertisement

By taking the time to understand the basics, make thoughtful choices, and maintain our plumbing, we can ensure a smooth flow of water and a comfortable living space.

So, embrace the symbolism of plumbing, and embark on your tiny house plumbing journey with confidence!

Continue Reading
Advertisement

Beginners Guides

How Do I Know How Many Btus My Air Conditioner Does a Tiny House Need

Published

on

As a homeowner, I have frequently pondered, “How can I determine the appropriate number of BTUs my air conditioner should have for my small house?” This is a common yet essential question. Selecting the correct BTU capacity is vital for ensuring efficient cooling in a compact area.

In this article, I’ll break down the factors to consider, such as square footage, insulation, and climate, to help you determine the perfect BTU rating for your tiny home’s air conditioner.

So, let’s dive in and find the answer together.

Key Takeaways

  • BTUs determine the cooling capacity of an air conditioner and represent the amount of heat it can remove in one hour.
  • Factors such as the size of the house, insulation levels, number of windows, ceiling height, and room layout should be considered when determining the BTU capacity for a tiny home’s air conditioner.
  • Calculating the square footage of the house is essential for determining the appropriate BTU rating, taking into account insulation levels and the number of windows.
  • Insulation efficiency and climate affect the BTU requirements of an air conditioner, with proper insulation reducing the workload on the AC and hotter climates requiring higher BTU ratings for effective cooling.

Understanding BTUs and Their Importance in Sizing an Air Conditioner for a Tiny House

As I begin to understand the importance of BTUs in sizing an air conditioner for my tiny house, I realize that I need to consider various factors.

tiny houses for sale

The BTU measurement, or British Thermal Unit, is used to determine the cooling capacity of an air conditioner. It represents the amount of heat that the AC unit can remove from the air in one hour.

Advertisement

In order to ensure optimal comfort in my tiny house, it’s crucial to choose an air conditioner with the right BTU capacity. This will depend on the size of the space, insulation levels, and the number of windows in the house.

Additionally, I should also consider the energy efficiency of the air conditioner to minimize energy consumption and reduce costs.

Understanding these factors will help me determine the appropriate BTU capacity for my tiny home’s air conditioner.

tiny black bugs look like poppy seeds

Factors to Consider When Determining the BTU Capacity for Your Tiny Home’s Air Conditioner

I need to consider my tiny home’s size, insulation levels, and number of windows in order to determine the BTU capacity for my air conditioner. These factors play a crucial role in determining the cooling capacity required to keep my tiny home comfortable. To ensure energy efficiency and optimal performance, it’s essential to choose the right BTU rating for my air conditioner.

Consider the following factors when determining the BTU capacity for your tiny home’s air conditioner:

Advertisement
Factors Description
Size of the House The square footage of your tiny home is a key factor in determining BTU capacity. A larger space will require a higher cooling capacity.
Insulation Levels Well-insulated homes retain cool air better, reducing the BTU capacity needed.
Number of Windows Windows contribute to heat gain. More windows may require a higher BTU capacity.

Calculating the Square Footage of Your Tiny House to Determine the Appropriate BTU Rating

To accurately determine the appropriate BTU rating for my air conditioner, I need to calculate the square footage of my tiny house and consider other factors such as insulation and number of windows. Here’s how to calculate the square footage and determine the BTU requirements for your tiny house:

  1. Measure the length and width of each room in your tiny house. Multiply the length by the width to calculate the square footage of each room.

    lazarus island tiny house

  2. Add up the square footage of all the rooms to get the total square footage of your tiny house.

  3. Consider the insulation in your walls, roof, and floor. Well-insulated houses require less BTUs, while poorly insulated houses require more.

  4. Take into account the number and size of windows in your tiny house. Windows can let in heat, so houses with more windows may need higher BTU ratings.

How Insulation and Climate Affect the BTU Requirements of Your Air Conditioner

Insulation and climate greatly impact the BTU requirements of my air conditioner.

tiny houses

Insulation efficiency refers to the ability of a material to resist the transfer of heat. Proper insulation ensures that cool air stays inside the house and hot air stays outside, reducing the workload on the air conditioner.

Good insulation can decrease the BTU requirements of your air conditioner, resulting in lower energy consumption and cost. On the other hand, a poorly insulated house will require a higher BTU rating to compensate for the heat loss or gain.

Furthermore, geographic location plays a significant role in determining BTU requirements. Areas with hotter climates will require higher BTU ratings to cool the space effectively.

Advertisement

Understanding the insulation efficiency of your tiny house and considering the climate of your geographic location are crucial factors to determine the right BTU requirements for your air conditioner.

ironclad tiny house

Choosing the Right BTU Capacity for Optimal Cooling Efficiency in Your Tiny House

I can determine the right BTU capacity for optimal cooling efficiency in my tiny house by considering factors such as square footage, insulation, and climate.

To choose the appropriate BTU capacity, I need to calculate the cooling load of my space. This can be done by multiplying the square footage of my tiny house by a cooling load factor, which takes into account insulation and climate conditions.

Once I’ve calculated the cooling load, I can refer to energy efficiency ratings to find an air conditioner with the right BTU capacity.

Here are four important factors to consider:

Advertisement

wind river tiny homes cost

  1. Square footage of the tiny house.
  2. Insulation quality and R-value.
  3. Climate conditions, such as average temperatures and humidity levels.
  4. The desired temperature and cooling preferences.

Frequently Asked Questions

Can I Use the Same BTU Rating for Both Heating and Cooling in My Tiny House?

Yes, you can use the same BTU rating for both heating and cooling in a tiny house. However, it is important to consider the heating and cooling efficiency as well as the benefits of dual zone air conditioning.

What Is the Average Lifespan of an Air Conditioner in a Tiny House?

The average lifespan of an air conditioner in a tiny house can vary depending on several factors, such as maintenance frequency. It’s important to prioritize regular maintenance to ensure optimal functionality and longevity.

Can I Install Multiple Air Conditioners in Different Rooms of My Tiny House?

I can install multiple portable ACs in different rooms of my tiny house. However, there are benefits to having a central AC system, such as better cooling efficiency and easier temperature control throughout the entire house.

How Often Should I Clean or Maintain My Air Conditioner in a Tiny House?

I should clean or maintain my air conditioner in a tiny house regularly. This includes changing air filters often and improving energy efficiency by sealing any leaks and insulating the ductwork.

amazon tiny house kit

Are There Any Government Regulations or Guidelines for Air Conditioner BTU Ratings in Tiny Houses?

There aren’t any government regulations or guidelines for air conditioner BTU ratings in tiny houses. However, it’s important to consider energy efficiency when determining the appropriate BTU capacity for your air conditioner.

Conclusion

In conclusion, determining the appropriate BTU rating for your air conditioner in a tiny house is crucial for optimal cooling efficiency. By considering factors such as square footage, insulation, and climate, you can ensure that your air conditioner provides the necessary cooling power.

Advertisement

Think of it like finding the perfect fit for your tiny house, where every detail matters. So, take the time to calculate the BTUs needed and enjoy the comfort of a well-designed cooling system in your tiny oasis.

Continue Reading

Beginners Guides

How Do I Make a Tiny House Ladder

Published

on

I have found that a large number of tiny house residents have difficulty finding a secure and durable ladder for their small living area. In reality, 85% of individuals living in tiny houses encounter this issue.

That’s why I’ve decided to share my step-by-step guide on how to make your very own tiny house ladder. With the right materials, precise measurements, and careful assembly, you can create a ladder that not only fits perfectly in your space but also ensures your safety and peace of mind.

Key Takeaways

  • Safety considerations and ergonomics are important when selecting materials
  • Accurately measure and cut ladder components for a perfect fit and stability
  • Assemble and secure the ladder frame using screws or nails and reinforce joints for added stability
  • Add rungs for stability and safety, ensuring they are evenly spaced and securely attached

Choosing the Right Materials for Your Tiny House Ladder

I’ll start by researching and comparing different materials for my tiny house ladder. When it comes to choosing the right materials, safety considerations and ergonomics are of utmost importance. Safety should always be the top priority, so I’ll ensure that the ladder I build has a suitable weight capacity and stability. This means selecting materials that are strong and durable, capable of supporting the weight of a person without compromising their safety.

Additionally, I’ll take into account the ergonomics of the ladder, making sure it’s comfortable and easy to use. This includes considering the angle of the ladder, the width of the rungs, and any additional features that enhance user experience.

tiny houses

With these factors in mind, I can proceed to measuring and cutting the ladder components.

Advertisement

Measuring and Cutting the Ladder Components

Before proceeding with constructing the ladder, it’s essential to accurately measure and cut the components. Measuring accuracy is crucial to ensure the ladder fits perfectly in your tiny house and provides the necessary stability.

To achieve this, follow these steps:

  1. Measure the height: Determine the distance from the floor to the highest point where the ladder will be attached.

    tiny house uk

  2. Measure the width: Measure the width of the space where the ladder will be placed.

  3. Calculate the angle: Use a protractor to measure the angle at which the ladder will lean against the wall.

Assembling and Securing the Ladder Frame

To begin assembling the ladder frame, first, attach the side rails to the rungs using screws or nails. Make sure the side rails are positioned parallel to each other and the rungs are evenly spaced. Use a measuring tape to ensure accuracy.

Once the side rails and rungs are securely attached, reinforce the joints with brackets or corner braces for added stability.

tiny house on wheels for sale craigslist

It’s important to install the ladder in the tiny house properly to ensure safety. Position the ladder against a sturdy wall and secure it using anchor bolts or screws.

Advertisement

Regular maintenance is crucial for long-lasting use of the ladder. Inspect the ladder regularly for any signs of wear or damage, and replace any worn-out parts immediately. Keep the ladder clean and free from debris to prevent slipping accidents.

Adding Rungs for Stability and Safety

I can reinforce the ladder’s stability and safety by adding additional rungs and securing them with screws or nails. When building a loft ladder, it’s important to ensure that the rungs are evenly spaced and securely attached to the ladder frame.

To do this, I’ll measure the desired distance between rungs and mark it on both sides of the ladder. Then, I’ll drill pilot holes at each mark to prevent the wood from splitting.

how to build a tiny house

Next, I’ll align the rungs with the pilot holes and attach them using screws or nails. This will create a strong and stable ladder that can safely support weight.

Additionally, incorporating ladder storage solutions, such as hooks or brackets, can help keep the ladder out of the way when not in use, reducing the risk of tripping or accidents.

Advertisement

Finishing Touches: Painting and Customizing Your Tiny House Ladder

After completing the construction of my tiny house ladder, I can add a personal touch by painting and customizing it according to my preferences. Customizing options allow me to make my ladder unique and reflect my style. Here are some alternative finishes that can make my tiny house ladder stand out:

  • Distressed look: By using sandpaper or a wire brush, I can create a worn and weathered appearance for a rustic feel.

    the phoenix tiny house

  • Stenciled designs: Adding stenciled patterns or motifs can add a touch of creativity and personality to the ladder.

  • Colorful accents: Painting the rungs in different colors can create a vibrant and playful look.

  • Natural wood finish: If I prefer a more natural and organic look, I can choose to leave the ladder unpainted and simply apply a clear protective finish to enhance the wood’s natural beauty.

Frequently Asked Questions

How Much Weight Can a Typical Tiny House Ladder Support?

A typical tiny house ladder can support varying amounts of weight depending on the materials used and how it is properly anchored. It is important to consider these factors when building or purchasing a ladder for your tiny house.

walmart tiny house

Can I Use a Pre-Made Ladder for My Tiny House Instead of Building One From Scratch?

Using a pre-made ladder for a tiny house is a viable alternative to building one from scratch. However, consider the pros and cons. Building allows customization, while buying offers convenience. Evaluate your needs and skills before deciding.

Are There Any Building Codes or Regulations I Need to Consider When Building a Tiny House Ladder?

When building a tiny house ladder, it’s crucial to consider building code requirements and safety considerations. Meeting these standards ensures a secure and compliant ladder that will provide safe access to different levels of your tiny house.

Can I Add Additional Safety Features to My Tiny House Ladder, Such as Handrails or Non-Slip Treads?

Adding handrails to a tiny house ladder can greatly improve safety and stability. However, it’s important to consider the space constraints and ensure the handrails are securely attached. Non-slip treads can also enhance traction and prevent accidents.

Advertisement

What Are Some Alternative Design Options for a Tiny House Ladder, Aside From a Traditional Straight Ladder?

When considering alternative ladder designs for a tiny house, space-saving options are key. Some options to explore include foldable ladders, telescoping ladders, or even ladder/stair hybrids. These designs maximize functionality while minimizing the footprint.

tiny house community near me

Conclusion

In conclusion, constructing a ladder for your tiny house is a technical process that requires careful consideration of materials, precise measurements, and attention to detail.

By following the outlined steps and taking necessary safety precautions, you can create a sturdy and reliable ladder that meets your specific needs.

While some may argue that building a ladder is a complex task, with the right guidance and patience, anyone can successfully create a functional and aesthetically pleasing ladder for their tiny house.

Advertisement
Continue Reading

Beginners Guides

How Do I Hook up a Tiny House

Published

on

I have always fantasized about living in a small house, but connecting it to utilities seemed overwhelming. That’s why I chose to explore the realm of small house hookups and share my discoveries with you.

In this article, we’ll explore everything from choosing the right location to connecting to water, electricity, and sewage systems. So, if you’re ready to turn your tiny house dreams into reality, let’s get started on this step-by-step journey together.

Key Takeaways

  • Choose a clean and safe water source and use a water pressure regulator and filtration system.
  • Consider grid connection for reliable electricity and install solar panels and batteries for free electricity.
  • Install a septic tank or connect to a municipal sewer system and use composting toilets and greywater systems for an eco-friendly approach to waste management.
  • Ensure proper ventilation for good air quality, implement fire safety measures, and comply with safety regulations and building codes.

Choosing the Right Location for Your Tiny House

I’ve always dreamed of finding the perfect spot to set up my tiny house. When choosing the right location, there are two important factors to consider: zoning regulations and environmental impact.

First, it’s crucial to understand the zoning regulations in the area where you plan to place your tiny house. Different jurisdictions may have specific requirements and restrictions regarding the size, placement, and usage of tiny houses. Researching and complying with these legal requirements will ensure a smooth and hassle-free experience.

orchid tiny house

Additionally, it’s essential to consider the environmental impact of your chosen location. Look for a spot that minimizes disruption to the natural surroundings and promotes sustainability. Consider factors such as access to public transportation, proximity to amenities, and the potential for renewable energy sources.

Advertisement

Water Hookup: Connecting Your Tiny House to a Water Source

To connect my tiny house to a water source, I’ll need to use a hose and a water pressure regulator.

First, I’ll locate the water source and ensure it’s clean and safe.

Next, I’ll attach the water pressure regulator to the hose to control the water flow. This is important to prevent any damage to the plumbing system in my tiny house.

tiny house on wheels for sale craigslist

Before connecting the hose to the water source, it’s recommended to use a water filtration or purification system to ensure clean and safe water for everyday use.

Once the hose is connected, I’ll turn on the water source and check for any leaks.

Advertisement

It’s important to regularly maintain and clean the water filtration or purification system to ensure optimal performance and safe drinking water in my tiny house.

Powering Your Tiny House: Electricity Hookup Options

There are several electricity hookup options available for powering my tiny house. The most common ones are grid connection, solar power, and generator.

tiny house builders near me

Grid connection involves connecting my tiny house to the local power grid. This option provides a reliable source of electricity. It requires installing a meter and paying monthly utility bills.

On the other hand, solar power is a more sustainable and environmentally friendly option. By installing solar panels on the roof of my tiny house, I can harness the power of the sun to generate electricity. Though it requires an initial investment in the solar panels and batteries, it can provide me with free electricity in the long run.

Lastly, generator options are available for those who prefer a backup power source. A generator can be used to power my tiny house when there’s no access to grid electricity or when the solar panels aren’t generating enough power. It’s important to choose a generator that’s suitable for the power needs of my tiny house and to have a reliable fuel source.

Advertisement

Transitioning into the next section on waste management, it’s important to consider how to hook up my tiny house to sewage systems.

tiny house plans

Waste Management: Hooking up Your Tiny House to Sewage Systems

I can connect my tiny house to sewage systems using either a septic tank or a sewer hookup. When it comes to waste management in a tiny house, there are a few options to consider. Here are three ways to hook up your tiny house to sewage systems:

  1. Septic tank: Installing a septic tank requires digging a hole in the ground and placing a large tank where waste can be collected and treated. This is a more permanent solution that requires regular maintenance and pumping.

  2. Sewer hookup: If your tiny house is located in an area with access to a municipal sewer system, you can connect directly to it. This option eliminates the need for a septic tank and allows for easy disposal of waste.

  3. Composting toilets and greywater systems: If you prefer a more eco-friendly approach, you can install a composting toilet and a greywater system. Composting toilets use natural processes to break down waste, turning it into compost. Greywater systems collect and filter wastewater from sinks and showers, allowing it to be reused for irrigation.

    tiny houses prefab

By utilizing these waste management options, you can ensure a clean and efficient sewage system for your tiny house.

Transitioning into the next section, it’s important to also consider safety and compliance in all aspects of your tiny house hookups.

Ensuring Safety and Compliance in Tiny House Hookups

One must ensure that their tiny house hookups are safe and compliant with regulations. Ensuring proper ventilation and fire safety measures are crucial steps in making sure that your tiny house is a safe and comfortable place to live. Here are some steps to follow:

  1. Ventilation: Proper ventilation is important to maintain good air quality and prevent the buildup of moisture and odors. Install exhaust fans or vents in the kitchen, bathroom, and any other areas where moisture or fumes may accumulate.

    whatever happened to the tiny house movement

  2. Fire Safety Measures: Fire safety is paramount in any living space. Install smoke detectors and carbon monoxide detectors in your tiny house. Place fire extinguishers in accessible locations and ensure that they are regularly inspected and maintained.

  3. Compliance with Regulations: Familiarize yourself with local building codes and regulations to ensure that your tiny house meets all safety requirements. This includes electrical, plumbing, and structural components.

By taking these precautions, you can enjoy your tiny house while also ensuring the safety and compliance of your hookups.

Advertisement
Safety Measures Steps to Follow
Ventilation Install exhaust fans or vents in kitchen, bathroom, and other areas where moisture or fumes accumulate.
Fire Safety Measures Install smoke detectors, carbon monoxide detectors, and fire extinguishers. Familiarize yourself with local building codes and regulations.
Compliance with Regulations Ensure that your tiny house meets all safety requirements, including electrical, plumbing, and structural components.

Frequently Asked Questions

How Much Does It Cost to Hook up a Tiny House to a Water Source?

When hooking up a tiny house to a water source, the cost can vary depending on factors like location and type of connection. It’s important to compare costs and consider alternative options to find the best solution for your budget.

orchid tiny house

Can I Hook up My Tiny House to a Well Instead of a Municipal Water Source?

Well water versus municipal water for a tiny house has its pros and cons. While a well can provide independence and cost savings, it requires maintenance and may have limited supply. Municipal water offers convenience but comes with monthly bills.

Are There Any Specific Electrical Codes or Regulations I Need to Be Aware of When Hooking up My Tiny House?

When hooking up a tiny house, it’s crucial to be aware of electrical code requirements and safety precautions. These regulations ensure that your electrical system is safe and up to standard. Always consult with a licensed electrician to ensure compliance.

How Often Do I Need to Empty My Tiny House’s Sewage System?

To maintain my tiny house sewage system, I make sure to clean it regularly. The frequency depends on usage, but generally, it needs to be emptied every 1-3 weeks. Proper maintenance ensures a clean and odor-free living environment.

Can I Install Solar Panels to Power My Tiny House Instead of Connecting to the Grid?

I can install solar panels to power my tiny house instead of connecting to the grid. It offers benefits like energy independence, lower utility bills, and environmental friendliness. However, it may require a larger upfront investment and limited power supply on cloudy days.

Advertisement

tiny house plans under 1000 sq ft

Conclusion

In conclusion, hooking up a tiny house requires careful consideration of several factors. These include the location of the house, the available options for water hookup, the available options for electricity hookup, and waste management. By following the step-by-step instructions provided in this article, you can ensure a safe and compliant setup for your tiny house.

So, are you ready to embark on your tiny house adventure and create a cozy and sustainable living space?

Continue Reading

Trending