If you are new to building a treehouse, you may have questions about how to securely attach it to two trees. There are several steps to follow. First, you will need to determine the size of the treehouse. Then, cut a piece of pine board to fit between the two trees. While prefabricated pine boards of similar lengths are available, trying out different sizes may help you find the perfect fit.
Tip to Avoid Lawsuits
One of the best ways to avoid lawsuits when attaching a new treehouse to your property is to talk to your neighbors about it. This will help prevent future problems and disputes and make them more willing to cooperate with your new project. You should also contact your homeowner’s insurance agent to see if you are covered. Otherwise, you may find yourself in hot water with a lawsuit.
Before attaching your treehouse to two trees, it is important to check with your local planning department or authorities. Make sure you know what heights are allowed, and you also want to avoid building on protected tree species. In addition, make sure to check local zoning laws to ensure that your treehouse does not violate any local laws. Make sure you know all the local laws regarding building treehouses and always get permission from your neighbor before building a treehouse.

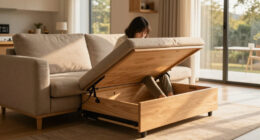
Settab 102" Cloud Modular Sectional Sofa, Boneless Comfy Fluffy Couch with Deep Seat for Living Room,Apartment, Bedroom,No Assembly Required,White
- No Assembly Required: Unpack and enjoy instantly
- Quick Expansion: Fully expand in 72 hours
- Luxurious Cloud Design: Chenille fabric with sleek curves
As an affiliate, we earn on qualifying purchases.
Using a TAB & Floating Bracket
Using a TAB & floating bracket to attach a treehouse to two trees is ideal if you don’t want to screw your treehouse to the ground or put it at risk of falling off a large tree. These brackets slide over the TAB and create a flexible platform for one inch of wind movement. The bracket is a rectangular frame attached to the treehouse structure that slides over the TAB. The rectangular frame is longer than the TAB stem so it can move with the tree.
The TAB’s height is dependent on the height of the floor in the treehouse. If the floor height is less than the TAB, you should attach it to two trees with brackets that slide over their perch. Then, install joist hangers in the middle of the platform and attach galvanized rafter ties. You may need to use quick post supports to attach your joists.
The bolts for attaching a treehouse are called TABs and are made from extra-large lag screws. These bolts can handle up to 2000 pounds of weight, which makes them the ideal choice for attaching a large treehouse to two trees. These bolts come with several accessories to complete the project, including cable eyes, knee brace, and floating brackets.
When attaching a treehouse to two trees, you need to remember that it should not be loaded to the point where it will damage the tree. The weight of the treehouse may cause it to rot or die. Using TABs will help prevent this problem. With proper installation, a treehouse can be a great place for relaxation and fun for kids.
If you’re connecting a treehouse to two trees, you should use a 1.25″ thick pipe bracket to attach the treehouse to the other tree. Pipe brackets are best used for cables that need to go higher in the tree. These pipe brackets are made of steel and come with a powder-coated finish. If you want to use a TAB & floating bracket, you need to check the dimensions of your tree and ensure they are appropriate for your treehouse.
Adding Railings & Walls to A Treehouse
First, add some wall space and railings. You will need two pieces of 2×8 plank for each level. These pieces will form the perimeter walls of the treehouse and the floor. Use a framing nailer to attach the four posts and the 2×8 planks to one another. Next, add the floor frame using 3-inch framing nails.
You’ll need to install railings if you’re using a treehouse design with a deck. If you’re building a single-story treehouse, you can use twox8 wood planks in the top and bottom railing. These two pieces are nailed to the posts. The higher you can place the railing, the more secure it will be. You can nail the planks to the posts with framing nails.
Once you’ve completed the frame, you’re ready to add the walls. The walls can be attached with framing nails, but it’s a good idea to use a nail gun to hammer them into place. Another helpful tip is to secure the ridge beam with a 2×6 plank, the length of which should be the same as the width of the treehouse. If necessary, use a scrap piece of wood to hold it upright.
You can add siding to your treehouse once you’ve finished building the frame. Once you’ve secured the siding, you can cut the window and door frames using a reciprocating saw. You can also add trim around the doors and windows. Adding the walls and railings to a treehouse makes it a safer space for your child to play in. It’s also a great way to keep your kids safe!
You may also need to use a wood spacer at the interference points. A spacer may need to be smaller over time if the treehouse is in an area where the woods will interfere with the treehouse’s walls. You can add a padded wooden spacer at those points to prevent interference. Depending on the type of treehouse you have, you may need to make some changes to the spacer.