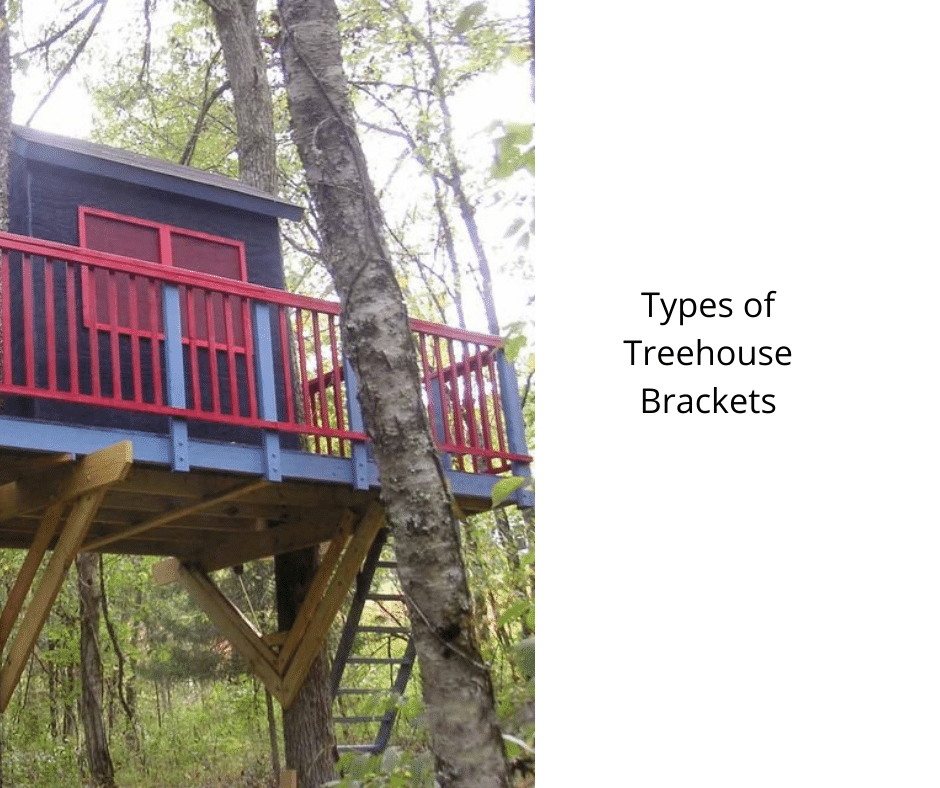
Connect with us

Beginners Guides

Types of Treehouse Brackets

Published

on

Brackets for treehouses form a critical part of any DIY endeavor involving treehouses. A sturdy and reliable support system is indispensable for treehouse construction. A variety of bracket types can be found, with the appropriate selection varying according to the project requirements. Options range from floating brackets and J-brackets to TABs and treehouse cables. Continue reading to discover more about each kind. Each has its advantages and disadvantages. When you’re constructing a treehouse for your child, it’s important to select the suitable types.

Floating Brackets

A floating bracket can support a treehouse in the wind. This can be achieved with a single-inch lag bolt. The bracket can withstand 50 kg of weight without the use of scaffolding or cherry pickers. A cheater bar can be used for additional leverage. Once the bracket is installed, the beams need to be screwed into the flat plate of the bracket. This allows the structure to sway with the tree.

When building a treehouse, it is important to use flexible supports. If you have multiple trees, you will want to use floating brackets. They are specially designed to withstand the swaying of the trees. They are better than through bolts because they do not damage the trees. Floating brackets are also better for long-term stability, so you can enjoy your new treehouse for a long time.

In order to attach the treehouse to a living tree, you will need to use TABs. These are specially designed bolts that attach a treehouse to a tree. These can withstand thousands of pounds of weight. They also help the tree heal. Treehouse attachment bolts are easy to install and do not require any tools or training. You can find them at home improvement stores. If you decide to use these brackets, make sure to check the manufacturer’s warranty.

Tree houses weigh thousands of pounds. This means that they must be stable. When using fasteners, be sure to use large bolts. These will provide the same strength and durability as a handful of nails or screws, but will also cause less damage to the tree. Moreover, you can also use lag bolts to perch your treehouse on them. However, it is important to use fasteners made for treehouses. They should be at least 1 inch in diameter.

J-brackets

There are two main types of J-brackets for building a treehouse: simple and strong. The former is made of a single bolt which is fed into the tree from one side. The second type requires a single bolt, which is a bit longer and bigger than the first one. It is easy to use and doesn’t need any special tools. The J-bracket can be attached to the tree with rope support or scaffolding.

Another type of attachment point is a floating bracket. These are used to support the roof of the treehouse. A single J-bracket can support up to 50kg. An array of floats can be as large as three feet. These are useful if the tree needs to move. While floating brackets are more expensive, they provide more security and can support the weight of your treehouse. For safety and stability, it is a good idea to hire a professional to install the treehouse.

To install a treehouse, you must follow specific guidelines. The first rule is to keep the spacing between treehouse components at least 12 inches horizontally and vertically. The second rule is to make sure that the J-brackets are not butted against the tree trunk. If you install them at the wrong height, you run the risk of compromising the safety of both you and the tree. This disclaimer is valid for both Be in a Tree LLC and Nelson Treehouse and Supply.

Another important rule of treehouse construction is to always use a solid support system. Do not nail or glue the tree house to the tree; this will only create a wobbly structure. A good solution to this is to use diagonal bracing beneath the structure. You may only need one set if your treehouse is supported by two trees, but you can use up to four if the treehouse is supported by only one.

To attach the treehouse to the tree, you should choose a strong and sturdy beam. A two-by-ten-inch beam should span eight feet and a four-by-six-inch beam is recommended for 12 feet and greater. Remember, most localities require building permits for a treehouse, so you should check your local laws before deciding on the size of the beams. This way, your treehouse will not be a hazard to the tree.

TABs

A treehouse bracket is a simple structure that slides over the TAB to create a flexible platform for the structure. It can withstand up to one inch of wind movement and is attached to the treehouse structure with a flat plate. It has a rectangular frame that resembles a long handle. It fits over the TAB so it can move with the tree. The bracket is made of durable materials to withstand the weight of the treehouse and can also be removed and washed.

Treehouse brackets can be used for different types of structures. The J bracket is one of the most common and is the most common. It requires the beam to be fed in from one side while the J bracket is designed to be installed the other way around. Treehouse brackets can be attached to a tree using rope supports or scaffolding. A cheater bar will give you additional leverage when mounting brackets on a tree. It is important to choose the right one for your treehouse project.

Before you install a treehouse bracket, you must measure the beam and make sure it is the correct length. Remember to do this on a calm day when you don’t have to worry about the wind. During construction, you will need a metal plate for the underside of the beam to prevent it from sliding out of the bracket. Using a 1/4″ steel strip for the bearing surface will help ensure the bracket doesn’t slide off the beam.

Another type of treehouse bracket is called the floating bracket. It can be used for treehouses with three or four trees. It is also used for connecting several trees with a single tree. Floating brackets are attached with 1.25″ lag bolts. They are only compatible with 1.25″ lag bolts. If you use a TAB for your treehouse, make sure to follow the manufacturer’s instructions.

Besides TABs, you also need to consider using attachment bolts. These special bolts are made for treehouse construction and distribute the weight. In general, these bolts can support up to 2000 pounds. The nut and bracket ensure that the beams and joists are protected and won’t fall off the bolt. They also prevent any damage to the tree. However, make sure that the bolts are not too loose or too tight.

Treehouse Cables

If you’re building a treehouse, you’ll want to think about where to run the cables and brackets. While they may not seem important, they’re an important part of the structure. Cables can support long beams, overhangs, and radiating supports. Cable designs can affect how much floor space your treehouse takes up, so consider how you want to use them. You can run them along the inside of the wall, or you can divert them in a diagonal fashion to save floor space.

The cable should not come into contact with the tree. Any branches that brush against the cables may lose bark. You also don’t want to wrap the cables around the tree trunk, as this can girdle it and cut off the flow of sap. Also, be sure to leave a gap of about two inches between the platforms and the tree. The common mistake that novice treehouse builders make is not giving enough room to the tree to grow.

For a treehouse to be safe, cable systems must be installed correctly. The cables should be at least four feet in length. If the cables are not long enough, they might end up damaging the tree. When installing them, make sure that the cables and brackets are installed at right angles to the tree. If they are not, the cables may wear away the bark. Be sure that the eyebolt is in the correct location and angle to the cable direction.

If the treehouse requires cables or brackets, make sure that the TAB is securely attached to the timber frame with lag screws. Then, install four sliding brackets. The cables must be secure and stable so that they don’t come loose in the event of a move. When the treehouse is in motion, cables and brackets can cut the bark of the tree. They must be secured to the tree, and ideally, the treehouse must be placed in a location where it won’t cause damage to it.

Continue Reading

Beginners Guides

Different Types of Treehouse Netting

Published

on

By

If the idea of constructing a treehouse is on your mind, acquiring netting for the treehouse is something you’ll probably need to do. Luckily, the market is abundant with a variety of options. Whether you’re looking for climbing nets in various hues, designs, or styles, you’ll find that these products are often marketed by linear foot and demand a certain amount of space – with 75 square feet being the starting requirement. Additionally, these nets are versatile, functioning well for both cargo lofts and hammocks. You have the flexibility to select a net that perfectly matches your treehouse project, whether that be for a hammock, a cargo loft, or a combination of both.

Dream Nets Are a Treehouse Netting

The concept behind Dream Nets is to create a tensile tree platform that can be woven on-site. It creates a safe and playful play environment that can be enjoyed by the entire family. The dream nets are made of nautical/fishery supplies and are sturdy yet flexible, making them a great choice for any treehouse. The average lifespan of the Dream Nets is 10+ years, making them a great alternative to traditional treehouse materials.

These innovative netting systems come in many different styles and colors. Tree House Supplies offers nets by the linear foot. Depending on the size of your structure, there are several different types of dream nets available. You can also purchase nets specific for hammocks, cargo lofts, or a cargo loft. If you have a large space, you can also buy a netting system that allows you to fit many different-sized hammocks and cargo bins in your treehouse.

Treehouses with net floors are fun for kids of all ages. They are an adventure for children and can be equipped with a rope swing. Kids love to swing from the treehouse and the net floor will make the experience more enjoyable. Treehouses with net floors can be constructed quickly and easily, making the experience fun for everyone. You don’t even have to spend hours or even days building the stairs. The net floors are flexible and can be customized to your child’s needs.

Spider Web Climbing Nets Are a Treehouse Netting

9.8 X 14.8FT Kids Playground Play Safety Net Outdoor Climbing Cargo Net Playground Sets Double Layers Backyard Net for Playground
Spider Web Climbing Nets

This climbing net is ideal for playgrounds, amusement parks, and residential areas. It’s easy to install with essential hand tools. The net is available in standard sizes of twelve, sixteen, and twenty feet. It has two-inch square netting liners and synthetic rope and can be attached to bridges, cargo climbs, and treehouse structures. A few tools are required to install this netting, and you’ll want to have some help if your children aren’t sure about it.

The net allows children to climb up and down without hurting themselves. These nettings are also very durable and should last a long time. These nets are often custom-made from high-quality materials. Once installed, they can be used as a treehouse roof or as an accessory for other structures. Spider web climbing nets are a great option for treehouses designed to keep kids safe. They don’t break easily and are very durable.

Double Stack Climbing Nets Are Ideal for Larger Areas

If you plan to create a playhouse in your backyard, you will need to use sturdy, double-stack climbing nets. You need to use the right knots when tying them, and most resources point you in the right direction. If you’re not sure about what knot to use, the Carrick Bend is an ideal choice. This ornamental knot is very strong and will not create sharp bends that can tear or damage your netting. However, you can experiment with different knots to ensure you’re tying the right knots to keep the net from fraying or breaking.

Double stack climbing nets are designed to accommodate multiple occupants and perfect for larger treehouse netting areas. They are made from two layers of two-inch square netting that are reinforced with a sewn edge and 5/8″ thick rope on the perimeter. The border rope also acts as a stronger connection point, and is usually attached to a wooden platform. These netting products are popular for treehouse platforms.

Treehouse Netting Can Be Used as A Ladder

Treehouse netting is an excellent alternative to traditional ladders for many reasons. Not only can it be used as a ladder, but it can also serve as a protective barrier in case of a fall. A store’s staff usually installs these nets. The installation costs depend on the size of the net, so it is best to check with the store before buying it.

Continue Reading

Beginners Guides

What Happens to a Tree House When the Tree Grows?

Published

on

By

A challenge you might encounter when constructing a tree house involves its weight. Suddenly, the tree has to bear the added weight of the structure, and the roots might need several years to expand sufficiently to support this extra load. This situation can compromise the tree’s stability during storms. Nevertheless, this issue can be mitigated. It’s advisable to evaluate the structure’s weight prior to making the decision to construct it.

Building a Treehouse

Using specialized bolts is important when building a treehouse. The platform should be at least eight feet above the ground, and the house should be out of reach of children and adults. You should also use safety measures such as railings and individual spacers to prevent falls. If you are not a construction expert, you may want to seek advice from a professional. If you are unsure of the safety precautions to take, consider a platform with railings on all sides.

If you’d like to build a treehouse, it should be built away from power lines. Power lines can fall on the branches of a tree, and a dangerous accident can lead to injury and death. Also, avoid building a treehouse near a waterfall, a working road, or a hilly area. Also, don’t forget to build a sandpit underneath the tree house. Make sure to leave enough room around the tree to accommodate the growth of the house.

You should discuss your plans with your neighbors before you start building. You’ll want to be aware of any potential legal or neighborly problems that might arise if your treehouse is too close to your neighbors’ property. While a treehouse may be fun for children, it’s not worth a neighbor’s ire. As long as you’re considerate and follow the city code, you’ll be able to enjoy your treehouse for years to come.

The cost of building a treehouse will depend on its height and size. The complexity and type of materials used will also determine the project’s overall cost. Remember that it can be hazardous to trees, so always check with a professional before you begin. For example, large bolts and fasteners can damage the tree. Also, the added weight can damage the tree’s trunk and branches. If you’re not sure of the tree’s capacity to handle the extra weight, consult with an arborist. Many tree care companies have arborists on staff.

Before building a treehouse, you should make sure the tree you plan to use is a strong one. If the tree is young and the trunk is a hardwood, you should consult with an arborist. You should also find a tree with strong limbs. You should also consider if the tree will grow to be a good fit for your new treehouse. This will ensure the safety of everyone who uses it.

Once you have a tree with enough size and shape to support a treehouse, you can start with the construction of the treehouse. You should build the base first, and then move on to the main part of the structure, the roof. If the tree is too small or too large, you may need to build a treehouse on stilts to avoid damage. Building a treehouse requires some preparation, but once you’ve completed the initial steps, you’ll be glad you did.

Problems with Tree Support

One of the most common reasons a young tree leans is its poorly developed roots. Soil that isn’t consistent, or which does not support the roots well is also a common cause. The tree may also be leaning because of wind or a wet ground. In these cases, addressing drainage patterns is essential to prevent the problem. Proper placement of stakes, cables, or other supports will prevent a tree from leaning and ensure it has sufficient support during its life.

Problems with Tree Compartmentalization

Wood decay in trees has several causes, including injuries caused by animals, inappropriate pruning cuts, and excessive weight. The damage can also occur as a result of extreme temperature changes. To survive, trees must protect themselves by creating boundary areas to prevent damage. This process is known as compartmentalization. It helps prevent the spread of discoloration and loss of normal wood function. However, this defense system can also lead to problems with tree compartmentalization.

The concept of tree compartmentalization was first introduced in the 1960s and has since become one of the standard concepts in the field. It is based on extensive studies of wood and bark. In addition to the lab, it is based on observational studies of trees in the field. This research led to the development of tree compartmentalization as a concept to describe the growth and decay of trees.

During a forest fire, the first step in preventing decay and disease is to protect the burned area. Trees respond to injury by forming a wall around it to prevent decay and disease from spreading. This wall covers the injured area and prevents the disease from spreading vertically. This wall is made up of two types of tissue: vascular tissue and thick-walled latewood growth rings.

The concept of compartmentalization was originally presented as a systems approach to decay problems. Before Shigo’s research, it was thought that living tree sapwood was dead and that decay was the result of cellular differentiation and maturation. Punky wood, a void left in a tree after wood decay, was also viewed as dead wood. With the compartmentalization concept, wood decay is understood as a multi-step process, beginning with wood formation in the vascular cambium, and culminating in apoptosis and shedding.

Continue Reading

Beginners Guides

How to Install a Tree House Slide

Published

on

By

A slide extending from the tree house to the ground is designed with a slope and length that should correspond to that of the rope. With a plethora of tree house slide varieties available, it’s important to select one that suits your family’s requirements. Optimal slides are crafted for children three years and older, providing enjoyment for the entire family! Don’t forget to explore our guide on top tree houses and slides to discover the perfect match for your household!

Features

A tree house slide can run from the edge of a tree house to the ground below. It must be located in an open area of flat ground with the slope of the slide the same as that of the rope. If the slide is located in a tree that is more than 20 feet high, there must be a space of at least six feet between the top of the slide and the top of the tree. Depending on the type of slide you choose, you may need to install an additional support pole in order to secure it.

A slide is a fun feature for kids and is also practical when it comes to building a treehouse. It makes it easy for children to get in and out and is safer than a ladder. A swing can also be installed under the treehouse, which prevents kids from fighting each other when trying to get out of the tree house. In addition, tree houses with swings are an excellent choice, as they are easily installed under the tree.

The Ultimate Fantasy Tree House Cabin Swing Set is a great way to build a treehouse for kids and is perfect for medium to large backyards. In addition to a slide, this swing set features a climbing lane and realistic artwork. There’s even an indoor version of this swing set, which is 30 feet long and includes a slide. It also includes a patented CAS system, which prevents the treehouse from deflating quickly in case of a power outage.

Installation

When installing a tree house slide, it is important to make sure that it is level with the tree house’s open space. You can do this by drilling holes where the slide meets the wood and lining them up. Then, install the bolts into the ground to secure the slide in place. Finally, test the slide to make sure that it is stable. It should be easy to slide down, but if it wobbles, make sure you add more wood mulch or straw.

To install a tree house slide, you must make an opening at least sixty inches wide. You should purchase a 2-x-10 pressure-treated wood beam, which is the main beam. Use the screws to attach it to the tree at the desired height. You should pre-drill the holes with a corded drill and extra-long auger bits. Once the holes are drilled, use the appropriate screws.

A tree house slide comes with complete installation instructions. You can use these instructions to complete the installation process. You should use a triangular cardboard template to mark the stringers. You can also use thin pieces of wood to make the template. Make sure to mark the stringers on a work bench or on a sturdy table. You should use 150×50 (2”x6″) stock for the handrail. Make sure to measure the spacing between the stringers.

If you want to save money, consider using reclaimed wood. This type of wood is sourced from different structures and can give the tree house a unique character. It is a unique way to recycle waste products. You can be sure that your kids will love playing with this recycled wood. It will give them hours of fun. You can also add accessories like ladders, swings, and a climbing wall. These will make your child’s tree house more exciting and fun.

Cost

The material that is used for a tree house slides is an important factor in the final price of the project. While you can use pressure-treated wood for the tree house slide, it is not recommended as this type of wood can leach harmful chemicals into the tree. Instead, you should use naturally rot-resistant wood. Redwood and cypress are two of the most common types of wood used for tree houses. These materials are also more durable than pressure-treated wood.

Treehouses can come in various shapes, sizes, and styles. Some are simple square decks, while others are elaborate multi-story buildings. The cost of a tree house slide depends on the style and materials used and the overall square footage of the deck or bottom section. Some of the designs are so elaborate that they require several trees, while others are more suitable for a single tree. Depending on the style, materials, and complexity of the design, the price of a tree house slide may vary wildly.

If you choose a treehouse slide kit, you must buy separate lumber for the construction. You can talk to your contractor about which kind of wood would be most appropriate for the treehouse, and what kind of wood you plan on using. Listed below are the costs for three common types of wood for a 10′ square treehouse with standard walls and a gable roof. This type of treehouse will cost more than a simple platform-style treehouse, as the construction and finishing process will be more complex.

The labor costs associated with a treehouse are also significant. A tree house builder can cost between $100 to $200 an hour. The amount of labor varies depending on the size, style, placement, and design process. However, if you choose to have a treehouse built, it will increase the total price. This is because treehouse labor costs are higher in the case of live-in structures, and living in such a treehouse will require permits and extra expenses.

Safety

A slide is a great way to increase the fun and safety of a tree house. Kids can get in and out easily, and slides are much safer than ladders. Swings are another great way to add to the fun in a treehouse. They are easy to install under a treehouse, and multiple swings will prevent kids from fighting over who gets to go up first. However, it’s important to follow safety precautions and instructions when installing a slide.

A child should not be able to climb higher than six feet. The height of a treehouse should be six to twelve feet, or even less. If you’re concerned about the safety of your child, keep the height of the treehouse to a reasonable level. Depending on your child’s age, you can choose a lower or higher platform for them. As your child grows older, they will feel more comfortable with heights and may want a slide that’s a little higher. This way, they’ll still be excited about the slide, even as they grow older.

A tree house slide can be as high as 20 feet. It will appeal to kids, but it is important to consider the safety of your child before buying one. Treehouse slides require an extra-wide opening that’s six feet wide. A tree house slide is extremely dangerous, so you should be sure to select a sturdy tree. If you’re not sure whether a tree is sturdy enough for a slide, consult with an arborist or a tree specialist to help you make the right choice.

Treehouses are a great way to entertain your children, but they can be dangerous, too. Ensure that the area around a tree house slide is safe by ensuring that its railing is at least 36 inches high and has vertical balusters spaced four inches apart. You should also ensure that there are no sharp objects in the fall zone. Wood chips are a good ground cover underneath a tree house.

Placement

The construction and placement of a tree house slide require some careful consideration. The design is intended for a specific patch around a particular tree, so it may require modifications to fit its surroundings. Use the following guidelines to plan the structure:

Continue Reading

Trending