
Beginners Guides
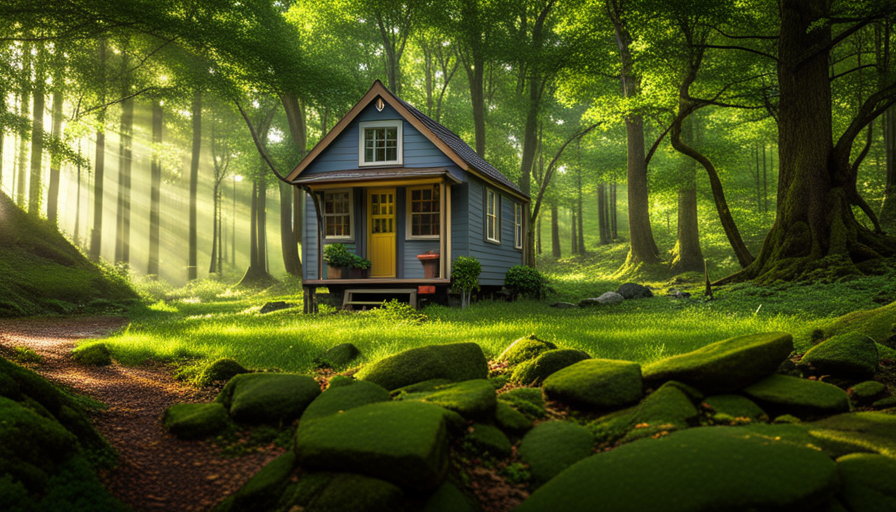
How Big Is A 1000 Sq Ft Tiny House
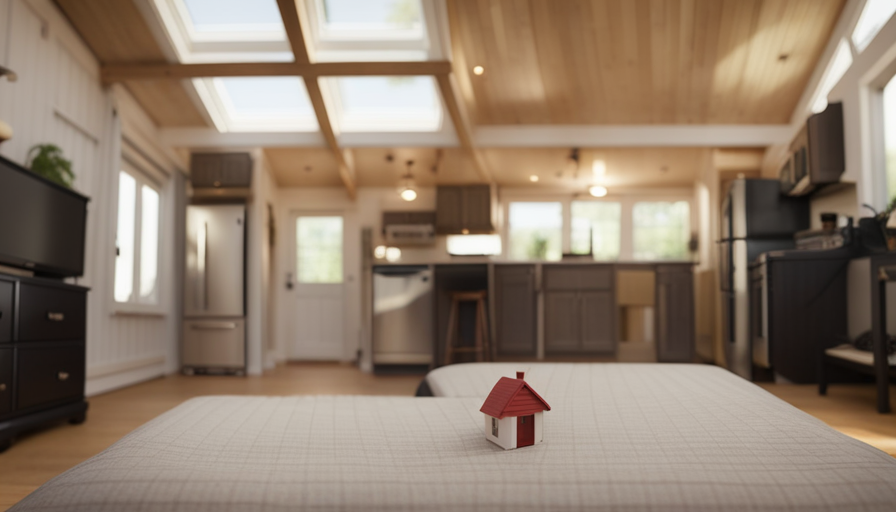
Prepare to be amazed as I’m set to unveil the astonishing specifics of a 1000 sq ft tiny house. Gear up for an exploration into the realm of tiny house living, a place where each square inch is valuable.
In this article, I will take you on a tour of the different areas that make up a 1000 sq ft tiny house, from the living area to the kitchen and dining space, sleeping quarters, bathroom facilities, and even the outdoor space.
Now, you might be wondering, how can a house that’s only 1000 sq ft be considered tiny? Well, let me tell you, my friend, when it comes to tiny houses, size is relative. These compact dwellings are designed to maximize functionality and minimize wasted space. So, even though a 1000 sq ft tiny house may not seem small by traditional standards, trust me when I say that every inch of space is utilized to its fullest potential.
So, let’s dive in and discover just how big (or should I say small) a 1000 sq ft tiny house can be.
Key Takeaways
- 1000 sq ft tiny houses maximize functionality and minimize wasted space
- Compact gardens and outdoor seating areas optimize space
- Clever storage solutions and multi-purpose furniture are essential in the interior layout
- Efficient appliances and storage solutions are important in the kitchen and bathroom areas
Understanding Tiny House Living
Living in a tiny house is like entering a cozy and efficient world where every square foot counts! Understanding the minimalist lifestyle is key to embracing this unique living arrangement.
By downsizing to a smaller space, you can simplify your life and focus on what truly matters. The benefits of downsizing are numerous, including reduced expenses, lower maintenance, and a smaller carbon footprint. It allows you to prioritize experiences over material possessions and encourages a more sustainable way of living.

Now, let’s explore the dimensions of a 1000 sq ft tiny house and how it can accommodate your needs while still providing a comfortable and functional living space.
Dimensions of a 1000 sq ft Tiny House
In discussing the dimensions of a 1000 sq ft tiny house, I’ll provide information on its exterior measurements, interior layout, and room configurations.
The exterior measurements of a 1000 sq ft tiny house typically range from 20 feet by 50 feet to 25 feet by 40 feet, depending on the design and shape of the house.
The interior layout of a 1000 sq ft tiny house usually includes a living area, kitchen, bathroom, and one or two bedrooms, with some variations depending on the builder’s design choices.
The room configurations in a 1000 sq ft tiny house can be customized to suit individual preferences, with options for open floor plans, loft spaces, or multi-purpose rooms to maximize the use of space.
Exterior Measurements
Outside the walls of a 1000 sq ft tiny house, its dimensions expand like a blooming flower. The exterior design of a tiny house plays a crucial role in maximizing space and creating a visually appealing structure. To make the most of the limited square footage, incorporating clever landscaping ideas can enhance the overall aesthetic of the property.
Here are three key elements to consider:
-
Compact gardens: Utilize vertical space for growing plants, such as installing trellises or using hanging baskets. Incorporate raised beds or container gardens to maximize the use of available ground space.
-
Outdoor seating areas: Create cozy nooks or small patios to enjoy the surrounding nature. Use compact furniture or built-in seating to optimize the available space.
-
Multi-functional structures: Incorporate features like pergolas or awnings that can provide shade and also serve as additional storage areas.
Transitioning into the subsequent section about the interior layout, we can explore how to optimize space within the tiny house.
Interior Layout
When designing the interior layout, it’s crucial to focus on maximizing every inch of available space. In a 1000 sq ft tiny house, efficient interior design is key to create a functional and comfortable living space.
Careful consideration must be given to space utilization in order to accommodate all necessary amenities without compromising on comfort. This involves clever storage solutions, such as built-in cabinets and multi-purpose furniture, to make the most of limited square footage. Additionally, open floor plans and strategic placement of windows can create an illusion of spaciousness.
By carefully planning the interior layout, it is possible to create a tiny house that feels much larger than its actual size. Transitioning to the subsequent section about room configurations, different layouts can be explored to further optimize the use of space.
Room Configurations
Room configurations are an important aspect of designing a functional and comfortable living space in a small house. When dealing with a 1000 sq ft tiny house, careful consideration must be given to room size and furniture placement to maximize usability. Here are three key factors to keep in mind:
-
Optimize the layout: With limited space, it’s crucial to plan the placement of rooms strategically. Consider the flow of movement and ensure that each room serves its purpose efficiently.
-
Utilize multi-functional furniture: In a small house, every inch counts. Choose furniture pieces that serve multiple purposes, such as a sofa that can convert into a bed or a coffee table with built-in storage.
-
Create open, airy spaces: To avoid a cramped feeling, incorporate design elements that create the illusion of space. Use light-colored walls, mirrors, and ample lighting to make the rooms feel more spacious.
As we move onto the next section about the living area, we’ll explore how to make the most of this central space in a 1000 sq ft tiny house.
Living Area
The living area of a 1000 sq ft tiny house feels surprisingly spacious, thanks to clever tiny house design and furniture arrangement. In order to maximize the limited space available, designers often utilize multi-functional furniture that can serve multiple purposes. For example, a sofa can double as a bed, and a coffee table can convert into a dining table. Additionally, built-in storage solutions are key to keeping the living area organized and clutter-free. By incorporating shelves, cabinets, and hidden compartments, every inch of space is utilized efficiently.
As we transition to the subsequent section about kitchen and dining space, it’s important to note that the living area seamlessly flows into these areas, creating a cohesive and functional living space.
Kitchen and Dining Space
In the kitchen and dining space of a tiny house, one of the key points to consider is the use of compact appliances. These space-saving appliances are designed to fit seamlessly into smaller areas without compromising functionality.
Additionally, efficient storage solutions are essential in maximizing the limited space available in a tiny house. From cleverly designed cabinets and drawers to creative storage solutions, every inch of space should be utilized efficiently.
Lastly, when it comes to dining options, flexibility is key. Consider incorporating multi-purpose furniture that can be used for both dining and other activities, such as a foldable dining table or a kitchen island with seating.
Compact Appliances
Compact appliances in a tiny house this size would allow you to cook gourmet meals while saving space. With the use of compact furniture and space-saving techniques, you can maximize the functionality of your kitchen and dining space. Here is a table showcasing some essential compact appliances that would fit perfectly in a 1000 sq ft tiny house:
| Appliance | Size |
|---|---|
| Compact stove | 24 inches wide |
| Mini refrigerator | 4.4 cubic feet |
| Countertop dishwasher | 18 inches wide |
| Combination microwave oven | 0.9 cubic feet |
| Compact washer and dryer | 24 inches wide |
These appliances are designed to be smaller in size without compromising their functionality. They fit seamlessly into the limited space available, allowing you to enjoy the convenience of modern appliances without sacrificing valuable square footage. With compact appliances like these, you can create a functional and efficient kitchen in your tiny house. Efficient storage solutions complement these appliances, ensuring that every inch of your space is utilized effectively.
Efficient Storage Solutions
Maximize your storage space with efficient solutions that optimize every inch of your kitchen and dining area. When it’s about living in a 1000 sq ft tiny house, efficient organization and clever storage are key to keeping everything in order.
In the kitchen, consider installing shelves that slide out, making it easy to access items stored in the back. Utilize vertical space by hanging pots and pans from a ceiling rack, freeing up precious cabinet space. Magnetic knife strips and spice racks can also be mounted on the wall, keeping countertops clutter-free.
In the dining area, opt for a table that can be folded down when not in use, allowing for additional space for other activities.
Transitioning into the subsequent section on dining options, let’s explore how to make the most of your small eating area.
Dining Options
To fully enjoy your dining experience in your cozy abode, explore creative options that optimize your small eating area. One way to maximize space is by incorporating outdoor seating into your tiny house design. This allows you to expand your dining area and enjoy meals in the fresh air. Additionally, consider incorporating multi-functional furniture that can be easily converted into a dining table when needed. Another option is to utilize foldable tables and chairs that can be tucked away when not in use.
Meal preparation in a small space can be challenging, but with the right organization and storage solutions, it can be efficient and enjoyable. Consider utilizing compact appliances and clever storage solutions to make the most of your kitchen area. Install shelves and hooks to keep your cooking utensils and ingredients within easy reach. Utilize vertical storage options to save space and keep your counters clutter-free.
Transitioning to the subsequent section about ‘sleeping quarters’, it is important to optimize your small space to ensure a comfortable and restful night’s sleep.
Sleeping Quarters
In the discussion of sleeping quarters in a tiny house, three key points to consider are loft beds, Murphy beds, and creative sleeping arrangements.
Loft beds are elevated beds that maximize vertical space and can be accessed by a ladder or stairs.
Murphy beds are foldable beds that can be concealed during the day, providing a versatile and space-saving solution.
Lastly, creative sleeping arrangements can include convertible furniture or innovative designs that optimize space and provide comfortable sleeping options.
Loft Beds
Imagine climbing up into your cozy loft bed in your 1000 sq ft tiny house, where you can stretch out and dream big in a space-saving sleeping area. Loft bed designs are crucial in maximizing vertical space in a tiny house.
These beds are elevated, allowing for ample space underneath to be utilized for other purposes such as a workspace or storage area. The loft bed can be customized to fit your needs, with various designs available, including built-in shelves or drawers for additional storage.
The elevated platform provides a sense of privacy and separation from the rest of the living area, creating a cozy and intimate sleeping space.
Transitioning to the subsequent section about ‘murphy beds’, let’s explore another innovative sleeping solution that can further optimize your 1000 sq ft tiny house.
Murphy Beds
Climb into the hidden sanctuary of a Murphy bed, where you can seamlessly transform your living area into a dreamy bedroom.
Murphy beds are a fantastic solution for tiny houses as they provide a space-saving alternative to traditional beds. These beds can be easily folded up and stored against the wall when not in use, maximizing space and allowing for a more functional living area during the day.
Murphy bed alternatives, such as sofa beds or wall beds, offer even more versatility, allowing you to utilize the same space for multiple purposes. With these options, you can effortlessly switch between a cozy bedroom and a comfortable seating area, making the most of your 1000 sq ft tiny house.
Transitioning into the subsequent section about creative sleeping arrangements, let’s explore even more innovative ways to optimize your sleeping space.
Creative Sleeping Arrangements
Discover the endless possibilities of arranging your sleep space creatively, transforming it into a sanctuary that invites relaxation and rejuvenation. Here are four creative sleeping arrangements that’ll maximize space in your 1000 sq ft tiny house:
-
Loft Beds: Utilize vertical space by installing a loft bed, allowing for a separate sleeping area while freeing up floor space below for storage or other activities.
-
Wall Beds: Also known as Murphy beds, these space-saving solutions can be folded up against the wall during the day, providing extra floor space. They can be easily pulled down at night for a comfortable sleep.
-
Sofa Beds: Opt for a sofa that can be transformed into a bed when needed. This multifunctional piece of furniture allows for both seating and sleeping arrangements, maximizing space.
-
Bunk Beds: Ideal for tiny houses with multiple occupants, bunk beds provide efficient use of vertical space, allowing for more floor area to be utilized for other purposes.
Now, let’s explore the innovative bathroom facilities in a 1000 sq ft tiny house.
Bathroom Facilities
Step into the bathroom of your 1000 sq ft tiny house and you’ll find a compact yet functional space that maximizes every square inch. The bathroom design in a tiny house prioritizes efficiency, with clever storage solutions and multi-purpose fixtures. Every inch is utilized to ensure that you have all the necessary amenities without sacrificing comfort.
Water conservation is also a key consideration in the bathroom design, with low-flow fixtures and efficient plumbing systems. Despite the smaller footprint, you’ll find that the bathroom in your tiny house has everything you need, including a toilet, sink, and shower. The space may be small, but it is designed to meet your needs without compromising on functionality.
Moving on to the subsequent section about outdoor space, you’ll find that the tiny house is also thoughtfully designed to incorporate a cozy and inviting outdoor area.
Outdoor Space
When you venture outside your compact living space, you’ll be delighted to find that the outdoor area of your 1000 square foot abode is specifically designed to be a cozy and inviting retreat, perfect for relaxation and enjoying the fresh air.
Did you know that studies have shown spending time outdoors can reduce stress and improve overall well-being?
The outdoor design of your tiny house includes carefully chosen elements to maximize the use of the limited space. You’ll find a well-designed patio or deck area that seamlessly extends your living space outdoors.
This outdoor space is equipped with comfortable seating and a small dining area, allowing you to entertain guests or simply enjoy a meal outside.
In addition, the outdoor amenities may include a compact garden or green space, providing you with the opportunity to cultivate your own plants and connect with nature.
Frequently Asked Questions
How much does it cost to build a 1000 sq ft tiny house?
To build a 1000 sq ft tiny house, the cost of materials can range from $30,000 to $100,000, depending on the quality of materials used. The construction timeline typically takes around 3 to 6 months, depending on factors such as weather conditions and the complexity of the design.
It’s important to carefully plan and budget for the project to ensure a smooth and successful construction process.
Can a 1000 sq ft tiny house be built on wheels?
Yes, a 1000 sq ft tiny house can be built on wheels. However, it’s important to consider building codes and zoning regulations. These regulations vary by location and may dictate the maximum size, weight, and height of a mobile structure. It’s crucial to consult local authorities and adhere to these guidelines to ensure compliance and safety when constructing a tiny house on wheels.
Are there any legal restrictions on living in a 1000 sq ft tiny house?
Living in a 1000 sq ft tiny house is subject to legal restrictions and zoning regulations. Some may argue that these rules limit personal freedom, but it’s important to understand that these regulations are in place to ensure safety, sanitation, and harmony with the surrounding community. Local authorities enforce zoning codes to control land use and protect property values. Compliance with these regulations is crucial to avoid legal issues and maintain a positive living experience.
How long does it typically take to build a 1000 sq ft tiny house?
Typically, it takes around 3-6 months to build a 1000 sq ft tiny house. To maximize space in such a small area, efficient design is crucial.
Here are some tips:
- Prioritize multi-functional furniture.
- Utilize vertical space with loft beds or storage.
- Opt for open floor plans.
- Incorporate clever storage solutions like built-in cabinets or under-stair storage.
These strategies will help create a more spacious and functional living environment within the limited square footage.
What are some common challenges faced when living in a 1000 sq ft tiny house?
Living in a 1000 sq ft tiny house poses several common challenges. One major challenge is space management. With limited square footage, it’s crucial to optimize every inch of available space. This requires careful organization and creative solutions to maximize storage and functionality.
Additionally, living in a small space can feel cramped and may require adjustments to daily routines and activities. Proper planning and efficient use of space are essential to overcome these challenges.
Conclusion
In conclusion, a 1000 sq ft tiny house offers ample living space for a minimalist lifestyle. The dimensions of the house are carefully designed to maximize functionality and convenience.
The living area provides a comfortable space for relaxation and entertainment, while the kitchen and dining area allow for cooking and enjoying meals. The sleeping quarters offer privacy and comfort, and the bathroom facilities are compact yet functional.
Additionally, the outdoor space provides opportunities for outdoor activities and relaxation. Overall, a 1000 sq ft tiny house offers a practical and efficient living solution.

Hi, I’m Emma. I’m the Editor in Chief of Tiny House 43, a blog all about tiny houses. While tree houses are often associated with childhood, they can be the perfect adult retreat. They offer a cozy space to relax and unwind, surrounded by nature. And since they’re typically built on stilts or raised platforms, they offer stunning views that traditional homes simply can’t match. If you’re looking for a unique and romantic getaway, a tree house tiny house might just be the perfect option.


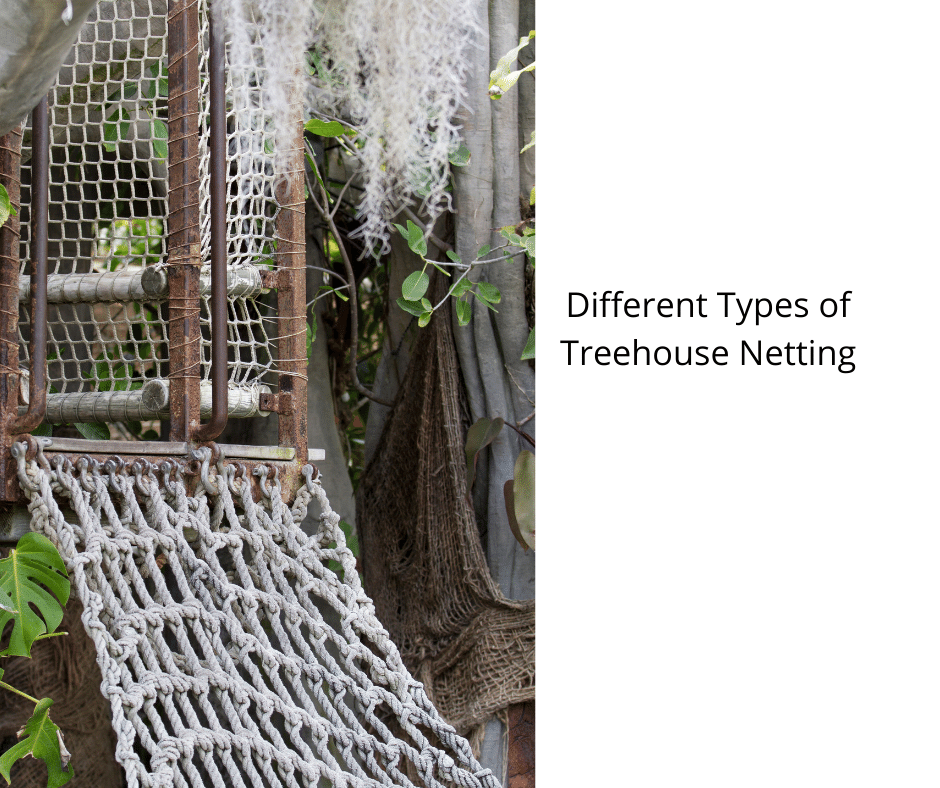
If you are considering building a treehouse, getting netting for the treehouse is essential. Fortunately, there are many options available on the market. Whether you need climbing nets in different colors, patterns, or styles, you will discover that these products are typically sold by the linear foot and require a specific amount of space – usually starting at 75 square feet. Moreover, these nets are multipurpose, working well for both cargo lofts and hammocks. You can choose a net that suits your treehouse project perfectly, whether it is for a hammock, a cargo loft, or a combination of both.
Dream Nets Are a Treehouse Netting
The concept behind Dream Nets is to create a tensile tree platform that can be woven on-site. It creates a safe and playful play environment that can be enjoyed by the entire family. The dream nets are made of nautical/fishery supplies and are sturdy yet flexible, making them a great choice for any treehouse. The average lifespan of the Dream Nets is 10+ years, making them a great alternative to traditional treehouse materials.
These innovative netting systems come in many different styles and colors. Tree House Supplies offers nets by the linear foot. Depending on the size of your structure, there are several different types of dream nets available. You can also purchase nets specific for hammocks, cargo lofts, or a cargo loft. If you have a large space, you can also buy a netting system that allows you to fit many different-sized hammocks and cargo bins in your treehouse.
Treehouses with net floors are fun for kids of all ages. They are an adventure for children and can be equipped with a rope swing. Kids love to swing from the treehouse and the net floor will make the experience more enjoyable. Treehouses with net floors can be constructed quickly and easily, making the experience fun for everyone. You don’t even have to spend hours or even days building the stairs. The net floors are flexible and can be customized to your child’s needs.
Spider Web Climbing Nets Are a Treehouse Netting

This climbing net is ideal for playgrounds, amusement parks, and residential areas. It’s easy to install with essential hand tools. The net is available in standard sizes of twelve, sixteen, and twenty feet. It has two-inch square netting liners and synthetic rope and can be attached to bridges, cargo climbs, and treehouse structures. A few tools are required to install this netting, and you’ll want to have some help if your children aren’t sure about it.
The net allows children to climb up and down without hurting themselves. These nettings are also very durable and should last a long time. These nets are often custom-made from high-quality materials. Once installed, they can be used as a treehouse roof or as an accessory for other structures. Spider web climbing nets are a great option for treehouses designed to keep kids safe. They don’t break easily and are very durable.
Double Stack Climbing Nets Are Ideal for Larger Areas
If you plan to create a playhouse in your backyard, you will need to use sturdy, double-stack climbing nets. You need to use the right knots when tying them, and most resources point you in the right direction. If you’re not sure about what knot to use, the Carrick Bend is an ideal choice. This ornamental knot is very strong and will not create sharp bends that can tear or damage your netting. However, you can experiment with different knots to ensure you’re tying the right knots to keep the net from fraying or breaking.
Double stack climbing nets are designed to accommodate multiple occupants and perfect for larger treehouse netting areas. They are made from two layers of two-inch square netting that are reinforced with a sewn edge and 5/8″ thick rope on the perimeter. The border rope also acts as a stronger connection point, and is usually attached to a wooden platform. These netting products are popular for treehouse platforms.
Treehouse Netting Can Be Used as A Ladder
Treehouse netting is an excellent alternative to traditional ladders for many reasons. Not only can it be used as a ladder, but it can also serve as a protective barrier in case of a fall. A store’s staff usually installs these nets. The installation costs depend on the size of the net, so it is best to check with the store before buying it.
Hi, I’m Emma. I’m the Editor in Chief of Tiny House 43, a blog all about tiny houses. While tree houses are often associated with childhood, they can be the perfect adult retreat. They offer a cozy space to relax and unwind, surrounded by nature. And since they’re typically built on stilts or raised platforms, they offer stunning views that traditional homes simply can’t match. If you’re looking for a unique and romantic getaway, a tree house tiny house might just be the perfect option.
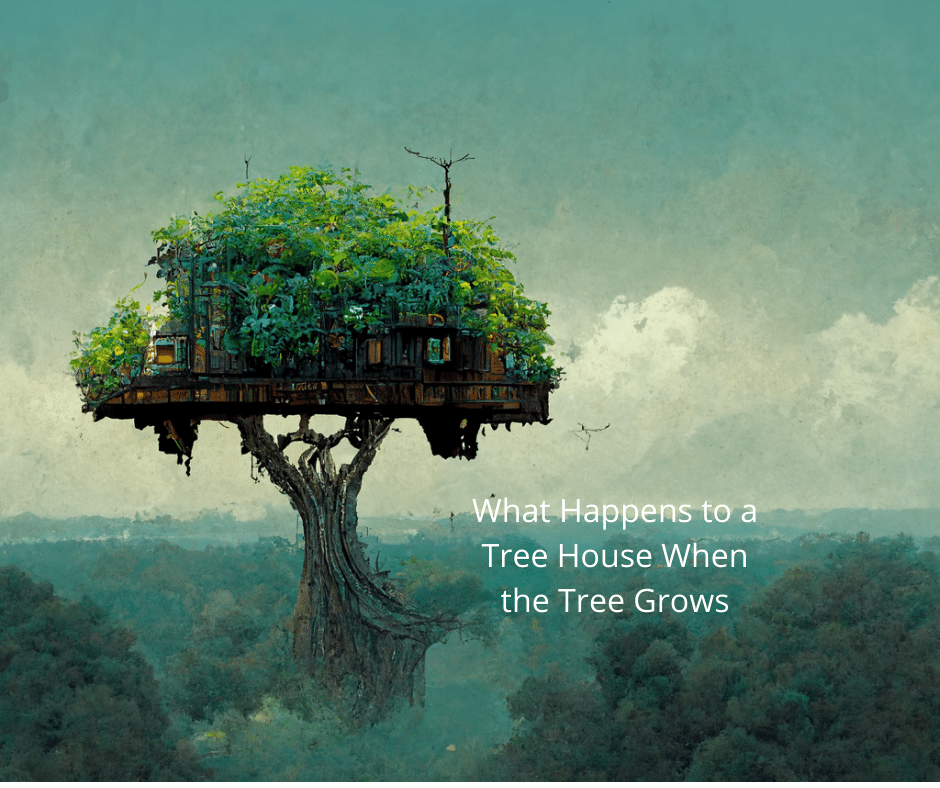
One obstacle you may face while building a treehouse is the weight it adds to the tree. The sudden increase in weight can strain the tree and its roots may take years to strengthen enough to support the additional load. This could potentially affect the tree’s stability in stormy weather. Despite this challenge, there are ways to address it. It is recommended to assess the structure’s weight before deciding to proceed with building the treehouse.
Building a Treehouse
Using specialized bolts is important when building a treehouse. The platform should be at least eight feet above the ground, and the house should be out of reach of children and adults. You should also use safety measures such as railings and individual spacers to prevent falls. If you are not a construction expert, you may want to seek advice from a professional. If you are unsure of the safety precautions to take, consider a platform with railings on all sides.
If you’d like to build a treehouse, it should be built away from power lines. Power lines can fall on the branches of a tree, and a dangerous accident can lead to injury and death. Also, avoid building a treehouse near a waterfall, a working road, or a hilly area. Also, don’t forget to build a sandpit underneath the tree house. Make sure to leave enough room around the tree to accommodate the growth of the house.
You should discuss your plans with your neighbors before you start building. You’ll want to be aware of any potential legal or neighborly problems that might arise if your treehouse is too close to your neighbors’ property. While a treehouse may be fun for children, it’s not worth a neighbor’s ire. As long as you’re considerate and follow the city code, you’ll be able to enjoy your treehouse for years to come.
The cost of building a treehouse will depend on its height and size. The complexity and type of materials used will also determine the project’s overall cost. Remember that it can be hazardous to trees, so always check with a professional before you begin. For example, large bolts and fasteners can damage the tree. Also, the added weight can damage the tree’s trunk and branches. If you’re not sure of the tree’s capacity to handle the extra weight, consult with an arborist. Many tree care companies have arborists on staff.
Before building a treehouse, you should make sure the tree you plan to use is a strong one. If the tree is young and the trunk is a hardwood, you should consult with an arborist. You should also find a tree with strong limbs. You should also consider if the tree will grow to be a good fit for your new treehouse. This will ensure the safety of everyone who uses it.
Once you have a tree with enough size and shape to support a treehouse, you can start with the construction of the treehouse. You should build the base first, and then move on to the main part of the structure, the roof. If the tree is too small or too large, you may need to build a treehouse on stilts to avoid damage. Building a treehouse requires some preparation, but once you’ve completed the initial steps, you’ll be glad you did.
Problems with Tree Support
One of the most common reasons a young tree leans is its poorly developed roots. Soil that isn’t consistent, or which does not support the roots well is also a common cause. The tree may also be leaning because of wind or a wet ground. In these cases, addressing drainage patterns is essential to prevent the problem. Proper placement of stakes, cables, or other supports will prevent a tree from leaning and ensure it has sufficient support during its life.
Problems with Tree Compartmentalization
Wood decay in trees has several causes, including injuries caused by animals, inappropriate pruning cuts, and excessive weight. The damage can also occur as a result of extreme temperature changes. To survive, trees must protect themselves by creating boundary areas to prevent damage. This process is known as compartmentalization. It helps prevent the spread of discoloration and loss of normal wood function. However, this defense system can also lead to problems with tree compartmentalization.
The concept of tree compartmentalization was first introduced in the 1960s and has since become one of the standard concepts in the field. It is based on extensive studies of wood and bark. In addition to the lab, it is based on observational studies of trees in the field. This research led to the development of tree compartmentalization as a concept to describe the growth and decay of trees.
During a forest fire, the first step in preventing decay and disease is to protect the burned area. Trees respond to injury by forming a wall around it to prevent decay and disease from spreading. This wall covers the injured area and prevents the disease from spreading vertically. This wall is made up of two types of tissue: vascular tissue and thick-walled latewood growth rings.
The concept of compartmentalization was originally presented as a systems approach to decay problems. Before Shigo’s research, it was thought that living tree sapwood was dead and that decay was the result of cellular differentiation and maturation. Punky wood, a void left in a tree after wood decay, was also viewed as dead wood. With the compartmentalization concept, wood decay is understood as a multi-step process, beginning with wood formation in the vascular cambium, and culminating in apoptosis and shedding.
Hi, I’m Emma. I’m the Editor in Chief of Tiny House 43, a blog all about tiny houses. While tree houses are often associated with childhood, they can be the perfect adult retreat. They offer a cozy space to relax and unwind, surrounded by nature. And since they’re typically built on stilts or raised platforms, they offer stunning views that traditional homes simply can’t match. If you’re looking for a unique and romantic getaway, a tree house tiny house might just be the perfect option.
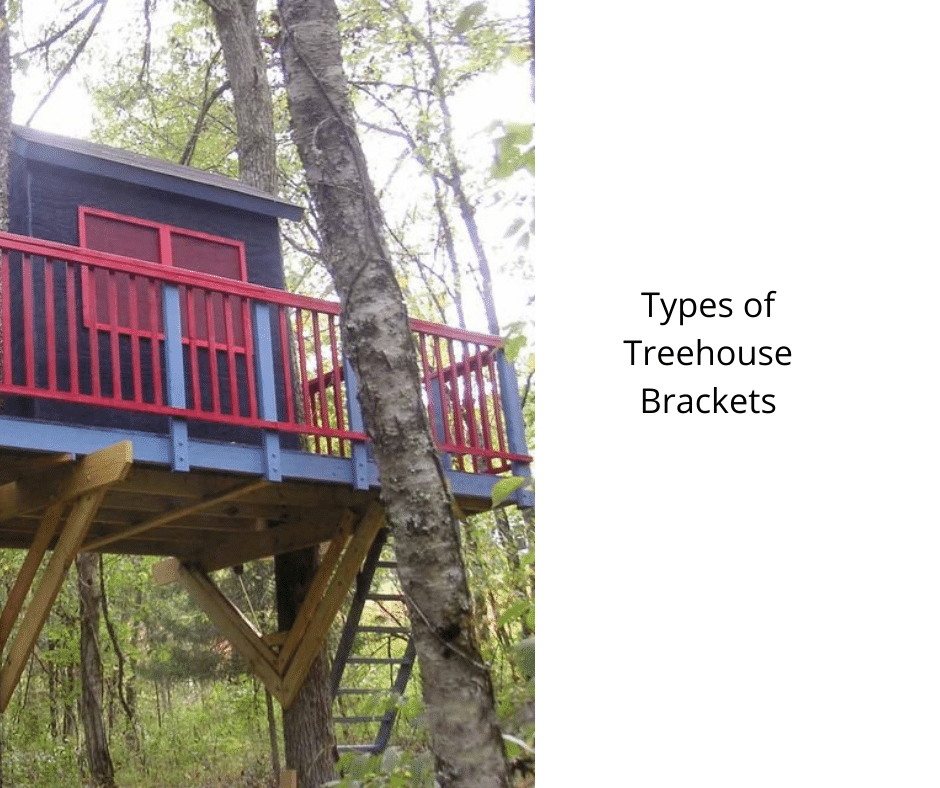
Brackets are essential for building treehouses in any do-it-yourself project involving treehouses. A strong and dependable support system is crucial for constructing a treehouse. There are various types of brackets available, and the right choice will depend on the specific project requirements. Options include floating brackets, J-brackets, TABs, and treehouse cables. Keep reading to learn more about each type. Each type has its own pros and cons. When you are constructing a treehouse for your child, it is important to choose the appropriate types.
Floating Brackets
A floating bracket can support a treehouse in the wind. This can be achieved with a single-inch lag bolt. The bracket can withstand 50 kg of weight without the use of scaffolding or cherry pickers. A cheater bar can be used for additional leverage. Once the bracket is installed, the beams need to be screwed into the flat plate of the bracket. This allows the structure to sway with the tree.
When building a treehouse, it is important to use flexible supports. If you have multiple trees, you will want to use floating brackets. They are specially designed to withstand the swaying of the trees. They are better than through bolts because they do not damage the trees. Floating brackets are also better for long-term stability, so you can enjoy your new treehouse for a long time.
In order to attach the treehouse to a living tree, you will need to use TABs. These are specially designed bolts that attach a treehouse to a tree. These can withstand thousands of pounds of weight. They also help the tree heal. Treehouse attachment bolts are easy to install and do not require any tools or training. You can find them at home improvement stores. If you decide to use these brackets, make sure to check the manufacturer’s warranty.
Tree houses weigh thousands of pounds. This means that they must be stable. When using fasteners, be sure to use large bolts. These will provide the same strength and durability as a handful of nails or screws, but will also cause less damage to the tree. Moreover, you can also use lag bolts to perch your treehouse on them. However, it is important to use fasteners made for treehouses. They should be at least 1 inch in diameter.
J-brackets
There are two main types of J-brackets for building a treehouse: simple and strong. The former is made of a single bolt which is fed into the tree from one side. The second type requires a single bolt, which is a bit longer and bigger than the first one. It is easy to use and doesn’t need any special tools. The J-bracket can be attached to the tree with rope support or scaffolding.
Another type of attachment point is a floating bracket. These are used to support the roof of the treehouse. A single J-bracket can support up to 50kg. An array of floats can be as large as three feet. These are useful if the tree needs to move. While floating brackets are more expensive, they provide more security and can support the weight of your treehouse. For safety and stability, it is a good idea to hire a professional to install the treehouse.
To install a treehouse, you must follow specific guidelines. The first rule is to keep the spacing between treehouse components at least 12 inches horizontally and vertically. The second rule is to make sure that the J-brackets are not butted against the tree trunk. If you install them at the wrong height, you run the risk of compromising the safety of both you and the tree. This disclaimer is valid for both Be in a Tree LLC and Nelson Treehouse and Supply.
Another important rule of treehouse construction is to always use a solid support system. Do not nail or glue the tree house to the tree; this will only create a wobbly structure. A good solution to this is to use diagonal bracing beneath the structure. You may only need one set if your treehouse is supported by two trees, but you can use up to four if the treehouse is supported by only one.
To attach the treehouse to the tree, you should choose a strong and sturdy beam. A two-by-ten-inch beam should span eight feet and a four-by-six-inch beam is recommended for 12 feet and greater. Remember, most localities require building permits for a treehouse, so you should check your local laws before deciding on the size of the beams. This way, your treehouse will not be a hazard to the tree.
TABs
A treehouse bracket is a simple structure that slides over the TAB to create a flexible platform for the structure. It can withstand up to one inch of wind movement and is attached to the treehouse structure with a flat plate. It has a rectangular frame that resembles a long handle. It fits over the TAB so it can move with the tree. The bracket is made of durable materials to withstand the weight of the treehouse and can also be removed and washed.
Treehouse brackets can be used for different types of structures. The J bracket is one of the most common and is the most common. It requires the beam to be fed in from one side while the J bracket is designed to be installed the other way around. Treehouse brackets can be attached to a tree using rope supports or scaffolding. A cheater bar will give you additional leverage when mounting brackets on a tree. It is important to choose the right one for your treehouse project.
Before you install a treehouse bracket, you must measure the beam and make sure it is the correct length. Remember to do this on a calm day when you don’t have to worry about the wind. During construction, you will need a metal plate for the underside of the beam to prevent it from sliding out of the bracket. Using a 1/4″ steel strip for the bearing surface will help ensure the bracket doesn’t slide off the beam.
Another type of treehouse bracket is called the floating bracket. It can be used for treehouses with three or four trees. It is also used for connecting several trees with a single tree. Floating brackets are attached with 1.25″ lag bolts. They are only compatible with 1.25″ lag bolts. If you use a TAB for your treehouse, make sure to follow the manufacturer’s instructions.
Besides TABs, you also need to consider using attachment bolts. These special bolts are made for treehouse construction and distribute the weight. In general, these bolts can support up to 2000 pounds. The nut and bracket ensure that the beams and joists are protected and won’t fall off the bolt. They also prevent any damage to the tree. However, make sure that the bolts are not too loose or too tight.
Treehouse Cables
If you’re building a treehouse, you’ll want to think about where to run the cables and brackets. While they may not seem important, they’re an important part of the structure. Cables can support long beams, overhangs, and radiating supports. Cable designs can affect how much floor space your treehouse takes up, so consider how you want to use them. You can run them along the inside of the wall, or you can divert them in a diagonal fashion to save floor space.
The cable should not come into contact with the tree. Any branches that brush against the cables may lose bark. You also don’t want to wrap the cables around the tree trunk, as this can girdle it and cut off the flow of sap. Also, be sure to leave a gap of about two inches between the platforms and the tree. The common mistake that novice treehouse builders make is not giving enough room to the tree to grow.
For a treehouse to be safe, cable systems must be installed correctly. The cables should be at least four feet in length. If the cables are not long enough, they might end up damaging the tree. When installing them, make sure that the cables and brackets are installed at right angles to the tree. If they are not, the cables may wear away the bark. Be sure that the eyebolt is in the correct location and angle to the cable direction.
If the treehouse requires cables or brackets, make sure that the TAB is securely attached to the timber frame with lag screws. Then, install four sliding brackets. The cables must be secure and stable so that they don’t come loose in the event of a move. When the treehouse is in motion, cables and brackets can cut the bark of the tree. They must be secured to the tree, and ideally, the treehouse must be placed in a location where it won’t cause damage to it.
Hi, I’m Emma. I’m the Editor in Chief of Tiny House 43, a blog all about tiny houses. While tree houses are often associated with childhood, they can be the perfect adult retreat. They offer a cozy space to relax and unwind, surrounded by nature. And since they’re typically built on stilts or raised platforms, they offer stunning views that traditional homes simply can’t match. If you’re looking for a unique and romantic getaway, a tree house tiny house might just be the perfect option.


Build Your Own Tiny Haven With Sonoma Shanty Plans
Exploring the Open Road: Embrace the Freedom of Mobile Tiny Homes

Meet Fna Van Life: Tiny House Nomads
Embracing the Journey: Navigating Life’s Twists in Tiny House Living

Affordable Tiny House: Sonoma Shanty Update!
Do Tiny Homes Need Planning Permission?
Using a Climbing Net For Treehouse Construction

How to Build a Treehouse Without Drilling Into the Tree

How to Build a Treehouse Rope Bridge
Do Tiny Houses Need Septic Tanks?

-
 Beginners Guides2 months ago
How To Buy A Tesla Tiny House
-
 Energy Efficiency3 months ago
Best Tiny Homes For Cold Climates
-
 Beginners Guides2 months ago
Tiny House Nation Where Are They Now Stephanie
-
Tiny House Resources (e.g., legalities, cost, insurance, FAQs)6 days ago
Do Tiny Homes Need Planning Permission?
-
 Beginners Guides2 months ago
From The Show Tiny House Nation How Many Keep Their Tiny House?
-
Beginners Guides1 week ago
Using a Climbing Net For Treehouse Construction
-
Beginners Guides1 week ago
How to Build a Treehouse Without Drilling Into the Tree
-
 Beginners Guides2 months ago
Where To Park A Tiny House In New Jersey